
Revealed within are the greatest secrets of the genies: their magics, their rulers, and their homelands. From the Citadel of Ice and Steel to the Great Dismal Delve, the works of geniekind are as wondrous as they are magnificent. Tour the City of Brass, from its golden towers to its brazen streets, foil the evil yak men and their dao servants, travel on the desert whirlwinds of the jann. Learn the legends and secret history of the genies, their cities, their foibles, and their feuds. Secrets of the Lamp includes a 64-page sourcebook about genies, a 32-page booklet of adventures set in Zakhara and the City of Brass, a full-color poster map, six cards showing details of the City, and four MONSTROUS COMPENDIUM pages that introduce new genies and other elemental creatures. TSR 9433

After hiring a group of brave adventurers to help him "acquire" a beholder specimen, the mage Velinax disappears! Rumors blame an insidious thieves' guild called the Unblinking Eye for this turn of events. Why would the Unblinking Eye wish to "take care" of the mage? Why does the guild want to speak to anyone involved with Velinax? Finally, what dark goal does the guild truly intend to accomplish? Finding out the answers to these questions will lead doughty adventurers straight through the shadows of a crafty thieves' guild and onto the threshold of an even deeper and more dangerous darkness. "Eye of Doom" is the second of three adventures featuring the nightmarish beholder. It can be played as an individual mission or as part of the series that began with "Eye of Pain" and concludes in "Eye to Eye." TSR 9530

Revolt of the Gladiators! The corrupt Thyatian senator, Helenites Osteropolus, his latest scheme smashed by the adventurers and their gladiator allies, hatches a new plot to destroy the influence of the Order of the Sands (even, perhaps, to attack the Emperor himself!) Yet greater dangers lie ahead. If his plot succeeds, it will remove the guardians that protect the city from the creatures that lurk in the caverns and catacombs below. Can the players block his gambit? Will the wheel of justice grind small, or will the greasy palm of political corruption reach out and save the senator once again? You decide, in the chaotic swirl of the Thyatian capital's politics. This module is designed especially for the DM who wants to sharpen his interactive skills. Recommended for four to six characters, levels 3-4 Includes map of a realistic catacomb complex below Thyatis City Unique role playing climax tests players' integrity and skill New information on the military Legions of Thyatis This module is a stand-alone sequel to DDA1 Arena of Thyatis. TSR 9296

To arms! To arms! The battle lines are drawn as desert men and inhuman tribes wait poised to strike on the fertile and rich lands of the east. The call has gone out through the civilized lands. The armies have been raised to match the invading foes from the west. Nobles and peasants have joined swords to greet the foes. But Fate or Chance has decreed another role for a small few. No glorious banners will wave on their march. No squadrons of knights will charge at their word. Instead, they will fight the war with stealth, secrecy, and cunning. The risks they will take are great, but the fates of both armies lie with them. It begins one night for your party far from the fighting. Suddenly you are entrusted with the most dangerous mission of the war. Can you cross the Sind Desert, occupied now by enemy armies, to find the Great Pass? Can you find the one known only as The Master? What will you do if you find him? So begins your adventure in The Master of the Desert Nomads, the first module of a two-part adventure that can be concluded in the exciting Temple of Death or played entirely on its own. Can your party do what must be done? TSR 9068
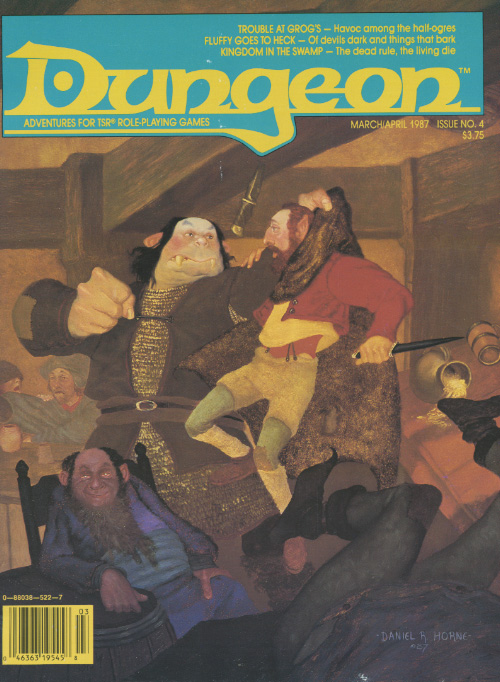
A little beer, a little trouble, a little party on the rubble. Can't a half-ogre find a little peace in the riverside town full of adventurers, bigots, and thieves? "'Trouble at Grog’s' presented something no one ever expected to see: a sympathetic half-ogre. All Grog wanted to do was settle down as proprietor of the Happy Half-Ogre Inn and Tavern. Little did he know his success would rub the competition the wrong way, leading to some 'inn-fighting' with the owner of the rival Dagger Rock Tavern, Yuri Kineron." - Christopher Perkins Pgs. 41-64

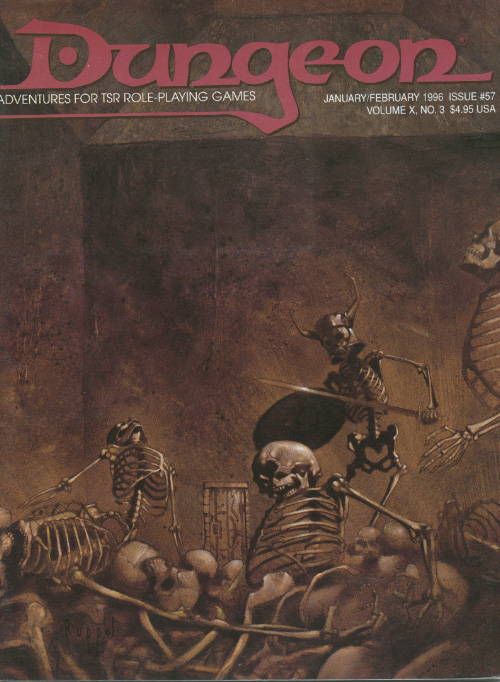
You don't know where - or what - you are. You wake up in a dungeon. But how did you get there, and why? This adventure is for a solo paladin character, on a quest to gain a war horse. The character is suffering from amnesia and believes him/herself to be a normal fighter to begin. The quest begins with the character in the middle of an adventure in a dungeon, but not remembering how they got there. After defeating several undead including an intelligent zombie leader, the paladin gains a magic stone to summon a paladin mount. Pgs. 28-35

Desolate and abandoned, the evil alchemist's mansion stands alone on the cliff, looking out towards the sea. Mysterious lights and ghostly hauntings have kept away the people of Saltmarsh, despite rumors of a fabulous, forgotten treasure. What is its sinister secret. Made for 5-10 character of levels 1-3, contains maps, handouts and encounter descriptions. The Sinister Secret of Saltmarsh is the first installment in a series of three modules designed and developed in the United Kingdom for beginning adventures with the AD&D rules. TSR 9062

An expansion on the original Tomb of Horrors with plot and explanation. Contains a facsimile of the original adventure. The Dark Intrusion is causing the dead to rise from their graves. This is linked to a being known as the Devourer. Following the trail of Desatysso, a wizard who followed a similar quest, the players must enter the Tomb, and beyond that, the cursed City that Waits and the Fortress of Conclusion.
By any other name A jewel rose has been stole and its up to the PCs to recover it in this arabain themed adventure. Pgs. 28-47 & 65
Don't feed the animals. Be kind to animals or else. The party is shown a rare set of baby monsters that they must face. Pgs. 56-59

For many years folks have gazed into the churning black vapors of the Shadow Rift and wondered at the horrors that might lie within. Some have speculated that it might be a realm of the doomed, where tortured spirits suffer the hours of eternity. Others have speculated that it might be an empty domain, waiting for the arrival of a master who is evil enough to claim it and shape it in his own image. Ever the mysterious Vistani do not know what secrets are hidden in the depths of this gaping chasm. Now, the time has come for the veil of Shadows to be parted. Loht, king of the shadow elves, has reclaimed the mighty Sword of Arak. With this relic, he intends to set in motion a plan that has taken thousands of years to form. He will throw open that vary gate of darkness and invite one of mankind's greatest enemies to walk the land of the living. And if he is not stopped, the rivers of Ravenloft will run red with the blood of the innocent. The adventure can be played independently or in conjunction with the Ravenloft Adventure Servants of Darkness. TSR 1163
The Northmen and their allies play hardball. The Northmen are on a rampage, and only the duergar know why. Discover the secret of the iron orb. In the lands of the Northmen, near the city of Tallborg a mysterious relic was uncovered in a mine: a perfect orb of black iron. The orb was taken to the temple. When Ulvmard, high priest of Odin lifted the orb it revealed its true nature. The orb levitated from his hands, floating before him. The orb had changed Ulvmard, bestowing him great powers. The orb spoke to him with flattery and advice. As he became reliant on the orb, its power over him extended, bending him to its will and taking control. It used him to further its agenda: destruction of the dwarven race and restoration of the duergar! Claiming to be acting on Odin's behalf, Ulvmard lead the Northmen to rise up against the dwarves, and ordered raids to pillage the southern kingdoms for the materials he would need to construct a colossal iron warrior to defeat the dwarves. This adventure has viking and norse mythology influences. Pgs. 50-71

Follows DLQ1 Knight's Sword. Rumors are circulating that Flint's axe has been seen around Hillhome. It is up to the player characters to solve the mystery and find the legendary battle axe of one of the Heroes of the Lance. TSR 9382

A traditional "funhouse" dungeon, White Plume Mountain begins with the archmage Keraptis stealing three artifacts and leaving cryptic poems with their former owners. The players are hired to recover the items, and find a bizarre dungeon in the side of the eponymous volcano. TSR 9027

"Tyr is free! Tyr is free!" Such is the heady cry that echoes from the darkest warrens to the gleaming chambers of the Council in that ancient city. Now is your chance to savor life released from the oppressive gloom of the sorcerer-kings-but for how long? New forces threaten the newly-born independence of Tyr, as outside forces march upon the city. King Tithian is determined to resist, but there are others on the Council of Advisors less eager to risk their wealth and lives for the cause of independence. It falls upon you to help mobilize and lead the citizen-army of Tyr on the road to Urik. In Road to Urik, the city-State of Tyr has thrown off the yoke of the sorcerer-king Kalak and declared all slaves free, but the neighboring city-state of Urik is amassing its own armies to conquer Tyr. In the first part of the adventure, the PCs must negotiate with various factions of the city in order to win their support for the war effort. In the second part the PCs leading a scouting force ahead of the main army, and the choices and successes in the first part will affect the troops they lead here. Finally, they will need to fight and lure away the Urik army's own scouting force, letting the army of Tyr ambush them. The second and third part make heavy use of the Battlesystem rules, which were pushed pretty heavily in the early Dark Sun books. Like many Dark Sun adventures, the module makes heavy use of handouts that come in a flip-book along with the main adventure. This adventure is a sequel to Freedom. It stands on its own, but the plot of the adventure is based on the events of Freedom and the novel the Verdant Passage, so you can't really run them in reverse order. Much like Freedom took place concurrently with The Verdant Passage, Road to Urik takes place just before the events of The Crimson Legion, the second novel in the Prism Pentad. TSR 2406

"Far be it from me to impugn the mettle of adventurers such as yourselves, but daring the depths of Undermountain merely for fortune's sake is more absurd than kicking a sleeping dragon in the nose for sport. Even so, you've returned for another trip to the Underhalls, so be prepared. You stand to enter the Lost Level this time: Gird yourselves for diplomacy as well as destruction. You'll find the last stronghold of an extinct dwarven clan: Do be good enough to extend the greetings of the Blackstaff to Bandaerl. There's also a dark vampiress who enjoys a good hunt, and be sure to mind the beholders: They're trained to keep you from escaping. "Enjoy, and don't say Khelben didn't warn thee." TSR 9519

Precis Intermedia brings back this follow-up to the first known commercially-published adventure (Palace of the Vampire Queen) for the original Roleplaying Game (First Edition/OD&D/0E). Originally released in 1977 by Wee Warriors, The Dwarven Glory provides 8* map sections that can be arranged as desired and containing pre-factored creatures and treasures (in other words, this is essentially a geomorphic stocked dungeon). While hit points are provided for the creatures, the First Edition RPG or an OSR equivalent (B/X recommended) is required for actual rules and their descriptions. At one time, the community of Dwarven Glory was a thriving and wealthy one. The community became easy prey for Mortoc and his Ten Orc Tribes. Although the Orcs conquered Dwarven Glory, they could not completely destroy it. There were parts of the caverns they did not even penetrate. Now the caverns echo in the misty gloom, offering refuge to the forgotten and promise to the adventurer. This piece of gaming history is a must for collectors and old school gamers. With the original on the extremely rare list, this classic reprint of The Dwarven Glory has been remastered for a clean print, and is readily available at a low cost. * The original printing included only 7 map sections, designated Sections B through H. The mythical Section A has been added as a bonus. Wee Warriors and The Dwarven Glory are trademarks of Precis Intermedia. All rights reserved.

The prince's godmother commissions you to retrieve the prince's jade crown, held in the tower of the vampire! The vampire's tower has three levels, and the three-level dungeon below 45 rooms. The party must be wary! Lethal traps abound. Marching order is important. A straight-forward dungeon crawl with many Gygaxian rooms and encounters. No roleplaying to speak of. Pgs. 4-18

You are hired by a merchant to protect a rare item, a crystal crown, for one night against the attempts of the city's thieves guild. The arrogant guildmaster has informed the merchant that he will steal the crown and he cannot be stopped. Continues in Part 2 in Polyhedron #23 Pgs. 13-20

The battles of the Blood War have raged for longer than mortals have known life, the conflict's savagery and hatred fueling the dreams, desires and obsessions of the multiverse. One way or another, the war spills through all the layers of existence, and little escapes its influence. Some clashes have consequences that shake the Lower Planes. Others are far less meaningful - they're fought solely for the sake of violence and killing. "The Field of Nettles" is set in the aftermath of an especially pointless battle. The adventure rips the player characters from their comfortable lives and thrusts them into the Blood War full force. The goal is to cross one of the more infamous battlefields, seeing the scope and the power of the fighting - and hopefully coming away with a greater understanding of just how big the Blood War is. The adventure is designed for a party of 4-6 PCs of 5th-8th level. The characters don't get to save the multiverse, nor do they find the key to unlock the dark of any great secrets. But they might come to realize their importance (or lack of it) in the scheme of things. On the fickle borders of the planes, that can be worth almost as much.