
Tortles of the Purple Sage - Part 2 completes a D&D Expert Set wilderness adventure which began in DUNGEON issue #6. Through the gate stones, into the unknown. This adventure takes place in the Known World of the D&D game, as outlined throughout the D&D game rule books and modules. The DM may find it useful to consult the Companion and Masters Sets, as well as most of the X-series of Expert Set modules. The DM may find it useful to consult the Companion and Masters sets, as well as most of the X-series of Expert Set modules. Expert Set module X9, The Savage Coast, would be especially helpful, as Tortles of the Purple Sage should easily serve to continue that module's direction and plot line, adding previously undescribed areas to the Known World. The DM may also place the areas and events of this adventure within an existing campaign setting, as long as the geographical areas of the campaign match those set forth here. Pgs. 8-25

The Lost Tombs, Volume 3 The Doomgrinder, a mysterious stone windmill many leagues east of the City of Greyhawk, has for centuries been a source of rumors, frustration and fear. The rumors say that vast treasures are stored inside-all cursed. The frustration belongs to hundreds of adventurers who over the years have attempted to enter the windmill and failed. The fear is felt by those who believe the world will end when the stone sails of the Doomgrinder turn again. In the City of Greyhawk, powerful spellcasters read bad omens for the future, and the Doomgrinder is part of them. Some see no future at all, good or bad. TSR 9581

Gray Mountain lies deep in the lush elven forest. The temple there was a haven of meditation and learning - until taken over by an evil cleric known as the Rahib. Far under the mountain, he paces before the temple's great altar. A brown-robed servant rushes in and falls to his knees, trembling at the sight of the Rahib's black panther. "Rahib, adventurers came to the village as the sun rose - the strangers now protect Rahasia." A scowl crosses the Rahib's face. "I must have Rahasia! Attack again tonight." As the servant scurries away, a deep growl rises from the giant cat. Gripping the panther's leash, the Rahib paces again, speaking out loud. "We must dispose of these strangers quickly; the secret beneath the temple will not wait much longer." Note: the setting is unspecified, but certain tie-ins, like the wines, prefigure Ravenloft. See: https://twitter.com/chrisperkinsdnd/status/703751906703749120 TSR #9115
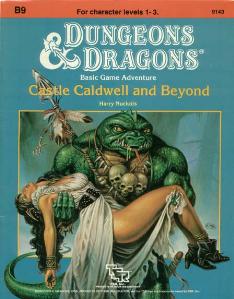
Five exciting short adventures to make your Basic campaign come alive! The Clearing of Castle Caldwell - A local merchant has recently purchased a small castle... but when he tried to move in, he discovered that the castle was already inhabited! Dungeons of Terror - A strange trapdoor in the floor of Castle Caldwell leads to a terrifying challenge! The Abduction of Princess Sylvia - On the eve of her wedding, the beautiful princess has been kidnapped! Can you save her in time? The Great Escape - Imprisoned in an enemy fortress, without armor or weapons, your situation seems hopeless. Yet there may be a way to freedom... The Sanctuary of Elwyn the Ardent - A mystical chime of great power has been stolen - but by whom? In the wrong hands, the chime can cause untold harm! But can you find and defeat this mysterious and powerful creature? TSR 9143

Along the caravan routes that tie the Cities of the West to the Kingdoms of the East, many tales are told of the mountains called the Towers of the Sun. One of these legends concerns a dark road said to be hidden among the twisty trails that spiderweb the mountains. Into the earth the road leads, into and through a series of vast caverns filled with treacherous traps and cunning monsters. Yet dangerous though the path is, many a party of adventurers have been tempted to walk it, for the stories say that the loot of a hundred lost caravans lies concealed along that evil way. [Comment: Uncertain for what levels of play this adventure is designed]

Sent on a desperate mission into an unknown land, you must seek out the one called "the Master" and his Temple of Death. There is little time to waste, as you must act before the Master's armies destroy your homelands. But to complete your task, you must battle fearsome guardians, travel through a hostile kingdom, and discover the secret of the master. Can you survive his defenses and win? This module contains referee's notes, background, maps and detailed keys. It is the second adventure in the two-part Desert Nomads series begun in X4, Master of the Desert Nomads, but it can stand on its own as a seperate adventure. Wheter you play Temple of Death by itself or as part of a series, the adventure will offer you hours of excitement and fun! TSR 9069

Danger Lurks in the Lendore Isles. Bands of evil creatures prowl the hills overlooking the town of Restenford. Now you have come to this sleepy little village looking for adventure and excitement. You seek to fathom the unexplored reaches of Bone Hill and unlock the mysteries of Restenford. TSR 9045
You found the treasure you were seeking. Now you have to escape from it. A change in perspective makes all the difference. Sheltering from a storm in a wayhouse, the PCs fall foul of a powerful magical relic. They must navigate their way through an unfamiliar environment populated with changed creatures in order to free themselves from its influence. Pgs. 42-63

"Tyr is free! Tyr is free!" Such is the heady cry that echoes from the darkest warrens to the gleaming chambers of the Council in that ancient city. Now is your chance to savor life released from the oppressive gloom of the sorcerer-kings-but for how long? New forces threaten the newly-born independence of Tyr, as outside forces march upon the city. King Tithian is determined to resist, but there are others on the Council of Advisors less eager to risk their wealth and lives for the cause of independence. It falls upon you to help mobilize and lead the citizen-army of Tyr on the road to Urik. In Road to Urik, the city-State of Tyr has thrown off the yoke of the sorcerer-king Kalak and declared all slaves free, but the neighboring city-state of Urik is amassing its own armies to conquer Tyr. In the first part of the adventure, the PCs must negotiate with various factions of the city in order to win their support for the war effort. In the second part the PCs leading a scouting force ahead of the main army, and the choices and successes in the first part will affect the troops they lead here. Finally, they will need to fight and lure away the Urik army's own scouting force, letting the army of Tyr ambush them. The second and third part make heavy use of the Battlesystem rules, which were pushed pretty heavily in the early Dark Sun books. Like many Dark Sun adventures, the module makes heavy use of handouts that come in a flip-book along with the main adventure. This adventure is a sequel to Freedom. It stands on its own, but the plot of the adventure is based on the events of Freedom and the novel the Verdant Passage, so you can't really run them in reverse order. Much like Freedom took place concurrently with The Verdant Passage, Road to Urik takes place just before the events of The Crimson Legion, the second novel in the Prism Pentad. TSR 2406

Your sleek cloudskate skims across the Skysea. It is midnight. All day long, the glass sea soaked up the scorching desert sunlight. Now, that heat lifts your ship a few inches off the glass and fills its sails. The only sound you hear is the soft swish of the diamond-edged rudder as it cuts a path across the Skysea. One thousand years ago, the wizard Martek knew that you would come to find his Sphere of Power. Now, one of his glowing Star Gems shows you the way. The starlight, reflected in the glass beneath you, flickers peacefully. Suddenly, the Skysea before you bursts up into a thousand shards of splintered glass, showering into the moonlight! A horrible creature is silhouetted against the moon. You strain against the rudder to keep your ship upright. Too late! Your cloudskate tips onto one runner, and then tumbles over, skidding to a stop on the glass. As your companions struggle to right the ship, you turn and face the monster. You must hold the creature back to give them time. Without the ship, none of you can get off the glass before the sun rises in the morning. Martek's prophecy spoke of heroes, tests, and dangers. Are you the heroes? What are the tests? What dangers and riches lie ahead? This adventure can be played by itself, or as the third and final part of the Desert of Desolation series. For character levels 7-9. TSR 9054

A bar room brawl? No big deal. Except when it starts on the Abyss—and the brawlers are a deva and a bebilith! The deva: A celestial champion who serves the cause of ultimate Good. The bebilith: A nightmarish monster whose every deed reeks of ultimate Evil. Two eternal enemies locked in a bizarre struggle for the ultimate prize. What terrible secret connects these two beings? And what does it all have to do with the legendary deva spark? Only a group of brave cutters can get to the dark of this peel, and they'd better hurry... because time is running out! "The Deva Spark" is a Planescape adventure for a party of four to six characters of 5th—9th levels. From the blasted pits of the Abyss to the peaceful forests of Elysium, the heroes track a barmy bebilith who holds the key to saving the life of a dying deva. Can your characters handle the fire of the deva spark?
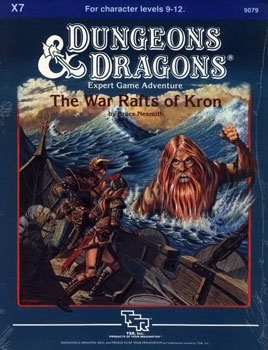
The lerendi princess, Corinna, has disappeared. She set sail aboard a ship of the Minrothad Guilds - the guilds whose ships have been pirated and plundered for many weeks. Trade is horribly disrupted as many ships leave, never to be seen again. The guild masters now call for adventurers of great skill and renown. They offer small fortunes to any who can help them discover who is pirating their ships. But most importantly, to any who can rescue the princess. Can you and your party of adventurers defeat the dangers that lurk in the dark depths of a terrifying sea? Or will you find a watery grave within the cold confines of a murky sea floor? This game adventure contains special rules for underwater adventuring. TSR 9079

Welcome to the dark heart of Forlorn, brooding Castle Tristenoira. In this stony ruin, ghosts rule the night and mortals quake in fear until morning comes. Few enter the gloomy halls of this keep and live to recross its crumbling drawbridge. Those adventurers who have survived such a foray tell eerie tales of half-seen shapes, shifting hallways, and ominous shambling beasts. "All is not as it seem sin Castle Tristenoira," they say through trembling lips. "Time itself has no meaning there." This adventure booklet is set entirely within the confines of Castle Tristenoira, and it serves as a climax to Melancholy Meetings, the other 32-page adventure booklet found in the Castles Forlorn boxed set. Eve of Sorrows brings together adventurers and the inhabitants of the castles three, providing a chance to solve several mysteries of this lonely domain. Included in Castles Forlorn - https://www.adventurelookup.com/adventures/castles-forlorn TSR 1088

In this town, nothing goes like clockwork. A voice in the darkness offered him power, with only one string attached: first he had to find some adventurers. A fiend and minions of the plane of fire have set up shop beneath a small town, and have been attracting evil minions to their lair! In this town of Jenkel, the religious leader (named Broderick) is secretly under the influence of the demon and has been doing her will out of his own greed for power. A tilted pyramid appeared in the town years ago, and is actually the tip of a tower buried in the town. The tower leads to a dungeon and a shrine where the party can fight off the demon and rid the town of the evil influence. Pgs. 18-31

A scenario for a single player taking the role of Moonstone, a 3rd-level elf caught up in an Arabian Nights adventure - no Dungeon Master required! It's also possible to use one of your own D&D characters, or even an AD&D fighter/magic-user.

Things are darkest before they go totally black. He wears black, hires orcs, and looks depraved - but don't be fooled. He's far more dangerous than he seems. Thaddigren Dentiata recently arrived in the village of Sisak, and within 3 months had constructed a great tower on the outskirts. The villagers have become more wary of him, since he employs the help of orc henchment (albeit polite ones), and also is suspected of using dark magic. Since then, livestock has begun disappearing from the surrounding pastures, and two drunk men fell upon a terrible fate when they went to investigate the tower secretly. One was killed and the other remains missing. The villagers have confronted Dentiata, but he and his henchmen politely turned aside their questioning. The players arrive just after one of the town elders was taken by orcs from the village after trying in vain to rally the rest of the townspeople. The players will spend some time in the village gathering information and then attack the tower itself, ending in a final battle with the evil wizard. The module provides details on all buildings in the town as well as all NPCs and stores. Pgs. 6-24
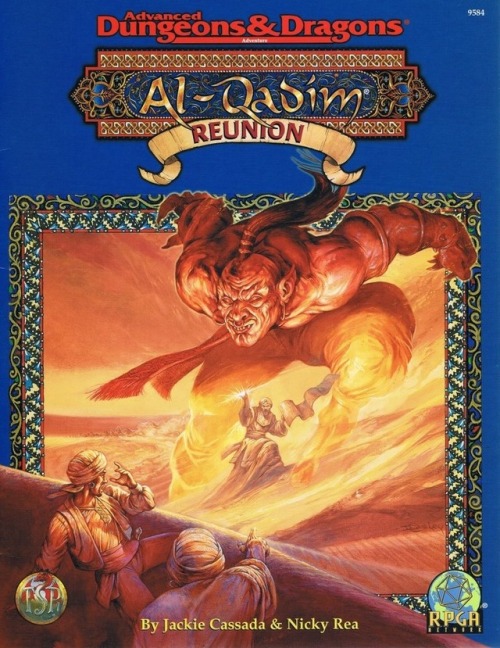
Once, the Tribe of Altair roamed the sands, free as the great eagle on the wind. Now, caged by an evil mage, these desert riders yearn for their lost freedom. But fate takes a hand as a noble djinn seeks to fulfill an ancient wish... In this unusual three-part scenario, players first take the roles of the men of the tribe, who stage a revolt after being enslaved in the Pit of the Laughing Efreeti and then try to battle their way to freedom. In the second part, the PCs are the women of the tribe, who must escape the evil flame mage's harem and use all their wits to win free of a strange city. Finally, the children of the tribe have to slip away from an evil temple before they can be sacrificed, which calls for them to embark on a magic carpet ride that promises to be the adventure of their lifetimes. TSR 9584

For many years folks have gazed into the churning black vapors of the Shadow Rift and wondered at the horrors that might lie within. Some have speculated that it might be a realm of the doomed, where tortured spirits suffer the hours of eternity. Others have speculated that it might be an empty domain, waiting for the arrival of a master who is evil enough to claim it and shape it in his own image. Ever the mysterious Vistani do not know what secrets are hidden in the depths of this gaping chasm. Now, the time has come for the veil of Shadows to be parted. Loht, king of the shadow elves, has reclaimed the mighty Sword of Arak. With this relic, he intends to set in motion a plan that has taken thousands of years to form. He will throw open that vary gate of darkness and invite one of mankind's greatest enemies to walk the land of the living. And if he is not stopped, the rivers of Ravenloft will run red with the blood of the innocent. The adventure can be played independently or in conjunction with the Ravenloft Adventure Servants of Darkness. TSR 1163
Pirates and powderkegs. An undersea menace has the merchants of Scalabar up in arms. A strange sea monster is plaguing the trade ships near Scalabar, a coastal city. You have arrived in Scalabar at the behest of Sora Calhaigne. The lady of House Calhaigne needs brave heroes to investigate the loss of her galleon, the Morning Star. She has reason to believe that the sea monster is not what it seems. Includes a list of random city encounters, a keyed map of the port city, Scalabar, as well as a simple overland map of the Scalabar coast, a map of a typical two-story warehouse, a keyed map of the pirate caves, and a keyed map of the ship Thresher. Pgs. 10-27

The heroes are sent to find what happened to a local druid, but discover his mind has been driven to madness and he is attacking the local villages. The heroes track down the druid's grove and find he was enchanted by a hag, and the heroes have to find a way to destroy the chimes she uses to enchant the druid.