The players get more than they bargain for when answering a night-time call for assistance from a mutual friend. Can they escape the githyanki prison known as the Crucible and find their way home from the Astral Plane? Designed for characters of 5th to 9th level, the Crucible can be played as a standalone one shot adventure, or as the first in a four part series of connected one shots that see the party fight their way to hell and back.

Anamdael is a small town remarkable only for its peacefulness. However, the town harbors a dark secret: Long ago, a resident entered into a pact with a Night Hag, whose services come at a price. Travelers who once gave little thought to Anamdael now hear rumors of a strange cult in its woods. Your party is hired to locate and return a missing person, last known to be traveling to Anamdael. Before you may enter “Mother’s” land, you face your first test. Your responses determine more than you know and set the stage for an eerie adventure.

As the story goes, worshipers of Bahamut and worshipers of Gruumsh spent years warring. As the dead piled up, a Bahamut faithful crafted a weapon of devastating power. Most of the inventor’s peers balked at its use, but some felt it was justified. Those few who used the weapon were twisted into mad, dark beings by its corrupting power. The rest of Bahamut’s flock locked them and the weapon away in a dungeon prison. The dungeon and its terrible secret were long forgotten—until a group of rakshasas happened across the ancient tale. Now they seek the weapon for their own designs. Pgs. 132-137
Sometimes things are not what they seem. While the PCs are sailing through pirate-infested waters, a crewman spots the floating wreckage of a sailing ship. Two survivors are standing on the deck waving frantically. The survivors — an eccentric old man, and a noble woman, claim to be merchants from Waterdeep, but are in fact pirates. During an attack on a merchant vessel, the old man, a mage, had missed with a fireball and hit their own ship causing serious damage and killing several crew mates. As punishment, the pirate leader left them marooned on the wreckage, taking the ship they had attacked. This is a short module focused on roleplay. Combat is unlikely as the pirates have no reason to attack or threaten their rescuers. The female survivor seeks a hidden treasure, which could provide a hook for ongoing adventure. While the module isn't explicitly written for solo play, it could be easily adapted for any group size provided the power balance between rescuer and pirate is maintained. Pgs. 24-25

“Do not try to escape. You are in my control. Look at me. I am the sum of all evils. Look carefully. My power infests all times, all galaxies, all dimensions...many seek me out...But see how I destroy their lives..." (from the film, Heavy Metal, 1981) For half a century, life in the mining outpost of Piktown has been peaceful and prosperous until a strange green glow in the nearby mountain range rekindled a frightening legend from the past. Does this recent luminous phenomenon signal the return of the dreaded Cult of the Green Orb? The Overlord has hired you and your fellow adventurers to stop the troubling green glow! This module is a classic-style dungeon crawl meant for a single night’s play, with plenty going on behind the scenes to keep players (and referees) interested. For use with Swords & Wizardry** or the Original Edition of the First Fantasy Roleplaying Game

Driven mad by the darkness of winter, the Prioress of the Red Abbey begins her work. After months of research and work in her lab, she found a way to summon beings of light to push back the darkness, if she could control their destructive natures. The characters find themselves investigating odd deaths, chasing weird weather phenomena and trying to help locals harmed by these creatures of light.

A millennium has passed since the Green Death swept across Hyperborea. In that bygone age of pestilence, a noble family fled the City-State of Khromarium. Far beyond the walls of the city, they entombed themselves in order to elude the inescapable plague. Their necromancer placed them in a deep slumber from which they never wakened. Also he summoned a mythical serpent to guard the vault, a beast reputed to shed gems for tears from eyeless sockets. Tales speak of this beast as the Sightless Serpent. Now, a knave of Khromarium claims to have witnessed the legendary beast. For a pittance he will lead your party to its trail in this swords and sorcery style adventure

You possess a map to the tomb of the cursed archmage Bigby. Legend has it that the dungeon itself changes, altered by a powerful artifact and changed each time the tomb is entered. Some tales say that Bigby is trapped in magical stasis seeking something to prolong his life. All agree that great treasure and magic lie within if you are brave enough to face the hazards.

PL1 – Encounters at Gormell is the initial adventure for the campaign in the Principality of Lockerbie. This series of adventures are set in the land known for the large city of Kettlespit and the capital of Xado Keep. The land resides to the south of the mountain range called the Spines, home to a devastating series of magic wars years ago. This land was the site of many battles and skirmishes and the western reaches are still very dangerous. This offering provides information on the village of Gormell and a variety of different scenarios to get your first level players up to second level and beyond!

Disturbing shadows have grown long over the northern reaches of The Land of Song. The fierce people who once fished the chilly fjords and hunted in the evergreen peaks now huddle in their villages. An evil is abroad in the land. The heroes are charged by Jarl Yngvar with traveling to the Valley of the Sleeping Jarls, an old tomb in the hills where dead kings are laid to rest, to discover the source of the malevolence bearing down upon the land and with eradicating it. Who can say what evil lurks amid the towering peaks and shadowed fjords? For decades this malevolent being plotted his vengeance upon Hjalmar’s heirs, for the jarl had gone the way of all mortals. Taking for himself the name Mogens (“powerful”), this evil spirit, now a self-styled dark lord, gathered wicked cronies and servants to itself and came to the Valley of the Sleeping Jarls. There, he has spent nearly two decades corrupting and desecrating the sacred resting place, reshaping the hollowed tombs into a blasphemous temple to his infernal lord.

This module features 5 locations ready to be put in any D&D 5e game. It features these 5 locations: - An old warehouse (lvl 1) An old building occupied by a gang of Kenkus that are trying to build a mechanical way to fly. - Ruined Sanctum (lvl 2) A decayed temple lost to time, some decades ago it was breached by some blights and they still use it as a resting place and a trap for adventurers. - The Lunar dove (lvl 3) A small and secretive brothel used by the elites. Unbeknownst to them, however, the Owner spies and hoards secrets to use to their advantage. - Cave of Mending (lvl 4) A cave with a magical healing lake, protected by a Druid that uses it to heal the wildlife from the surrounding area. - The temple to Xotarr (lvl 4) A hidden temple to an evil God where the cultists partake in calculated sacrifices.

A hideous hag threatens to corrupt everything it can, including a young bronze dragon who protects this stretch of coastline. The heroes must stop Dread Shelan at all costs, lest the entire area come to ruin. Can the brave adventurers defeat Dread Shelan and her pet sahuagin? This package (adventure, maps, etc. within) forms a complete module for use with Dungeons & Dragons ® 5th Edition rules. It is especially designed for Dungeon Masters to initiate play with a minimum of preparation, and to invoke that OSR look and feel you remember from the original Saltmarsh back in the 80s. In addition to descriptive and situational material, this module also includes special informational sections giving background history and legends, listings of possible monsters and treasures and how to place them, a list of adventuring characters, tips on various aspects of play for the Dungeon Master, and helpful advice for starting players. Old School Look and Feel! Instructions given for scaling the encounters for levels 5 to 10.

Figgy Puddin' Steals Christmas is a short adventure for three to six characters, and optimized for 2nd level characters. We also include Scaling Suggestions, allowing you to run this adventure for lower- or higher-level characters. We anticipate a run-time of 2- to 4-hours. There's a bit of roleplay in this adventure, which may extend the playtime. Adventure Background A traveling jester known as Figgy Puddin’ and her Coal Smudge Gang have stolen Christmas presents and now hold them for ransom. While safe and secure in her lair, she awaits either a payment of an outrageous ransom, or a crew of heroes to claim the presents after they navigate her not-so-festive lair. What's the Adventure? After you introduce the hook, the adventure occurs in Figgy Puddin's lair - a refurbished kobold bunker consisting of eight rooms. As the characters explore the linear dungeon, they encounter new creatures, complete challenges, and are tested about their Christmas knowledge. However, the final confrontation with the naughty Figgy Puddin' could make for a very Unhappy and Unmerry Christmas for our heroes, the children of Thistleton, and their parents. Who Is Figgy Puddin’? Figgy Puddin’ was once a happy jester who loved Christmas. For years she traveled the realm, bringing fun and festive cheer to villages and children while preparing the way for Santa. However, times have become tough, and entertainment doesn’t always pay as well as one would like. As Figgy prepares for retirement, she’s learned she doesn’t have enough gold to last. During this time, she’s also decided that Santa doesn’t know who she is, let alone appreciate the work she puts in every year. Using her savings, extortion, blackmail, and other nefarious means, she’s convinced several mechanical geniuses and arcane specialists to help her refurbish her underground bunker with wondrous effects, creatures, and tests. To fund her retirement, she’s taken extreme measures to make some quick gold — holding Christmas presents for ransom.

Caverns of the Dorgel Mountains is/was the finale in Filbar series. It features Lexicon Meridius the Ancient Red Dragon and scourge of the Dwarf Lords (F4 & F5). This large adventure represents how I look at the difficulty of taking on the deadliest dragon of the Prime Material plane. Will your party return to the Halls of the Dwarf Lords to help aid them one more time?

The night air is chilly, but the crackling fire you've started warms your bones comfortably. Crickets chirp, and you smile up at the stars, glad for the quiet evening. There is a loud roar, and you are blinded momentarily as the campfire suddenly surges up into the air. The flames split down the middle, revealing an abyss that leeches the warmth from your soul. Out of this hellish place stumbles a black-cloaked figure clutching a scythe. Quickly, you reach for your weapons. The strange apparition staggers for a moment. Then, gathering its strength, it pulls back the hood on its cloak. Beneath is a bleached skull with stars for eyes. "I am Azrael, Lord of the Undead," it hisses. "Or rather, I will be Azrael, after time itself has died." Even as Azrael speaks, decay begins to eat away at its body, and the god shudders. Holding one arm up to watch as tiny fissures form in its bones, the deity sighs, "Ah, sweet Entropy, come to claim me at last." It's gaze sweeps back to you. "But no, not just yet. First, I must set events in motion." Weakness begins to overcome Azrael, and it sinks to one knee. "Long ago, I became the most powerful of all the gods, in spite of my enemies' efforts to stop me. Delirious with power, I destroyed the other gods and eventually fell to feasting upon the souls of their worshipers. After devouring every living creature, I consume the planets and, eventually, the stars themselves, until I was left alone, in darkness." The god struggles to finish its message as its bones turn to dust and blow away, "Unexpectedly, I felt remorse for what I had done. I grieved for the universe I had destroyed, but I lack the power to recreate it. So, I have come to you, to beg you to do what I cannot." Azrael reaches into its cloak and produces a leather sack. "Take these items and use them." As Azrael dissolves, it gasps out, "Kill me tonight, or tomorrow will never dawn." All that remains is a pile of dust and a leather bag.

An army has appeared from the desert wastes led by a sorcerer said to be immortal. Fearing imminent attack, the Border Kingdoms have sent assassins to slay this so called Ravager and find this terrible rumor is true. You are tasked with discovering the secret to the sorcerer's immortality, hidden amidst an ancient crypt.

After carving out quite the reputation, you and your associates have been summoned to meet with the local regent. As you wait in the audience chamber you notice that the furnishings appear to be in the middle of an upgrade. After being introduced to the slovenly king, his vizier explains the task ahead of you. Apparently the monarch wants to decorate his throne room and wants a Giant Ape as the showpiece. As luck would have it, rumors point to a nearby island in the Jarteach Mere…

The Iron King's daughter has been cursed by a demon who lurks inside a mirror locked deep in the palace dungeons. Can the characters win their freedom from those same dungeons by entering the mirror demon's horrifying, maze-like realm and finding a way to end the curse? The Demon in the Mirror is a creepy dungeon crawl adventure for 5th-level characters. It takes about 5-7 hours to complete and includes: -An otherworldly, reality-bending realm inside a magical mirror -Four new monsters: the mirror demon, ceiling creep, reflection demon, and librarian of Leng! -Combat cards for each monster, PC, and special treasure -Gorgeous digital maps (with and without grid) for virtual table tops

Uncover the curious tale... When the party are shipwrecked they take shelter in an old forgotten cottage. They soon find themselves uncovering the mysterious death. One thing is for sure, they are not alone... Back to the sea is a 3-5 hour one shot, recommended for Level 3-4 adventurers. It offers a refreshing and different look at Ghosts in D&D. Contains 3 beautiful original digitally illustrated Maps. Unique Monsters and interesting combat scenario. Encourages player creativity and problem solving. Screen reader version.
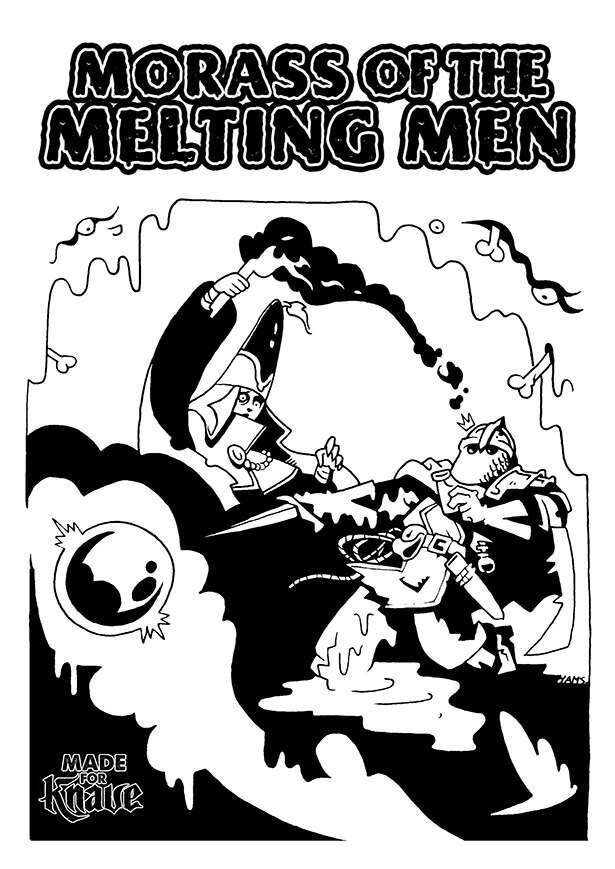
In these lands of eldritch goo, it's a fine line between victory and a sticky situation Tzork, the sentient globe of glass, wasn’t exactly born from a grand spell—it was more of a cosmic "oops". After a backstabbing disciple named Theridus offed his master and snagged the relic, he promised his followers unimaginable power. But instead of turning them into terrifying demons, Tzork turned them into puddles of goo. Now, the once "glorious" cult's mansion is less a temple and more a swamp of melted, failed adventurers, attracting only the most reckless of treasure hunters. 'Morass of the Melting Men' is an adventure for Knave 2e, suitable for low-level PCs. The adventure revolves around an extremely powerful sentient magical item that has gone out of control, melting all the nearby people and turning what was once an evil temple into a swamp of slime, filled with bones and eyeballs. In Morass of the Melting Men, players enter a location flooded with a magical liquid exuding chaotic energy. The longer the PCs remain within the swamp, the more they suffer the unexpected effects of this alien magic. Step inside this morass if you dare — goo and treasure awaits... but mostly goo What you'll find here: A complete 22-page adventure A 20 room dungeon map Several new (and bizarre) magic items such as the magnificent Tray of Force and the powerful Theridus' Head. Several wild random tables of weird and gooey outcomes