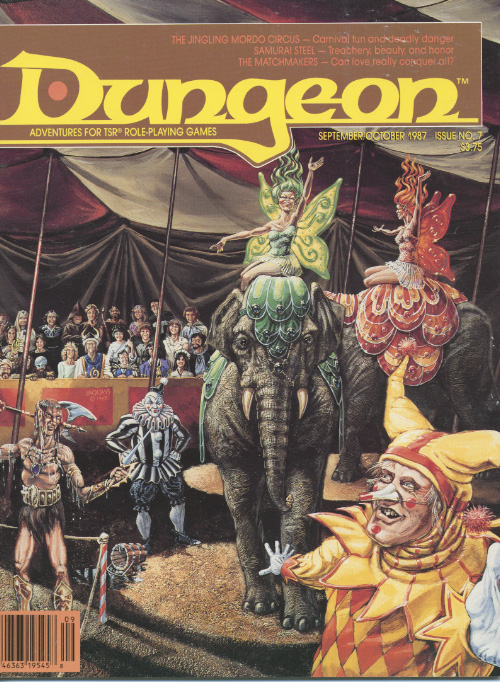
Your cousin Rolph is dead - and while there is cause for sadness, there is also cause for celebration. As his heir, you were willed his dominion: Fenhold. Of course, the Deep Swamp is threatening to engulf all of your new holding. People are seeing ghosts and disappearing mysteriously. Animals die without reason, and crops are suddenly blighted. The farmers don't like the swampdwellers, the swampdwellers don't like the farmers, and no one likes the halflings. The entire civil service of the dominion seems to have either worked for the failure of the dominion or resigned due to actions of the others. It's going to be tough task to make all this ship-shape once again, but you're 15th level now. Isn't it about time you settled down? TSR 9210

Gray Mountain lies deep in the lush elven forest. The temple there was a haven of meditation and learning - until taken over by an evil cleric known as the Rahib. Far under the mountain, he paces before the temple's great altar. A brown-robed servant rushes in and falls to his knees, trembling at the sight of the Rahib's black panther. "Rahib, adventurers came to the village as the sun rose - the strangers now protect Rahasia." A scowl crosses the Rahib's face. "I must have Rahasia! Attack again tonight." As the servant scurries away, a deep growl rises from the giant cat. Gripping the panther's leash, the Rahib paces again, speaking out loud. "We must dispose of these strangers quickly; the secret beneath the temple will not wait much longer." Note: the setting is unspecified, but certain tie-ins, like the wines, prefigure Ravenloft. See: https://twitter.com/chrisperkinsdnd/status/703751906703749120 TSR #9115

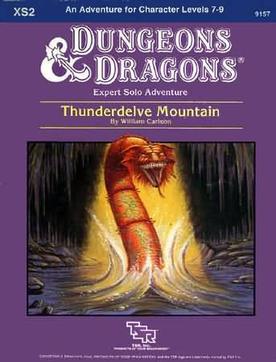
The ancient dwarven kingdom of wonder and fable is no more! Only the tales of it's grandeur remain to entertain the children, or so you thought. Then you met Nimron. Distraught and desperate, you alone can pass the gates sealed so long ago. Within are the lairs of bandits, cutthroats, and worse. The evil that destroyed the dwarven home - the Halls of Paradise - is awakened again. Into this horror ventured the dwarven princess Grona Marblefist to reclaim her kingdom. She, like so many others, has not returned. Now you must face this peril alone. Thunderdelve Mountain is a solitaire adventure for the DUNGEONS & DRAGONS Expert game. Players who don't wish to face the fallen Halls of Paradise alone may also use this adventure for group play. TSR 9157

Part 1 of an Expert-level quest into a hostile wilderness. This adventure takes place in the Known World of the D&D game, as outlined throughout the D&D game rule books and modules. The DM may find it useful to consult the Companion and Masters Sets, as well as most of the X-series of Expert Set modules. D&D Expert Set module X9, The Savage Coast, would be especially helpful, as Tortles of the Purple Sage could easily serve and continue that module's direction and plot like, adding a previously undescribed area (the Great Northway) to the Known World. The DM may also place the areas and events of this adventure within an existing campaign setting, as long as the geographical areas of the campaign match those set forth here. Pgs. 40-62

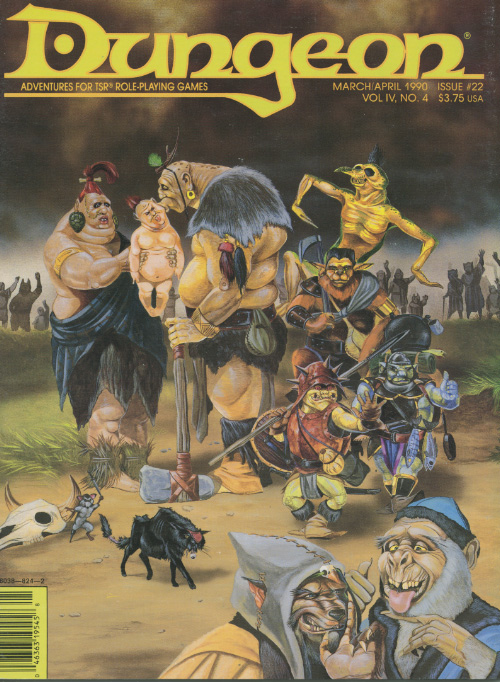
Somewhere ogre the rainbow.... You and your fellow humanoids are going to be diplomats! Can you say "disaster?" I knew you could. This module is made for humanoid monster PCs created with GAZ10 (The Orcs of Thar Gazetteer). That module is required to play through this adventure. The players start in the village of Flooshpragh, which acts as the horde center for the Rude Mongrel tribe of goblinoid races. Unknown to the players, the tribe has grown unmanagebly large, and the chief has marked the players as expendable individuals! Many subtle clues exist throughout the module to clue the players into this betrayal. The adventure proceeds through a town with roleplaying opportunities, a tower dungeon, and finishes by the players unknowingly pranking a human wizard. Pgs. 50-64

You are cordially invited to a masquerade celebrating the engagement of Lady Laina Vandevic to Lord Iajo Moubotka. Lord Gustav Vandevic welcomes you to his manor for an evening's entertainment. The servants are delighted to make your acquaintance - but watch out for the other guests! Intrigues within intrigues are afoot in Vandevicsny Manor. When a celebration becomes a night of terror, only the most cunning heroes will survive! TSR 2509

One of the original D&D classics, "The Isle of Dread" is a hex crawl wilderness adventure. It focuses on surviving primitive beasts, dinosaurs, and pirates while uncovering the mystery of the island's inland city, where a great treasure awaits. From the cover: "This module contains maps and background material for the Isle, fifteen new monsters, and suggestions for further adventures. In addition, The Isle of Dread contains a map and background information for a large continent, and eleven smaller maps for encounters on the island itself. In this module, players will push their way through dark jungles and treacherous swamps to discover the lost plateau, and the final secrets of - the Isle of Dread!" TSR 9043

Tortles of the Purple Sage - Part 2 completes a D&D Expert Set wilderness adventure which began in DUNGEON issue #6. Through the gate stones, into the unknown. This adventure takes place in the Known World of the D&D game, as outlined throughout the D&D game rule books and modules. The DM may find it useful to consult the Companion and Masters Sets, as well as most of the X-series of Expert Set modules. The DM may find it useful to consult the Companion and Masters sets, as well as most of the X-series of Expert Set modules. Expert Set module X9, The Savage Coast, would be especially helpful, as Tortles of the Purple Sage should easily serve to continue that module's direction and plot line, adding previously undescribed areas to the Known World. The DM may also place the areas and events of this adventure within an existing campaign setting, as long as the geographical areas of the campaign match those set forth here. Pgs. 8-25

X11 Saga of the Shadow Lord consists of two linked adventures as a mini-campaign: In the first adventure called Elvenstar, PCs try to steal a magic item from the Shadow Lord to thwart his planned invasion of a peaceful neighboring kingdom. Encounters in this adventure include a village populated by adventurers, and a cloud giant living in a small castle, before the party reaches the Shadow Lord's lair for the final encounter. In the second adventure, also enclosed in module X11, The Halls of Drax Tallen, the Shadow Lord returns more powerful than ever. His undead minions are searching for another magical item to give him immense power and the PCs must find this item before he does. Player characters must get past the undead army of the Shadow Lord and infiltrate his haunted fortress to retrieve the magical Elvenstar. TSR 9165

In a dark cell, Rollo Bargamnn, merchant of Thyatis, turns away in disgust from his evil, green-skinned prisoner; capturing this wretch cost a ship and sixty gallant men. Then his heart hardens once more, and he resumes the interrogation. Here, perhaps, he may find an answer to the question that haunts him. What new evil is casting its shadow over the storm-swept eastern reaches of the Sea of Dread? The trading routes are no longer safe. The attacks of the green-skinned "Orcs-of-the-Sea" and the mysterious "Ship-bane" now go unchecked. Once their raids were random, but the influence of some unseen master has made them into an organized menace. Soon the questioning will be over; Rollo will know enough to track the threat to its lair. Then he will need a band of hardy adventurers brave enough to take on the task. You perhaps? TSR 9127 (Graeme Morris's name is spelled 'Grame' on the cover of this module)

A cloud of dust forms over the horizon as a titanic army of evil threatens the entire civilized world! The Master of the Desert Nomads and his legions are back, and they form the greatest threat that you have ever faced. You must persuade powerful rulers to join you cause, stave off threats to the alliance, and lead your armies to victory! This adventure contains a full-color map of the D&D Expert Set game world, 200 counters, and a special expansion of the War Machine mass combat rules that allows you to fight the entire war as a strategic wargame! Major battles and engagements can be fought using the BATTLESYSTEM Fantasy Combat Supplement for incredible tabletop action. Never-before-published information on all the nations of the Expert Set game world provides background and detail that will enrich your campaign. This adventure includes large-scale battles and uses an expansion of Douglas Niles and Gary Spiegel's warfare system, "The War Machine", developed as part of the D&D Companion Set (BECMI Ed.) from 1984. "Red Arrow, Black Shield" is more than just a follow-up to X4/X5; it's a lynchpin for the entire B/X/CM adventure sequence. The players travel through many lands that were home to past adventures, and their past interactions with those places could affect diplomacy in this new adventure. TSR 9160

The wizard Kavorquian is dead. But certain items belonging to his adopted son were in the wizard's keeping at the time of his demise. Now someone must venture into the silent vaults of Kavorquian's stronghold and recover the missing property. Queen's Harvest picks up its story where B11, King's Festival, left off. It can be played as a sequel to that adventure or as a complete adventure in itself. It is tailored for beginning Dungeon Masters and players and contains helpful hints on adventuring and the land of Karameikos. The story develops simply, but ultimately leads the player characters into the nether reaches of Penhaligon's politics to confront Ilyana Penhaligon, mad pretender to the throne! TSR 9261

Special Basic/Expert Transition Module Barely one day's march from Kelven, the uncharted tracts of the Dymrak forest conceal horrors enough to freeze the blood of civilized folk. Those who have ventured there tell how death comes quick to the unwary - for the woods at night are far worse than any dungeon. But you are adventurers, veterans of many battles, and the call of the wild is strong. Will you answer the call, or are you afraid of the dark terrors of the night? The campaign adventure is for characters just beginning Expert play (levels 2-4) and hurls them into the exciting outdoor world which awaits in the Expert rulebook. With a 64 page booklet, 2 double-panel covers, a double-sided, fold-out mapsheet and 120 die-cut counters, this super module provides all you need for epic wilderness and dungeon adventuring. Journey across the Grand Duchy of Karameikos in a desperate race against time and the forces of evil. This adventure is for use with the Dungeons & Dragons Expert Set, which continues and expands the D&D Basic Rules. This adventure cannot be played without the D&D Basic and Expert rules produced by TSR inc. TSR 9149

Civil War Unrest. Turmoil. Rebellion. As above, so below - the cataclysmic events of the Wrath of the Immortals echo throughout the Hollow World setting. The Milenian Empire, with its classical Greek culture, has not escaped. Already the streets are un-safe, and the omens are getting worse... The emperor is dead... long live the emperor! But is the new emperor a man of the people, or a tool in the hands of malevolent powers? Walk carefully, for no stranger is safe upon the streets these days, and adventurers least of all! The mood of the capital city is turning ugly. Minions of the new emperor look on uncaring, while citizens disappear and philosophers fall to heedless mobs. The old emperor's elite guards are disbanded and scattered. Disorder reigns, and restless citizens threaten open revolt. And yet... a whisper is heard. Civil war can be averted. An ancient artifact, the Milenian Scepter, can rally those who would serve the Empire best. But the Scepter has been lost for generations, and who can say where it might be? The trail leads into the depths of the city, and across a dangerous wilderness to a forgotten oracle. For the lucky and the bold, perhaps it will lead to... THE MILENIAN SCEPTER This stand-alone adventure is compatible with the Wrath of the Immortals boxed set and the accessory HWR3, The Milenian Empire. You will need the D&D Hollow World boxed set to play this adventure. Easily adaptable to the AD&D game. TSR 9378

Sent on a desperate mission into an unknown land, you must seek out the one called "the Master" and his Temple of Death. There is little time to waste, as you must act before the Master's armies destroy your homelands. But to complete your task, you must battle fearsome guardians, travel through a hostile kingdom, and discover the secret of the master. Can you survive his defenses and win? This module contains referee's notes, background, maps and detailed keys. It is the second adventure in the two-part Desert Nomads series begun in X4, Master of the Desert Nomads, but it can stand on its own as a seperate adventure. Wheter you play Temple of Death by itself or as part of a series, the adventure will offer you hours of excitement and fun! TSR 9069

𝐓𝐡𝐢𝐬 𝐚𝐝𝐯𝐞𝐧𝐭𝐮𝐫𝐞 𝐢𝐬 𝐚 𝐜𝐨𝐧𝐭𝐢𝐧𝐮𝐚𝐭𝐢𝐨𝐧 𝐨𝐟 𝐭𝐡𝐞 𝐨𝐫𝐢𝐠𝐢𝐧𝐚𝐥 𝐬𝐚𝐦𝐩𝐥𝐞 𝐝𝐮𝐧𝐠𝐞𝐨𝐧 𝐟𝐨𝐮𝐧𝐝 𝐢𝐧 𝐭𝐡𝐞 𝟏𝟗𝟕𝟕 𝐁𝐚𝐬𝐢𝐜 𝐑𝐮𝐥𝐞𝐛𝐨𝐨𝐤, 𝐤𝐧𝐨𝐰𝐧 𝐚𝐬 𝐭𝐡𝐞 𝐓𝐨𝐰𝐞𝐫 𝐨𝐟 𝐙𝐞𝐧𝐨𝐩𝐮𝐬. It includes the hinted at, deeper dungeons and darker secrets of Zenopus. This adventure details the Tower of Zenopus located in the map found in Ghosts of Saltmarsh and is a quick side bar for adventurers level 1-3. It has been 50 years since anyone has seen or heard from Zenopus. Rumors abound concerning cultists and marshland creatures roaming near Portown. Could it be that Zenopus is behind it all? Return to the dungeon that started it all. Additional material based on Dr. J. Eric Holmes’ original sample dungeon. More levels, more monsters, more treasure await under the Tower of Zenopus! 4 new dungeon levels included!

Part of the First Quest Box Set TSR1105, this is an adventure designed to introduce new players and DMs to AD&D. Ever want to spend a night in a haunted house? Want to know what it would be like to meet a ghost? Well, doom creeps closer and closer with each hour your heroes spend in the old house on Harrow Hill! Are they brave enough to make it through the night? Or will the ghost claim some new victims? First Quest Adventure Book Pgs. 28-44

The PCs answer a call for heroes by the Church of Traladara, asking for help in finding an ancient relic- the Shield of Halav. This is located in a lost temple, and the PCs must locate this temple, and brave its dangers to recover the shield before two competing teams from other churches find it first. Part one involves setting up the adventure, doing research, following clues, and discovering the site of the lost temple. Part two; once the site is known (ruins under a modern town) the heroes must travel there and find the entrance. Part three is braving the lost temple, filled with traps, puzzles, and other dangers, to find the missing shield, and then culminating in a climatic showdown with the completing teams.

One of four magical, snow white pearls protecting Tarylon has been stolen! And you, a Companion level elf, are responsible for its safe keeping. Now the very existence of your beautiful village is threatened unless you can find the powerful pearl. Milgor, the evil wizard with an evil sense fo fun, challenges you to find the pearl, and return it to Tarylon. This adventure uses a "Magic Viewer" - a piece of colored film - to reveal the hidden results of the player's choices. This includes encounters, puzzles, and traps. TSR 9128

Immortals lie chained atop a mountain in the Broken Lands. Their bonds relentlessly drain their power while demons cavort with glee around the wispy barrier, as strong as any prison. Have you the courage to embark on a dangerous mission for the materials necessary to craft an artifact? If you survive that task, you must then assume the Identities of legendary heroes of Darokin and face deadly Immortal foes without revealing your Immortality! The demons of Entropy stand between you and your final Goal. Have you the power to rescue the imprisoned Immortals and preserve the Prime Plane? The future of the Prime Plane is in your Hands! TSR 9189