
Important: The adventure is 1e but it has monster conversion notes for D&D 4th edition The town of Highport, once a human community overlooking Wooly Bay from its perch on the northern coast of the Pomarj, fell prey to hordes of humanoids swarming out of the jungle-covered hills surrounding the settlement. Though the orcs, goblins, kobolds, ogres, and gnolls razed much of the place in their ferocious rampages, the smoldering ruins they left behind soon became a new kind of community, a place of trade between the humanoid “locals” and the unsavory human traders who have no compunction about doing business with them. Slaves are a commodity in ready supply in Highport’s market, since many pirates raid up and down the coast of the bay, putting fishing villages to the torch and filling their holds with captured refugees. Slavery has become a thriving business in the town, and rumors abound of a cartel of Slave Lords who run things from behind the scenes, filling their coffers in secret from the buying and selling of human chattel. The trade has become so prolific that the good folk to the north have grown tired of these depredations and decided to fight back. Forces of righteousness and honor have recently descended upon Highport, some openly and others in secret, in various attempts to destroy the machinations of the Slave Lords and abolish the abominable enterprise that has taken far too many loved ones from home and hearth. One such doughty servant of goodness is Mikaro Valasteen, a cleric of Trithereon. Mikaro slipped unnoticed past the crumbling walls of Highport with a single mission: to rescue and transport as many slaves to their freedom as possible. Mikaro and a handful of faithful assistants located a number of escaped slaves—as well as rescued a few more not sufficiently restrained and guarded—and shepherded them through the gates and beyond the reach of their humanoid tormentors, returning them to their lands and homes. This covert freedom brigade enjoyed remarkable success early on, since the servants of the Slave Lords were often lax in their vigilance and sloppy in their efforts to prevent loss of the “merchandise.” After one too many shipments never made its destination, the humanoids stepped up their security and the normal channels of escape from Highport closed to Mikaro and his team. He cannot risk exposure by smuggling the freed slaves through the gates as merchandise any longer, since shipments of goods are now regularly stopped and checked. No longer able to free the slaves in that manner, Mikaro began hiding his charges in an abandoned villa in a particularly rundown part of the town. Although they are safe for the moment, their numbers have grown unmanageable, and the priest fears it is only a matter of time before someone slips up and brings slavers to their doorstep. Ever more desperate to find a new means of escape from Highport, Mikaro has started work on a plan that is both daring and dangerous. He intends to use a series of old sewers coupled with natural caverns running beneath the town as an escape route to the sea beyond the walls. But he needs someone to clear out the creatures and pitfalls he knows lie within. Pgs. 2-27

The corrupt town guard of the Styes refuse to help when a mysterious monster begins to slaughter the residents of Hopen'er Asylum, an old decrepit mental aslyum. A call is put out for any adventurers willing to defeat this mosnter and save Hopen'er before it falls any further into madness... From the author of Murder on the Primewater Pleasure comes The Horrors Beneath Hopen'er Asylum. If you enjoyed that adventure then you will love this! This horror adventure takes place in and below Hopen'er Asylum. Originally designed to serve as an introduction to the location known as The Styes frorm the Ghosts of Saltmarsh campaign book, this adventure can be easily transferred to any setting (advice is given on how to do this). The characters will explore an abandoned underground wing of the mental asylum, before delving into a forgotten cave system to face an unknown enemy, a Dubh. The adventure is designed for 6th - 7th level characters and takes anywhere between 4 - 6 hours to finish. The adventure contains full colour maps, as well as VTT versions of the maps.

A horrific drug has seized the population of the strange city of Exag, yet confronting its source only reveals the true extent of a dire new threat. Part one of the Seeds of Sehan campaign arc, this is a D&D adventure for 8th-level characters.

To stop a devastating rampage of giants across the land, the party must venture into the lair of the stone giant thane Arnak to uncover the truth about why he has broken his peace with the neighboring dwarves. In the process, they will have the opportunity to retrieve important symbols of the fight against the giants and uncover a dangerous excavation. The adventure is part of the "Against the Giants" series originally by Gary Gygax, hence the writing credit.

The final confrontation with the giant, King Snurre, and the entry of mighty adventurers into the caverns under his stronghold (DUNGEON MODULE G3, HALL OF THE FIRE GIANT KING) discovered the Dark Elves, the Drow, had instigated the giant alliance and its warfare upon mankind and its allied races. This module contains background information, a large-scale referee's map with a matching partial map for players, referee's notes, special exploration and encounter pieces, a large map detailing a cavern area, encounter and map matrix keys, and an additional section pertaining to a unique new creature for use with this module and the game as a whole. A complete setting for play of ADVANCED DUNGEONS & DRAGONS is contained herein. This module can be played alone, as the first part of a series of three modules (with SHRINE OF THE KUO-TOA, D2, and VAULT OF THE DROW, D3), or as the fourth part of a continuing series of modules which form a special progressive campaign scenario (DUNGEON MODULES G1, G2, G3, D1, D2, D3, and Q1, (QUEEN OF THE DEMONWEB PITS). TSR 9019

The colony of Farshore has survived on its own for years, a secluded and struggling hamlet perched on the western shore of the tiny island of Temute. An island dwarfed by the savage landscape across the narrow channel to the north, a landscape of rugged mountains, tangled jungles, and trackless swamps. This is the Isle of Dread, and its resources and hidden treasures are matched only by its peril. Yet for all these dangers, what may bring doom to Farshore is not an invasion of inhuman monsters from the mainland, but an invasion of all-too-human monsters from across the sea. "Tides of Dread" is the fifth chapter of the Savage Tides Adventure Path, a complete campaign consisting of 12 adventures appearing in Dungeon magazine. For additional aid in running this campaign, check out Dragon magazine's monthly "Savage Tidings" articles, a series that helps players and DMs prepare for and expand upon the campaign. Issue #352 of Dragon magazine features rumors of Farshore, a helpful list of improvements the PCs can make to the colony, and other features to help get PCs oriented in their new home on the Isle of Dread. The destruction of a pirate ship signals the beginning of a Crimson Fleet invasion. The PCs must race against time to prepare for the onslaught before an old enemy can release another savage tide. Pgs. 28-59 Also see Pgs. 60-71 Backdrop: Farshore City of Hope.

This material was originally published as two separate adventures, D1: "Descent into the Depths of the Earth" and D2: "Shrine of the Kuo-Toa." Contained herein are referee notes, background information, maps, and exploration keys intended for use with the Advanced Dungeons & Dragons rules. The adventure can be used alone or as part of an extended adventure that begins with G1-3: "Against the Giants" and continues with D3: "The Vault of the Drow" and Q1: "Queen of the Demonweb Pits." TSR 9059

In order to stop a series of devastating giant raids, the party must venture into the stronghold of the frost giant jarl Grugnur to both recover the giants' plans and eliminate Grugnur, who is the tactical head behind the operations. The adventure is part of the "Against the Giants" series originally by Gary Gygax, hence the writing credit.

His name has inspired fear in legions of heroes, and his cult has lurked in the dismal reaches of the world for countless ages. His minions are savage and feral, his worshipers vile and wretched. He is Demogorgon, and his temples are nightmare realms haunted by primeval menaces and hateful legacies from a time when the world was savage. And now, a vengeful death knight has discovered one of these lost temples—will the PCs aid him in his dark quest for revenge, or will they fall before the awakened host of the Prince of Demons? Pgs. 64-83

A long-simmering merchant conflict has turned into a war of assassination, and the PCs are called in to prevent an attempt to murder the daughter of one of the merchants. They lead her yuan-ti would-be killer on an overland chase through a canyon called Ehlonna’s Scar, which contains surprises of its own.

The Assassin's Knot is a sequel to The Secret of Bone Hill, picking up on themes from that module and shifts them to a new locale. The player characters must solve the mystery of who killed the Baron of Restenford, with evidence pointing to somebody from the town of Garrotten. The scenario describes the town and its castle. The Assassin's Knot module is different from most of its contemporaries in that it contained no dungeon or dungeon-like area. The longer the players take to find the murderer, the more unfortunate events occur in the village. The village, Garrotten, is reputed to be the place to go to have someone killed. The entire village shuts down when the Baron of Restenford is found dead, mutilated beyond the possibility of magical restoration. Three small clues are all the player characters have to unravel the mystery. TSR 9057
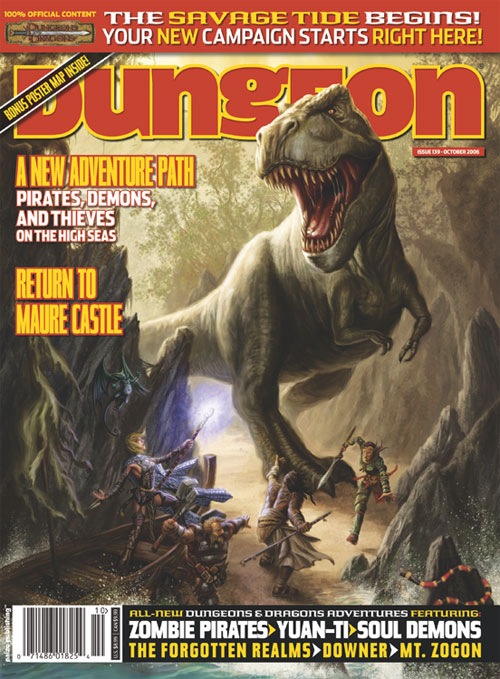
The first savage tide has already touched the mortal world, yet none who live today recall this time of red ruin. Unleashed from the cruel heart of a fell seed known as a shadow pearl, this savage tide swept over an ancient city perched atop the crown of a remote island. The tide transformed beggar and noble, merchant and thief, resident and visitor into feral, ravenous fiends. The fruits of centuries of labor came crumbling down in a matter of days, and when the survivors tried to stem the tide by destroying the pearl, the resulting blast of power sunk their city into the boiling lake of death. Through it all, the Abyssal architect of the savage tide watched, taking pride in the ruin. When the tide's final ripples had faded, what was left became known as the Isle of Dread. Now, after a thousand years, the true masters of the Isle of Dread look upon new targets, new cities beyond the horizon, compelled by the hateful will of their demonic lord Demogorgon to prepare for the coming glory. This time, the doom will not be limited to one hapless city. This time, all of civilization waits unknowing on the shore, blissfully ignorant of what the incoming tide brings in. "There Is No Honor" is the first chapter of the Savage Tide Adventure Path, a complete campaign consisting of 12 adventures that will appear in the next twelve issues of Dungeon. For additional aid in running this campaign, check out Dragon's monthly "Savage Tidings" articles, a series that helps players and DMs prepare for and expand upon the campaign. Issue #348 of Dragon kicks off this series with details on six affiliations based in Sasserine that your players may wish to join. And if you're running Savage Tides in the Forgotten Realms or Eberron, make sure to check paizo.com for the latest conversion notes for each adventure. The Savage Tide Adventure Path debuts as a new band of heroes confronts exotic monsters, undead pirates, and a sinister guild of thieves on the cusp of unleashing a murderous coup. Pgs. 14-46

Player's pickup the quest from the Greyhawk Adventurer's Guild to escort a barge down the Nyr Dyv.

Prince Zeech, the ruler of the town of Alhaster and lord of the domain of Redhand, is throwing a party. Bandits, slavers, pirates, and worse have been invited, along with a mysterious woman who holds the key to the coming apocalypse. "The Prince of Redhand" is the eighth installment of the Age of Worms Adventure Path, a complete campaign consisting of 12 adventures, several "Backdrop" articles to help Dungeon masters run the series, and a handful of poster maps of key locations. For additional aid in running this campaign, check out Dragon's monthly "Worm Food" articles, a series that provides additional materials to help players survive this campaign. Issue #340 of Dragon presents guidelines for what the PCs can do to dress to impress, and perhaps eke out a few precious bonuses on their Diplomacy checks. Pgs. 48-79
The party is enlisted to assist the Righteous Host, an army formed as a last resort to defend the world against the monsters of Elemental Evil. The host is greatly outnumbered. Its leaders send the party on a series of missions, each of which will give the Righteous Host an edge in the great battle to come. This epic adventure ends with the final push against the forces of Elemental Evil in the Meadows, and the outcome is informed by how effective the party is in their missions... and whether they are willing to risk putting themselves in the front lines. If the Righteous Host loses, players may decide to travel to Hommlet or other nearby towns to defend them. Whether the host is successful or not, players can decide to follow many different plot threads: exploring the Temple of Elemental Evil, finding the lich Kell the Eldest's lair and destroying his phylactory, or following the will of Bitbaern's Shield and discovering historical sites that were previously lost. Pgs. 44-69

Iggwilv. Orcus. Maleanthet. Obox-Ob. Charon. These names are among the most notorious in the multiverse, appellations belonging to some of the most dangerous and powerful creatures on the lower planes. Heroes from countless worlds have raised their arms against these immortal foes and, in most cases, these heroes have perished to their soul-blasting, life-ending might. Their lairs are notorious as they are: the River Styx, beautiful but deadly Shendilavri, the Gray Wastes of Hades, frozen Thanatos, and mind-numbing Zionyn. Simply entering one of these scions of evil is akin to suicide. Yet now, as the Prince of Demons begins the final rituals to bring the savage tide to the Material Plane, heroes must approach these immortal villains not as enemies, but as allies. "Enemies of My Enemy" is the eleventh chapter in the Savage Tide Adventure Path, a complete campaign consisting of 12 adventures appearing in Dungeon magazine. For additional aid in running this campaign, check out Dragon magazine's monthly "Savage Tidings" articles, a series that helps players and DMs prepare for and expand on the campaign. Issue #358 of Dragon magazine features a map of the River Styx and advice for those who would use this notorious river as a route in exploring the lower planes. The time draws near for the final assault on Gaping Maw, but first the PCs must recruit allies from the depths of the Abyss to the eladrin Court of Stars. yet will this unlikely alliance of demons and eladrins be enough to stop the Prince of Demons? Pgs. 40-85

Stirrings of an ageless war between Law and Chaos are drawing you into an epic adventure! A Struggle More Savage than Good vs. Evil Imagine a time before the words Good and Evil had meaning, a day when the world was young. Discover an ancient conflict that predates the stars. It was in these days that Law and Chaos forged worlds out of nothingness; their war began while the cosmos was yet unfinished. The Rod of Seven Parts defines epic role-playing. The reappearance of the Rod has awakened the powers of Chaos, and their queen seeks to turn the whole world into a battleground. Bold heroes must undertake the enormous task of seeking out and assembling the pieces of the Rod, but even its power cannot stand alone. Ages ago, primal forces of Law stood fast against Chaos; now their champions must once more confront the Queen of Chaos and her foul spyder-fiends, lest the flame of civilization be extinguished. Follow the quest for the capricious Rod as it leads characters on a journey of high fantasy. The Rod of Seven Parts is designed for four to six heroes and heroines of levels 10 to 12. This boxed set includes: Initiation to Power, a 96-page book of grand adventure playable in any AD&D world, including original campaigns; The War Against Chaos, a 64-page book of world-crossing adventures pitting PCs toe to toe against the minions of Chaos; Might and Menace, a 32-page book detailing the mysterious powers of the Rod of Seven Parts: how it affects both its enemies and its friends; Monsters, a 16-page book of new villains, new monsters, and even a new race! 6 two-sided reference cards; 6 full-color poster maps portraying the key locations heroes can visit. Read about this ancient artifact in the epic novel The Rod of Seven Parts by best-selling author Douglas Niles! TSR 1145

Indomitable it stood for centuries, a symbol of order in a world of chaos. Bastion of the pass through the Kamph Mountains, the very stones of the Keep of Adlerweg were the stuff of legends. What evil power had strength enough to take it? How were its defenses swept aside? Fell creatures now attend the battlements that overlook the only pass between Berghof and the sea. This is not a pretty problem to be solved by the militia of the local villages. These and more may be needed to withstand the mayhem stirred up by the fall of the keep. Indeed, if the Keep is not retaken, and retaken soon, the Hold of the Sea Princes itself may not be secure. Now is the time for heroic action. Aided by the Sentinel, former protector of the legendary Guardians of Adlerweg, have you the courage and the determination to rid the keep of its sinister occupants? UK3: "The Gauntlet" (1984), by Graeme Morris, is the third UK-series adventure and the second half of the two-part Adlerweg series. It was run as the final round of the GamesFair 1983 AD&D Open (and won by a RuneQuest fan!). It was then published in 1984. TSR 9111

Fleeing the rage that consumed their feuding families, Juliana and Orlando fled to the Cave of Echoes, where it is said every wish is granted. Two years have passed, and all attempts to return the lovers to their parents have failed, though some believe them lost in the enchanted garden beyond the cave. Many are the rescuers venturing into that enchanted park; a few have returned after long absences, their minds and memories curiously disturbed. Now, the handsome reward offered for the return of the lovers has tempted you, but who knows that lies beyond the Crystal Cave? TSR 9066

Trapped in the dungeons of the Slave Lords! The hardy adventurers must find a way out, with only their wits and courage to help them. But can they do it before everything is destroyed by the dreaded Earth Dragon? This module contains a challenging scenario for experienced players, the tournament scoring system, and nine fully-equipped playtested characters. Also included are large-scale referee maps, playing aids, notes, and background information. A4 is a complete adventure in itself, but can also be used in conjunction with A1 (SLAVE PITS OF THE UNDERCITY), A2 (SECRET OF THE SLAVERS' STOCKADE), and A3 (ASSAULT ON THE AERIE OF THE SLAVE LORDS). TSR 9042