
It all begins with a simple request (doesn’t it always?) from an old farmer. The request – protect his cattle herd from vicious wolves. Simple enough for the brave adventurers, right? But it doesn’t stay that way. Not at all. Soon, the adventuring party will find themselves in the thick of it as they solve puzzles, avoid traps, fight for their lives, and endure witty taunting. And in the end, they discover an artifact that may, or may not, be useful to them. This adventure includes a cursed shield, a new undead creature, and a new artifact. Total party experience earned is approximately 14,500.

For decades, the city of Chala, nestled on the banks of the Leal River, boasted a prosperous fishing business. The community's life revolved around the wide, slowly rolling river that meandered miles northward into the Blackweed Swamp Now the city faces misfortune, pestilence, and decay, because the sacred Tefnut statue has been stolen. All clues suggest that the sacred object was carried into the heart of nearby Blackweed Swamp. But who, or what, would commit such a crime? Whoever is responsible, the statue must be recovered, at any cost. TSR 9424

This quest is for a party whose members all perished in the same encounter. The loss of an entire party is hard to recover from and often spells the end of an adventure. However, with the assistance of the enigmatic Raven Queen, the party’s tale might not be over just yet. The characters must wander through the Fortress of Memories; confront their pasts, present selves, and possible futures to return to life. Includes a quest-related NPC that a player can control if they're waiting for their character to be resurrected.

The first part of the Dreams of Red Wizards adventure path originally published for the D&D NEXT Playtest. Following the events Ghosts of Dragonspear Castle, a new set of adventurer's will see some of the repercussions of that adventure. This adventure is intended to be continued in the Dead in Thay adventure (Note that they Dead in Thay 5e adventure featured in Tales from the Yawning Portal is missing a significant portion of interlude that links Scourge of the Sword Coast to the events within the Doomvault). The adventurers arrive when Daggerford is crowded with refugees from outlying lands. Goblins, gnolls, and orcs have been raiding the countryside. Now, food is scarce and tension is high. Blame for a theft has fallen on the refugees, and the Duke of Daggerford has forbidden more of the displaced from coming into town. After overcoming difficulties to enter Daggerford, the characters learn more about the raids. As they fight against the humanoids and delve deeper in the darkness that encircles Daggerford, the characters learn of Bloodgate Keep. After a final fiendish ambush, they’re ready to confront the real threat to the area. DM Note: This adventure points the adventurers strongly towards Bloodgate Keep but that location does not appear until the Dead in Thay adventure; at several points the party may feel drawn to explore that location rather than continue their investigations around Daggerford. However, since Bloodgate Keep is only eluded to as a source of great evil power, it can serve to easily segue to an entirely different adventure path. As a NEXT Playtest adventure, Scourge of the Sword Coast uses milestone leveling and the included stat blocks for creatures do not necessarily match or even appear in the 5e Monster Manual, nor do they have XP values or challenge ratings. In some places it will reference rules used in the Playtest but dropped or changed in the 5e release, these are unlikely to substantially impact gampley with 5e rules.

Off in the forest is an ancient Yuan-ti Temple that many believe to be abandoned. Of course, a temple makes for fine real estate, but wealthy lords don't do the dirty work of clearing out such a place - that is what they pay adventurers to do. Fight through the halls of this ancient temple against all kinds of Yuan-ti enemies, eventually destroying the false god that has taken refuge within its crumbling walls.

East of Beregost, nestled in the outskirts of the Wood of Sharp Teeth, Durlag’s Tower has intrigued and yet stymied adventurers for decades. Stuffed full of mechanical traps and arcane wards, and rumored to be inhabited by fiends, very few have managed to extract any REAL treasure from the former home of Durlag Trollkiller. However, a powerful item in the ancient fight against the giants is said to be housed there, and the cloud giant Baron Rajiram has committed significant resources toward recovering it. After a pleasant tea in her garden, SEER calls upon you to beat him there and put a stop to his efforts! Continued in Durlag's Tomb.

When the players get teleported to the plane of the Beastlands, they meet with an intelligent petitioner in the form of a Dog named Reith. Eventually Reith will lead the players to a human; an eagle winged boy by the name of Addler. Addler already knows a way out of the Beastlands, but doesn’t want the players to know because the key is his body and if the petitioners knew he could leave, they wouldn’t like him anymore. Not being the best at planning, he’ll be coerced into giving the players a map to the petitioner that helped him find the portal (A snake named Siy). After passing through some small adventures in the beastlands, the players will meet with Siy and learn about Addlers portal. From here, the players will travel back to Addler and confront him.

Sent on a desperate mission into an unknown land, you must seek out the one called "the Master" and his Temple of Death. There is little time to waste, as you must act before the Master's armies destroy your homelands. But to complete your task, you must battle fearsome guardians, travel through a hostile kingdom, and discover the secret of the master. Can you survive his defenses and win? This module contains referee's notes, background, maps and detailed keys. It is the second adventure in the two-part Desert Nomads series begun in X4, Master of the Desert Nomads, but it can stand on its own as a seperate adventure. Wheter you play Temple of Death by itself or as part of a series, the adventure will offer you hours of excitement and fun! TSR 9069

A mysterious clue has led you outside of the safety of the city’s walls and into the jungle beyond. You have been asked to venture into the jungle and seek out the wisdom of some of the native humanoids in the area—perhaps they will be able to shed some light on the situation and provide some insight on who is behind it all. Part Two of The Jungle Has Fangs Trilogy.

In the town of Bellhold, it's not difficult to realize that something is wrong. Everyone is irritable and suffering from nightmares, children are missing, and the local adventuring company has been gone for a week. Yet the townsfolk's headaches are sure to pass, so the mayor is not especially worried. He should be. Of Sound Mind flings you into a maelstrom of trouble, for the situation is much, much worse than it first appears. Before your investigation is over, you will be dangling from cliffs, descending deep into a mountain's bowels, uncovering lost hoards of treasure, fleeing from people you thought were friends, and desperately trying to outwit an enemy that is far more than you could ever imagine. The fate of thousands hinges on your success or failure. Think your up for it? Published by Fiery Dragon

The plague-stricken Copper District of Waterdeep's Southern Ward needs your help. What is causing the plague? Can it be stopped? Are you the right person for the job? Published by Arcana Games.

Baron Rajiram’s forces have secured the Nelanther Isles and have scoured the Sword Coast for treasures. Now they have begun to explore a mysterious island that recently just popped into existence nearby. SEER seems to believe that an aboleth artifact is their goal. It is up to the adventurers, in competition with the baron, as well as aboleths, the Kraken Society, and the mysterious caretaker of the island, to locate the Eye of Xxiphu and avert catastrophic disaster.

Wherein the Heroes step through a Portal to find themselves in a Location Most Foul, from which they make their Entrance into the infinite Planes of Adventure. Chapter I of the "Well of Worlds" adventure anthology. Pgs. 8-23 TSR 2604
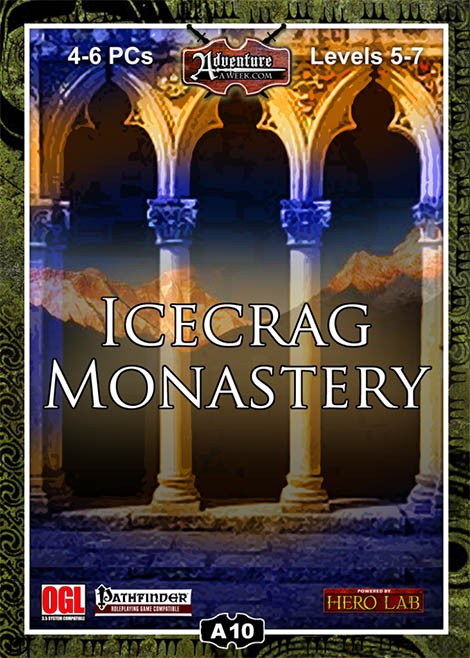
Icecrag Monastery is located atop a towering mountain peak and has long been a haven for those that choose a peaceful and meditative way of life. After receiving a dire plea for help from the Icecrag monks the PCs make the long and dangerous journey to the isolated monastery. Upon arrival they discover a once stable relationship between neighbors has been shattered, though the catalyst is not readily known. Strangely enough an orc shaman, a lesson in herbalism from the old monks, and an old legend may help the PCs resolve the conflict and once again bring peace to the region. Also included in ""Icecrag Monastery"": The new ""Herbalism"" Feat introduced in the Apothecary of Icecrag Monastery A new magical plant form to go with the new feat Two new magical items; one used for good, the other: evil An exciting location to use in future games complete with maps by three time ENnie Award winning cartographer Todd Gamble Different ways to complete the primary quest

None know from where the Heresiarch first came, but all remember the night that it did. It rode down from the bleeding stars on a great serpent, hurling bolts of obsidian lightning that shattered the monuments and capitols of every nation. Its infernal army swept aside the defenses of the mortal empires in a single hour, decimating legions once thought to be the invincible fist of humanity's god-kings. Faceless priests - each bearing the symbol of the trident - drifted through the fallen cities and scorched villages on a frigid wind, and when they rose to greet the huddled men and women ringed by their festering, bloated dead, they spoke a single, simple offer: worship the Heresiarch or die. Thousands of crusaders fell tonight so that you might be given this chance. In a last stand that, for the first time, united all of the empires of humanity as brothers and sisters, a way was cleared into an infernal stronghold said to contain a gate to the Heresiarch’s fane. All is silent save for the clangor of distant battle. Surrounded by grim-faced knights and teary-eyed peasants – their hands clasped in desperate hope – you step through the glowing, churning doorway, knowing there will be no help and likely no return. Published by Defy Danger and Save Versus Death
:strip_icc()/pic1775414.png)
This is Part 1 of an adventure designed for characters of the 20th to 21st level About 200 years ago a horrific massacre took place on the remote Soron island of Heikun. For months, the deranged and corrupt priests had sought to create a race of hybrid Snake-Men...a race which they believed once existed in Soro. They kidnapped folk from surrounding villages and took them back to their temple. There they performed unspeakable rites and experiments. Sensing their debasement, the dark spirits of the mountains called to the priests in their dreams, luring them down into the vast sub-levels beneath the Pyramid. Somewhere in the cavernous depths they were touched by an eternal evil and given horrific new forms. The deformed priest-things of Heikun crawled back to the surface, systematically destroying all living creatures in their path, including the city's hapless, ineffective leader: the inbred boy-king Yusef.

Heavy mists have plagued the area around Phlan for weeks, even after the reported death of Vorgansharax, the Maimed Virulence. People have been disappearing in those deadly fogs, and now dead bodies are turning up. A D&D Adventurer’s League adventure set in the Quivering Forest.
Freeport is a fantasy “free city” you can place in a fantastic setting. Its basic premise is a pirate city gone legit… at least on the surface. In truth, the pirate tradition is alive and well in Freeport, but camouflaged by a veneer of respectability. These days the city’s pirates are privateers, legalized pirates Freeport loans out to the highest bidder. You’ll learn more in the short history of the city that follows. This should help give you a taste of the flavor of Freeport before the adventure begins and the given background is all you need to run this adventure. It is an ideal starting place for a new campaign as the player characters find themselves stranded in Freeport after a deal goes sour. A seemingly simple job plunges them into the strange underside of the city, where they uncover secrets worth dying for. Death in Freeport is the first from the Freeport trilogy, together with Terror in Freeport and Madness in Freeport. Synopsis: Death in Freeport drops the player characters into the midst of political and magical intrigue, as the hidden Brotherhood of the Yellow Sign manipulates events to bring its dread god to the world. Freeport is still a bustling center of trade, but evil currents run beneath the surface. There are secrets here, and questions unanswered. The characters will undoubtedly learn there is more here than they expect in a simple seaport. The question is, will that knowledge kill them? As the adventure begins, the player characters (PCs) have just come to Freeport on a merchant ship. While on the docks, the PCs are attacked by a press gang, who mistake them for easy marks. The press gang is handily beaten off; since they are unused to real resistance. A bookish young man named Brother Egil then approaches the PCs. He says that he’s been looking for a group that can take of itself, and that he has a job for them if they are interested: finding a missing librarian. The missing man, Lucius, disappeared two days previously, and Egil is eager to find him. Egil gives the PCs some background on Lucius and his strange behavior. The PCs are then free to investigate: They are likely to visit Lucius’s home, the temple to the God of Knowledge, and an orc pirate ship. This should form a picture of Lucius as a man searching for his own past—who found something he wasn’t counting on. Following a trail of clues, the PCs learn about the Brotherhood of the Yellow Sign. With a little luck, the PCs can trail the cultists back to their hideout, penetrate the lair, and discover secret tunnels underneath it. Deep underground they find degenerate serpent people, and eventually Lucius himself. The librarian has been tortured badly and will die without aid. The PCs also have to deal with the leader of the cult, a man they may recognize from the temple. When the cult priest is slain, they are in for an even bigger surprise. He was not human at all, but a serpent man in disguise. What this means for Freeport only the gods can say.
The Temple of Tesh-Yatra is a setting-neutral dungeon delve for a party of 6th level adventurers, inspired by the classic funhouse dungeons of yesteryear. The dungeon takes 6-10 hours to fully explore. It features a high proportion of non-combat encounters: puzzles, exploration, and the occasional deadly centrifuge. The ungodly fusion of a mad scientist’s lab and a planar temple, the dungeon includes an encounter that can launch your players into the Nine Hells – for a price... The Temple of Tesh-Yatra includes two new constructs to use in your game: the sinister Maimers, and the enigmatic Skorverra; as well as a new magic item: the Amulet of Tesh-Yatra, an artisan’s dream! The Temple of Tesh-Yatra also comes with a VTT battlemap (transparent PNG format). The Temple of Tesh-Yatra was originally set in the Outlands, as an extraplanar dungeon. But given its self-contained nature and the Temple's age, it is well-suited to any wildnerness, and would work equally well seeding a hex crawl.

In “Rescue at Rivenroar,” the player characters must brave the depths of ancient catacombs in search of prisoners taken from the town of Brindol in a midnight raid. The hobgoblins, bandits that style themselves after an invading horde from long ago, have taken refuge in a dungeon under a ruined mountain fortress, and the PCs must clear them out to find the captive townsfolk and the treasures taken from Brindol. “Rescue at Rivenroar” also marks the first step in a great journey - the Scales of War Adventure Path, which spans 30 levels and put the PCs at the crux of events that shapes the world for centuries to come. While the scope of this adventure isn’t as grand, it represents the seed from which an epic tale will surely grow. Pgs. 4-45