
Years ago the valley was green, and animals ran free through golden fields of grain. The princess Argenta ruled over this peaceful land and the people were secure and happy. Then one day a warrior riding a red dragon appeared in the skies over the princess’ castle and almost overnight the tiny kingdom fell into ruin. Now only ruins and rumors remain, and what legends there are tell of a fabulous ruby still buried somewhere within the Palace of the Silver Princess TSR 9044

In this adventure, the PCs discover that not all souls rest easy, particularly those spirited away to Nightwyrm Fortress. To learn the truth, players must pierce death's veil itself and enter the Shadowfell, where sinister echoes of life wing through eternal gloom. This adventure can be run as a stand-alone adventure or as Part Three of a three-part series of adventures (starting with P1 King of the Trollhaunt Warrens(TM) and P2 Demon Queen's Enclave(TM)) that spans 10 levels of gameplay.

This deluxe adventure takes heroes into the ruins of Gardmore Abbey, a monastery that was once the base of a militant order of paladins devoted to Bahamut. According to legend, the paladins brought a dark artifact back from a far crusade and stored it in their abbey for safekeeping, and evil forces gathered to assault the abbey and take it back. What the legends don’t tell is that this artifact was actually the Deck of Many Things, a force of pure Chaos. This adventure brings characters into the extensive dungeons beneath the ruins - dungeons that are warped and twisted with the raw forces of Chaos surrounding the cards of the deck.
Dirty rotten scoundrels. Carn Perrin needs an exterminator. A city is plead with ware rats. Its up to the party to find their lair and kill the rat king. Pgs. 38-55

Civil War Unrest. Turmoil. Rebellion. As above, so below - the cataclysmic events of the Wrath of the Immortals echo throughout the Hollow World setting. The Milenian Empire, with its classical Greek culture, has not escaped. Already the streets are un-safe, and the omens are getting worse... The emperor is dead... long live the emperor! But is the new emperor a man of the people, or a tool in the hands of malevolent powers? Walk carefully, for no stranger is safe upon the streets these days, and adventurers least of all! The mood of the capital city is turning ugly. Minions of the new emperor look on uncaring, while citizens disappear and philosophers fall to heedless mobs. The old emperor's elite guards are disbanded and scattered. Disorder reigns, and restless citizens threaten open revolt. And yet... a whisper is heard. Civil war can be averted. An ancient artifact, the Milenian Scepter, can rally those who would serve the Empire best. But the Scepter has been lost for generations, and who can say where it might be? The trail leads into the depths of the city, and across a dangerous wilderness to a forgotten oracle. For the lucky and the bold, perhaps it will lead to... THE MILENIAN SCEPTER This stand-alone adventure is compatible with the Wrath of the Immortals boxed set and the accessory HWR3, The Milenian Empire. You will need the D&D Hollow World boxed set to play this adventure. Easily adaptable to the AD&D game. TSR 9378

The renegade magic-user Bargle is wanted, dead or alive. Rumor holds that he dwells in the bowels of a nearby abandoned keep, performing all sorts of foul sorcery. Only the truly brave, or perilously foolish, would dare to challenge Bargle in his own domain. Expanded dungeon of the BECMI red box sample dungeon.

The battles of the Blood War have raged for longer than mortals have known life, the conflict's savagery and hatred fueling the dreams, desires and obsessions of the multiverse. One way or another, the war spills through all the layers of existence, and little escapes its influence. Some clashes have consequences that shake the Lower Planes. Others are far less meaningful - they're fought solely for the sake of violence and killing. "The Field of Nettles" is set in the aftermath of an especially pointless battle. The adventure rips the player characters from their comfortable lives and thrusts them into the Blood War full force. The goal is to cross one of the more infamous battlefields, seeing the scope and the power of the fighting - and hopefully coming away with a greater understanding of just how big the Blood War is. The adventure is designed for a party of 4-6 PCs of 5th-8th level. The characters don't get to save the multiverse, nor do they find the key to unlock the dark of any great secrets. But they might come to realize their importance (or lack of it) in the scheme of things. On the fickle borders of the planes, that can be worth almost as much.

To stop a devastating rampage of giants across the land, the party must venture into the lair of the stone giant thane Arnak to uncover the truth about why he has broken his peace with the neighboring dwarves. In the process, they will have the opportunity to retrieve important symbols of the fight against the giants and uncover a dangerous excavation. The adventure is part of the "Against the Giants" series originally by Gary Gygax, hence the writing credit.

This adventure is designed for the D&D Adventures League Season 5 - Storm King’s Thunder campaign, and is meant to enhance your party’s connection to important events and NPCs. While it is intended for a party of around 6th level, the nature of the quest is such that it fits easily with a higher level as well. It will put your players in contact with Felgolos, the bronze dragon that is encountered in Chapter 9 of D&D Adventures League Season 5 - Storm King’s Thunder, as well as the ancient dragon Iymrith, who plays a prominent role in the main plot. Of course, you can also change names and locations to make this adventure fit into any other campaign world – as long as it has dragons and deserts. Enjoy!
A level 2–3 sewer adventure by Glynn Seal. PCs plumb fetid sewers and recently-revealed secret halls, in search of a lost worker. In these forsaken chambers, they may find answers and treasures, but may also come face-to-face with a bloated monstrosity and its depraved followers. For Old-School Essentials (OSE) Included as one of four adventures in "Old-School Essentials Adventure Anthology 1"

Just Add Water is a sewer-based dungeon crawl that can be easily inserted into any adventure. All you need is a location with a sewer system and a reason for the party to explore it.

Kalakeri: The Forbidden Temple is a gothic horror adventure for 4-5 characters of 7-8th level. It can be played over the course of 8 hours for a one-shot, but works better when played slowly over the course of two games. This is the third part of the Carnival of Lost Souls campaign. It can also be played as a standalone adventure. Kalakeri: The Forbidden Temple features: Exploration of the ancient Greater Vochalam temple with a powerful eidolon guardian. Lots of dangers and rival explorers are waiting for the characters, among them the priests of Osybus and Firan Zal’Honan himself! Intense social encounters with the leaders of major forces of Kalakeri: Ramya, Arijani and Reeva, and the possibility to align with them. Random encounter table for Kalakeri travels, and mechanic for quick resolution of random combat encounters. New custom monsters to make combat encounters truly memorable and exciting. High-quality maps, also available in universal vtt format. Check out previous adventures in the series: Lamordia: The Hardest of Hearts and Dementlieu: Dance with the Devil! And look out for the next adventure in the Carnival of Lost Souls series: Valachan: Hunter’s Moon! It will be released in the next month. Once all four adventures are out, we will also release a special Campaign Guide, which will explain in detail how to best set up and play the campaign. However, if you want to start your campaign right now, don’t worry - we have included a short appendix at the end of each adventure that will explain the basics! Disclaimer: We are a team of writers from Ukraine, so the unprovoked war and senseless aggression of the terrorist state of russia influenced our initial timelines significantly. However, we are now as safe as we can ever be under the constant threat of missile strikes, and determined to finish the whole series! And after that - who knows, maybe even more cool adventures will follow ;) Made in Ukraine

Giants have been raiding the lands of men in large bands, with giants of different sorts in these marauding groups. Death and destruction have been laid heavily upon every place these monsters have visited. This has caused great anger in high places, for life and property loss means failure of the vows of noble rulers to protect the life and goods of each and every subject -- and possible lean times for the rulers as well as the ruled. Therefore, a party of the bravest and most powerful adventurers has been assembled and given the charge to punish the miscreant giants. This module contains background information, referee's notes, two level maps, and exploration matrix keys. It provides a complete module for play of ADVANCED DUNGEONS & DRAGONS, and it can be used alone or as the first of a three-part expedition adventure which also employs DUNGEON MODULE G2 (GLACIAL RIFT OF THE FROST GIANT JARL) and DUNGEON MODULE G3 (HALL OF THE FIRE GIANT KING). TSR 9016
You are the guest of the count, one of your allies and the strongest man in the region. Your sojourn has been pleasant, a nice change after weeks of battle. Suddenly the courtyard below your window is filled with the noise of galloping horses. More Guests? You yawn as you look out. But these people arriving look more like tax collectors than guests. You decide to give your attention to something more interesting, like dinner. Relax while you can, friend, because these new arrivals are about to lead you to a crimson sailor, a cozy Tower of Terror, and a river with an aching heart. Sabre River includes a complete campaign setting, new NPCs, dungeon and wilderness encounters, and a mysterious story. TSR 9119
"Orcs have returned to the once quiet border province of Blackmarch. The Bleak Tower and its meager garrison are all that stand against the tide. Their only hope lies in a ragtag band of adventurers willing to venture into the perilous maw of Ironwood Gorge..." "Ironwood Gorge is a fantasy role-playing adventure for 4-8 characters of levels 2-5, designed for older editions of the world's most popular fantasy role-playing game and its clones such as Labyrinth Lord and OSRIC. The material is also easily adaptable to any other class and level based fantasy role-playing game. Ironwood Gorge serves as part two in the Blackmarch sequence of adventures, but is built to function just as well as a one-off adventure, a drop-in-a-hex location for sandbox games, or as a kick start to a new campaign. The module includes keyed maps detailing both the Bleak Tower: a living, breathing refuge for adventurers; and Ironwood Gorge: a cave complex with over 100 keyed areas of traps, monsters and mayhem. The module is illustrated throughout with original artwork and includes appendices detailing new monsters, magic items, and spells. Whether you are looking for an out-sized adventure to usher the hardiest characters to the intermediate levels, or a fully-realized location to plunder for maps and ideas, Ironwood Gorge is a treasure from the old-school of gaming..." An alternative to B2 - Keep on the Borderlands
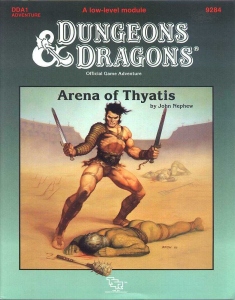
It's party time in Thyatis... And simply everyone is going to the magnificent Villa Osteropolus, home of the wealthy old senator, Helenites. Raucous fun, exotic food, and even advanced betting on the upcoming Arena games are expected. Even adventurers just in from the outlands may meet the powerful here. So don your festive togas, for in Thyatis City there are important connections to be made and deeds to be done, duels to be fought and fame to be won. (But beware, oh Adventurer! The politics of Thyatis can be as labyrinthine as mazes beneath the Coliseum...) This module is designed especially for the DM who wants to sharpen his interactive skills. Presenting the detailed layout of a Thyatian noble's mansion and maps of the multi-level Coliseum of Thyatis. Four four to six characters, levels 2-3 Brief guide to Thyatis legal system New optional class, the Rake Fast unarmed combat system, including disarming attacks Special appendix on creating Thyatian names Featuring the DM's Guide to Winging It TSR 9284

Deep beneath the Isle of Dread, in a place forgotten by the world of light, an ancient, unfathomable evil festers. Within the desiccated ruin known as Golsimorga, the debased kopru servants of Demogorgon work foul rites, steeping immature shadow pearls in pits of liquid insanity. None from the world above have yet fathomed what terrors lurk beneath the Isle of Dread, nor what mad scheme roils to profane life deep within the city's gangrenous corpse. "The Lightless Depths" is the sixth chapter of the Savage Tides Adventure Path, a complete campaign consisting of 12 adventures appearing in Dungeon magazine. For additional aid in running this campaign, check out Dragon magazine's monthly "Savage Tidings" articles, a series that helps players and DMs prepare for and expand upon the campaign. Issue #353 of Dragon features ways to improve the PCs' vessel, the Sea Wyvern, as they take their adventures back to the seas. When the PCs journey deep under the Isle of Dread to find the source of the shadow pearls, they discover horrors beyond imagining in a haunted underground city perched on sanity's razored edge. Pgs. 28-66

Many of the local lords had gathered for a peace moot. A perfect opportunity for the demon-possessed Aeldrith Forkbeard to murder them all in cold blood. The PCs, attending the moot, must now flee for their lives. Harried by a Northlander warband, the party is forced to flee into the dreaded Witchwood. To reach the safety of the Kingdom of Marshes they must traverse the depths of the forest, avoiding Northlander raiders and the strange creatures of the Witchwood. The adventure also takes the PCs into the Feywild, where time runs strangely and memories are fragile. Finally, they must face the chilling Gatekeeper guarding the Feywild portal that allows the PCs to return to the Material Plane. Into the Witchwood is a generic adventure suitable for use in the Moonshae Isles. The adventure includes a map of the area, three new creatures and a new legendary magic item, the Circle of the Forest God.

This material was originally published as three separate adventures: G1 (STEADING OF THE HILL GIANT CHIEF), G2 (THE GLACIAL RIFT OF THE FROST GIANT JARL), and G3 (HALL OF THE FIRE GIANT KING). Contained herein are referee notes, background information, maps, and exploration keys for three complete adventures using the ADVANCED DUNGEONS & DRAGONS rules. This module can be used alone or as the first in a series of adventures that includes Dungeon Modules D1-2 (DESCENT INTO THE DEPTHS OF THE EARTH), D3 (VAULT OF THE DROW), and Q1 (QUEEN OF THE DEMONWEB PITS). TSR 9058

"The creatures are just too intelligent, too crafty, and too strategy-minded to "rampage." Rampaging brings the wrath of oath-bound knights, powerful mages, and divinely-protected priests. Why would a dragon want such attention, unless it had some special secret, or unless it was insane? Or both. The northern reaches of the Derideth Swamp were once plagued by a rampaging dragon. This black dragon, named Storamere, took a mad glee in attacking human villages, wiping out orc camps, driving off the lizardfolk, and decimating farmland. He met his untimely end, though, in an ambush devised by the monks of the Order of St. Chausle. Storamere died with a curse upon his draconic tongue: "you could not have defeated me in my lair," he told his slayers. "I am forever invincible in my lair." Now Storamere is back, with a horde of his misshapen half-dragon offspring, to have his vengeance. All that remains of the once-heroic monks are two old men driven mad by their last encounter with the black dragon, so it falls to a band of adventurers to again defeat the mighty dragon -- this time in his palace, where the boastful Storamere claims he is at his strongest." Includes maps and damage rules for navigating Storamere's lair, a semi-solid palace made of a dangerous, corrosive liquid five feet thick and located on the ethereal plane. Most of the monsters in the lair have the Half-Dragon template applied. Published by Atlas Games