
Decades have passed since Sokol Keep was reclaimed, and a small garrison placed there along with a beacon to help guide ships. Now, that beacon has gone dark, and the garrison has disappeared. In Phlan, rumors circulate that something ancient was discovered in the grounds beneath the keep, dating to before the clerics of Tyr built the small fortress. Uncover the secrets of Sokol Keep! An adventure for 1st-4th level characters.
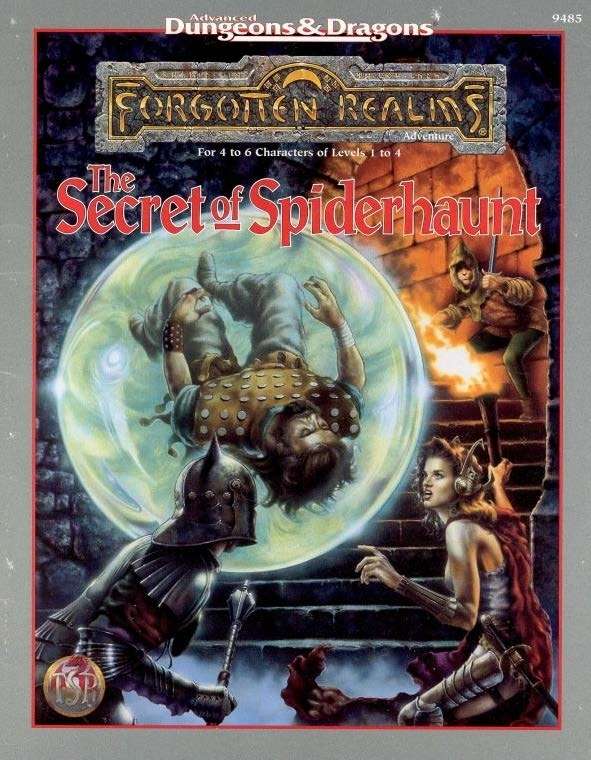
The infamous Sword of the Dales has always held a certain fascination in the eyes and hearts of the citizens of the Dalelands. Thus, it was no surprise when Randal Morn, rebel leader of Daggerdale, led an expedition into the crypt of a long-dead wizard to recover the weapon. Shaevyn the weapons-mage had created the Sword long ago, and it stood to reason that the blade would be waiting within his tomb. Perhaps the Sword of the Dales woulld allow Randal Morn to rule Daggerdale once again. But Randal Morn never returned from that fated party. Only tales of terror told by a lone survivor held any clues as to Randal's fate. A brave hand of heroes accomplished what Randal Morn's group failed to do in part one of this adventure trilogy, "The Sword of the Dales." Battling through the tomb's undead inhabitants, those heroes reached the burial crypt of Shraevyn. There, resting in the center of the coffin, was the Sword of the Dales, its azure glow filling the chamber. However, there was no sign of Randal Morn. Only a note signed by his hand held any clue as to his fate. "Seek me in Spiderhaunt," it proclaimed. "The fate of Daggerdale is in your hands." This is the second part of a trilogy of modules that began with "The Sword of the Dales." The saga concludes with "The Return of Randal Morn." TSR 9485
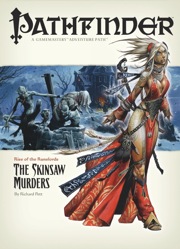
The Rise of the Runelords Adventure Path continues! A sudden string of brutal killings terrorizes the town of Sandpoint, and the killer's mark bears a familiar shape. Investigation leads to the Lost Coast's most notorious haunted mansion, a dilapidated ruin that has become the lair of a monstrous murderer. Yet this killer is but one of many, a member of a group of fanatic cutthroats calling themselves the Skinsaw Men. To defeat the cult, the PCs must travel to the bustling city of Magnimar to unravel the sinister source of these murders before they become the Skinsaw Men's next victims!

A tribe of evil norkers led by a human illusionist threaten the town of Nolivari. The heroes must brave the wilderness, find Grakhirt's lair, and defeat him to ensure the safety of the local villagers. A straightforward dungeon crawl against lots of norkers! When do you get to see those guys in an adventure? Lots of monsters from the AD&D Monster Manual II as well. This adventure features a little bait-and-switch; the titular bad guy Grakhirt is assumed to be a norker, or gnoll, or some other monstrous humanoid, but is in fact a human illusionist/assassin! Note: The adventure doesn't feature caves AND a dungeon, but since the caves are treated like a dungeon with doors and numbered rooms, this is listed as a dungeon adventure as well. Pgs. 28-37

In the deep, it has awoken. Hidden in the ruins of an old dwarven kingdom awaits a powerful relic, and an army kobolds are on the march to retrieve it. Dare the heroes enter this ancient place, and will they find the relic before the army arrives. In a race against time the adventures may unleash the greatest evil, while trying to save the world from a grim fate. Tomb of the Dragon's Heart is a low-level OSR adventure suited for Labyrinth Lord and other oldschool retro clones. The adventure was originally written for the Danish Living Campaign The Hinterlands, and it is for the first time presented in English. The adventure introduces the players to a different tradition of adventures, and it one with a focus on exploration and encountering the unknown. The adventure contains new magical items and relics and new monsters to challenge your players. Tomb of the Dragon's Heart also functions as a prequel to The Flooded Temple and to Grave of the Heartless. Published by Greis Games.

Having put down a rising of giants, it was discovered that the motivating force behind their depredations was that of long-forgotten evil - the Dark Elves. Determined to seek out these creatures, a body of doughty adventurers mounted an expedition to learn the strength of the Drow and bring retribution to them (DUNGEON MODULE D1, DESCENT INTO THE DEPTHS OF THE EARTH). This module contains background information, a large-scale referee's map with a matching partial map for players, referee's notes, special exploration and encounter pieces, a large map detailing a temple complex area, encounter and map matrix keys, and an additional section pertaining to a pair of unique new creatures for use with this module and the game as a whole. A complete setting for play of ADVANCED DUNGEONS & DRAGONS is contained herein. This module can be played alone, as the second part of a series of three modules (with DESCENT INTO THE DEPTHS OF THE EARTH, D1, and VAULT OF THE DROW, D3), or as the fourth part of a continuing scenario (DUNGEON MODULES G1, G2, G3, D1, D2, D3, and Q1, QUEEN OF THE DEMONWEB PITS). TSR 9020, From 1978

Into the Drachensgrab Mountains! Hot on the trail of the marauding slavers, you and your fellow adventurers plunge deep into hostile hills. Spurred on by your past success, you now seek the heart of the slaver conspiracy. But hurry! Your must move quickly before the slavers recover from your previous forays and attack! This module was originally used for the official Advanced Dungeons & Dragons Tournament at Gen Con XIII and is the third of four in a series of related tournament modules. This module contains a challenging scenario, the tournament scoring system, plus nine pre-rolled, playtested tournament characters. Also included are large scale referee's maps, notes, and background information. A3 is a complete adventure in itself, but it is also a companion to A1 (Slave Pits of the Undercity), A2 (Secret of the Slavers' Stockade), and A4 (In the Dungeons of the Slave Lords). TSR 9041

Restore an Abandoned Temple Enter the catacombs near the desecrated Temple of Muir, Goddess of Paladins, and search for the lost tomb of Abysthor. Will your party be able to cleanse the evil that now inhabits these once-sacred halls, and recover the Stone of Tircople? Can your characters survive the traps of an undead sorcerer? Will your players discover the chamber of Living Rock and the secret power it holds? Adventure awaits! Gold and Glory! A fantasy adventure published for the D20 system, The Tomb of Abysthor is the first module in Necromancer Games Dungeon series and can be played as a stand-alone story or in conjunction with The Crucible of Freya and the forthcoming city supplement Bards Gate. What secrets lie hidden in the tomb of Abysthor?

Devastated in a war with a nearby wizards' school, the Fighters' Academy has since been surrounded by a foul and dank swamp - the Gloomfens. Since the climatctic battle between the wizards and fighters, the tower has decayed. The spirit of the head of the academy haunts the building, eternally plotting his revenge on the wizards who killed him. his loyal sutdents remain faithful to him even in death. Other foul undead have made their home in the rotting, spacious academy. From their lair, they make forays into farmsteads near the swamp in search of victims to feed their unspeakable appetites. The Problem of these terrible attacks by the savage undead will not stop until the evil that has found a home at the tower is burned from the face of the land forever. Will your party heed the call and help the town of Melinir? Will they be able to clear the former Academy of its undead? Lair of the Vampire Lord is the third in a three part adventure, The Haunted Tower. Or, it can be ran as a stand alone adventure. The choice is up to you. Part of TSR 1081 The Haunted Tower

When huge stones fall out of the night sky, A deadly curse settles over Gravencross. Help the village exorcise the Demon Stones. “The sun had set an hour ago, and the rain lashed down and the wind howled on the dark moor. A storm this late in the season was unusual, but this one seemed different. The clouds were more menacing, tinged with anger, the rain colder and more biting than usual. Skerrill had to find the lost calf and get him back to the farm before his father came back from the city on business. He’d been looking for two hours now, and he was right in the middle of the moor when the storm hit. He knew he should have turned back as soon as darkness fell, but then he was never the brightest boy in the valley. If only he had remembered to lock the farm gate. The calf was now likely dead anyway having stumbled among the boulders and rocks, panicking in the dark, and then fallen in a floodwater stream and drowned. Either way, he was in more trouble than he could imagine. Suddenly, a bright flash of white light and a roaring peal of thunder were preceded by an explosion as a huge object fell from the sky and impacted the ground of the moor no more than a stone’s throw from him. Dirt, mud, water, and debris erupted from the impact site, flying high into the air and then covering the moor for hundreds of feet all around. Skerrill was knocked to the ground instantly and covered in the fallout from the blast. His ears rang and his head spun, but he staggered to his feet in a daze. He stumbled to where the blast had happened only moments before, and in a depression in the ground lay a huge stone glowing orange as if hot. Skerrill passed out. Two more thunderous explosions crashed in the distance.”

Trapped in the mysterious Castle Amber, you find yourselves cut off from the world you know. The castle is fraught with peril. Members of the strange Amber family, some insane, some merely deadly, lurk around every corner. Somewhere in the castle is the key to your escape, but can you survive long enough to find it? TSR 9051

The valley of Haven was a peaceful land. Its crops were abundant, its citizens prosperous. Elves, Dwarves, Halflings, and Humans lived together in harmony. Hidden away in the heart of the Thunder Mountains, Haven was a safe place to live. The rivers were sweet and pure; the weather was pleasant and warm. Something terrible has come to pass in Haven - terrified refugees speak of a fabulous ruby uncovered in the mountains and a catastrophe that befell the palace. Whatever the cause, Haven now lies in chaos. Raiding bands of orcs, goblins, and hobgoblins terrorize the countryside. The disaster happened so suddenly that the citizens are confused and helpless. Without their leaders, who are trapped in the palace, they have no courage to fight back. The situation has become desperate. TSR 9044

A handful of would-be adventurers gathers to explore an ancient tomb, eager to trade their discoveries for a ticket to a better life. What they find within presages the advent of the Age of Worms, an era of darkness, decay, and writhing doom. "The Whispering Cairn" is the first installment of the Age of Worms Adventure Path, a complete campaign consisting of 12 adventures, several "Backdrop" articles to help Dungeon masters run the series, and a handful of poster maps of key locations. For additional aid in running this campaign, check out Dragon's monthly "Worm Food" articles, a series that provides additional materials to help players survive this campaign. Pgs. 14-47

When a group of archaeologists put out a call for adventurers to help them escort a valuable artefact back to civilization, nobody expects anything out of the ordinary. However, our heroes have more than mere bandits to deal with at Havel’s Cross... Undead monsters roam the night and an ancient artefact stirs within a long forgotten temple. Getting to the bottom of the mystery will require a strong sword-arm and an even stronger stomach.

The End of the World Is at Hand! A hideous death cult has seized control of an ancient artifact-monument known as Tovag Baragu. The power behind the cult is the Old One himself, Iuz the Evil, demonic master of an empire. He's on an all-or-nothing quest for supremacy over the world—and the heavens beyond. To stop him, heroes must face horrors never dreamed of, journeying to a shadowed city where Death rules and the living cower. Here, Iuz will achieve his mad dream by destroying the imprisoned master of that alien citadel: Vecna, the mightiest lich, an immortal demigod. Two items exist with the power to stop Iuz—the Eye and the Hand of Vecna—but using them carries fantastic risks. Not even the gods know what will be unleashed when these items are fully activated. Die Vecna Die! takes the heroes from the Greyhawk campaign to the demiplane of Ravenloft and then to the Planescape city of Sigil. However, none of the material from those settings is required for play. TSR 11662

The Wells of Darkness is the seventy-third layer of the Infinite Planes of the Abyss, a prison used by demon lords and a graveyard for creatures the multiverse would rather forget. Imprisoned in one of these wells is Shami-Amourae, the Lady of Delights. This minor demon lord and former consort of Demogorgon is one of the few beings who knows the true secrets of Demogorgon's twin personalities and his plot to reconcile them, thereby growing immeasurably in power. "Wells of Darkness" is the tenth chapter in the Savage Tides Adventure Path, a complete campaign consisting of 12 adventures appearing in Dungeon magazine. For additional aid in running this campaign, check out Dragon magazine's "Savage Tidings" articles, a series that helps players and DMs prepare for and expand on the campaign. Issue #357 of Dragon magazine features rules for three new binder vestiges connected to the imprisoned demons within the Wells of Darkness. The Prince of Demons hides a secret, one that could well be the key to stopping the savage tide. Yet the only one who knows this secret is imprisoned on one of the most notorious realms in the Abyss. Will the price for rescuing her be too high? Pgs. 52-84

A "simple errand" is never what it seems. It's a wizard's privilege - and curse - to change his mind. Pgs. 3-7

The entity known as Oreiax is a gruesome, stunted monstrosity born of ancient death. Rescued from an eternity of petrification by Doresain the Ghoul King, Oreiax immediately pledged itself to the Ghoul King's service, and thus indirectly, into Orcus's service. Oreiax, born of stone and death, seeks to glorify Doresain by petrifying the world. Pgs. 112-119

This adventure works best after going through the original trilogy (Death, Terror, and Madness in Freeport). After exposing the madness and corruption of the previous Sea Lord, a succession crisis is upon Freeport. There are no heirs to the seat of power, leading the Captains' Council to overturn the Law of Succession. But opening up succession plunges the city into chaos as various factions vy for the title. The PCs will need to survive riots and secret plots to make sure the right man (or woman) ends up with the job.

What good is a king without a city to rule over? What happens when everyone in a city disappears, gone without a trace? This is the state in which an adventuring party, your characters, finds Sheol in; a city devoid of all life forms, claimed by Hegemon, a Wraith that used to be its king. Explore the empty city! Be mindful of the thieves' guilds! Find your way to the portal that leads to the castle! Fight your way through the hoards of undead to foil Hegemon's insidious plan! An adventure perfect for the middle part of any campaign, full of plot hooks, possible plot points and areas of exploration! Tons of places, like the Tower of Eiden, with backstories to tie in with any existing campaign! Discover the "Hell's Gifts", red gems that defy space! This adventure offers: 30 pages of exploration of an empty city and a castle swarming with undead. Maps for major locations Two new Monsters, Hegemon and Corvus, also usable as NPCs. 3 new magic items. A plethora of plot hooks, possible plot points, and setting-neutral lore. Many hours of fun gameplay A Dungeons & Dragons adventure written for 8th level player characters, with level adjustments for levels 5-10 for the encounters.