
Restore an Abandoned Temple Enter the catacombs near the desecrated Temple of Muir, Goddess of Paladins, and search for the lost tomb of Abysthor. Will your party be able to cleanse the evil that now inhabits these once-sacred halls, and recover the Stone of Tircople? Can your characters survive the traps of an undead sorcerer? Will your players discover the chamber of Living Rock and the secret power it holds? Adventure awaits! Gold and Glory! A fantasy adventure published for the D20 system, The Tomb of Abysthor is the first module in Necromancer Games Dungeon series and can be played as a stand-alone story or in conjunction with The Crucible of Freya and the forthcoming city supplement Bards Gate. What secrets lie hidden in the tomb of Abysthor?

"A dwarven prince has requested your party's aid in quelling the coming invasion (if there is one, of course). Do you take him at his honorable word, and gird yourselves for battle? Or do you listen to the street talk, and take the side of those who disbelieve the warmongering? Most importantly of all: what if you make the wrong choice?" Patriots of Ulek is an adventure set in the world of Greyhawk - designed for a party of six to eight characters of first to third level who must help defend the Principality of Ulek against the despot’s horde and uncover a conspiracy which could lead to Ulek’s defeat. Fighters and clerics with healing spells are best suited to this adventure, as it involves a substantial amount of combat. Mages are helpful, but not required. Thieves will find minimal opportunities to practice their trade, although their skills as spies and scouts may come in handy. This adventure was designed specifically for inexperienced players and beginning dungeon masters. TSR 9385

Part 1 of an Expert-level quest into a hostile wilderness. This adventure takes place in the Known World of the D&D game, as outlined throughout the D&D game rule books and modules. The DM may find it useful to consult the Companion and Masters Sets, as well as most of the X-series of Expert Set modules. D&D Expert Set module X9, The Savage Coast, would be especially helpful, as Tortles of the Purple Sage could easily serve and continue that module's direction and plot like, adding a previously undescribed area (the Great Northway) to the Known World. The DM may also place the areas and events of this adventure within an existing campaign setting, as long as the geographical areas of the campaign match those set forth here. Pgs. 40-62

Within a lawless region of the Nameless Realms known as the Barrens, strength, cunning, and a will to survive are all that matters. Here, amid the arid high plateaus, the smoldering hat of the deep jungles, and the haunted marshlands of the northern fringe, countless adventures can be had for those brave, or foolish, enough to undertake them. This is a land of ancient ruins, petty robber barons, wild tribes, elder curses, and the undead. Sorcerers rule over fallen cities, and dark priestesses hold power with all manner of evil minions. Will your party be bold enough to undertake the challenges that await them in this first adventure in the Folio: Black Label Series? Can they overcome the curse of the three sisters, and will they make a name for themselves among the scattered outposts of Humanity? Only time, dice and comradery around the gaming table will tell. This adventure is formatted to both 1E & 5E gaming rules.
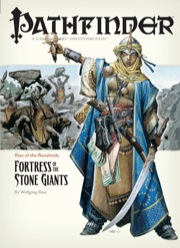
The Giants are on the March! The Rise of the Runelords Adventure Path continues! Driven to battle by a maniacal warlord, the once-peaceful stone giants of the Storval Plateau threaten to destroy the sleepy town of Sandpoint. Will fast action and quick wits be enough to save the defenseless community? Yet, even if the giants' initial raid can be repelled, only by striking at the heart of their titanic war machine—the black-towered fortress of Jorgenfist—can the menace be quelled. But who knows what mysterious bloodlust spurs the usually peaceful giants to war, or what mysteries lie beneath their ancient fortress?
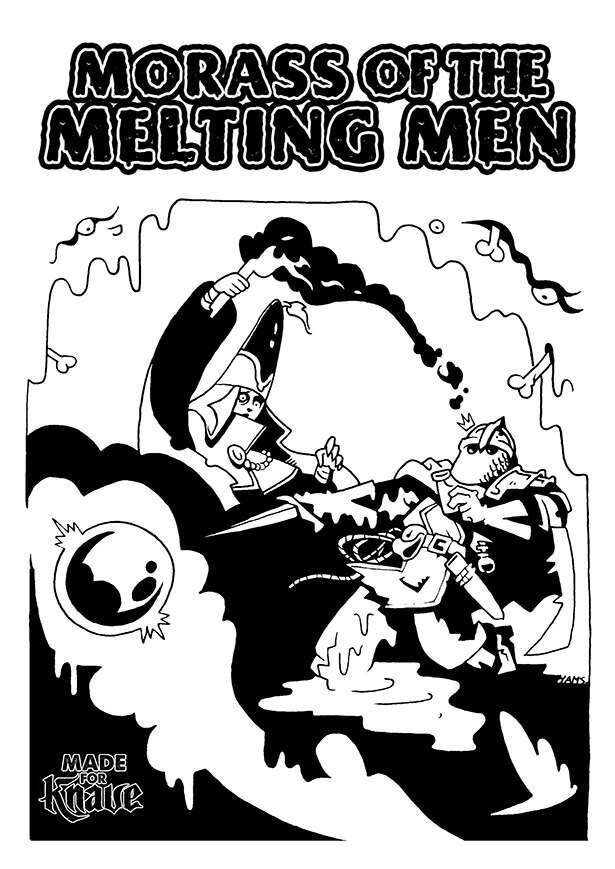
In these lands of eldritch goo, it's a fine line between victory and a sticky situation Tzork, the sentient globe of glass, wasn’t exactly born from a grand spell—it was more of a cosmic "oops". After a backstabbing disciple named Theridus offed his master and snagged the relic, he promised his followers unimaginable power. But instead of turning them into terrifying demons, Tzork turned them into puddles of goo. Now, the once "glorious" cult's mansion is less a temple and more a swamp of melted, failed adventurers, attracting only the most reckless of treasure hunters. 'Morass of the Melting Men' is an adventure for Knave 2e, suitable for low-level PCs. The adventure revolves around an extremely powerful sentient magical item that has gone out of control, melting all the nearby people and turning what was once an evil temple into a swamp of slime, filled with bones and eyeballs. In Morass of the Melting Men, players enter a location flooded with a magical liquid exuding chaotic energy. The longer the PCs remain within the swamp, the more they suffer the unexpected effects of this alien magic. Step inside this morass if you dare — goo and treasure awaits... but mostly goo What you'll find here: A complete 40-page adventure A 20 room dungeon map Several new (and bizarre) magic items such as the magnificent Tray of Force and the powerful Theridus' Head. Several wild random tables of weird and gooey outcomes
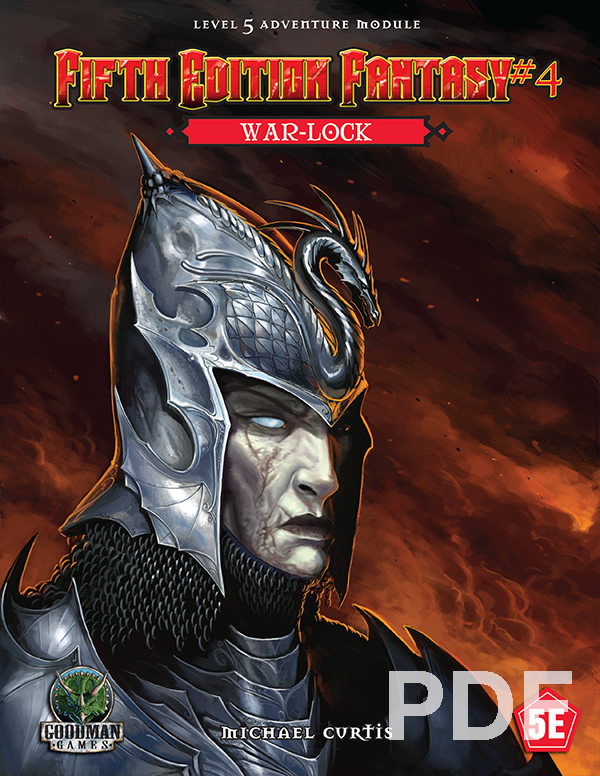
Devilish sorcery and ancient steel merge in the form of a reborn menace rising in the wild hills on civilization's verge. As the badlands burn with wildfire, an arcane warlord gathers his monstrous troops under his tattered banner. He is rumored to be immortal, and it will take tremendous bravery, immense cunning, and more than a little luck for stalwart adventurers to end his campaign of malice. Can your mighty heroes locate the War-lock's one weakness before his forces drown the realm in blood and fire?

30 Ravenloft adventures inspired by various domains of dread, including Gothic Earth, that can be played as a single campaign! Dreams of Solitude is a collection of thirty exciting adventures that can either be played as a campaign, run as a one-shot, or have pieces taken out to supplement your current home game! You'll meet your match against Atarte, the evil master of dreams, who will task you to defend ancient fortresses from the undead, explore a terrifying maze, fight in the trenches of world war 1 or even a karaoke contest with werewolves! It's SO much fun, and you'll be able to go back for more adventures, again and again! Adventures summary: Demon's Isle: Explore a watery cave and find your way to the Pirate Demon Zekel! Airic's Forest: Survive a forest ruled by werewolves while you try to find the cure for lycanthropy! Fractured City: Enter a glitchy uncompleted illusory town and try to find the "Butcher" that roams the dark alleys. The Heinfroth Heist: Enter Dr. Heinfroth's asylum and steal his journal without becoming his test subject! Tomb of the Hentempet the Red Queen: Face Hentempet the red queen inside her Pharaoh tomb! Graveyard Of invitation: Enter a cursed graveyard and follow the clues to find the reason why the undead have risen! Fey Blood Merchant: Help the Vistani child escape his Rakshasha master before he returns! Horrors in Chateaufaux: Play the role of the Gendarmerie guards and find out who creates chaos in the roads of Dementlieu! On the Run: Explore an ancient tomb and escape the curse that you have unleashed! Vampire Escort Child: Can you help this poor child leave this jail meant for monsters? Defend the Keep!: Command your own military force to defend a keep against waves of undead! Lena's Pets: Explore the heidius laboratory of Frantisek Markov's student and escape before you become body parts for her next experiment! Lava trip: Who would want to be inside an ACTIVE VOLCANO? RUN! Escape Rooms: Find the way to escape before time runs out! How investigative are you? Singing Showdown: Karaoke competition with werewolves??? Labyrinthine Horror: Can you escape the labyrinth before the Vampiric Minotaur catches you? Teety's Hunt for Lulo: Find Teety's elusive love in an enchanted forest of pain! Monster Lab: Create your own Flesh Golem and make sure you are a good parent! Through fire and steel: Run through the No-man's-land while enemy planes and tanks bombard you and assassinate the enemy general! Don't forget to dodge the bullets! Drowning in Filth: Will you manage to escape before you drown in filth? Wilted Roses: Explore the forests of Sithicus and find the Black Rose Effigy! Shyclin’s Circus: An encounter inspired by the Carnival. The joke's on you! Among Us: Can you find shelter in a small cabin found in the woods? The Free Trader, Mist Runner: Avoid the enemy pirate ship at all cost while trying to reach the port with your own ship! The Curious Case of the Man Who Drowned in Air: Solve a detective's case in Victorian era London! Night at the Museum: Protect the museum's artifacts from invisible adversaries! Raid the Shadow: Lay siege on a castle controlled by the undead! Who could be its ruler? Journey to the Center: Control a mechanical worm of Kwalish and drill to the center of the earth to mine mithril! Journey Through Barovia: Visit Barovia's most famous places while trying to solve riddles or die trying! Choose Nothing: Solve a Death Slaad's riddle or get mad! The Final Dream: Tackle Atarte and their illusions in an environment that continiously alters between all of the dream-adventures! Only few can take on a Darklord and live to tell the tale! Published by Mistfactor Press

It's all over (and literally so) after midnight. A mission with an unforgiving deadline. The characters must remove the magically-infused remains of a dead wizard and his medallion from a crypt. Pgs. 10-23

Buried in fire, but hardly dead. Only the Keep survived the destruction of Koralgesh, but few adventurers will survive the terrors that now stalk the lost Keep's halls. Players hear rumours of the Keep at Koralgesh and then traverse it to acquire the treasure within. Pgs. 45-64

A young boy befriends an extra-planar construct that has mysteriously appeared at his family’s farm. Once the boy finds out that other creatures are coming to take it back home, he comes up with a plan to get help from the party to save his new friend. Fairly in depth adventure with plenty of RP opportunity.

In “Rescue at Rivenroar,” the player characters must brave the depths of ancient catacombs in search of prisoners taken from the town of Brindol in a midnight raid. The hobgoblins, bandits that style themselves after an invading horde from long ago, have taken refuge in a dungeon under a ruined mountain fortress, and the PCs must clear them out to find the captive townsfolk and the treasures taken from Brindol. “Rescue at Rivenroar” also marks the first step in a great journey - the Scales of War Adventure Path, which spans 30 levels and put the PCs at the crux of events that shapes the world for centuries to come. While the scope of this adventure isn’t as grand, it represents the seed from which an epic tale will surely grow. Pgs. 4-45

The Sea Witch is a short adventure for four 10th-level characters. The difficulty of the adventure can be adjusted by changing the level of main antagonist (Black Molly, the sea hag pirate) or by altering the number of her ogre servants. To tailor the encounter to groups of different levels, refer to table 4-1 in Chapter 4 of the DUNGEON MASTER’S GUIDE. The adventure is set off a lightly populated coastline known as Misty Bay, but adapts easily to any coastal region in existing campaigns. The sea hag known as Black Molly is a notorious pirate who has plagued the coastal cities for the better part of a decade. A successful Knowledge (local) check (DC 15) will reveal that Molly and her ogre crew have a filthy reputation as merciless killers who delight not only in plundering vessels for their riches, but also in destroying the ships themselves and sending all hands to the bottom of the sea. Now the villain and her followers have seized control of the Old Lighthouse of Misty Bay located off a lightly populated coastline. For generations the lighthouse beacon has protected the fishermen of this region, warning them of the dangerous rocks that lurk just below the level of the high tides. Recently, the hag has put out the beacon, darkening the lighthouse; misery and destruction are sure to follow as ships start to blunder into the rocks. Blackmail is apparently Black Molly’s aim in this venture: She conveyed a message to the nearest shore community, the fishing village of Poisson, demanding the princely sum of 50,000 gp. Until she receives this ransom, she intends to hold the lighthouse and its beacon hostage. The fate of the human keepers who tend the lighthouse is unknown to the seaside communities at this time, but they fear the worst. The Sea Witch is ostensibly a rescue mission: The PCs are pitted against the evil of Black Molly and the brawn of her savage ogre crew. It is the heroes’ task to retake the lighthouse and, if possible, free its captives from the clutches of their jailer. What neither the PCs nor the shore communities yet realize is that while she 1would be pleased to have the gold, Black Molly is in fact after bigger treasure. Molly has no intention of giving up the lighthouse — at least, not until she finds what her master sent her here for. Lying on the sea floor practically at the base of the rock on which the lighthouse sits is the wreck of the war galley Flying Cloud, which according to popular legend was captained by a cleric who wore around his neck an amulet of the planes. Black Molly wants this prize, but so far she hasn’t been able to find it. She’s scoured the wreck without finding any sign of the magic item. Now she’s trying to determine where to search next, for the item might well be somewhere near the wreck. If she can’t find it, she’ll start torturing her captives to find out if they have any useful knowledge about the amulet.

This 4 hour adventure for 3rd level characters begins in a prison cell where the adventurers must figure out a way to escape, acquire weapons and armor to defend themselves more effectively, and most importantly, escape a repurposed dwarven forge that has been appropriated by a fire giant who uses slave labor and even a captured red dragon wyrmling to smelt ore and forge an arsenal under the volcano Mt. Hotenow.
"Orcs have returned to the once quiet border province of Blackmarch. The Bleak Tower and its meager garrison are all that stand against the tide. Their only hope lies in a ragtag band of adventurers willing to venture into the perilous maw of Ironwood Gorge..." "Ironwood Gorge is a fantasy role-playing adventure for 4-8 characters of levels 2-5, designed for older editions of the world's most popular fantasy role-playing game and its clones such as Labyrinth Lord and OSRIC. The material is also easily adaptable to any other class and level based fantasy role-playing game. Ironwood Gorge serves as part two in the Blackmarch sequence of adventures, but is built to function just as well as a one-off adventure, a drop-in-a-hex location for sandbox games, or as a kick start to a new campaign. The module includes keyed maps detailing both the Bleak Tower: a living, breathing refuge for adventurers; and Ironwood Gorge: a cave complex with over 100 keyed areas of traps, monsters and mayhem. The module is illustrated throughout with original artwork and includes appendices detailing new monsters, magic items, and spells. Whether you are looking for an out-sized adventure to usher the hardiest characters to the intermediate levels, or a fully-realized location to plunder for maps and ideas, Ironwood Gorge is a treasure from the old-school of gaming..." An alternative to B2 - Keep on the Borderlands

Important: The adventure is 1e but it has monster conversion notes for D&D 4th edition The town of Highport, once a human community overlooking Wooly Bay from its perch on the northern coast of the Pomarj, fell prey to hordes of humanoids swarming out of the jungle-covered hills surrounding the settlement. Though the orcs, goblins, kobolds, ogres, and gnolls razed much of the place in their ferocious rampages, the smoldering ruins they left behind soon became a new kind of community, a place of trade between the humanoid “locals” and the unsavory human traders who have no compunction about doing business with them. Slaves are a commodity in ready supply in Highport’s market, since many pirates raid up and down the coast of the bay, putting fishing villages to the torch and filling their holds with captured refugees. Slavery has become a thriving business in the town, and rumors abound of a cartel of Slave Lords who run things from behind the scenes, filling their coffers in secret from the buying and selling of human chattel. The trade has become so prolific that the good folk to the north have grown tired of these depredations and decided to fight back. Forces of righteousness and honor have recently descended upon Highport, some openly and others in secret, in various attempts to destroy the machinations of the Slave Lords and abolish the abominable enterprise that has taken far too many loved ones from home and hearth. One such doughty servant of goodness is Mikaro Valasteen, a cleric of Trithereon. Mikaro slipped unnoticed past the crumbling walls of Highport with a single mission: to rescue and transport as many slaves to their freedom as possible. Mikaro and a handful of faithful assistants located a number of escaped slaves—as well as rescued a few more not sufficiently restrained and guarded—and shepherded them through the gates and beyond the reach of their humanoid tormentors, returning them to their lands and homes. This covert freedom brigade enjoyed remarkable success early on, since the servants of the Slave Lords were often lax in their vigilance and sloppy in their efforts to prevent loss of the “merchandise.” After one too many shipments never made its destination, the humanoids stepped up their security and the normal channels of escape from Highport closed to Mikaro and his team. He cannot risk exposure by smuggling the freed slaves through the gates as merchandise any longer, since shipments of goods are now regularly stopped and checked. No longer able to free the slaves in that manner, Mikaro began hiding his charges in an abandoned villa in a particularly rundown part of the town. Although they are safe for the moment, their numbers have grown unmanageable, and the priest fears it is only a matter of time before someone slips up and brings slavers to their doorstep. Ever more desperate to find a new means of escape from Highport, Mikaro has started work on a plan that is both daring and dangerous. He intends to use a series of old sewers coupled with natural caverns running beneath the town as an escape route to the sea beyond the walls. But he needs someone to clear out the creatures and pitfalls he knows lie within. Pgs. 2-27

This material was originally published as three separate adventures: G1 (STEADING OF THE HILL GIANT CHIEF), G2 (THE GLACIAL RIFT OF THE FROST GIANT JARL), and G3 (HALL OF THE FIRE GIANT KING). Contained herein are referee notes, background information, maps, and exploration keys for three complete adventures using the ADVANCED DUNGEONS & DRAGONS rules. This module can be used alone or as the first in a series of adventures that includes Dungeon Modules D1-2 (DESCENT INTO THE DEPTHS OF THE EARTH), D3 (VAULT OF THE DROW), and Q1 (QUEEN OF THE DEMONWEB PITS). TSR 9058

At the end of the Hateful Wars, Lord Sandor led his army into the Barrier Peaks in pursuit of a host of goblins and orcs. He and his army vanished, and now a group of adventurers follows his footsteps to discover what doom fell upon him and his men. Pgs. 30-46

This adventure takes place in the Moonsea of Faerûn. The players have been brought to Melvaunt to search for the missing scions of the city's great families. To the north, in Thar the orc tribes converge on the ruined fortress of Xul-Jarak, flocking to the banner of a charismatic warlord. There, he intends to sacrifice the scions of the great families of Melvaunt in a bloodritual to Gruumsh. The players will escape Melvaunt, search along the wilderness of Thar for the Fortress of Xul-Jarak, and then explore the dungeons of the ruined fortress and hopefully rescue the scions before they are sacrificed. There also is a Web Enhancement by Eric Cagle on the archives of wizards of the coast's website designed to scale the adventure to level 8. For example, it replaces the Owlbear with a Tyrannosaurus. This is an easy to scale adventure with much of the player's difficulty coming from intelligently avoiding problems, choosing how to approach each floor in the most tactical way, and quickly adjusting when something goes wrong. The adventure has sidebars including common orc battle cries (In Orc!), ready to use orc names, weather and random encounter table in Thar, a description of what happens if the party fails or partially succeeds, and suggested minis for each of the encounters. There is even an extended description of the bloodspear ritual, an event the party is not meant to encounter in a normal run. The appendix is detailed for all the humanoid characters including the scions and their equipment, the named villains, and variety of unnamed orcs the party will encounter. The fortress also offers an opportunity to introduce the players to the Underdark and the Zhentil Keep. There is a passage to the Underdark the players can accidentally explore, and return to later. Emissaries from Zhentil Keep have come to watch the ritual and have their own motivations. These npcs provide an opportunity for exposition and role playing at a point which otherwise might be combat heavy, acting as a valve for the first floor - helping or hurting the party with subtle magic should the difficulty be off.

The king has hired adventurers to investigate the sudden rash of giant attacks and strange phenomena around the town of Bywater. Meanwhile the townsfolk believe an evil witch is directing the attacks and only the magic sword of the town's founder can defeat her.