
"Blood Money" is a caper adventure in which the adventurers work outside the law to pull off a major robbery. Good planning is essential, and the characters need to stay cool under pressure.

In ages past, the wizard Karavakos made a deal with devils, which resulted in him being trapped in an extradimensional pyramid, unable to escape. His only hope for escape is to lure adventurers into the Pyramid, in hopes that they will destroy his splinters and return his power to him. But his wife Vyrellis, whom he slew in a rage when the Pyramid formed, still lingers in spirit and wants nothing more than to see him laid low... Although set to allow PCs to just fight through each encounter, tips are included for PCs negotiating with the factions trapped in the pyramid.

The lost Bloodtower has returned, arising from its earthen grave to stand as a mute sentinel over the fog-shrouded moorland. In the weeks since it's return, local travelers have spoken of new undead roaming the countryside. Pgs. 80-87

Uncover a Hidden Legacy A lost passageway on the upper level of the most infamous dungeon in Faerûn has recently been uncovered. When a patron hires a band of adventurers to brave the dangers of Undermountain, a search is on to uncover secrets of an apprentice of the dungeon’s lost creator – Halaster.

In the ruins of Kiris Dahn, a human town, lies a 'Slaying Stone'. The stone is said to have the power to kill any foe, though the stone is consumed in the process. The party will venture into the ruins which are the home to an assortment of goblins, hobgoblins, and kobolds. However, a mercenary band of orcs have been hired (by a benefactor who is not met in the module) to search the ruins for the Stone, and the party must find it first. The party must use caution and stealth to move through the town without alerting the denizens or the mercenaries while searching strategic points around the abandoned town to find the Stone. Eventually, the party should find the stone under the protection of an indifferent Brass Dragon.
:strip_icc()/pic1775414.png)
This is Part 1 of an adventure designed for characters of the 20th to 21st level About 200 years ago a horrific massacre took place on the remote Soron island of Heikun. For months, the deranged and corrupt priests had sought to create a race of hybrid Snake-Men...a race which they believed once existed in Soro. They kidnapped folk from surrounding villages and took them back to their temple. There they performed unspeakable rites and experiments. Sensing their debasement, the dark spirits of the mountains called to the priests in their dreams, luring them down into the vast sub-levels beneath the Pyramid. Somewhere in the cavernous depths they were touched by an eternal evil and given horrific new forms. The deformed priest-things of Heikun crawled back to the surface, systematically destroying all living creatures in their path, including the city's hapless, ineffective leader: the inbred boy-king Yusef.

E2, following up on Death's Reach, the PC's first travel to Sigil following the smuggled remains of the primordial Timesus. The pursuit then leads into the Abyss, through the White Kingdom to face Doresain, the Ghoul King, exarch of Orcus. The module certainly is epic, placing the PCs up against powerful monsters like greater demons, death knights, and a demilich. It may be frustrating that the PCs arrive too late to disrupt the plot (have to allow for the finale in the next adventure) but taking out Orcus' right hand ghoul may be satisfying. Includes a skill challenge for crossing a portion of the Abyss For environments, City refers to Sigil.

The Bloody Maul of Kord is a magic weapon protected by the priests of Kord, who occasionally allow a noteworthy hero to use it when going on a dangerous quest worthy of the storm deity’s blessing. Six months ago, Atrimos of Ardor took the Bloody Maul for a quest to the Caverns of Demise, hoping to end attacks to the realm being launched from the caverns. He never returned. Now, the clerics of Kord hire the PCs to go into the caverns to retrieve the Bloody Maul of Kord—and to find Atrimos, if possible. Pgs. 108-113

Stonefang Pass wends its way through the mountains of the Stonemarch, home to brutal tribes of orcs. The time has come to clear the pass and gain a foothold, so that it can be used for trade between the town of Winterhaven and the lands beyond the mountains. Brave adventurers are needed to rid the pass of monsters and liberate Stonefang Keep from the orcs. Who’s up for the challenge?
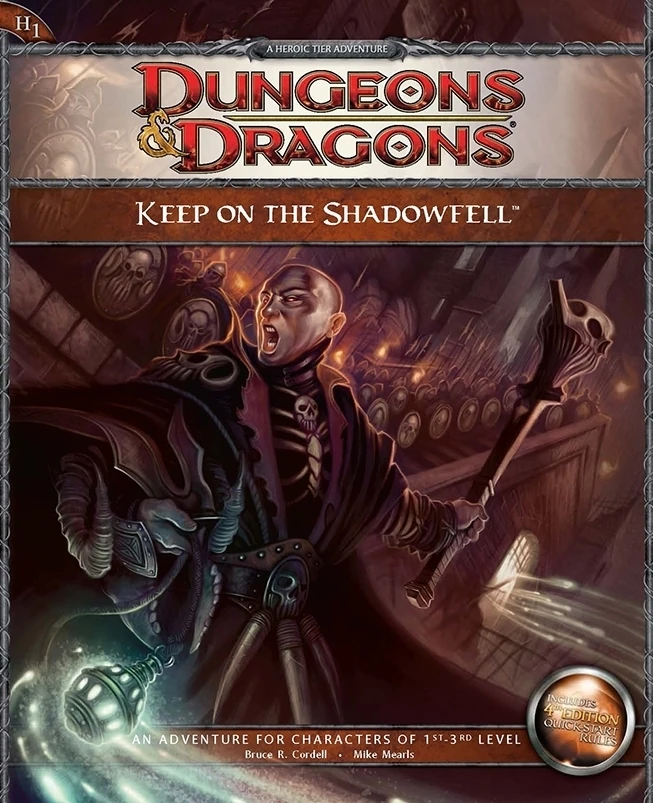
Darkness looms near Winterhaven! Kobold brigands have grown ever bolder in their attacks, marauding the once peaceful town, and a known explorer has been missing ever since their departure to the excavation site of a dragon burial site. When the party investigates, they will discover that the kobold's leader, Irontooth, bears a tattoo of a ram-headed demon. This is a troubling portent, for the townsfolk will report that this can only mean the dread god Orcus, master of death, has an active cult in that ruined keep! It is up to the party to enter the Keep on the Shadowfell and put a stop to the cult's fell machinations before it threatens all the realm. There they will fight the evil priest Kalarel, Scion of Orcus and seal off the vile portal to the dark realms he is master of. Should the heroes seize victory, glory and treasure are sure to be theirs. But first they must endure the challenges of that dreaded KEEP ON THE SHADOWFELL!

On a trade road to the city-state of Tyr, a caravan is assaulted by a deadly obsidian shardstorm, forcing the survivors to band together and navigate the wastes to safety. But the force of nature that destroyed the caravan is under the malevolent control of the being known as the Wastewalker, who will stop at nothing to see the end of those that escaped his initial wrath. Can the heroes reach the Ringing Mountains before it’s too late?

When Monsters threaten the village of Crystalbrook, it's up to adventurers to track down where they're coming from. The investigation leads them on a journey across planes. In the Feywild, the heroes must explore an enchanted island garden and unravel the plot of a foul hag, before she and her fiendish companion can perform a ritual to seize control of the island. "Beyond the Crystal Cave" is a Dungeons & Dragons adventure designed for the winter 2011 season of the D&D Encounters official play program. This season incorporates character options from Player's Option: Heroes of the Feywild, and it comes with three full-color maps, thirteen ready-to-play encounters, and information on the D&D Encounters program. Originally found in Dungeon Magazine #211 now available as a stand-alone adventure. Pgs. 63-122
At the behest of Orcus, Demon Prince of Undeath, a mighty deathpriest hierophant has begun assembling a powerful strike force. He intends to launch the first of many assaults on the world, readying it for his master’s arrival. With the help of potent allies and grand rituals, the PCs have discovered a route to the Abyssal headquarters of this hierophant. This delve begins as the PCs teleport from the world to the first of a complex of interconnected chambers deep in the Abyss, linked only by portals. Pgs. 126-131

In “Rescue at Rivenroar,” the player characters must brave the depths of ancient catacombs in search of prisoners taken from the town of Brindol in a midnight raid. The hobgoblins, bandits that style themselves after an invading horde from long ago, have taken refuge in a dungeon under a ruined mountain fortress, and the PCs must clear them out to find the captive townsfolk and the treasures taken from Brindol. “Rescue at Rivenroar” also marks the first step in a great journey - the Scales of War Adventure Path, which spans 30 levels and put the PCs at the crux of events that shapes the world for centuries to come. While the scope of this adventure isn’t as grand, it represents the seed from which an epic tale will surely grow. Pgs. 4-45

“The Shadow Rift of Umbraforge” is a sequel to “Siege of Bordrin’s Watch” and the third part of the Scales of War Adventure Path. In “Siege of Bordrin’s Watch,” the PCs discovered that dark creepers had sold arms and tactical intelligence to the orc war chief Tusk, aiding him in his attack against the folk of the Stonehome Mountains. In this adventure, the PCs investigate the link between the orcs and the dark ones, stumbling into an armsrunning operation that takes them to the Shadowfell in order to finally confront the charismatic figure behind it. Pgs. 4-53

The characters arrive in Fallcrest just as a blizzard starts from the gloomy black clouds. the villagers gather to discuss how to survive the untimely and unusual blizzard. Suddenly between the roar of the wind and thunder, a ship descends filled with undead with one message: Return the ice scepter!. Afterwards, the characters must decide, find and return this relic to the Winter King, or bluff and plan to dethrone him. As they reach the tops of the mountains, possibly injured, the whole of the Winter King's inner domain stands before them. If they fail, winter will claim the Nentir Vale forever. Group of 4-6 players.

Something stirs in the dark heart of the Warwood, and in response something stirs in the stars. A simple encounter with bandits on the road leads the PCs to a frightening place where even dreams are deadly. Cultists seek to free the soul of a terrible entity from beyond the stars. The PCs must retrieve the soul vessel of a long-dead evil paladin to stop cultists’ plan from coming to fruition. Pgs. 60-92
The Tower of Zoramadria is hidden away in the Feywild. The tower is an arcane academy under the tutelage of the lich Parthal. Parthal and his students lead serene lives of study and contemplation, except when they engage in a bout of bloody necromantic research that requires innocent souls as vital components. Parthal has a score to settle, and the Feywild itself might shudder and scream before the lich has had his revenge on those who killed his love. Pgs. 104-111
The Raven Queen’s servants often seek out mighty allies. One of these is the black dragon Quetzallus, who resides in a deep cavern on the Shadowfell guarding a stream of souls flowing into the Raven Queen’s realm. But a death knight named Raxikarthus, betrayed by the Raven Queen in life, now seeks to enslave this dragon for his own purposes. He madly believes that he can stand against the Raven Queen, and seeks allies of all stripes—even her own servants—to do so. The death knight has found a pathway into the Shadowfell thought closed by mortals. Beneath a decayed keep, the undead dragonborn has reopened this portal and led his forces into the Shadowfell itself. The PCs are called in to beard the death knight in his lair. They find it abandoned, but discover a strange passage in the lower reaches. Pgs. 162-167

"And they bade their slaves, 'Build unto us tombs to rival the palaces of the gods, for there shall we live or lives and sleep our deaths in splendor.' And the people of Maru-Qet wore their fingers down, broke their backs, burst their hearts to obey. Indeed they raised up great tombs to rival the palaces of the gods. And their masters were well pleased, for it was as gods they saw themselves." The brown dragon Urum-Shar lurks in a strange tomb, plotting schemes only a wyrm of incredible power could understand. Expanding on content from Draconomicon: Chromatic Dragons, this adventure takes the heroes into Urum-Shar’s dark and trap-filled lair, where they will eventually face the powerful dragon herself. The dungeon heavily employs the use of traps, with fewer monsters. The upper tomb consists of a great puzzle of twelve rooms, and the lower tomb contains the dreaded Urum-Shar, an ancient brown dragon and heir to the lost draconic empire of Maru-Qet. The dungeon has special protections against scrying and other divinations, as well as teleportation. Pgs. 55-90