
High tide is coming in in this week’s encounter: Sea Trolls in the Net, a tongue-in-cheek combat encounter about a troll troubling fishermen and getting tangled up in their net. This encounter works best when it can add flavor to a grim, seaside locale as a random encounter the adventurers stumble across while exploring. While exploring a blighted shoreline on some forsaken coast, the adventurers find a sea troll feasting upon fishing nets full of freshly caught fish while their fishermen flee from the shore.

The Lady Marinto’s father is embroiled in political turmoil in his home nation. So he spirited his daughter away and the PCs are asked to guard her for a time. But just who, or what, is after her…and why? A four-hour adventure for 4th level characters set in the Forgotten Realms, featuring elements from far-off Kara-tur.

A fiend lurks among the Black Blade goblins. A shapeshifting barghest fashioned by the General of Gehenna to exact revenge on all goblin-kind. It’s aim: to kill as many goblin leaders as possible… A masked goblin approaches the party asking for help. Two tribe leaders are dead. But a rival for chief has control of the crime scene. Will the party discover the barghest among the goblin ranks? Can they stop this imposter before it strikes again? Adventure Overview The adventure’s story is spread over 4 parts and takes approximately 4 hours to play. The adventure begins with a Call to Action scene. Part 1: Goblin Politics. Krill sends his emissaries to implore help from any strong intermediary. The party is asked to investigate the murder of Thrawn in Dringly’s lair. This is Story Objective A. Part 2: The Opposition. Gain entry into Dringly’s lair and investigate the murder of Thrawn. Gather enough evidence to find the killer. This is Story Objective B. Part 3: To The Lair! Now that the players have determined the barghest (Yeep) is to blame, they need to get to Krill’s lair quickly as he is in imminent danger. This is Story Objective C. Part 4: The Barghest.When the players arrive at the lair, they need to get to Krill and expose and defeat the barghest. This is Story Objective D. Adventure Background A barghest named Yeep has begun its onslaught of attacks against the Black Blade goblins. Starting with Chief Gnar, then his second in command Thrawn, the barghest is moving methodically down the line of command. Krill is now chief. But he has some problems: Two leaders of the Black Blades are dead. Who killed them and why? Is he next? Dringly, the next in command, has decided to take his lair for himself, declaring himself Chief of the Black Blades. Who are the Black Blades? The Black Blades are a tribe of goblins in the local area. They are known for dipping their blades in a dark black substance. It is rumored these blades are poisonous. The Black Blades regularly attack passersby on the road to rob them. The Black Blades have two lairs, one run by a chief who leads the whole tribe, and another overseen by a boss lieutenant. The Black Blades have a well-established pecking order which is how Krill stands to become chief. The next in line is Dringly, who has also declared himself chief and wants Krill dead. Krill suspects that there is something suspicious about two leaders being killed within a day of each other, but he has already burned Gnar’s body without any investigation. He needs to investigate the body of Thrawn, but it is in Dringly’s lair. Krill wishes to avoid direct confrontation with Dringly at the present for three reasons: 1) Any violence would only kill his own tribe members and further divide the lairs. 2) He believes there is still hope for negotiation to reunite the Black Blades. 3) He believes that if he were to attempt negotiations himself, Dringly would kill him. This adventure features: Two maps. Ready for your favorite Virtual Tabletop. A full color pdf. A black and white pdf. One custom monster, a reprint of barghest, all others available in the Monster Manual. Four hours of entertainment involving: roll playing a goblin bard, investigating a murder scene, tracking down a barghest before it strikes again. Applicable to any setting.
Fables is a complete campaign released in six monthly episodes.

Who is ready for a murder mystery? This scenario is completely customizable for a variety of levels available. We won't kid you, this scenario is not something you just throw on the table and play as soon as it is downloaded. A spreadsheet for understanding clues vs. suspects will need to be studied for you (the DM) to understand how to run the mystery. That being said, everytime we (myself & playtesters) have run it, it has been a smash! Like all of our offerings, you SHOULD customize it to fit your needs.

Kalzok the Minotaur pirate discovered an old smuggler's hold on a tiny island in the Nelanther Isles, not far from Nemessor. The island sits amid a dangerous archipelago encircled with scores of hidden shoals that is avoided by all but the most daring or foolish navigators. The area's waters are notorious for claiming the ships of unwary sea captains who tried to steer through the gauntlet of hidden reefs. This offering includes an overview of Kalzok's island along with the details of Kalzok's hidden lair.
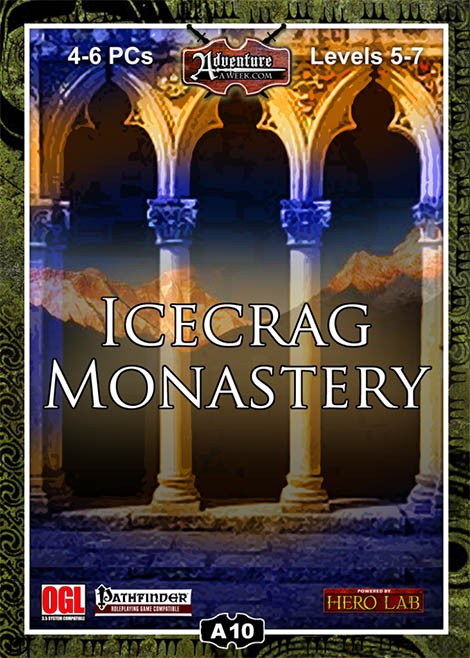
Icecrag Monastery is located atop a towering mountain peak and has long been a haven for those that choose a peaceful and meditative way of life. After receiving a dire plea for help from the Icecrag monks the PCs make the long and dangerous journey to the isolated monastery. Upon arrival they discover a once stable relationship between neighbors has been shattered, though the catalyst is not readily known. Strangely enough an orc shaman, a lesson in herbalism from the old monks, and an old legend may help the PCs resolve the conflict and once again bring peace to the region. Also included in ""Icecrag Monastery"": The new ""Herbalism"" Feat introduced in the Apothecary of Icecrag Monastery A new magical plant form to go with the new feat Two new magical items; one used for good, the other: evil An exciting location to use in future games complete with maps by three time ENnie Award winning cartographer Todd Gamble Different ways to complete the primary quest

This scenario was presented to Gryphcon's 30th anniversary last year. The party finds themselves coming to the Triland on their way to Taco Del Toro. This island chain is unique in that it has a land mass made of clouds, hovering over the island. Upon landing, your group discovers that the governor's child has been abducted by a Cloud Giantess. Time for your hero hats...

Dead from Above is intended for use with four to six player characters of levels 6 to 8. It will likely take two game sessions to complete. The adventure is set in (and above) a hilly region at the outskirts of civilization, presumably one near the base of a mountain chain. With a little work, the GM can place Dead from Above wherever he or she desires in the campaign world.

When the players get teleported to the plane of the Beastlands, they meet with an intelligent petitioner in the form of a Dog named Reith. Eventually Reith will lead the players to a human; an eagle winged boy by the name of Addler. Addler already knows a way out of the Beastlands, but doesn’t want the players to know because the key is his body and if the petitioners knew he could leave, they wouldn’t like him anymore. Not being the best at planning, he’ll be coerced into giving the players a map to the petitioner that helped him find the portal (A snake named Siy). After passing through some small adventures in the beastlands, the players will meet with Siy and learn about Addlers portal. From here, the players will travel back to Addler and confront him.
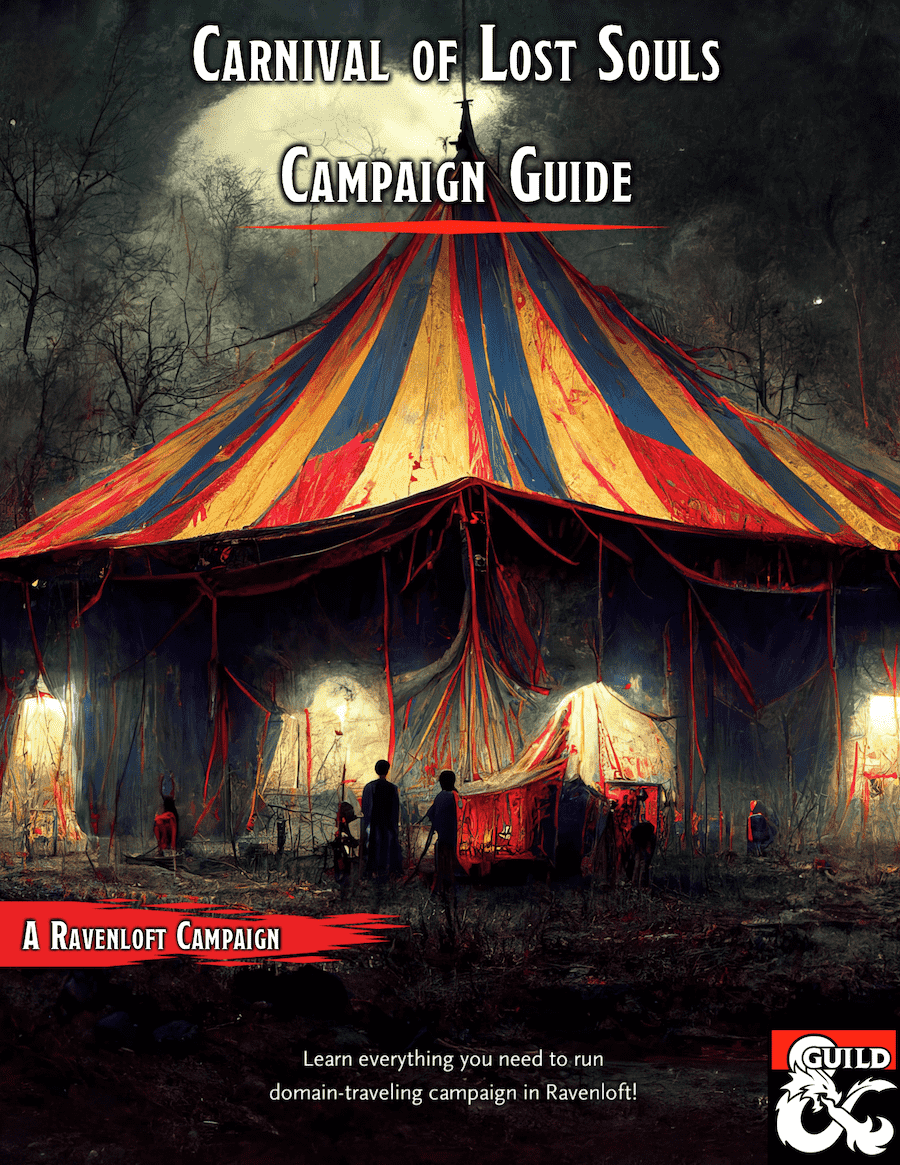
Ravenloft: Carnival of Lost Souls Campaign Guide is a guide for Dungeon Masters who bought our other products from the Carnival of Lost Souls campaign series. It connects together all the modular one-shots we released previously into one grand campaign. It also offers guidance about expanding the scope of the campaign with your own ideas. Ravenloft: Carnival of Lost Souls Campaign Guide features: - Starting adventure to kick the things off and get the characters to know the Carnival - In-between interludes and short encounters, which help to flesh out the Lost Souls NPCs more and add depth to the campaign - Grade Finale - an epic showdown with The Caller in the Mists! - Full description for each of the Lost Souls and what happens to them as a result of players’ actions - Check out the modular adventures of the series: Lamordia: The Hardest of Hearts, Dementlieu: Dance with the Devil, Kalakeri: The Forbidden Temple and Valachan: Hunter’s Moon! Disclaimer: We are a team of writers from Ukraine, so the unprovoked war and senseless aggression of the terrorist state of russia influenced our initial timelines significantly. The release of the Campaign Guide marks also a year since the start of the full-blown war. At the moment, we are as safe as we can ever be under the constant threat of missile strikes, and extremely proud that we managed to finish the whole campaign! We are hopeful that the victory is close at hand, and in the new, whole, and peaceful Ukraine, we will create even more cool adventures! ;) Made in Ukraine

Laugher’s Gorge occupies a stretch of the canyon that runs through the local badlands, named for the haunting laughter that occasionally erupts from its depths. When travelers using the road past the gorge become infected with cackle fever, it’s up to the party to find out what’s causing the mysterious laughing sickness. Though they find a pack of gnolls infesting the canyon, it’s no joke when they discover who (or what) is pulling the strings! Laughter and humor are central themes in No Laughing Matter. The players are met with the will of a prankster god, riddles to solve, and may be forced to come up with some jokes of their own. But this isn’t an adventure to take lightly. If the party underestimates Laugher’s Gorge, they may find themselves infected with cackle fever… and there’s nothing funny about that! Dungeons on Demand is a line instant dungeons you can drop into your campaign, each is designed for 4-5 player parties of specified levels, and each dungeon is complete with a back story, hand drawn maps, traps, puzzles, and reference information to monsters and treasure. You can customize each one to fit in your campaign however you wish, and each one can be played through in one or two gaming sessions.

East of Beregost, nestled in the outskirts of the Wood of Sharp Teeth, Durlag’s Tower has intrigued and yet stymied adventurers for decades. Stuffed full of mechanical traps and arcane wards, and rumored to be inhabited by fiends, very few have managed to extract any REAL treasure from the former home of Durlag Trollkiller. However, a powerful item in the ancient fight against the giants is said to be housed there, and the cloud giant Baron Rajiram has committed significant resources toward recovering it. After a pleasant tea in her garden, Seer calls upon you to beat him there and put a stop to his efforts! Sequel to Durlag's Tower.

Every autumn the sleepy village of Faen celebrates the Soultide Festival. The souls of the departed are guided out of the forest and can depart for their appointed afterlife. There is feasting and celebration of life. The children of Faen dress in costumes, pretending to be their favorite Monsters. The Party are guests for this year's celebrations and are chosen to be the judges in an annual costume contest. They must wander the village, meeting the locals in order to determine their favorite costume. Along the way, they learn about the village's traditions and local lore. However, the village harbors a dark secret. A timeless evil sleeps below the village. The adventurers must descend into the depths to confront a shadowy threat that has been harassing the village for many years. Will they rise to the occasion, or will the children of Faen be in jeopardy for years to come? For use with the 5th edition Player's Handbook, DM's Guide, and Monster Manual.

Delbert's friend Thordyn has been wrongfully arrested and placed in quarantine inside the Lazar's Walls, where all those who have contracted King's Evil are banished to. It is your missing to infiltrate the settlement, and free Thordyn. The task will not be simple, as a crime syndicate rules the Lazar's Walls with an iron fist.

An original one-shot adventure designed for 3-6 level 3 characters. SUMMARY: A recent archaeological expedition in Icewind Dale has uncovered a remarkable discovery: the Spine of the World mountain range is, in fact, the actual spine of a great giant. The discovery confirms an ancient legend, that giants as tall as mountains once roamed the Forgotten Realms. Lead archaeologist Silja Stengravar knows the truth. Centuries ago, a lich, threatened by the giants’ ancient elemental power, banished their race to an abandoned planet known as Kaiva. The lich was defeated, but its curse remains, protected by its minions in the heart of Garagai Mountain. Held captive to the curse, the giants are suspended in time, unable to roam free and claim Kaiva as their own. Silja’s discovery has summoned the portal to Kaiva. Will adventurers brave the perilous journey through the hostile and awe-inspiring planet to destroy the curse and reawaken the giants? DETAILS: 2-4 hour session for 3-6 players Play-tested material Unique items and mechanics Printable cards 16-page campaign guide Enjoy the adventure? Share your experiences with me! Hashtags: #SleepingGiantMountain #GiantsOfKaiva

The party arrange for passage on a fast ship called the Silver Slipper. The good Captain Sara agrees to take them aboard for a reasonable fee. The voyage, however, is marred by strange events, and the crew begin whispering about a dark statue taken aboard as cargo. The statue is to be delivered to a port beyond the PCs' destination. When a fog rolls in one night, the ship is attacked by evil agents of a dark god come to claim the statue. In this nautical nightmare, the PCs must travel aboard the ship, interact with the crew, and save themselves from a boarding party of eldritch evil.
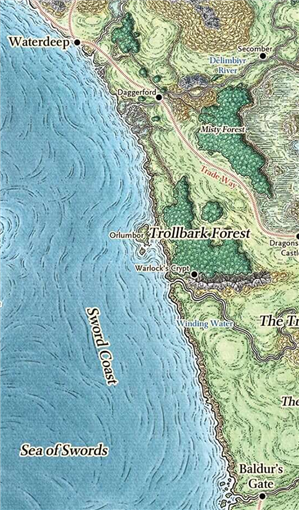
While traveling along the Trade Way, the characters see a small hut on the side of the road, and a spiked barricade erected in the middle of the road. Two men with cudgels in their hands stand on either side of the road. These two brigands proclaim to be members of the Waterdeep City Watch, but any Waterdhavian with half a brain knows this to be a lie. The truth is that these are common highwaymen trying to fleece travelers and merchants with a phony road toll. In this simple encounter, the characters can employ whatever inventive tactics they want to pass the brigands. They may simply pay the toll, they may try to intimidate the bandits or appeal to their better nature by making a Charisma check, or they might resort to violence. Or, they may attempt something else entirely! Encourage creativity.

Rumor has reached your ears that the legendary Amulet of Rafael is in this region. Further investigation has revealed that a reclusive nobleman in the north called Xantus is currently in possession of the item. While details are sketchy about the item, it is well known that quite powerful in the hands of a mage. You decide that you will go north and locate the “Ice Lord” and see if he is willing to part with the item.

𝐍𝐨𝐰 𝐰𝐢𝐭𝐡 𝐚𝐧 𝐢𝐥𝐥𝐮𝐬𝐭𝐫𝐚𝐭𝐢𝐨𝐧 𝐛𝐲 𝐂𝐇𝐑𝐈𝐒 𝐇𝐎𝐋𝐌𝐄𝐒 𝐚𝐧𝐝 𝐚 𝐏𝐑𝐈𝐍𝐓𝐄𝐑-𝐅𝐑𝐈𝐄𝐍𝐃𝐋𝐘 𝐃𝐔𝐍𝐆𝐄𝐎𝐍 𝐌𝐀𝐏! 𝐓𝐇𝐄 𝐑𝐔𝐈𝐍𝐄𝐃 𝐓𝐎𝐖𝐄𝐑 𝐎𝐅 𝐙𝐄𝐍𝐎𝐏𝐔𝐒 is a fifth edition (5E) conversion of the ground-breaking introductory adventure for Dungeons & Dragons that served as a DM aid in the first 𝐃&𝐃 𝐁𝐚𝐬𝐢𝐜 𝐒𝐞𝐭, released by TSR in 1977. This set included a 48-page rulebook covering the first three levels of play, and was skillfully edited by 𝐃𝐫. 𝐉. 𝐄𝐫𝐢𝐜 𝐇𝐨𝐥𝐦𝐞𝐬 from the original 1974 D&D rules written by 𝐆𝐚𝐫𝐲 𝐆𝐲𝐠𝐚𝐱 and 𝐃𝐚𝐯𝐞 𝐀𝐫𝐧𝐞𝐬𝐨𝐧. Holmes advanced the "Sample Dungeon" concept by writing a new thematic dungeon with a strong backstory, creating an adventure that has remained a fan favorite over the decades. Officially, its only title is "Sample Dungeon" but colloquially it goes by various names based on Zenopus, the doomed wizard who built the dungeon under his tower. An adventure for 1st to 2nd level characters; four pregenerated characters are included. Also includes ideas for using it as an adventure site in 𝐆𝐡𝐨𝐬𝐭𝐬 𝐨𝐟 𝐒𝐚𝐥𝐭𝐦𝐚𝐫𝐬𝐡. 𝐍𝐎𝐓𝐄: Using this conversion requires a copy of the original dungeon found in the (1977) Basic D&D rulebook. However, Wizards of the Coast has provided a free pdf of this dungeon since 2008 on their website, see the first page of the pdf for the link. 𝐂𝐎𝐍𝐓𝐄𝐍𝐓𝐒: Introduction, page 2 The Setting, page 3 About the Dungeon, page 4 Dungeon Master's Map, page 5 Areas of the Dungeon, pages 6-13 Appendix A: Further Reading, page 13 Appendix B: Dungeon Factions, page 14 Appendix C: Portown Rumors, pages 15-17 Appendix D: Use with Ghosts of Saltmarsh, pages 18-19 Appendix E: Pre-generated 1st level characters, page 20 𝐈𝐧𝐜𝐥𝐮𝐝𝐞𝐬 𝐭𝐡𝐞 𝐟𝐨𝐥𝐥𝐨𝐰𝐢𝐧𝐠 𝐧𝐞𝐰 𝐦𝐨𝐧𝐬𝐭𝐞𝐫𝐬, 𝐍𝐏𝐂𝐬, 𝐚𝐧𝐝 𝐌𝐚𝐠𝐢𝐜 𝐈𝐭𝐞𝐦𝐬 𝐟𝐨𝐫 𝟓𝐄: Cleaning Cube, Veteran Smuggler, Thaumaturgist, Monstrous Sand Crab, Lemunda, Monstrous Rat, Brazen Head of Zenopus, Verminslayer Longsword, Lesser Wand of Petrification, Scroll of Stone to Flesh The Ruined Tower of Zenopus was featured as part of the "D&D Classics" column in Issue #32 of Dragon+ magazine! Go to 𝐝𝐫𝐚𝐠𝐨𝐧𝐦𝐚𝐠.𝐜𝐨𝐦 or find the link on the Wikipeda page for Dragon magazine. 𝐂𝐑𝐄𝐃𝐈𝐓𝐒: Original Dungeon: J. Eric Holmes Conversion, Added Content & Cartography: Zach Howard Content Review & Editing: Scott McKinley Interior Art: Chris Holmes (“Octopus Attack”, page 9) Cover Art: “Italian Coast Scene with Ruined Tower” by Thomas Cole, 1838. Open Access Image from the National Gallery of Art at images.nga.gov Format: Derived from the “Adventure Template for Open Office/LibreOffice” by Dale Robbins on DMs Guild Dungeon Maps drawn using the application Gridmapper by Alex Schroeder