
The town of Whitehaven is beset with undead. The townsfolk are quick to blame the Witch of Whitehaven, who lives nearby with her partner in the Surbrin Hills. Yet a more insidious evil lurks in the midst of town, cloaked in a holy man’s robes. And far underground, an ancient evil artifact stirs. The town is in need of heroes. Will you answer the call?

The loss of Skyreach Castle in Hoard of the Dragon Queen was a major setback to the Cult of the Dragon, but still only a setback. The cult is determined to retake the castle and claim Tiamat’s lost treasure buried in its frozen walls and cloudstuff vaults, but they aren’t the only ones. Blagothkus the cloud giant is still the master of Skyreach, and he has gone to the hall of his cousin Brunvild, ice lord of Uldoveld, for the resources to repair and reoccupy the castle. At the same time, the party is dispatched by the Council of Waterdeep to reclaim some of the stolen treasures lost when the castle fell.

As fledgling adventurers, your group is looking for anything to increase their fame and line their pockets with gold. Upon crossing the countryside your group comes to Creedo’s Trail a small thorp in the Duchy of Starryshade. Upon arrival in town you find an inn to stay indoors finally and a job opportunity hanging at the Bagel Inn purporting an “easy job” for a “big reward”. The poster is reputedly a crone or witch who has need for some components for an experiment she is currently working on. Easy job AND big reward…what’s not to like!

A gnome tinker summons the heroes to his workshop, but before he can explain his request a vengeful fey creature arrives and disrupts the meeting. Estimated play time - 1 hour. This product contains a combat encounter designed for 4th level PCs, an extensive backstory, detailed NPC descriptions, new monsters and new magic items. Easily adaptable to almost any campaign setting. This side trek encounter is the first of a three-part Fey's Bargain encounter series.
Pursued by wolves and worse, the party must fight a running battle to take refuge at the relative safety of the Bittermoon Inn, a decrepit old inn high in the mountains. But night is falling, can they uncover the secrets of the inn and use them to survive the night? This adventure can be played as a stand alone one-shot, or can be used as a drop-in side quest to almost any campaign. It is suitable for a party of about 5 characters at the First Tier (Levels 1-4). The players must fight a running battle with wolves to reach Bittermoon, then they must discover the secrets of the inn before escaping through a smuggler's tunnel. Finally they must face off against their unseen opponent at Skull Cavern. There are four encounter maps included with this title.

A mysterious tower beckons. Recently a strange tower hidden in the forest was rediscovered, but only one scout returned to tell the tale, but a strange tale of cults, bandits and ghosts it was. Dare our heroes explore this forgotten place? Originally from the Danish convention Fastaval as part of the living campaign, Hinterlandet. Now presented here for the first time in English. It is an adventure with emphasis on exploration and meeting the unknown.

Infiltration of a ruined archive; the players--beseeched by a mysterious psionic calling--work to uncover the machinations of the Nalar and hopefully free their captive held far below...

A desert trade route has been besieged by an aggressive blue dragon. The Radiant Oasis, a town on the shores of a small lake in the middle of the unforgiving wastes, relies on the caravans for its existence. Track the vicious lizard, Ilvax, back to his pyramid lair. Brave devious and deadly traps and battle the dragon’s loyal minions. If you survive, Ilvax himself awaits in his cavernous lair. There, even the sands beneath the party’s feet bend to his malevolent will! Includes: The Radiant Oasis, an oasis town, and the potentate that rules over it. A two level map of the dragon's lair, in a hidden cave behind an ancient pyramid Stat blocks for all monsters Unnumbered map suitable for use in your favorite VTT A new playable race, the scarab like Kheperite Published by Goblin Scrawl Games

A job has come up for your party straight from the leader of Phoenix! A trade deal is desired with the leader of an island chain known for Ioun Stones. The Zephyr has requested that your party go and use your skills to negotiate the deal. Upon arrival, your talents serve you well but King Homa requires that your talents serve him...

A Mulmaster refugee named Ani Kuleimatt discovered references to a forgotten mine near the Moonsea, a mine rumored to produce an unexpected export. The adventurers are hired to locate the complex and secure its resources for the Mulmaster Diaspora.
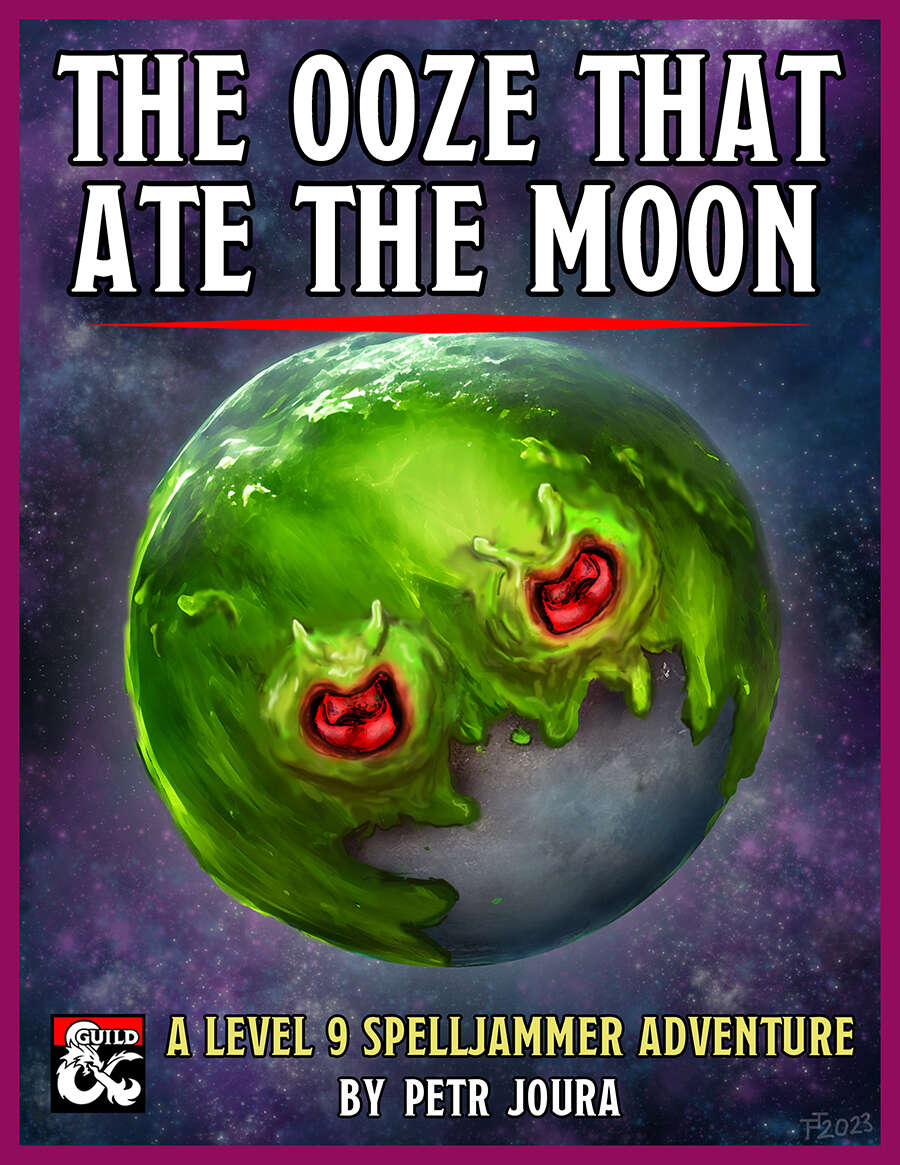
The moon is turning green. A colossal tide of green slime has begun to engulf it, threatening to dissolve it entirely. As it does so, a tide of demonic madness begins to engulf the lands below. As the green shadow flows across the night sky, the world turns mad. The source? An insane cult of plasmoids dedicated to Juiblex, the demon lord of oozes and slimes. Soon the moon may be gone, the first part of a mad plan to dissolve the multiverse into the primordial slime of the Abyss. If only some heroes could appear before it’s too late... The Ooze That Ate The Moon is 5th-edition Dungeons & Dragons adventure based on the Spelljammer campaign setting. It is an investigative high-orbit pulp thriller paired with the wacky zaniness of Spelljammer, and every playthrough is likely to be different. It is designed for four 9th or 10th level characters and to be run in 3 to 6 three-hour sessions, or 2 to 3 longer sessions. It can be run as multi-session one shot or as part of an ongoing campaign. It fits perfectly after the events of Light of Xaryxis, but is written so as to be easily incorporated into any non-Spelljammer campaign. It requires the 5th Edition Spelljammer boxed set to run. Gameplay is based around investigation and roleplaying, with a good smattering of combat in the later acts. The climax of the adventure presents the players with a problem that has no clear solution. They’ll have to use all their wits and resources to overcome it, but can they do so in time?

Encounters in the Savage Wilderness contains 19 encounters / mini-adventures, a few new creatures and items, and downloadable maps. We've also added suggestions on how to use the encounters in Eberron.
Set in the Radiant Citadel, this is the perfect supplement to your "Journeys Through the Radiant Citadel" campaign, allowing adventurers to explore the ancient city and discover more about its people and places. From the Trade Discal to the Preserve of the Ancients, delve deeper into the secrets of this bastion of wonder and hope. Included in this supplement you’ll find: 10 one-session encounters for characters ranging from levels 2–13 A hand-drawn dungeon map for a new area in the Citadel 3 VTT maps 5 original stat blocks 2 new magic items A printer-friendly version with only essential graphics and text And a host of memorable NPCs! Easily drop an encounter into your existing campaign or build out a new adventure entirely. You’ll find a broad range of themes to help your table bring to life this ancient city in the heart of the Deep Ethereal Plane.
A deadly encounter for a party of level 7-10s. Brave the crypt in an attempt to save Lord Eldark's son. This challenging dungeon is adaptable and easy to run in any existing campaign. It has some very tough encounters and is available for free on DM guild!
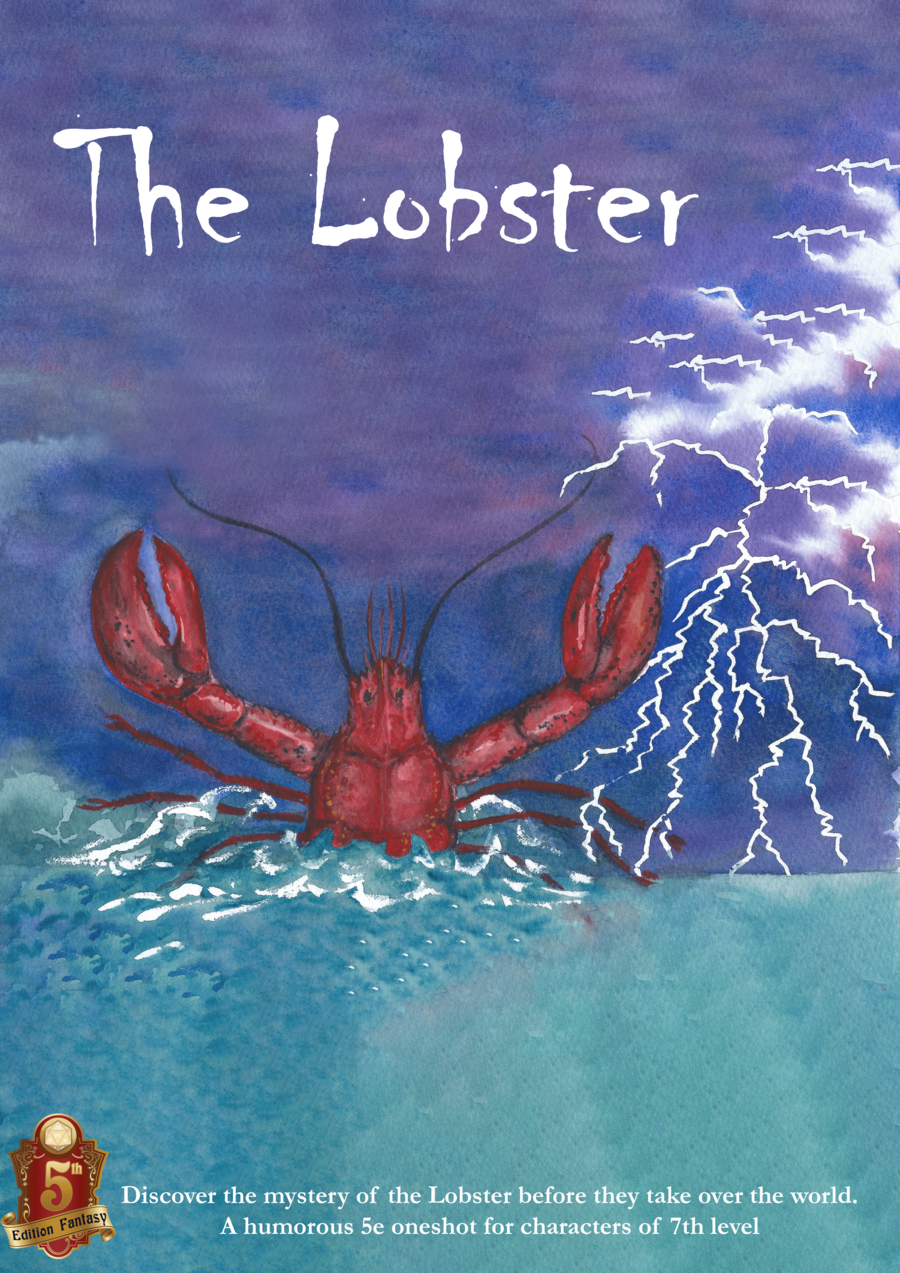
The retired Captain and pirate hunter, Old Man Blood has been finding lobsters appearing dead on his lawn for the last week without any rhyme or reason. Concerned he asks you to look into it for him before his lawn is overrun with lobsters. A one-shot 4-6 hour comedy sea-side adventure designed for characters of 7th level. Upon accepting Blood's mission, you'll explore the town of Saltingrad and meet the eccentric villagers that inhabit the quaint fishing town, unraveling this bizarre mystery. When the answers reveal themselves in an epic, strange and humorous conclusion, your players will be sure to talk about this adventure for weeks to come, or at least question what they experienced.

𝐓𝐡𝐞 𝐟𝐢𝐫𝐬𝐭 𝐚𝐝𝐯𝐞𝐧𝐭𝐮𝐫𝐞 𝐢𝐧 𝐭𝐡𝐞 𝐔𝐩𝐫𝐢𝐬𝐢𝐧𝐠 𝐒𝐚𝐠𝐚. The PCs have escorted a trade caravan to the dwarven stronghold of Nirzumbil and are preparing for a boring trip home. But what is that sound of horns in the distance? And why are the dwarves closing the front gates to the mines? This is an adventure for 2nd level PCs. It is the first in a series of adventures detailing on orc uprising against the dwarves with sinister implications. Includes a 5th edition write up of the Dread Warrior, an undead that previously appeared in Monsters of Faerun.

Hanging out in the city of Acre has gotten mundane and the old adventuring itch is flaring up. Your fruitless search for jobs quickly changes as a farmer locates you. He indicates that he has a minor farming problem with a land shark that the party can deal with. Once this job is completed, the party is approached by more opportunities!

The Doom Desert in the Decanter of Delirium is an exotic OSR romp through a mysterious world of riddles, puzzles, inscrutable denizens. 5e compatible, this love letter to psychedelia is as vivid and beautiful as exciting and surreal. Get wrapped up in conversation with the dead drunks at the last saloon on earth, solve the sphinx riddle and discover the secrets of the Ziggurat, or break bread and wine with whispering harpies or the sun itself. This compelling narrative is written by Austin Holm and captures the exploration, social, and challenge pillars of a great game with the deft prose of a poet. With art by Maya Bee that captures the essence of the adventures many stunning scenes and characters. Your players will thank you for this one.

The characters, members of the Clifftop Adventurers’ Guild, have been tasked with acquiring the Chains of Mur’taal, an artifact tied to Thelanis, by their guild handler, Lhara. This artifact is the latest in a series that Provost Nigel Faurious has commissioned the Clifftop guild to retrieve for him. The adventure starts when the characters arrive in Rhukaan Draal via Orien caravan. They’re given a chance to explore a small portion of the city before they head to a local bar to meet their contact provided by Lhara. Accompanied by a local guide, they make their way to the Seawall Mountains, where they’ll have to follow clues and their intuition to find the Valley of the Hero, which conceals the artifact that they’ve been hired to obtain. In order to earn the artifact, characters must first pass three tests laid before them by the Story: The Test of Courage, the Challenge of Wisdom, and the Trial of Honor. Once they finish the tests and collect the artifact, the party heads back toward Rhukaan Draal. But there are Marguul forces in the area, and they don’t intend to let the heroes escape with a priceless piece of their folklore…

After a restful time in Queen’s Point you begin to hear rumors of some “lost city” being discovered. After speaking with some of the locals and visiting the library you become intrigued. Apparently Harvick was abandoned during the plague years and its riches were never recovered. Along with the regular valuables one would find in an abandoned city, it is rumored that an ancient artifact or two may also be present. Sounds like it’s time to strap on the adventuring gear and take a look around.