A snow hag lair suitable for four or five 7th-level characters. Mother Rime lives north of a small fishing village in the far cold north. For years she's hidden her true nature from the townsfolk, appearing as an old benevolent wild-woman to the town. When one of Mother Rime's 'children' break from her cold-hearted ways, adventurer's are sought to seek to correct the evil in the north.

Be Ready with the Snapping Line... Just about every community, big or small, civilized or seedy, has at least one popular tavern. Folks may go there to relax or to look for work, to celebrate or to mope, to learn the latest or to forget. And while some may be willing to travel far from the comfort of their favorite watering hole in search of adventure, in the seaside town of Saltmarsh, they may not have to. At the Snapping Line Inn and Tavern: * Enjoy food, drink, gossip, a darts competition, and maybe a rousing bar fight. * Participate in a gambling night. Watch out for pirates! * Stop a dark ritual to save an innocent—and yourselves. * Come to the rescue when there’s an accident by the pier—and the predators arrive. Four linked encounters around a pier-side tavern for characters of levels 5-10. Playable individually, scattered throughout another campaign, or together as a four-to-six-hour adventure.

A dwarven laboratory forgotten for many centuries has finally been rediscovered, but there is sure to be danger lurking within. It turns out some of the other machines within are still active, as are some of the traps and puzzles. Prepare your party for a blend of challenging puzzles and diverse fights in the dungeon that was home to my first player kill.

In the peaceful village of Auchendale, the local blacksmiths have lost their enchanted forgehammer. Trickery is afoot and soon enough, the adventurers will have to embark on a chase, in a comedy of errors and misfortune. Follow the path of the Forgehammer from a rural village, through the summery farmlands and deep into the forest and its shadowy undergrowth – all in one gameplay session, in a generic setting easily adapted to all manner of worlds. Designed for introducing your group to D&D with a focused 3-4 hour questline. This adventure fits best with a level 3-4 party. Includes hand-drawn illustrations and maps. Published by: Green Bird RPGS

As Faerûn recovers from the demon threat, a prominent leader goes missing. Is this a simple rescue mission, or is there more at stake? This is a Tier 3 (APL 13) Adventurer's League legal adventure set in a small town near Yulash. This module first premiered at TotalCon 2017. Contents include: PDF of the adventure Fantasy Grounds module PDF of the Adventurer's League certificate
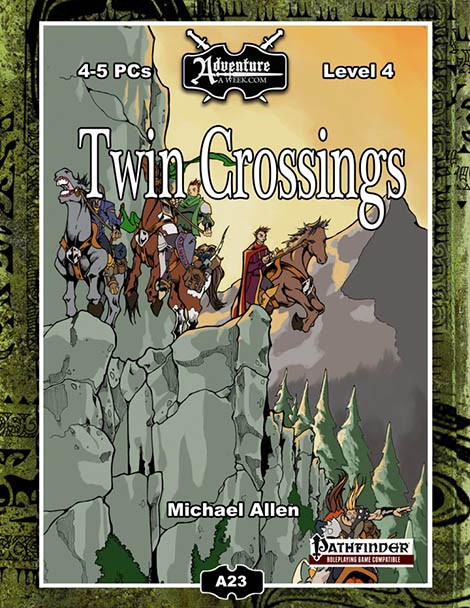
Embroiled in a struggle between two rival merchant houses, the party races to assemble and escort a valuable load of cargo to a commerce-starved city. The loss of the yearly supply ship to a late winter storm places an isolated town in peril. A lone survivor, clinging to a hatch cover and blown hundreds of miles by the tempest, brings the disastrous news. Two premier merchant houses make plans to attempt the overland route. The race is on to get word to the far side of the mountains and assemble a relief caravan to cross back over. The loss of the ship means that any goods that do make it over the hump will yield great profit. The survival of not only of the merchant houses but of the very town itself is dependent on those willing to brave the journey. Monsters, difficult trails, and unscrupulous behavior by the competition stand in the way of success—and profit. Also included in this adventure: A flexible encounter sequence that allows the PCs to chart their own course over the mountains. Rich roleplaying opportunities and skill challenges that impact the party’s final success. Three new magic items including magical engineering equipment from a hidden cache. A new monster—the Salt Worm—that leaves naught but the desiccated husks of its victims behind. Notes on scaling the encounters for parties of six or more.

A plug in adventure that can be used as part of a larger campaign or run as a one shot for 3-4 Tier I characters (scalable for tier II characters) set in the Forgotten Realms. This adventure can be placed in other settings as well. The characters have learned of a new and young threat in the Mere of Dead Men. Sent to identify and solve the issue for the nearby people of the region there are multiple setups and information for continuing adventure within the Mere. The adventure comes with the following: 10 page PDF adventure file. 1 Regional Map of the Mere of Dead Men 3 Parchment style DM and Player maps ready for VTT use 3 Printer friendly DM and Player maps ready for VTT well as printer friendly DM and Player maps that are VTT ready 1” diameter tokens ready to be cut out for use in person as well as files for use in a VTT

A short adventure meant to be inserted into Storm Kings Thunder set on the small island group known as Red Rocks along the Sword Coast. The adventure faces the players of against a coven of hag sisters who have been threatening the region for some time. Hags of the Red Rocks is a encounter and mini-dungeon meant to be dropped into the D&D Adventures League Season 5 - Storm King's Thunder, but can easily be an evenings play for any group travelling along a treacherous coastline.

Six short adventures to supplement your exploration of the jungles of Chult! These six fun adventures feature interesting challenges highlighting the dangers of the jungle. Each scenario is easy to drop into Tomb of Annihilation or any wilderness campaign. Includes the following adventures: Tavern Trouble - With a mysterious curse upon your guide, escaping lizards, and foes who have come to settle debts, your jungle trek gets interesting before you even leave the tavern! If Looks Could Kill - Crossing paths with a merchant prince's expedition can be very lucrative. The expedition members' agendas present interesting choices, as do the dangerous denizens of the swamp. Ambush from Above - Grung acrobats? With a team mascot? What is going on here? Mystic River - Traveling downriver suddenly comes alive with dangerous white water, carnivorous plants, a brontosaurus' tail... and an unusual spectator! Mudslide - It's been raining for days, and that rumble isn't a dinosaur! Run for your lives, and watch the creatures in the mud! Beautiful Plumage - Ancient ruins are now home to beautiful but dangerous singers. A batiri queen demands revenge and her tribe's totem awakens! Perfect for DMs running Tomb of Annihilation: Each adventure fully supports levels 1-10 Ready to run fun, with maps, art, and complete monster statistics Is traveling through the jungle getting dull? Drop in one of these innovative encounters providing interesting roleplay and combat experiences! Party unsure of where to head next? Each scenario provides links both to other Jungle Trek adventures and to Tomb of Annihilation plot points. Provides hours of play!

AL19 – Junket to the Southlands has the PCs enjoying a little R&R in southern Allatrama when a caravan comes into town. Scuttlebutt has it that some famous Bard came in with them and is giving a performance later. With nothing else to do you opt to take a listen. After hearing the tales recited by the incredible poet you opt to visit the location of her stories. Saddle up folks, you’re heading into the frozen land to the south!
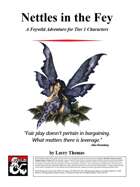
An inexperienced eladrin leader leaves herself dangerously exposed to her enemies. An exiled hag schemes to rebuild her army. A bog troll conspires to overthrow. A child is kidnapped. PCs find themselves in the middle of a power struggle between competing forces, each seeking to dominate the feywild territory known as the Unbound Regions. Trapped in the feywild until they complete the quest, the adventurers must deal with the curious culture of the fey by striking deals, battling opponents, and ultimately deciding which competitor they will support.

What elder evils lurk in the depths of the freezing mountain ruins? Find out in The Stoneheart Ruin! The adventure features: An adventure set in a desolate, wintry mountain landscape. 16 pages full of intrigue and mystery, containing full color maps, plus 2 unique monster stat blocks. Provides a great introduction to Mind Flayer lore and mythos for Tier 1 players. Can easily be set in the Spine of the World for use in Rime of the Frostmaiden. Let your characters test their mettle as they climb and face the ancient dangers lurking in the cracks of The Stoneheart Ruin! “I have no explanation for any of these finds. We heard disturbing noises coming from further within the mountain; thunderous and growling.” Excerpt from a pamphlet, signed: “Koralia Meadring, Anthropologist Extraordinaire” Koralia needs you to investigate her most recent discovery: a ruined cavern deep in the mountains. Her small team of academics did a cursory walk-through and think they've found a big breakthrough! However, they left in a hurry after being frightened by the horrors they heard coming from deeper in the mountain. They escaped and found one of their team was missing - a goliath named Marek. You must climb the mountains and locate the ruin, make certain that it is safe for study by Koralia’s team, and if possible, find and rescue Marek, whose fate is uncertain. Made during the November 2020 RPG Writer's Workshop.

A fiend lurks among the Black Blade goblins. A shapeshifting barghest fashioned by the General of Gehenna to exact revenge on all goblin-kind. It’s aim: to kill as many goblin leaders as possible… A masked goblin approaches the party asking for help. Two tribe leaders are dead. But a rival for chief has control of the crime scene. Will the party discover the barghest among the goblin ranks? Can they stop this imposter before it strikes again? Adventure Overview The adventure’s story is spread over 4 parts and takes approximately 4 hours to play. The adventure begins with a Call to Action scene. Part 1: Goblin Politics. Krill sends his emissaries to implore help from any strong intermediary. The party is asked to investigate the murder of Thrawn in Dringly’s lair. This is Story Objective A. Part 2: The Opposition. Gain entry into Dringly’s lair and investigate the murder of Thrawn. Gather enough evidence to find the killer. This is Story Objective B. Part 3: To The Lair! Now that the players have determined the barghest (Yeep) is to blame, they need to get to Krill’s lair quickly as he is in imminent danger. This is Story Objective C. Part 4: The Barghest.When the players arrive at the lair, they need to get to Krill and expose and defeat the barghest. This is Story Objective D. Adventure Background A barghest named Yeep has begun its onslaught of attacks against the Black Blade goblins. Starting with Chief Gnar, then his second in command Thrawn, the barghest is moving methodically down the line of command. Krill is now chief. But he has some problems: Two leaders of the Black Blades are dead. Who killed them and why? Is he next? Dringly, the next in command, has decided to take his lair for himself, declaring himself Chief of the Black Blades. Who are the Black Blades? The Black Blades are a tribe of goblins in the local area. They are known for dipping their blades in a dark black substance. It is rumored these blades are poisonous. The Black Blades regularly attack passersby on the road to rob them. The Black Blades have two lairs, one run by a chief who leads the whole tribe, and another overseen by a boss lieutenant. The Black Blades have a well-established pecking order which is how Krill stands to become chief. The next in line is Dringly, who has also declared himself chief and wants Krill dead. Krill suspects that there is something suspicious about two leaders being killed within a day of each other, but he has already burned Gnar’s body without any investigation. He needs to investigate the body of Thrawn, but it is in Dringly’s lair. Krill wishes to avoid direct confrontation with Dringly at the present for three reasons: 1) Any violence would only kill his own tribe members and further divide the lairs. 2) He believes there is still hope for negotiation to reunite the Black Blades. 3) He believes that if he were to attempt negotiations himself, Dringly would kill him. This adventure features: Two maps. Ready for your favorite Virtual Tabletop. A full color pdf. A black and white pdf. One custom monster, a reprint of barghest, all others available in the Monster Manual. Four hours of entertainment involving: roll playing a goblin bard, investigating a murder scene, tracking down a barghest before it strikes again. Applicable to any setting.

The adventures in Dalentown continue in The Darkness Beneath Dalentown. Workers in the town’s sewers have stumbled upon the long abandoned halls of the dwarves that once settled beneath this region. What they’ve found is a haunted library. What they’ve woken is something far more sinister! The Darkness Beneath Dalentown features hordes of oozes, undead, and demons festering for years in an ancient dwarven mining stronghold. Now, they are slowly working their way to the surface, and the folk of Dalentown are in dire peril!
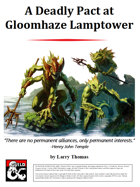
The shipping lanes south of Candlekeep have been disrupted. Unknown to anyone, an incredible alliance between a terran and a waterfolk tribe has caused the lamp at Gloomhaze Point lamptower to be extinguished. Merchant ships are being wrecked and plundered. The story unfolds in the nation of Amn. Adventurers will face a formidable kobold tribe that knows how to maximize its tactics, its smaller-than-human size tunnels, and an abundance of unique traps. The bloodthirsty sahaugin won’t be defeated without the adventurers taking a dive.

Valachan: Hunter’s Moon is a slasher/gothic horror adventure for 4-5 level characters of 8-9th level. It can be played over the course of 6-8 hours and should roughly take one playing session, if the party is quick, or two if the party is progressing slowly. This is the fourth and final part of the Carnival of Lost Souls campaign, which can also be played as a standalone adventure. Valachan: Hunter’s Moon features: Fully fleshed out Trial of Hearts with dangerous encounters along the journey Rules for sabotaging rival parties before the Trial New custom monsters to make combat encounters truly memorable and exciting High-quality maps, also available in universal vtt format Check out the previous adventures in the series: Lamordia: The Hardest of Hearts, Dementlieu: Dance with the Devil and Kalakeri: The Forbidden Temple! And look out for the special Campaign Guide, which will explain in detail how to best set up and play the campaign. However, if you want to start your campaign right now, don’t worry - we have included a short appendix at the end of each adventure that will explain the basics! Disclaimer: We are a team of writers from Ukraine, so the unprovoked war and senseless aggression of the terrorist state of russia influenced our initial timelines significantly. However, we are now as safe as we can ever be under the constant threat of missile strikes, and determined to finish the whole series! And after that - who knows, maybe even more cool adventures will follow ;)

5e Solo Gamebooks presents Drums at Daggerford, the fifth in our continual series of solo adventures set in the Forgotten Realms. This quest enables you to experience D&D without a dungeon master! Simply roll up a level 5 PC and get playing. Drums at Daggerford is the way you must experience solo adventuring. Players and DMs beware, a new standard has been set. This solo adventure continues the story arc first begun in Death Knight’s Squire, developed further in Tyrant of Zhentil Keep & Citadel of the Raven, and left in The Tortured Land. Drums at Daggerford’s ability to echo a Tolkien spirit reverberates throughout the narrative no matter which path you may choose. But choose wisely because a razor’s edge separates peril from glory. Over a year in the writing, this latest instalment in our solo adventure series is a mini sandbox campaign that will give you anywhere up to 8 hours of solo adventuring enjoyment. Completionists and those who like to replay these adventures will get even more gametime. There are mysteries to be uncovered, items and sidekicks to be gained, codewords to unlock and villains to conquer! With lots of exploration, meaningful decisions, hard fights, and a variety of rewards and stories, Drums at Daggerford will continue to resonate with you long after solving the big mystery behind Krond Vikkurk’s malevolent plans.

The mining town of Glister has a problem. The latest caravan only arrived with a part of its supplies. Orcs waylaid them, took much needed goods, and are now making demands that the town return an artifact that is theirs, but the town is unfamiliar with. Help track down information about this artifact and possibly defend the city from an orc invasion! A 4-hour Adventure for 1st-4th Level Characters Part 2 of Kossuth's Kiss

Nanfield is an island village of over 50 NPCs with mysteries plaguing both its present and its past. It contains a unique ecosystem and economy and a ship full of friendly pirates that will invite you by for dinner after accidentally attacking your party. It can be inserted into any campaign as an interlude during a travel montage, as a one-shot encounter, or as the base of future adventures. Nanfield contains over 50 NPCs you can use, several very unique and compelling characters, a Druid stat-bloc, a ship-to-ship fight, an investigation, and a fight with a Harpy (or more, depending on the outcome of the investigation).

The time has come to venture beyond the village of Orașnou and explore the realm of Barovia. However, in your travels, you happen across an unusual tribe of peopl —distrusted denizens of the Demiplane of Dread. Do the Vistani truly possess the ability to see the future, or is it simple parlor tricks and deceit? Part Five of Misty Fortunes and Absent Hearts.