
Escape from Elturel is a 6-8 hour Dungeons & Dragons adventure for characters of levels 1-2, for use as an introduction to Baldur's Gate: Descent into Avernus. Pilgrims and travelers flock to the holy city of Elturel to bask in the light of its second sun. But when the Companion starts to malfunction, the characters must escape the doomed city before it is pulled down to the Nine Hells. In the aftermath, a caravan of refugees needs their help to find a safe haven in that notorious hive of scum and villainy, Baldur's Gate! The adventure has everything you need to start a new campaign in Elturel, including: - a new adventure hook for Descent into Avernus - short introductory encounters set during and after the fall of Elturel - a skill challenge for escaping Elturel as it is pulled down to Avernus - resources, encounters, travel activities, and NPCs for a caravan to Baldur's Gate - notes for transitioning into Descent into Avernus - two creature and NPC stat blocks - a map pack with two maps by Dyson Logos Escape from Elturel also includes suggestions for combining this adventure with Burial in Baldur's Gate if you want to run a mixed party of characters from Elturel and Baldur's Gate.

Nanfield is an island village of over 50 NPCs with mysteries plaguing both its present and its past. It contains a unique ecosystem and economy and a ship full of friendly pirates that will invite you by for dinner after accidentally attacking your party. It can be inserted into any campaign as an interlude during a travel montage, as a one-shot encounter, or as the base of future adventures. Nanfield contains over 50 NPCs you can use, several very unique and compelling characters, a Druid stat-bloc, a ship-to-ship fight, an investigation, and a fight with a Harpy (or more, depending on the outcome of the investigation).
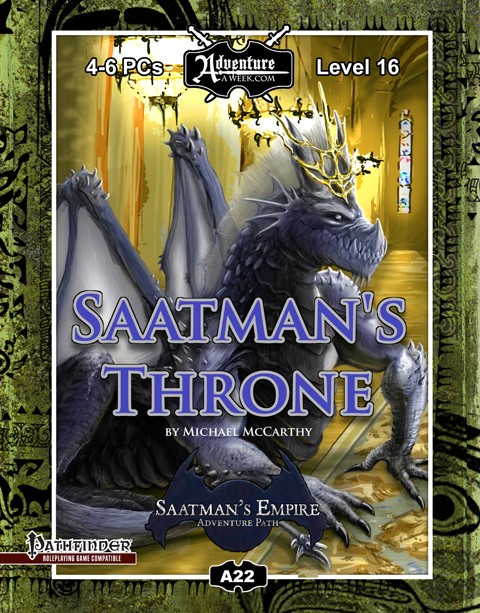
Nearly two thousand years ago, in the land which now holds the Klavek Kingdom, a different power ruled the land. The Saatman Empire was a land unlike any seen before or since: it was a place where dragons ruled as gods, each in their own kingdom keeping lesser races as cattle. And above all of these god kings stood and watched the Saatman, an emperor among god-kings. Eventually, the humans rose up, and great heroes struck down Saatman, bringing the empire to the ruins it was today, and scattering their servants. But not destroying them. Now, a cult still dedicated to the dragon-god-emperor has returned the ancient dragon to life. In revenge of his own empire, he has declared war on the Klavek Kingdom – and commanded the death of all humankind. Can the party stop the genocide, and turn his own allies against him? Also included in “Saatman’s Throne”: A detailed system for reputation and infamy amid a city warring houses – all of which lay claim to dozens of mad wizards! The city of Gustavin, where dragons are gods and feuding houses control every coin. The Scrollblade, a powerful weapon that can store any magic it chooses Radiant Elixir, and endless source of magical power, at a steep price A great and terrible spell, Genocide A stitched-together monstrosity, the Serpens Appendix: Gods and Kings detailing hidden secrets in the Klavek Kingdom Maps by ENnie award winning cartographer, Todd Gamble
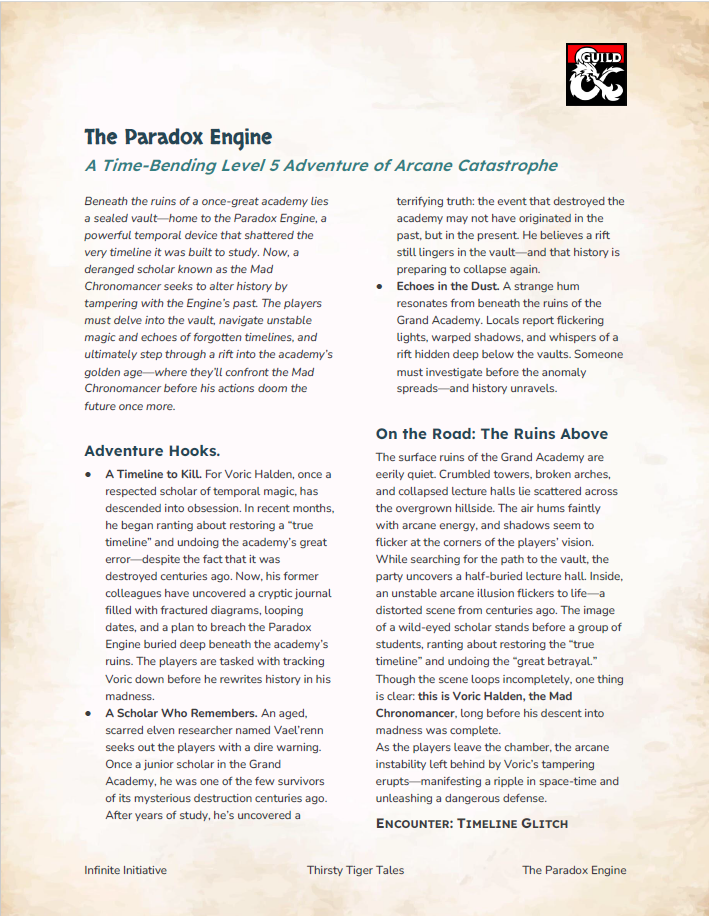
A Level 5 Adventure of Time-Bending Catastrophe Part of the Thirsty Tiger Tales series Beneath the crumbling ruins of a legendary arcane academy lies the Paradox Engine—a dangerous temporal device that shattered the very timeline it was built to study. Now, a deranged scholar known as the Mad Chronomancer seeks to rewrite history itself. In this time-twisting dungeon crawl, players must brave unstable magic, flickering echoes of the past, and a rift into the academy’s golden age—where they’ll confront the Mad Chronomancer before his actions doom the future forever. Two-timeline dungeon: Navigate the same vault in both past and present Puzzle rooms with lasting consequences Unstable combat environments and unique timeline hazards A solo boss fight that bends time against the players Includes the Temporal Warp Cloak, a rare magic item that glitches your image through time This one-shot is perfect for groups looking for a high-concept, low-prep adventure with puzzle-solving, combat variety, and an arcane twist.

Dracula, the Lord of Shadow and Darkness, has covered the land in shadow and dispatched armies of monsters and undead from his magical castle. His armies threaten to overrun major cities and plunge the world into a literal Dark Age. The last of the vampire-hunting clan that traditionally opposed him has disappeared, and still the armies advance. He must be stopped. If that's not enough motivation, it is well-known that his castle is full of magical items and great riches... but also great danger. If you've ever wanted D&D and Castlevania to meet, look no further. This adventure is exactly what you wanted. Every area of the castle poses different and unique challenges to keep the party engaged and on their toes. Written for the DM as a ready-to-run adventure, it is designed for four to six characters. The adventure starts at level 3 at the outer defenses of the castle, and ends with the party advancing to level 13 after defeating Dracula in an epic battle. The adventure includes documentation to help even a new DM succed, including suggestions for how to run each of the area "boss" monsters in combat. There are approximately 50 new enemies and over 3 dozen new magical items. It also comes with a list of suggested music for many areas of the castle, and a 25-page campaign log recounting an actual tabletop play-through of this adventure from the DM's perspective.

The characters will investigate a grim mystery in the elven village of Alkai Tor, hunt for answers in a lethal swamp, and finally confront a desperate killer in the Temple of Shattered Minds itself.

The exciting artifact series concludes with AS3 – Peregrination. With a pair of control rods in hand you are guided to an ultimate prize, a Gnomish flying vessel! The rods have directed you to a crashed ship buried in the sandy beach. A check of the debris sheds light on the mystery of the artifact and a description of how to repair the intricate machine. Apparently finding the vessel is just the start!
The Temple of Tesh-Yatra is a setting-neutral dungeon delve for a party of 6th level adventurers, inspired by the classic funhouse dungeons of yesteryear. The dungeon takes 6-10 hours to fully explore. It features a high proportion of non-combat encounters: puzzles, exploration, and the occasional deadly centrifuge. The ungodly fusion of a mad scientist’s lab and a planar temple, the dungeon includes an encounter that can launch your players into the Nine Hells – for a price... The Temple of Tesh-Yatra includes two new constructs to use in your game: the sinister Maimers, and the enigmatic Skorverra; as well as a new magic item: the Amulet of Tesh-Yatra, an artisan’s dream! The Temple of Tesh-Yatra also comes with a VTT battlemap (transparent PNG format). The Temple of Tesh-Yatra was originally set in the Outlands, as an extraplanar dungeon. But given its self-contained nature and the Temple's age, it is well-suited to any wildnerness, and would work equally well seeding a hex crawl.

Your time on the mainland of Calentria has come to an end and with an appropriated ship you find yourself approaching a collection of island in the middle of the ocean. Some of the sailors that have ventured into this area before report there may be a language barrier. As you approach a large land mass a dark shape in the sky seems to take notice of you…
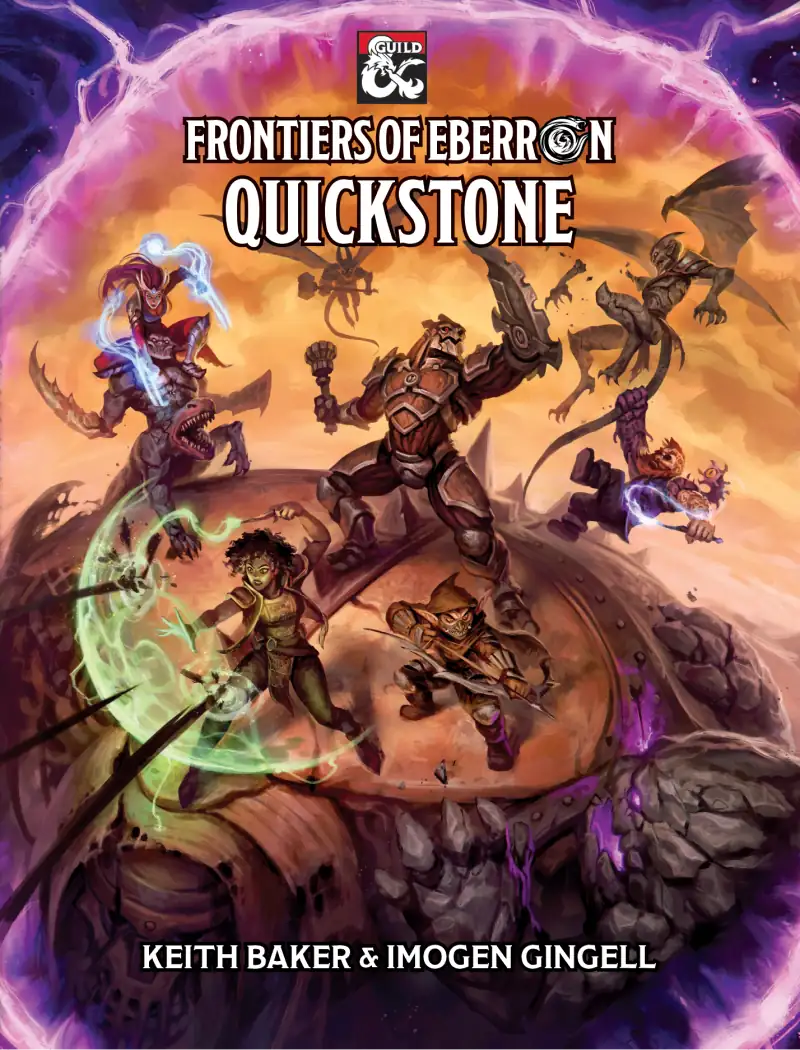
When a quickstone quarrying operation breaks into the site of a magical seal, a cult of the daelkyr Orlassk is unleashed upon the region. The player characters must gather scattered artifacts in order to repair the seal, and shut away Orlassk and its minions for good. An introductory adventure for the Eberron campaign setting for a party of five 1st-level characters. The adventure takes place in the town of Quickstone on the western border of Breland, where the nation abuts Droaam, the nation of monsters. Characters will advance to 5th level by the end of the adventure.

Who can the heroes trust in the verdant depths of the Feywild? While resting in the wilds on the night of a full moon, the party are accidentally drawn into the Feywild, and must find their way back. With a choice of routes to follow, the heroes may encounter either the naive but vengeful undine Dapple, or the urbane and callous fey lord Verian. Each holds the ability to send the party home, if they agree to retrieve something from the other. Venturing past carnivorous vines and a troll-guarded bridge, can the adventurers be persuasive or sneaky enough to avoid an outright battle? Full Moon, Fey Tales is a 3-4 hour adventure for characters of 5th to 7th level. It aims to give the players genuine choice on how to deal with their plight, and can be completed without a single combat, or by battling the whole way through - whatever your group prefers!

You and your cohorts have pulled into Free Haven, a port city in the northern reaches to settle down for the season. Your respite is short lived as word reaches the city that a small community further north has been attacked by humanoid raiders! Refugees from North Port have arrived and report their community has been sacked. There is little hope of survivors and the fear is that Free Haven may be next. With little else to do, it is time for the party to put on their “hero caps” and save the day!
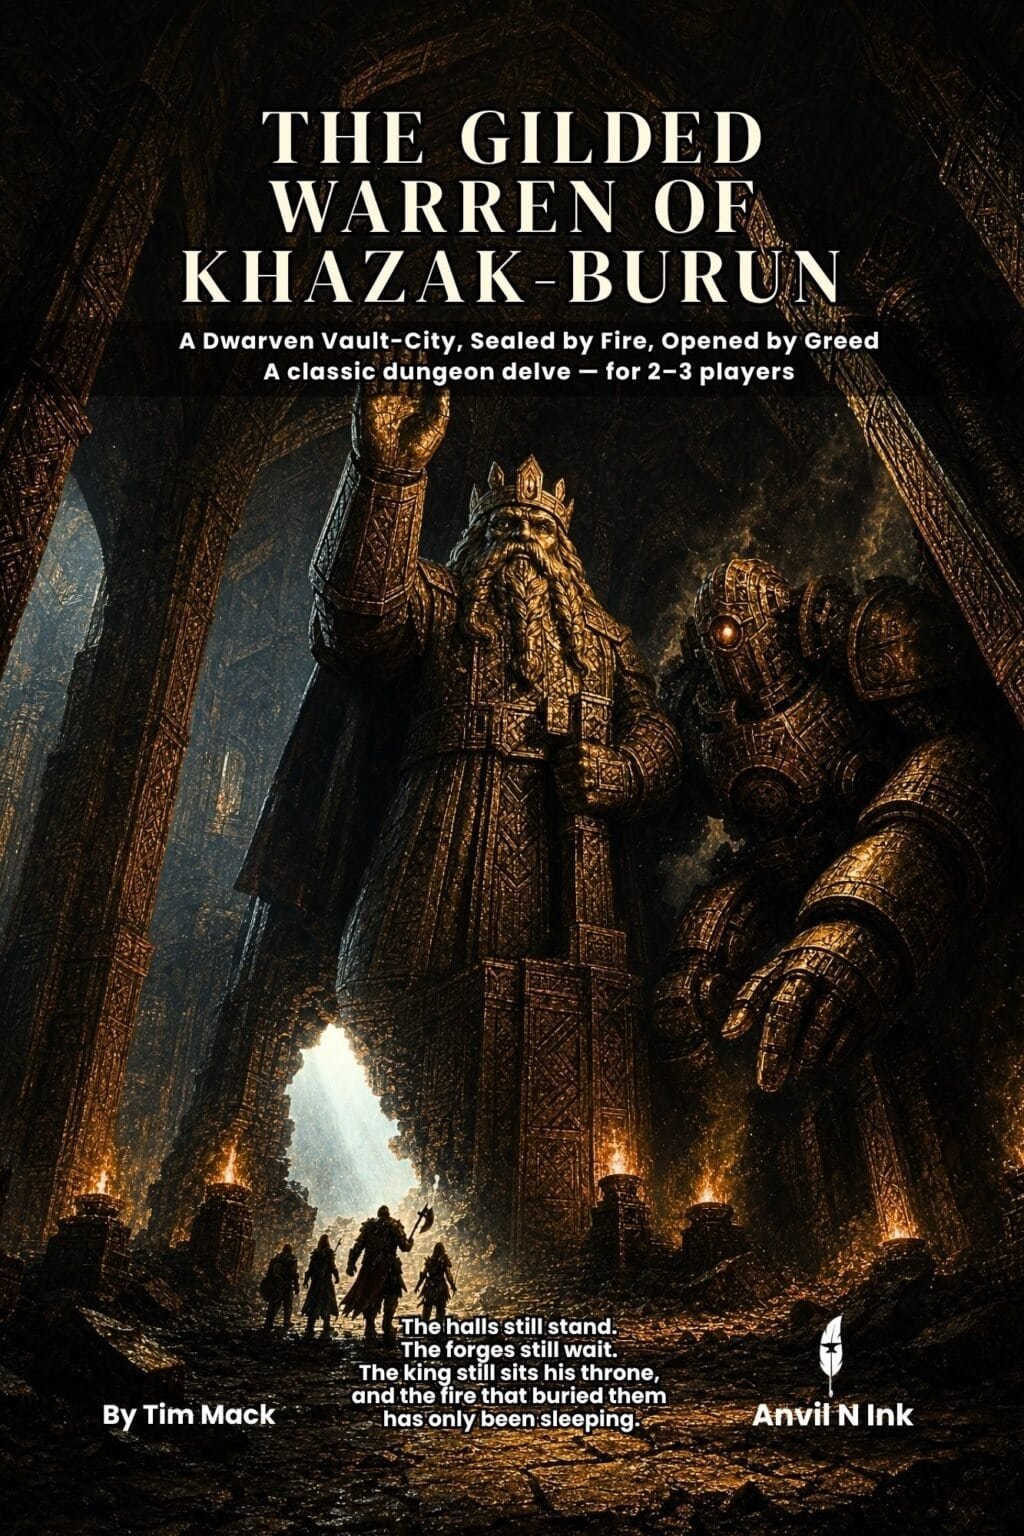
A zero-prep dwarven dungeon crawl for 2-3 players at levels 2-3, playable in a single 2-3 hour session. A prospectors' guild hires the party to delve Khazak-Burun, a dwarven vault-city sealed under a volcano for three centuries, and recover the last Vault-King's signet ring. But the ash was a seal, not a tomb: the forges still hold heat, the traps are still wound, and the clockwork sentinels still walk their routes. At the city's geothermal heart the party chooses whether to wake the machines or descend in the dark, before a vertical foundry, a bridge over a magma lake, and a three-phase confrontation at the vault-throne with the fire bound beneath the mountain. Four acts across seventeen keyed scenes, four pregenerated characters, five original stat blocks, six battle maps, a genuine branching choice, scaling for 2-4 players, and a final moral decision.

A four-hour adventure for 5th-10th level characters. The enemy is revealed, but time short and if you are not successful in your mission to Mount Baratok, love will never die. Part fourteen and the finale of Misty Fortunes and Absent Hearts. In an effort to locate the evil witch Esmae Amarantha, the party must work to enable a tarot card reading by Jeny Greenteeth, a quixotic hag. However, finding casters to aid Jeny in her ritual is its own ordeal, and even if they succeed, there is still the task of venturing to Esmae's ritual site and putting a stop to her plans.

Within the jungles of Chult is a vast expanse of ash. While a red dragon is known to reside deep within the Land of Ash and Smoke, it is far from the deadliest of its denizens. Deeper still is a pit filled to the brim with pure evil. None who have sought out its secrets have survived to tell its tale. Will you be more successful than they?

Blinsky's Toyshop is our take on what happens to Blinsky and Piccolo during, or after the Curse of Strahd campaign. Blinsky, the toymaker in Vallaki with the cute monkey wearing a pink tutu, received a large inheritance from a long-time client. The client, Obtavius Swat, a retired adventurer and avid collector of toys, left his entire estate to Blinsky. The estate included coin, precious gems, art, and his collection of toys, some made by Blinsky and others he acquired during his travels. Blinsky used the fortune to pay a wizard to create a small island in the middle of Lake Zarovich, located just outside of Vallaki. He then paid masons and workers to build a fantastic new toyshop, which he designed to be an experience for both the young and old alike. Though the number of children in Barovia was increasing, mostly imparted to the devil Strahd’s downfall, Blinsky wanted to touch the inner child of the adults in the city. He wanted happiness. He wanted smiles. He named the castle Blinsky’s Toyshop of Marvels. One of the toys, a small silver tiara kept in a black satin-lined ivory jewelry box, was such a lovely piece. Blinsky couldn’t stand the thought of leaving it in the box. He already had enough gold and losing the small tiara wouldn’t be a large loss, so he decided to give it to his monkey – Piccolo (see Creatures of the Toyshop). He smiled at the thought of her running around in her pretty, shiny tiara. Sadly, as Barovian luck would have it, trapped inside the tiara is the sole of an evil gnome wizard named Aribetha Strangge. In his old age, Obtavious Swat forgot that he and his fellow adventurers used the tiara to imprison the gnome’s soul. Yesterday, when Blinsky placed the tiara on Piccolo’s head, silver tendrils cascaded from the tiara and into poor Piccolo’s skull, allowing Aribetha to control the monkey. Now, Aribetha has incapacitated Blinsky in the toyshop’s tower, brought many of the toys to life, and imprisoned or killed many of the workers and customers. The adventure includes costumes (which the character may wear), Strahd Hand Puppets, and a possessed Piccolo.

The loss of Skyreach Castle in Hoard of the Dragon Queen was a major setback to the Cult of the Dragon, but still only a setback. The cult is determined to retake the castle and claim Tiamat’s lost treasure buried in its frozen walls and cloudstuff vaults, but they aren’t the only ones. Blagothkus the cloud giant is still the master of Skyreach, and he has gone to the hall of his cousin Brunvild, ice lord of Uldoveld, for the resources to repair and reoccupy the castle. At the same time, the party is dispatched by the Council of Waterdeep to reclaim some of the stolen treasures lost when the castle fell.

A noble scion and his retinue from Baldur’s Gate left on an adventure amid much fanfare. That was two weeks ago. Rumours in the taverns suggest only a single soldier returned, bearing grievous wounds and a ransom demand. Is this a simple case of misadventure, or are darker conspiracies afoot? Can you locate and rescue the nobleman, or will you fall victim to the malevolent powers stirring deep within the Temple of the Opal Goddess?

Have you ever wondered what it would be like to actually encounter an area where someone has used Guards & Wards, Symbol, and other spells to actually fortify a location against casual intrusion and thievery? If you want to find out just how deadly a wizard's "getaway cabin" in the mountains can be when the owner isn't there to let you in, this is the adventure for you and your players. Suitable for a single session of play (unless characters get killed, forcing a retreat and later return), there's only one combat encounter, but the traps are deadly. Not recommended for parties below level 12. All of the defenses are based on actual PHB spells, although a couple are assumed to have been bound into items or interactions within the dungeon. This dungeon is originally from the "Against the Idol of the Sun" high-level hexcrawl campaign.
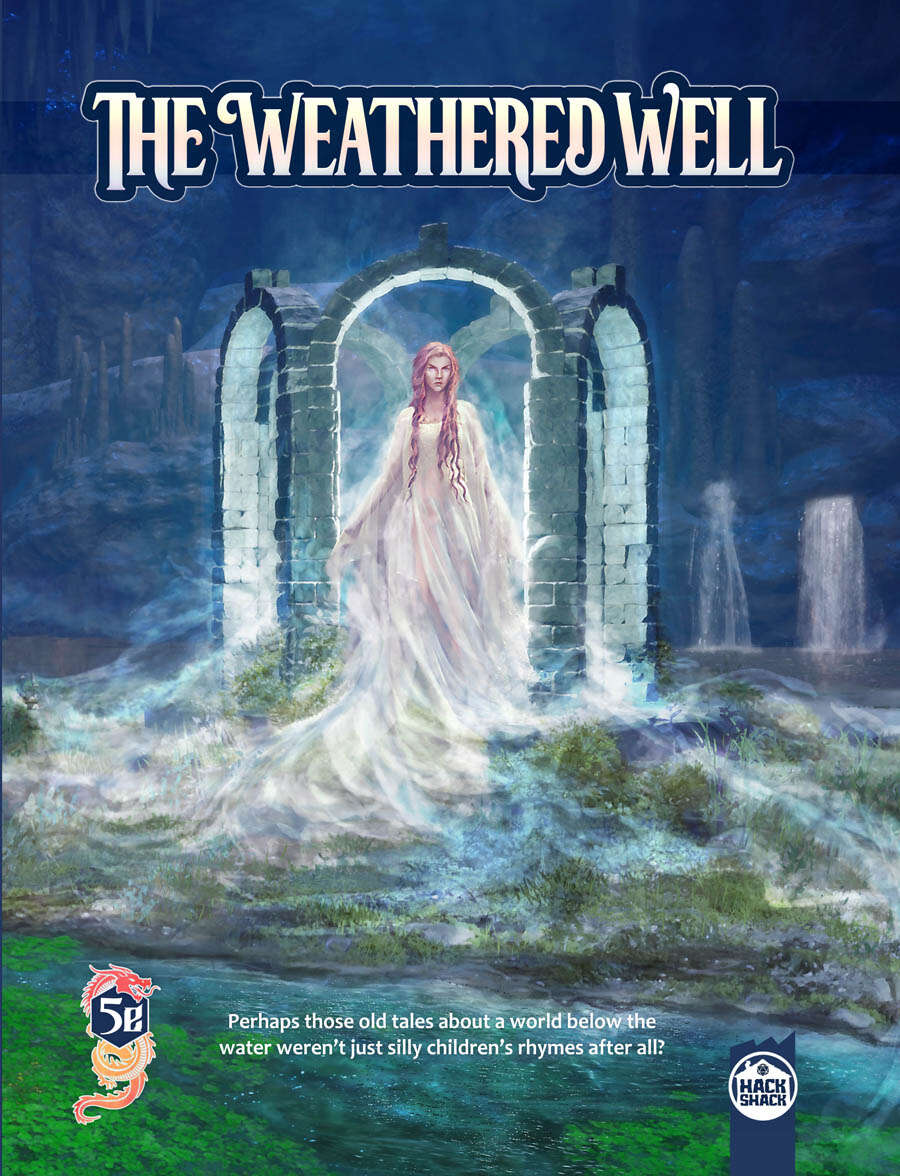
It’s a story as old as time. Boy meets girl. Girl meets abandoned well. Boy chases girl down abandoned well only to find horrors beyond their worst nightmares.. Perhaps those old tales about 'ol Grim Jack and Granny Hentooth lurking in a world below the water weren’t just silly children’s rhymes after all? The Weathered Well is a starting level Tabletop RPG adventure for the 5th edition of the world's greatest roleplaying game, centered around classic themes that feel familiar yet fresh to players of all skill levels. Designed to be easy to add into existing campaign worlds, this module takes the players through 3 levels of social, puzzle, and tactically focused combat encounters, and should take 10-12 hours to complete for a standard party of 1st-2nd level characters. The adventure takes the players through an open area town map, then into a more exploration focused dungeon crawl, and finishes up with a series of cinematic and challenging encounters, which combine enemy forces and the landscape to challenge the party and players alike. Designed for New Players and Game Masters! Getting started in tabletop roleplaying can be a daunting task. Learning the rules, finding the players, and convincing some poor fool to be the GM, all are difficult enough tasks on their own. We felt that there were a lack of adventures truly designed to be "1st level friendly" out there, and so got together to make The Weathered Well for just that purpose. This adventure is designed in a linear low-combat style which is intentionally helpful for low level characters and new players, and includes occasional blocks of DM Notes and tips to also aid Dungeon Masters new at their craft. It can be played both 'pick up and go', with many helpful block text descriptions, or read in advance for more appreciation of the backstory or for customization. The Weathered Well contains: 68 pages of highly illustrated adventure content, with detailed room and encounter descriptions. Three full-color maps printed within the book. The Black Root - a fully playable necromantic druid subclass, and the original builders of the Temple. Use them to create unique NPC's, or maybe even allow one of your players to play as a long lost member rediscovering their ancient temple! 13 new monsters, styled to fit the 'dark druids' theme; including bizarre fey creatures and monstrosities, like the Clawed Butterfly, Bliss Lizards, Weasel-worms, Zombie Oozes, and the vine wrapped crocodillian monster - the Hagator. 12 new magic items, specifically designed for low level characters. A mix of roleplaying, combat, puzzles, and skills designed to challenge but not overwhelm players of all skills. Multiple intro hooks, with matching wrap ups, as well as Further Adventures prompts. Published by Hack Shack Games