
Blinsky's Toyshop is our take on what happens to Blinsky and Piccolo during, or after the Curse of Strahd campaign. Blinsky, the toymaker in Vallaki with the cute monkey wearing a pink tutu, received a large inheritance from a long-time client. The client, Obtavius Swat, a retired adventurer and avid collector of toys, left his entire estate to Blinsky. The estate included coin, precious gems, art, and his collection of toys, some made by Blinsky and others he acquired during his travels. Blinsky used the fortune to pay a wizard to create a small island in the middle of Lake Zarovich, located just outside of Vallaki. He then paid masons and workers to build a fantastic new toyshop, which he designed to be an experience for both the young and old alike. Though the number of children in Barovia was increasing, mostly imparted to the devil Strahd’s downfall, Blinsky wanted to touch the inner child of the adults in the city. He wanted happiness. He wanted smiles. He named the castle Blinsky’s Toyshop of Marvels. One of the toys, a small silver tiara kept in a black satin-lined ivory jewelry box, was such a lovely piece. Blinsky couldn’t stand the thought of leaving it in the box. He already had enough gold and losing the small tiara wouldn’t be a large loss, so he decided to give it to his monkey – Piccolo (see Creatures of the Toyshop). He smiled at the thought of her running around in her pretty, shiny tiara. Sadly, as Barovian luck would have it, trapped inside the tiara is the sole of an evil gnome wizard named Aribetha Strangge. In his old age, Obtavious Swat forgot that he and his fellow adventurers used the tiara to imprison the gnome’s soul. Yesterday, when Blinsky placed the tiara on Piccolo’s head, silver tendrils cascaded from the tiara and into poor Piccolo’s skull, allowing Aribetha to control the monkey. Now, Aribetha has incapacitated Blinsky in the toyshop’s tower, brought many of the toys to life, and imprisoned or killed many of the workers and customers. The adventure includes costumes (which the character may wear), Strahd Hand Puppets, and a possessed Piccolo.
Do you want to run or play an adventure where characters start at level 13 instead of ending at level 13, and actually get to progress to 20 like the rules say they should? Do your players like to travel far and wide, exploring a huge unknown area? Do your players like to change their plans on a whim, and travel somewhere other than where they told you they planned to go last session? Do your players feel like fighting against an empire at odds of 20,000 to 1? Do your players want to commit occasional acts of sky piracy? Do you want an adventure that is designed to handle players using Scrying, Transport Via Plants, and Teleportation on a daily basis? If you answered yes to some of these questions, this adventure may be for you. Check out the detailed preview packet, which includes a campaign log showing how this adventure has actually played out. WARNING: FULL OF SPOILERS; VERY LONG. Against the Idol of the Sun is an epic hexcrawl campaign designed for high-level play. Adventuring parties should start at about level 13, and will likely end the campaign at level 20 with multiple Epic Boons. As a hexcrawl, there is no set adventure path that the party must follow. There is only one encounter that's even close to plot-mandatory aside from the climactic battle. Anything else can be skipped or handled in any order. The players are free to move about the map in any direction at any time, limited only by the risk of enemy action and encounters. The DM, meanwhile, is encouraged to have foes react to and actively hunt the PCs once they become a threat. Along the way, they may find and explore a number of dungeons, including a millenia-old laboratory in the grips of a time distortion, several mines that were abandoned for good reason yet may hold wealth within, and other challenges appropriate for high-level characters. This module is heavy on Exploration and Combat, but the Social aspect of D&D also is necessary as the player characters meet new peoples, work to convince them that they can make a difference, motivate them to action, and create overall plans for the NPCs and factions to follow off-screen to support the players in their main assaults. The key set piece encounters, which are optional but highly probable, involve attacking well-defended temples in the centers of enemy cities. Planning for these attacks will require paying attention to reconnaissance, timing, the use of allies, how to enter, and how to exit and break contact succesfully when dealing with enemies that fly faster than most player characters can walk. The adventure does not include artwork, and the maps are basic.

Nightmares that kill, a mysterious thief that only steals knick-knacks, tales of a huge beast terrorising fisherfolk, an inn with disappearing guests, discoveries of hidden magic portals and rumours of an assassin at large: None of these things are enough to stop the ever-flowing tide of traders and travellers crossing the Bridge of Fallen Men, but its protectors - Cormyr's Purple Dragons - are short on time, and courage... ...will adventurers answer the call?

The gnome village of Clefton is built on the sides of a deep gorge, their homes built safely into the gorge walls. But for the past two nights Clefton has suffered the attacks of sightless creatures that crawl down the walls and steal away the gnomes’ loved ones. It’s up to the PCs to follow the creatures’ trail back to The Draigesgyrn Caves and put an end to their threat. As the PCs explore the unusual cave complex, they may discover the caves are the empty husk of a colossal dragon, buried many years ago beneath a landslide. In the depths of these caves they encounter the dread spirit of the dragon rider and an entrance to the Underdark. Will they seal the entrance or will they begin a new adventure deep underground? The Draigesgyrn Caves is a D&D 5th Edition adventure suitable for four to five PCs of 5th level and estimated to take 4-6 hours. The adventure could be set in any mountainous area. In the Forgotten Realms, it might be set in the Fairheight Range on the Moonshae Isles. The end of the adventure introduces an option to begin an Underdark adventure or campaign. Includes: A map of the dragon husk caves by EB Moreno Two new monsters for 5th edition – the ghoulish ooze and a grimlock shaman Four new magic items

In the eastern desert stands the ancient tomb of Solomon III. Like all tombs, it is full of magical treasure and crawling with deadly creatures. But unlike other tombs, this one is screaming. Years ago, soldiers and wizards went in to silence the screams, and they succeeded, but they never returned. Now Solomon’s tomb is once again screaming out across the dunes, and no one knows why. Solomon’s treasure is still down there, but then, so is whatever is screaming. ADVENTURE TYPE: Small Linear Dungeon DESIGN NOTES: This adventure is intended for characters levels 5 to 7. It includes a desert wilderness area, an oasis, the tomb exterior, the tomb interior, and a cave system below the tomb to explore. Each area contains various NPCs, new monsters, old traps, shiny treasures, and strange magical items. There are many opportunities for (deadly) combat, and a few of them may be inescapable, but it is possible for players to have complex interactions and to experience very different consequences, depending on their choices. INCLUDES: Story hooks, dialogue prompts, creature stat blocks, dungeon overview map, and full-sized battle maps of each dungeon room that can be printed and used right on the table. KEYWORDS: Tomb, ghuul, ghoul, skeleton, ooze, demon, devil, thief, wizard, desert, sabercat, oasis, spider, viper

The Triad Series comes to a head with the party be called upon to again save the land. While successes against both the Goat and Lion branches of the triad have been successful, the toughest group, the Dragons, has formed the army and is moving against the forces of good. Can your party meet the force that General Barsoon has assembled?

The loss of Skyreach Castle in Hoard of the Dragon Queen was a major setback to the Cult of the Dragon, but still only a setback. The cult is determined to retake the castle and claim Tiamat’s lost treasure buried in its frozen walls and cloudstuff vaults, but they aren’t the only ones. Blagothkus the cloud giant is still the master of Skyreach, and he has gone to the hall of his cousin Brunvild, ice lord of Uldoveld, for the resources to repair and reoccupy the castle. At the same time, the party is dispatched by the Council of Waterdeep to reclaim some of the stolen treasures lost when the castle fell.

In the kingdom of Minoxia, the dragon Oxitorus rules the people with a disease his breath causes. A rebel approaches you and implores you to investigate a lead he has on a cure. The travel through Minoxia's swamp will be difficult, and you can't trust anyone, as the tyrant's spy network has roots everywhere. What will become of you, even if you succeed?

Guilds Town is in the middle of Dravens, a province of the realm of Shrave. 50 years ago, the neighboring dwarven province of Kiernard rebelled and tried to overthrow the green dragon Shrave who rules the realm. They failed and their province was dissolved. Dwarves who left the province mostly fled to Dravens, and are called Nards as both a racial slur and a stigma of their people’s dishonor. Guilds Town are the ones really in control of the province and are the current opposition of the Dravens nobility. In recent times, corruption and crime in the city have risen to new heights as 4 cults compete for control of the city and their citizens. Published by NaturalCrit

Modrons, Mephits & Mayhem is a Dungeons & Dragons 5E tier 2 adventure for three to five characters of levels 5-8. It is primarily set in a modron-designed research facility that has been abandoned by its creators but retains guardians that are still active. Additionally, two groups have broken into the facility with their own goals in mind; the githyanki and their red dragon cohort are antagonistic and provide the main source of combat in this adventure, while a modron traveling with a few mephits may prove friendly although ultimately troublesome. Inspired by adventure games in which the protagonists explore baroque, esoteric technological fortresses, and seeded throughout with factions that sport competing and often bizarre goals, Modrons, Mephits & Mayhem is sure to test the mettle of any group of players, and will provide endless amusement for Dungeon Masters seeking something different from the typical hack-and-slash dungeon crawl. This 70-page adventure features: *Two wilderness areas, random wilderness encounters, and a massive, interlinking 3-level dungeon filled with bizarre puzzles. *Ancient machinery powered by elemental portals, all of which can be activated, turned off, or manipulated by the player characters and the various factions within the modron facility. *Planar creatures like githzerai and githyanki, modrons, mephits, and elemental guardians, skillfully placed into the High Moor area of the Forgotten Realms setting. *Monsters and NPCs that have detailed (yet easy to run!) personalities and goals that will provide tons of roleplaying opportunities. *Notes and sidebars on running the NPCs with added complexity, or simplifying the NPCs' motives to make the adventure more straightforward. *Tactics notes for every single encounter! *An appendix that features all monster stat blocks, and both tagged (DM) and untagged (Player) versions of the dungeon maps. *Wilderness hex map by Elven Tower Cartography! Three interlinked dungeon levels by Dyson Logos...and one of them is a flying fortress! Cover art by Patrick E. Pullen!
A Star-Crossed Tragedy. When the party is hired to investigate a haunted castle, they’re drawn into a tale of hatred, love and betrayal stretching back more then 300 years. Will they be able to free the ghosts haunting Arevon Castle, or will they find themselves just another footnote in its long history of misery?

While in the peculiar village of Basht, a town full of strange customs and superstitions, an elderly woman asks you to check in on her grandson, a Gondite tinkerer testing out his latest invention in a nearby cavern. Sounds easy enough, right? A Two-Four Hour Adventure for 5th-10th Level Characters This adventure originally debuted as custom content for the 2019 U-Con convention in Ann Arbor, Michigan. Visit them at https://www.ucon-gaming.org/

When old ruins are discovered, rumors swirl about the lost owner's magical blade. This scenario involves an overland crossing and a dungeon delve and none of it will be easy for the players.

Kobolds. To some, that name means “a tiny creature that dies easily”. To others, that name invokes fear and dread of a relentless, diabolical nightmare. This adventure introduces you to the latter. If your party is unlucky enough to enter the kobold-infested mountain, they will wish they hadn’t after triggering traps around every corner. And if that doesn’t discourage them, the red dragon surely will.
This book goes over the various rules around the faction of the Order of the Gauntlet in Phandalin and the Forgotten Realms, making it easy for any new or veteran DMs to integrate it more into the core stories being told, and making the faction feel more useful for the players that choose to join. In the adventure, the characters are tasked with exploring the depths of the Old Owl Well.

The party approaches the Dwarven Kingdom of Narol'Duun, where things are far different than in your typical dwarven empire. The first major difference is that Narol'Duun is split into three distinct categories of dwarven tribes based on the main type of ore that they mine and refine. The dwarves take on characteristics of these ores - the Cobalt Dwarves having a tinge of blue to their hair, the Copper Dwarves having tough skin and beards of shining reddish-brown, and the skin of the Iron Dwarves is a deep grey in color. These dwarves engage in trade and drink, but the one thing that they are sure to never do is breed outside of their respective tribes. To be found in a relationship with a dwarf of another tribe is to be exiled to the surface - a punishment worse than death for most of these dwarves. On this particular adventure, the party finds themselves caught up in a case of forbidden love between a royal member of the Cobalt Dwarf family - Nadom Glintstone - and a simple merchant woman from the Copper Dwarf tribe by the name of Lajeera Copperfist. They have been doing their best to keep their love a secret for they both know the risks, but the Cobalt King, Norgith Glintstone, has suspicions and is deeply afraid of the damage such a scandal could have on his family's reputation. He doesn't want to draw any attention to the situation, so it is difficult to find a dwarf of his own tribe that could look into it further, so when the party comes along he sees it as a perfect opportunity. He will hire the party to look into the situation with Nadom, offering grand rewards in exchange for the truth if they can provide proof. The party will be torn between multiple threads of possibility in this adventure – telling Norgith the truth about his son's affair with Lajeera, helping Lajeera to permanently change her form to that of a Cobalt Dwarf so they can be together, or perhaps even trying to end the tribalistic ways of the dwarven kingdoms all together. This is a heavily role-playing based adventure, perfect for those who would rather talk their way through a difficult situation than cut their way through it, but there is still some combat along the way depending on the party’s choices. This story will decide if love can win out against all odds or if the temptation of coin is greater than the happiness of others.

An Adventurers League Con-Created Content Module. Tier 1, 4 Hours. (Compatible with Homebrew games too!) May I have the next 100 words to convince you to purchase this adventure? **PITCH BEGINS!** This module features three ways to play: join the Knights of Holy Judgment, the Cult of Zariel, or the forces of Chaos as you face The Heir of Orcus! Play like it is 1990 and experience the first Adventurer’s League module to use 16-bit art for maps, tokens, NPC portraits, and magic items! Each purchase includes the PDF, Fantasy Grounds module, one map, 18 tokens, comic art for the backstory, and an imaginary high five from the author. Make a DC 92 Wisdom saving throw. On a success, reroll! On a failed save, buy this adventure! **PITCH ENDS!** Author’s note: This is part two of a two part Tier 1 series. I plan to make future Verses if these do well and people like them. Thanks for looking at my adventure and please leave an honest review! -Anthony Joyce (Twitter: @Thrawn589) All artwork was commissioned and commercially licensed for this module. Pixel Art by: Joaquin Reymundo "Dsurion" (Twitter: @Dsurion) Comic Art by: James Gifford (Twitter: @Mrjamesgifford) Fantasy Grounds Module by: Chris Jernigan

East of Beregost, nestled in the outskirts of the Wood of Sharp Teeth, Durlag’s Tower has intrigued and yet stymied adventurers for decades. Stuffed full of mechanical traps and arcane wards, and rumored to be inhabited by fiends, very few have managed to extract any REAL treasure from the former home of Durlag Trollkiller. However, a powerful item in the ancient fight against the giants is said to be housed there, and the cloud giant Baron Rajiram has committed significant resources toward recovering it. After a pleasant tea in her garden, SEER calls upon you to beat him there and put a stop to his efforts! Continued in Durlag's Tomb.
Adventures in Hawk's Rest is a love letter to low-level D&D: Studio Ghibli meets the Shire meets Lost Mine of Phandelver. An open-world hexcrawl for characters of 1st to 2nd level, Hawk's Rest is intended as a prologue to a longer campaign, with seven keyed adventure sites and fantastic maps by Dungeon Baker (How to Defend Your Lair, The Lazy DM's Companion). Hawk's Rest is written for new and veteran players alike but avoids the usual pitfalls associated with 1st-level adventures: not only are encounters balanced to avoid character death, but most combats can be avoided entirely with clever roleplaying.
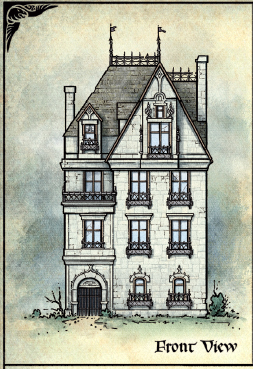
This adventure introduces characters to the land of Barovia. It expands what we know about the lands around Castle Ravenloft and sheds new light on the dark past of the castle’s lord. Players will investigate mysterious happenings in a small haunted house in Barovia.