
Sometimes wandering through the frontier garners information as opposed to bloodshed. In this adventure the party stumbles across a party of Plainsmen who tell the party of some strange goings on at a remote graveyard. They tell the party that they observed ghostly figures after a lightning strike and small fire. As they were unprepared to deal with the undead but suggest if the party is up for some experience, perhaps they should head north in the morning!

It's strange that a shrine to a vanished god should still be taking sacrifices. Not everyone forgets a forgotten god. The party explores an old shrine to a demon lord, kept up by a superstitious local. Pgs. 3-8

When adventurers are in the same area its nice to have a base of operations. The Village of Tomore rests between adventures pertaining to two different campaigns in the Filbar region. The quaint village has a caravan stop and will allow PCs to come into contact with a wide variety of personages and rumors for exploration. This area can be utilized as a base of operations near the areas of the FN or F series campaigns or just as a rest stop for the party.

An introductory adventure set in and under Shadowdale after the Time of Troubles. The subject of the adventure is the tunnels connecting to to Tower of Ashaba that are rumored to connect to the underdark.

This adventure has it all for an upper level group of players. With the rumor of a lost wizards staff on an island, the chase is on to find this powerful piece of magic. Arrival on the island leads off in over three directions and each path has a different set of challenges and rewards. Can your party locate the staff?

When you wander the wilderness you run into the strangest things. Nestled in the middle of a few mountains in a volcanic basin is a strange temple structure. This is the final resting place of the legendary warlord Khan Sing. A hero among the plainsmen, this ruler was believed to have grabbed power with the assistance of a magic weapon known as the “Blood Mace”. Will the party’s investigation find this mysterious artifact?

FQ6 – Vortex at the Temple continues the quest for the missing pages of the Codex of Gamber Dauch. This adventure takes the PCs to the ancient temple of Kabish Mo-Del a former druidic stronghold. Once there the party will have to battle creatures and puzzles to continue. If successful the party may just find themselves in a foreign land and have to find their way back home!

Revealed within are the greatest secrets of the genies: their magics, their rulers, and their homelands. From the Citadel of Ice and Steel to the Great Dismal Delve, the works of geniekind are as wondrous as they are magnificent. Tour the City of Brass, from its golden towers to its brazen streets, foil the evil yak men and their dao servants, travel on the desert whirlwinds of the jann. Learn the legends and secret history of the genies, their cities, their foibles, and their feuds. Secrets of the Lamp includes a 64-page sourcebook about genies, a 32-page booklet of adventures set in Zakhara and the City of Brass, a full-color poster map, six cards showing details of the City, and four MONSTROUS COMPENDIUM pages that introduce new genies and other elemental creatures. TSR 9433

From the magazine: "The monster you're sent out after is so dangerous that even mind flayers fear it. And the illithids want your help!" Earthquakes hit the area around Needlespire mountain, affecting both dwarven and deep gnome villages, and the local mining industry. Deep gnome expeditions discover an illithid outpost! This adventure includes roleplaying encounters with both deep gnomes and illithid in their quest for the true cause of the earthquakes. The creature causing the earthquakes is a draknor which has sent its huge tentacles into the earth seeking magma to fuel its growth. Pgs. 38-60

At last- an opportunity to avert the threat to the little town of Saltmarsh! The real enemies have been identified-- evil, cruel creatures, massed in force and viciously organized. Can the brave adventurers thwart this evil and ensure the safety of Saltmarsh? The Final Enemy is the final part in the series of three modules designed and developed in the United Kingdom for beginning adventures with AD&D rules. Its plot follows directly from those of the first two parts (U1 - The Sinister Secrets of Saltmarsh, and Module U2 - Danger at Dunwater.) TSR 9076
Afraid of the dark? Don't be afraid of the dark - be afraid of what's in it! The town of Hargast has recently been plagued by a series of grisly murders. No one is safe. For the past two months, the remains of humans and animals have been found, their bones picked clean and left to dry in the mourning sunlight. Pgs. 62-65

Introductory adventure for Dark Sun, included in the original box set. PCs start on a slave caravan but are freed when it is attacked. With limited equipment and water, they must cross the desert to an oasis then save a druid. As with many Dark Sun adventures, uses a flip book providing 24 maps and illustrations for players. Combines combat encounters with survival encounters, where the treasure may just be food or enough water for another day.

The battle between the mighty undead army of the Witch-King of Vaasa and the forces of Bloodstone has come to a standstill. As long as the source of the Witch-King's power is at work, his evil forces will never be defeated! As the rulers of Bloodstone Pass, it is up to you to find and destroy the sources of Vaasa's power. All you have to do is journey to the Abyss, confront the mightiest demon of all, steal the Wand of Orcus, and take it to the Seven Heavens to be destroyed. The Throne of Bloodstone is the fourth and final installment in a series of modules specially designed for high-level characters. While it is not necessary to have played any of the three previous modules, The Throne of Bloodstone is the climax of an epic struggle for a kingdom against the forces of darkest evil. Recommended for characters of levels 18-100, The Throne of Bloodstone is the highest-level adventure ever published by TSR! TSR 9228

Having put down a rising of giants, it was discovered that the motivating force behind their depredations was that of long-forgotten evil - the Dark Elves. Determined to seek out these creatures, a body of doughty adventurers mounted an expedition to learn the strength of the Drow and bring retribution to them (DUNGEON MODULE D1, DESCENT INTO THE DEPTHS OF THE EARTH). This module contains background information, a large-scale referee's map with a matching partial map for players, referee's notes, special exploration and encounter pieces, a large map detailing a temple complex area, encounter and map matrix keys, and an additional section pertaining to a pair of unique new creatures for use with this module and the game as a whole. A complete setting for play of ADVANCED DUNGEONS & DRAGONS is contained herein. This module can be played alone, as the second part of a series of three modules (with DESCENT INTO THE DEPTHS OF THE EARTH, D1, and VAULT OF THE DROW, D3), or as the fourth part of a continuing scenario (DUNGEON MODULES G1, G2, G3, D1, D2, D3, and Q1, QUEEN OF THE DEMONWEB PITS). TSR 9020, From 1978
Some ports are more dangerous than the storm. It's alive, it's hungry, it's growing. And you're on the menu. Alone, out in the wilds with a savage winter storm bearing down on you, you need shelter to survive. You stumble through the trees and smell wood-smoke. Ahead you spot the small fortified trading outpost known as Jacob's well. You're not the only traveller to find themselves stranded here in the teeth of the storm. The only problem, someone has bought something with them, it's alive, it's growing, it's voracious and you are all on the menu. Think Aliens and The Thing and you're on the right track. Has potential to be scaled to suit a group of adventurers. Pgs. 8-23

While the PCs continue the quest for the missing pages of the Codex of Gamber Dauch they find the lands of Count Elam. The ruler has recently been informed of an agricultural problem with a herd of Anhkheg tearing up the lush farmland. Further investigation will uncover darker secrets in the area, and those involving Drow and Derro!

Gang War! is a companion adventure made to go along with the events unfolding in Folio #9 (DF2 The Lost Apprentice). It contains the information needed to run a side advenute during the events of The Hidden Valoria Campaign. Yep, you've stepped in it now! Cross blades with several of the gangs of the Patina to help avoid an all-out war that is likely to set the neighborhood ablaze! Once again the players are pressed into service to help keep the peace in the Patina when a rumor of a murder and deciet will pit on gang against another, their tenuous alliances threatening to pull other gnags into the mess as well. This adventure is formatted to both 1E & 5E gaming rules.

The PCs are looking to gain entry to the Glantri School of Magic, after the initial admission tests they are drawn into a commotion where one of the other students is being attacked by an evil sorceress. He tries to flee but but is killed, and the PCs are framed for the murder. The authorities are called and bribed to just kill the PCs, they flee and are chased and taunted by the evil sorceress. Eventually, during one of her attacks, she opens a weak spot in the ground and the heroes are dropped into the warrens under the school. They must navigate the warrens, which are shrouded in magical darkness, defend against further attacks, and find escape where they can prove their innocence.
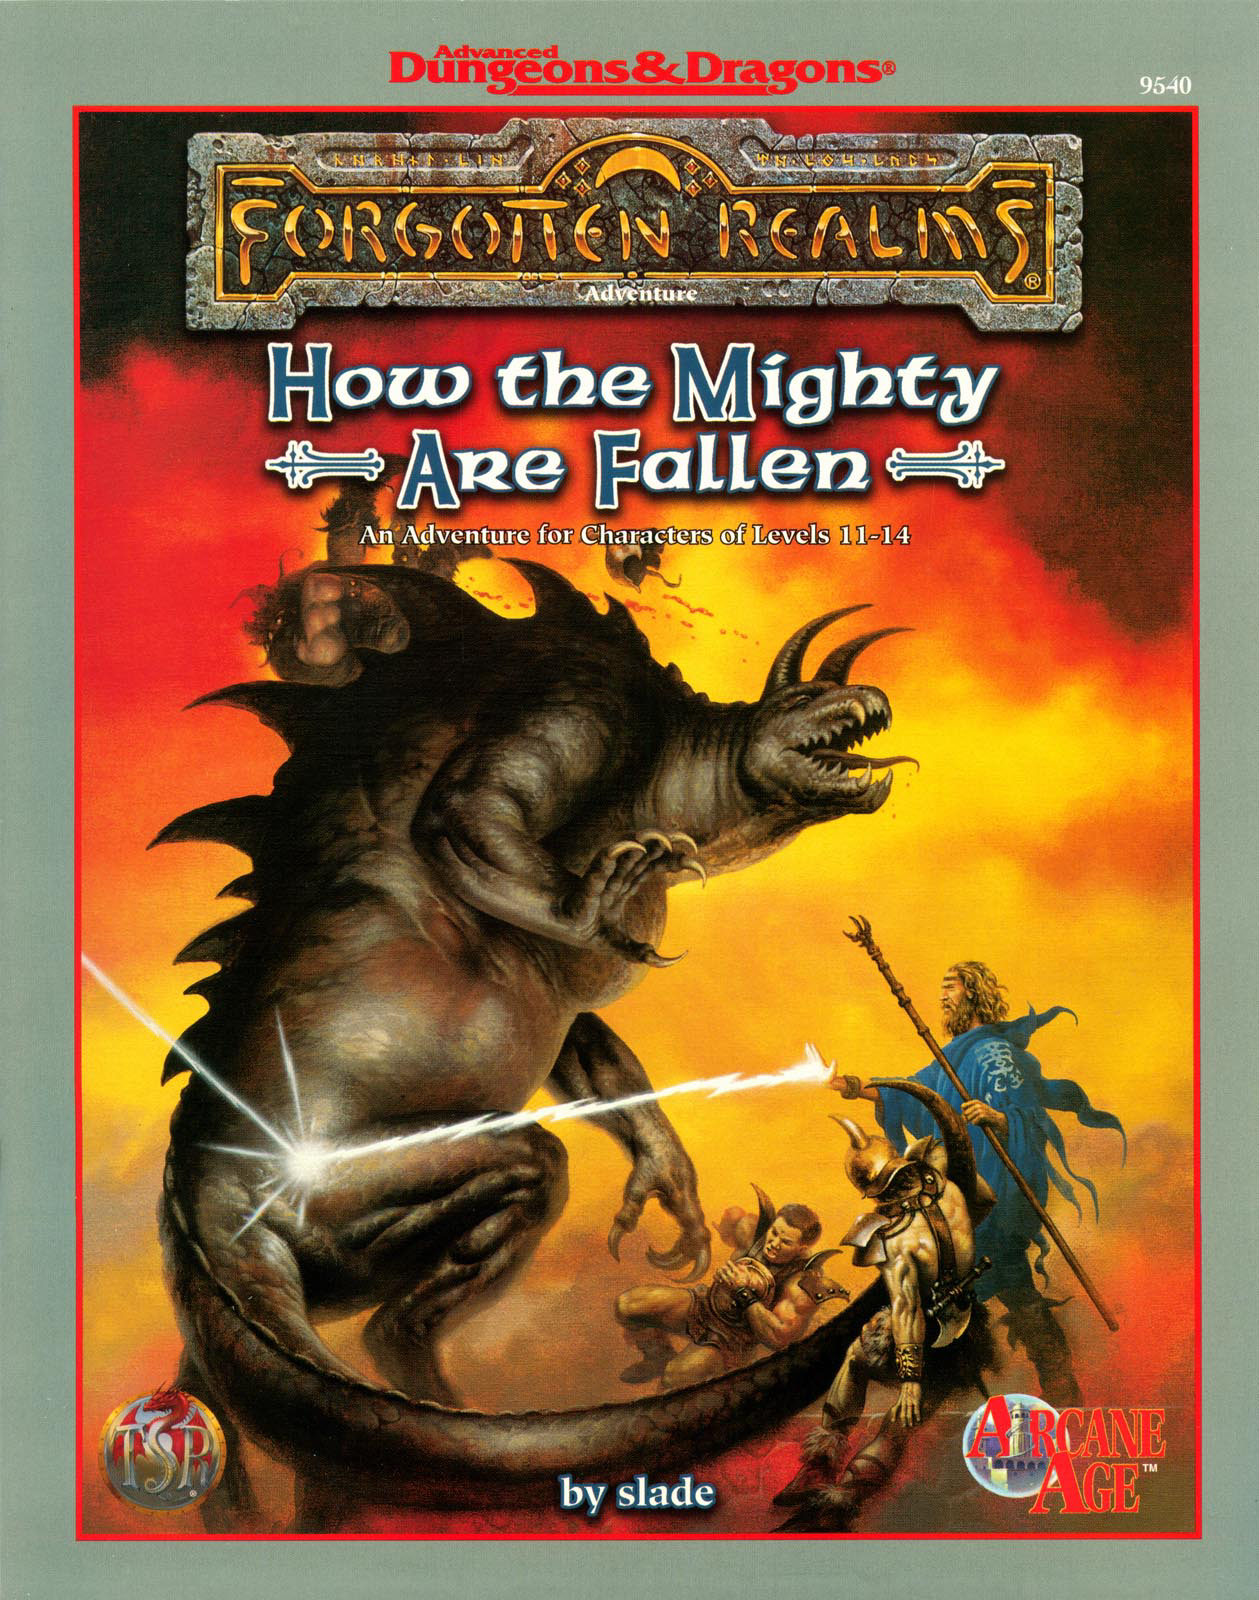
As the floating cities of Netheril hover peacefully in the air, the winds of intrigue boil all around them. The phaerimm continue to plot the downfall of the Netherese even as Karsus prepares for the casting of his greatest spell. Undead walk the land, driving orcs and humans before them. And somewhere below the greatest nation of Faerûn, the Tarrasque awakens from a long slumber. How the Mighty Are Fallen, is an adventure designed for use with the Netheril: Empire of magic boxed campaign setting (which is required to play this adventure). Within these pages, the final heroes of Netheril can : Gather the spell components, that Karsus requires for casting his "most wondrous" spell, the only 12th level spell ever known. He just needs a few body parts from two creatures - A gold dragon and the Tarrasque. Reuinte lost lovers after they have been separated by death. Nopheu's wife was killed in a magical explosions, and now he's finally saved enough money for her to be resurrected. Certainly a dead body couldn't pose a threat to a band of stalwart heroes?! Follow the winds of fate to wherever Tyche delivers them. Numerous side adventures allow players to take their characters to a variety of different locations. Some heroes might want to follow the trail of the missing nether scrolls, while others might want to join the resistance and fight Karsus and the other archwizards. But only the bravest hearts can take the first step... TSR 9540

Candon Shaman of the Dark Fen is a companion adventure made to go along with the events unfolding prior to the core adventure found in Folio #14 (WS1 Isle of Jade). It contains the information needed to run a side adventure that will help characters gain a degree of experience before setting out into the interior of the Isle of Jade. After moving into the swamps of the southern coast the party becomes aware of a threat to the native village that now repairs their vessel. A Candon shaman, roused by the corruptive magic of the Necrotic Pearl, is raising a force to destroy the town and only the players have a chance of stopping the Candon before his forces grows to a size they cannot handle. The islanders fear some dark power has corrupted the Candon lizardmen of the lowland fens. If their shaman leader has fallen to the side of darkness, it is only a matter of time before his calls for war are answered by the fern goblins. Can the adventurers stop the shaman before his summons can be answered? This adventure is formatted to both 1E & 5E gaming rules.