
Devastated in a war with a nearby wizards' school, the Fighters' Academy has since been surrounded by a foul and dank swamp - the Gloomfens. Since the climatctic battle between the wizards and fighters, the tower has decayed. The spirit of the head of the academy haunts the building, eternally plotting his revenge on the wizards who killed him. his loyal sutdents remain faithful to him even in death. Other foul undead have made their home in the rotting, spacious academy. From their lair, they make forays into farmsteads near the swamp in search of victims to feed their unspeakable appetites. The Problem of these terrible attacks by the savage undead will not stop until the evil that has found a home at the tower is burned from the face of the land forever. Will your party heed the call and help the town of Melinir? Will they be able to clear the former Academy of its undead? Lair of the Vampire Lord is the third in a three part adventure, The Haunted Tower. Or, it can be ran as a stand alone adventure. The choice is up to you. Part of TSR 1081 The Haunted Tower
For hundreds of years, Aknar Ratalla's tomb remained undisturbed, the Black Blade safely hidden within its vaults. Can a band of adventurers use the tomb's guardians and traps to keep it that way? Long ago, Aknar Ratella brought pain and desolation down upon the land. His reign of ruin was finally ended by an unlikely alliance of the forces of law: a band of devils and devas slew the warlord but were unable to destroy his dangerous weapons and relics. They chose instead to hide these potent artifacts of evil in a remote tomb, selecting a devil and a deva to stand guard over the tomb for the rest of time. For many centuries, the tomb stood unspoiled... but now, a new player has entered the scene. After infiltrating the tomb themselves, a band of adventurers must become its guardians and use its denizens and traps to prevent a monstrous gnoll chieftain from claiming the deadly artifacts hidden within for his own nefarious glory. Pgs. 58-80

The entity known as Oreiax is a gruesome, stunted monstrosity born of ancient death. Rescued from an eternity of petrification by Doresain the Ghoul King, Oreiax immediately pledged itself to the Ghoul King's service, and thus indirectly, into Orcus's service. Oreiax, born of stone and death, seeks to glorify Doresain by petrifying the world. Pgs. 112-119

A trek across the Shadow Marches leads weary travellers to Blackroot, a quiet village of ramshackle huts nestled among the darkwood trees. Here, orcs and humans live in peace. However, all is not well. Something evil has crawled up from below, threatening to devour the village and its denizens. Only a party of brave heroes stands in its way. In Khyber’s Harvest, the PCs battle an ancient evil threatening a remote village in the Shadow Marches. The dark power of the planes has grown strong in this place. Depraved cultists and twisted aberrant creatures are dragging innocents down into ancient caverns to undergo a horrific transformation. To save these helpless villagers, the PCs must overcome the terrors of Khyber—a quest that brings them to the attention of the dreadful Belashyrra, the Lord of Eyes.

Save the village of Millvein! Prevent a war with the drow! In this 3-4 hour adventure for 4-5 characters of 2nd level, travel to a small chitine lair to prevent them from destroying the small village of Millvein and inciting a war between the surface and the drow. Includes: A 3-4 hour adventure for 2nd level characters Map of the village of Millvein 2 DM maps Stat blocks for all monsters the players might encounter. See where the adventure began in Into the Underdark - Part 1 A Family Affair The adventure continues in Into the Underdark - Part 3 They Call It A Mine

The heroes arrive at the eponymous Keep on the Borderlands, a fortress on the edge of civilization built to stave off the chaos and evil of the wilderness. Using it as a home base, a party can make forays into the surrounding wilderness, encountering monster and marauder alike. The centerpiece of the adventure is certainly the CAVES OF CHAOS, a network of tunnels and caverns found in the walls of a nearby but isolated ravine. It is here that hordes of evil humanoids have made their home. Through combat and negotiation, the players can try to explore and map out these caves, perhaps with the aim of accumulating valuable treasure or even cleansing the land of evil creatures. However, even the Caves are not all they seem. Beyond the goblins and kobolds lurk dark horrors: cults dedicated to fiendish chaos and a Minotaur's enchanted labyrinth await the unprepared adventurer. But for the hero who is brave, clever, and fortunate in equal and sufficient measure, great treasures and glory await in the Caves of Chaos that lie beyond the Keep on the Borderlands! TSR 9034

Many centuries ago, the dwarven kingdom of Sarphil stretched out across the Galena Mountains east of the Moonsea. They dug for the precious metals hidden beneath the rocky terrain, and they established numerous cities and settlements to aid in their excavation and manufacturing efforts. This was during the early days of Myth Drannor, the elven kingdom in the forest of Cormanthor, and the dwarves and elves initially clashed as each sought resources and expanded their territories. Myth Drannor and Sarphil eventually settled their differences, and many dwarves moved into the elven city to offer their services and expand their knowledge. In the Galena Mountains, Sarphil continued to flourish. Unfortunately, these days of prosperity did not last long. The last great king of Sarphil was lost in the dwarven city of Mount Throndor, beneath the mountain peak of the same name, and Sarphil withered under bitter clan disputes since no single family could claim legitimate lineage over the fragmented kingdom. What happened under Mount Throndor has been a mystery for thousands of years. Many attempts have been made to reclaim the lost riches and legacy of the last Sarphilan king, but powerful wards have prevented intrusion under the mountain, wards erected by the dwarves of Sarphil. Were the wards built to keep outsiders from intruding – or to keep something inside from escaping? An enterprising dwarven leader wants to find out, but she is going to need some help from a band of heroes. Horrors of Mount Throndor is a Dungeons & Dragons adventure of exploration, darkness, and terror featuring a lost dwarven city overrun by forces from the Far Realm and the journey to cleanse it once and for all. The adventure is designed for a group of 11th-level characters, and successful completion of the adventure should put the characters at 16th level. Here There Be Monsters Mount Throndor has become infested with madness from the Far Realm. During their journey to penetrate the ward and through the city itself, the characters are going to face gibbering horrors, unpredictable slaadi, fanatic stone giant cultists, degenerate star spawn horrors, mutant derro, undead dwarves, and countless golems. The ancient breweries of Mount Throndor have produced alementals who slither in the darkness, and a great dwarven war juggernaut named Big Hans stomps through the city. Legendary Villains and Epic Moments Though it has been sealed, Mount Throndor is not empty. The characters have opportunities to meet, interact with, and (likely at least) combat against powerful foes within the legendary dwarf city. A dwarf lich, a Far Realm spider goddess, an iron-encased demilich, and a melted flesh derro warlock monstrosity all await, along with a mind-bending force - Great Cthulhu! The characters have a chance to face an avatar of Great Cthulhu in the dwarven depths in the final confrontation of the adventure to free Mount Throndor and rid Faerun of a Far Realm invasion! An Adventure of Exploration Mount Throndor is a big, sprawling complex, a dwarven city with two major strongholds, a bridge system spanning a massive underground lake, and a deep mining complex. The scale is difficult to grasp and convey. Previous examples of adventures featuring these elements have included maps - usually lots of them, great spawling maps connected at ends to make huge subterranean dungeons. It is the classic image of a D&D dungeon crawl, and the map is a key component to its visualization. However, in this adventure, the maps are handled differently. There are certain areas, ususally outside the dwarven city itself, that include maps that are suitable for use at the game table, either in theater of the mind style or grid-and-miniatures. Mount Throndor itself is presented with an abstract map, and exploring it utilizes the exploration procedure outlined in Appendix A. Characters traverse the huge subterranean system using this abstract system, and during their travels they are going to run into random encounters and sites with more interesting and complex encounters.

For years the Verbeeg clan on Clover Island has lived peacefully with the human settlement of Corsair Bay. A peace treaty has remained in effect that both groups attested to and have lived by. Recently the annual tribute that is to be paid to the giants has not come and now the giants are preparing for battle. Can your party go and act as an envoy to the giants or will they choose to go to war against them?

A sinister demon Fledgling trying to become a mighty Nabassu lures the adventuring party to a dungeon with a cruel history. The dark walls of the dungeon holds more terrors than just scary monsters and deadly traps. Will the adventurers figure out that they are nothing more than the next meal before reaching the waiting demon of the dungeon?
If love overcomes evil, remember to get rid of the imp! It took only the love of one good woman - and the hatred of one evil familiar. After leading a life a villainy, the wizard Elzid Natholin gradually left his wicked ways, transformed by the true love of a young maiden. His imp familiar was not pleased with this benign transformation and tricked his master into detonating himself and his tower. The players will investigate the tower to determine the nature of the explosion. The imp still guards the treasure in the dungeon, and is waiting for a legion of infernal soldiers to come claim the treasure for their devil lords. Pgs. 20-28

Thomepreus’ curse is a classic crawl with elements of exploration, mystery and time travel. A curse has befallen the heroes and the source of their predicament is located in a buried temple. Here a forgotten cult have used a magical sand clock to curse their enemies. The temple seem empty but the arrival of the heroes appear predetermined and soon the heroes are propelled through time to arrive in the past. Here clues and objects are required to solve the mystery and to break the curse. However, they must hurry before cult members complete the preordained curse on the heroes.
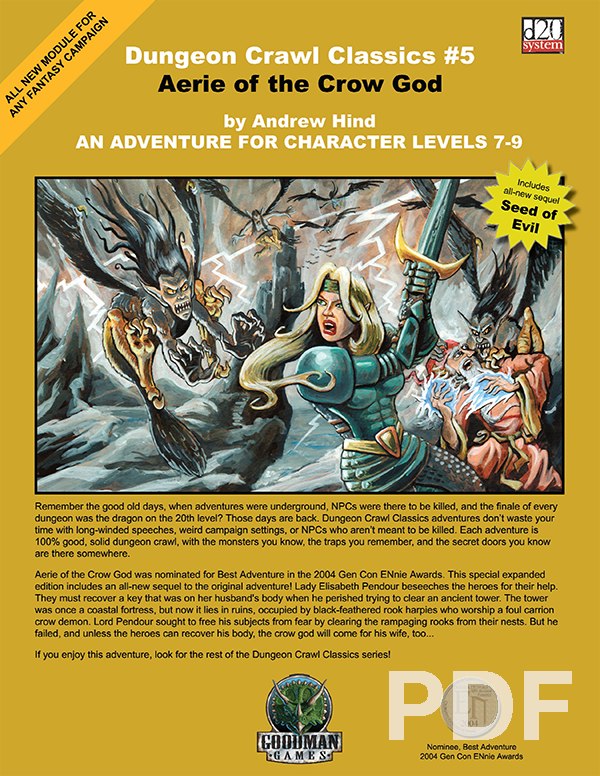
Lady Elisabeth Pendour beseeches the heroes for their help. They must recover a key that was on her husband’s body when he perished trying to clear an ancient tower. The tower was once a coastal fortress, but now it lies in ruins, occupied by black-feathered rook harpies who worship a foul carrion crow demon. Lord Pendour sought to free his subjects from fear by clearing the rampaging rooks from their nests. But he failed, and unless the heroes can recover his body, the crow god will come for his wife, too…

It's all over (and literally so) after midnight. A mission with an unforgiving deadline. The characters must remove the magically-infused remains of a dead wizard and his medallion from a crypt. Pgs. 10-23

A Mulmaster refugee named Ani Kuleimatt discovered references to a forgotten mine near the Moonsea, a mine rumored to produce an unexpected export. The adventurers are hired to locate the complex and secure its resources for the Mulmaster Diaspora.

The Iron King's daughter has been cursed by a demon who lurks inside a mirror locked deep in the palace dungeons. Can the characters win their freedom from those same dungeons by entering the mirror demon's horrifying, maze-like realm and finding a way to end the curse? The Demon in the Mirror is a creepy dungeon crawl adventure for 5th-level characters. It takes about 5-7 hours to complete and includes: -An otherworldly, reality-bending realm inside a magical mirror -Four new monsters: the mirror demon, ceiling creep, reflection demon, and librarian of Leng! -Combat cards for each monster, PC, and special treasure -Gorgeous digital maps (with and without grid) for virtual table tops

Kavalar Coppernight, a dwarf prospector, led a couple of dozen volunteers in a quest for rich veins of ore. Several months ago, they began underground mining operations, as well as a surface excavation for a small keep. Hearing of this development, the mayor of the nearest town sent two veteran militia members to investigate. They should have returned two days ago, and the mayor is growing anxious. The PCs are asked by the mayor to find out what happened to the two militia members. Pgs. 12-17

𝐍𝐨𝐰 𝐰𝐢𝐭𝐡 𝐚𝐧 𝐢𝐥𝐥𝐮𝐬𝐭𝐫𝐚𝐭𝐢𝐨𝐧 𝐛𝐲 𝐂𝐇𝐑𝐈𝐒 𝐇𝐎𝐋𝐌𝐄𝐒 𝐚𝐧𝐝 𝐚 𝐏𝐑𝐈𝐍𝐓𝐄𝐑-𝐅𝐑𝐈𝐄𝐍𝐃𝐋𝐘 𝐃𝐔𝐍𝐆𝐄𝐎𝐍 𝐌𝐀𝐏! 𝐓𝐇𝐄 𝐑𝐔𝐈𝐍𝐄𝐃 𝐓𝐎𝐖𝐄𝐑 𝐎𝐅 𝐙𝐄𝐍𝐎𝐏𝐔𝐒 is a fifth edition (5E) conversion of the ground-breaking introductory adventure for Dungeons & Dragons that served as a DM aid in the first 𝐃&𝐃 𝐁𝐚𝐬𝐢𝐜 𝐒𝐞𝐭, released by TSR in 1977. This set included a 48-page rulebook covering the first three levels of play, and was skillfully edited by 𝐃𝐫. 𝐉. 𝐄𝐫𝐢𝐜 𝐇𝐨𝐥𝐦𝐞𝐬 from the original 1974 D&D rules written by 𝐆𝐚𝐫𝐲 𝐆𝐲𝐠𝐚𝐱 and 𝐃𝐚𝐯𝐞 𝐀𝐫𝐧𝐞𝐬𝐨𝐧. Holmes advanced the "Sample Dungeon" concept by writing a new thematic dungeon with a strong backstory, creating an adventure that has remained a fan favorite over the decades. Officially, its only title is "Sample Dungeon" but colloquially it goes by various names based on Zenopus, the doomed wizard who built the dungeon under his tower. An adventure for 1st to 2nd level characters; four pregenerated characters are included. Also includes ideas for using it as an adventure site in 𝐆𝐡𝐨𝐬𝐭𝐬 𝐨𝐟 𝐒𝐚𝐥𝐭𝐦𝐚𝐫𝐬𝐡. 𝐍𝐎𝐓𝐄: Using this conversion requires a copy of the original dungeon found in the (1977) Basic D&D rulebook. However, Wizards of the Coast has provided a free pdf of this dungeon since 2008 on their website, see the first page of the pdf for the link. 𝐂𝐎𝐍𝐓𝐄𝐍𝐓𝐒: Introduction, page 2 The Setting, page 3 About the Dungeon, page 4 Dungeon Master's Map, page 5 Areas of the Dungeon, pages 6-13 Appendix A: Further Reading, page 13 Appendix B: Dungeon Factions, page 14 Appendix C: Portown Rumors, pages 15-17 Appendix D: Use with Ghosts of Saltmarsh, pages 18-19 Appendix E: Pre-generated 1st level characters, page 20 𝐈𝐧𝐜𝐥𝐮𝐝𝐞𝐬 𝐭𝐡𝐞 𝐟𝐨𝐥𝐥𝐨𝐰𝐢𝐧𝐠 𝐧𝐞𝐰 𝐦𝐨𝐧𝐬𝐭𝐞𝐫𝐬, 𝐍𝐏𝐂𝐬, 𝐚𝐧𝐝 𝐌𝐚𝐠𝐢𝐜 𝐈𝐭𝐞𝐦𝐬 𝐟𝐨𝐫 𝟓𝐄: Cleaning Cube, Veteran Smuggler, Thaumaturgist, Monstrous Sand Crab, Lemunda, Monstrous Rat, Brazen Head of Zenopus, Verminslayer Longsword, Lesser Wand of Petrification, Scroll of Stone to Flesh The Ruined Tower of Zenopus was featured as part of the "D&D Classics" column in Issue #32 of Dragon+ magazine! Go to 𝐝𝐫𝐚𝐠𝐨𝐧𝐦𝐚𝐠.𝐜𝐨𝐦 or find the link on the Wikipeda page for Dragon magazine. 𝐂𝐑𝐄𝐃𝐈𝐓𝐒: Original Dungeon: J. Eric Holmes Conversion, Added Content & Cartography: Zach Howard Content Review & Editing: Scott McKinley Interior Art: Chris Holmes (“Octopus Attack”, page 9) Cover Art: “Italian Coast Scene with Ruined Tower” by Thomas Cole, 1838. Open Access Image from the National Gallery of Art at images.nga.gov Format: Derived from the “Adventure Template for Open Office/LibreOffice” by Dale Robbins on DMs Guild Dungeon Maps drawn using the application Gridmapper by Alex Schroeder

Somewhere under a lost and lonely hill of grim and foreboding aspect lies a labyrinthine crypt. It is filled with terrible traps and not a few strange and ferocious monsters to slay the unwary. It is filled with rich treasures both precious and magical, but in addition to the aforementioned guardians, there is said to be a demilich who still wards his final haunt (Be warned that tales told have it that this being possesses powers which make him nearly undefeatable). Accounts relate that it is quite unlikely that any adventurers will ever find the chamber where the demilich Acererak lingers, for the passages and rooms of the Tomb are fraught with terrible traps, poison gases, and magical protections. Furthermore, the demi-lich has so well hidden his lair, that even those who avoid the pitfalls will not be likely to locale their true goal. In the far reaches of the world, under a lost and lonely hill, lies the sinister TOMB OF HORRORS. This Labyrinthine crypt is filled with terrible traps, strange and ferocious monsters, rich and magical treasures, and somewhere within rests the evil Demi-Lich. TSR 9022

"For untold eons, Eshebala ruled over Vulgarea, the 193rd Layer of the Abyss...content to revel in hedonism, corrupt the hearts of her dwindling followers and inflict petty cruelty. Yet, if there are days in the Abyss, there came one when she realized she despised her own province. She hated demonkind. She hated the Abyss. It had become unbearably tedious, spent...done. The burgeoning goddess decided she would dip her toe back into the lives of mortals, and quest to remember...to understand her own existence...But that was a lofty goal for a mind that had long ago begun to unravel. Instead...She is learning that all she has left is cruelty...and it was always cruelty that gave her power, so she now believes, to the woe of any who cross her path." Partly inspired by a scant notation by Carl Sargeant in 1992's TSR book Monster Mythology: "Eshebala is the foxwoman deity of vanity, charm, greed, and cunning. Her symbol is a female fox. Eshebala appears as a foxwoman, a shapely fur-covered female with a fox’s head, or as a beautiful young elf maiden. She is bedecked in rich clothing and jewels, and carries a silver mirror. Eshebala’s realm of Vulgarea can be found on the 193rd layer of the Abyss. She is wily and vain. She favors beautiful things and collects jewelry and art, the tackier and flashier the better. She prefers to overcome her opponents using subtlety rather than force, seducing and devouring out of boredom. She loves gossip, and always insists on being the center of attention. Eshebala is a patron of evil shapeshifters who use their wits and wiles before resorting to violence." Eshebala is a true chaotic evil demon goddess, behaving 100% true to form, and an extremely challenging opponent to take down for your players. An unforgettable 262 page jaunt for Levels: 15-17, with multiple possible modes of play, including Party Mode for up to 12 players. Profusely and paintstakingly illustrated over the course of several years by an award-winning professional illustrator. No stock illustration in this beast! A loving, dark & insanely detailed exploration of the 193rd Abyssal Plane An exuberant nod to the most grueling, deadly dungeons ever created Rich encounters that play out in a unique way each time 100 + NEW CREATURES 200 + NEW TREASURES (& possibly the most illustrated treasury ever provided) 82 BOOKS for PCs to discover 70 + NEW SPELLS & RITUALS, INCLUDING DETAILED OPTIONS FOR DEMON SUMMONING 50 + NEW TRAPS, HAZARDS & EFFECTS (guaranteed to run amuck) 4 RANDOM TREASURE TABLES, including a TABLE OF GEMSTONES that would be useful in any campaign 2 NEW CLASS SHIFTS: the Demonologist & the Exorcist!
Far from the nearest town, hidden deep in the forest, lies a marshy, boggy valley. Woodsmen and hunters shun the place—kept away by rumours of a terrible beast lairing within and of a ghost haunting the valley’s boggy mere. But, as well as great danger, treasures magical and mundane may yet lie unclaimed in the valley for three unexplored tombs built by ancient hands, stand amid the mud and reeds. Dare you explore the Shunned Valley of the Three Tombs?