
The valley of Haven was a peaceful land. Its crops were abundant, its citizens prosperous. Elves, Dwarves, Halflings, and Humans lived together in harmony. Hidden away in the heart of the Thunder Mountains, Haven was a safe place to live. The rivers were sweet and pure; the weather was pleasant and warm. Something terrible has come to pass in Haven - terrified refugees speak of a fabulous ruby uncovered in the mountains and a catastrophe that befell the palace. Whatever the cause, Haven now lies in chaos. Raiding bands of orcs, goblins, and hobgoblins terrorize the countryside. The disaster happened so suddenly that the citizens are confused and helpless. Without their leaders, who are trapped in the palace, they have no courage to fight back. The situation has become desperate. TSR 9044

FN11 – The Amulet of Dorian Beldor begins as a race to catch a fugitive from justice and quickly escalates into a much larger problem. With over 40 pages and 8 different maps this adventure has your party stumbling onto a former city covered by a rock slide now inhabited by a large group of humanoids. Buried deep within the complex is the ancient relic that controls elementals and will be quite useful as the Filbar North series winds down.

"The southlands of Eor are being despoiled. Merchants will no longer run their caravans on the main highway past the quiet village of Waycombe. The peasants are fleeing their lands, and all are demanding protection from the powerful Count of Eor. The goodly count has sent a troop of his trusted fighters to exterminate the brigands believed responsible for these outrages, but weeks have passed, and still there is no word from this force. Now John Brunis, Count of Eor, has turned to you for aid. After taking counsel with the High Priest of Eor, he believes that a small party of cunning, bold adventurers may succeed where armed might has failed. You find yourselves faced with many mysteries! Why has robbery suddenly erupted in the peaceful southlands? How could mere brigands be as powerful as the foes described to you by their numerous victims? Is this really mere robbery? Or is there some truth to the rumors, told only in hushed whispers, about the beginnings of a hideous plot being hatched by an ancient, vile, and evil foe of all mankind?" Eor is beset by marauders and lizardmen of a boldness not seen in years. Hired by the Count of Eor, the party is tasked with tracing the source of these foes and eliminating them for the safety of the realm. After a set piece combat in Count Brunis's castle, the party must trek across Eor's wilderness, eventually coming to the Great Southern Swamp beyond the village of Waycombe. With further exploration they can locate the Ancient Temple which serves as the tomb and stronghold of Sakathas, the vampiric LIZARD KING! TSR 9055

The adventure begins one moonlit night, when PCs are walking in the vast moors south of the city. The Darker the Knight, the more ghosts will walk...
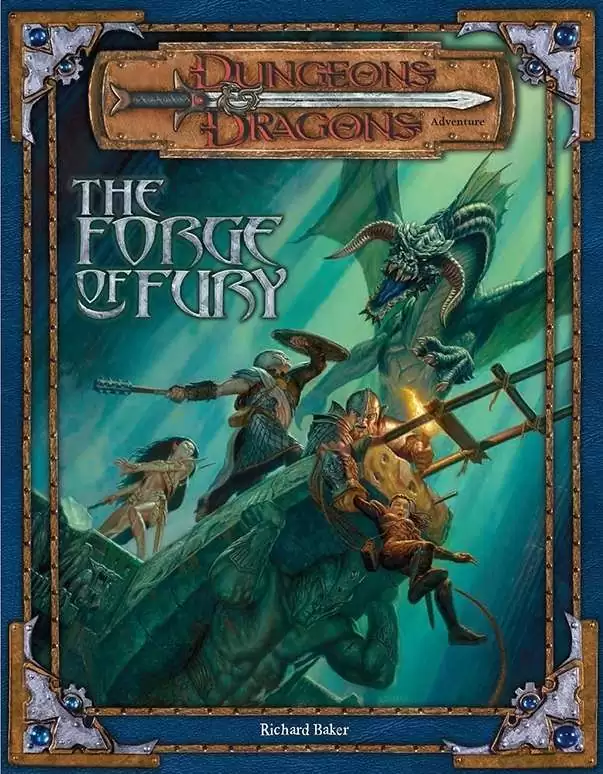
Two centuries past, the dwarven smith Durgeddin the Black carved a secret stronghold from the caverns riddling a hill known as the Stone Tooth. Laboring ceaselessly in their halls under the mountain, Durgeddin’s clan forged enchanted weapons for use in their vendetta against the orcs that had driven them out of their old homes. Durgeddin and his followers are long dead, but the dwarf-hold is not empty. Deadly peril waits in the caverns beneath the Stone Tooth, as well as Durgeddin’s hidden armory of matchless weaponry. The Forge of Fury is a dungeon crawl, or site-based adventure, describing the ruined stronghold of Khundrukar. The characters come to the Stone Tooth in search of a hidden cache of Durgeddin’s superior blades. They find the old stronghold inhabited by a number of dangerous monsters.
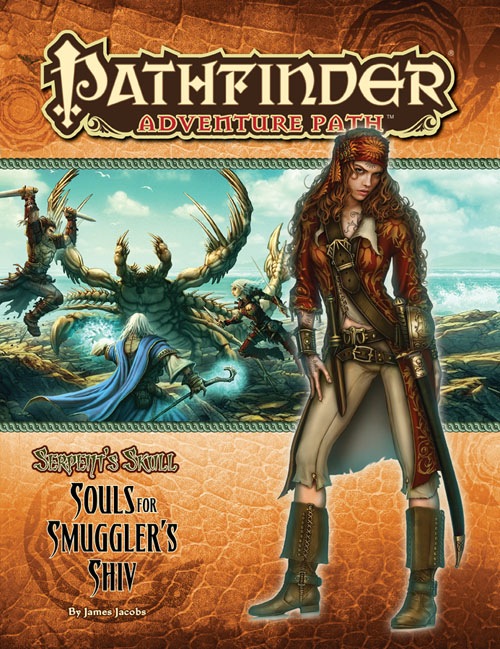
A deadly storm shipwrecks the passengers and crew of the Jenivere upon infamous Smuggler’s Shiv, an island off the coast of the jungle realm of Sargava. If they’re to have any hope of escaping the notorious pirates’ graveyard, the survivors will need to band together to outwit the isle’s strange beasts and legendary menaces. But can the PCs unite the swift-to-squabble castaways, especially when several seem to have mysterious goals of their own? And does Smuggler’s Shiv hide secrets even deadlier than its desperate denizens? This is part one of the Pathfinder Adventure Path "Serpent's Skull", but can be played as a standalone adventure that lasts approximately 10 four-five hour sessions. Great for first time dungeon masters. This is not a seafaring adventure. The PCs are shipwrecked on an island for the entire duration. This adventure ends with (hopefully) the PCs finding a way off the island (reaching level 3). It is therefore a great starting adventure with a definitive conclusion. After this module, you can continue with part two or change into your own homebrew.
In a small hamlet, things are strangely becoming tidy in the night. Far from being pleased, the citizens are alarmed by these events. A local painter has gone missing, as has a travelling scholar. What is going on here?

A fiend lurks among the Black Blade goblins. A shapeshifting barghest fashioned by the General of Gehenna to exact revenge on all goblin-kind. It’s aim: to kill as many goblin leaders as possible… A masked goblin approaches the party asking for help. Two tribe leaders are dead. But a rival for chief has control of the crime scene. Will the party discover the barghest among the goblin ranks? Can they stop this imposter before it strikes again? Adventure Overview The adventure’s story is spread over 4 parts and takes approximately 4 hours to play. The adventure begins with a Call to Action scene. Part 1: Goblin Politics. Krill sends his emissaries to implore help from any strong intermediary. The party is asked to investigate the murder of Thrawn in Dringly’s lair. This is Story Objective A. Part 2: The Opposition. Gain entry into Dringly’s lair and investigate the murder of Thrawn. Gather enough evidence to find the killer. This is Story Objective B. Part 3: To The Lair! Now that the players have determined the barghest (Yeep) is to blame, they need to get to Krill’s lair quickly as he is in imminent danger. This is Story Objective C. Part 4: The Barghest.When the players arrive at the lair, they need to get to Krill and expose and defeat the barghest. This is Story Objective D. Adventure Background A barghest named Yeep has begun its onslaught of attacks against the Black Blade goblins. Starting with Chief Gnar, then his second in command Thrawn, the barghest is moving methodically down the line of command. Krill is now chief. But he has some problems: Two leaders of the Black Blades are dead. Who killed them and why? Is he next? Dringly, the next in command, has decided to take his lair for himself, declaring himself Chief of the Black Blades. Who are the Black Blades? The Black Blades are a tribe of goblins in the local area. They are known for dipping their blades in a dark black substance. It is rumored these blades are poisonous. The Black Blades regularly attack passersby on the road to rob them. The Black Blades have two lairs, one run by a chief who leads the whole tribe, and another overseen by a boss lieutenant. The Black Blades have a well-established pecking order which is how Krill stands to become chief. The next in line is Dringly, who has also declared himself chief and wants Krill dead. Krill suspects that there is something suspicious about two leaders being killed within a day of each other, but he has already burned Gnar’s body without any investigation. He needs to investigate the body of Thrawn, but it is in Dringly’s lair. Krill wishes to avoid direct confrontation with Dringly at the present for three reasons: 1) Any violence would only kill his own tribe members and further divide the lairs. 2) He believes there is still hope for negotiation to reunite the Black Blades. 3) He believes that if he were to attempt negotiations himself, Dringly would kill him. This adventure features: Two maps. Ready for your favorite Virtual Tabletop. A full color pdf. A black and white pdf. One custom monster, a reprint of barghest, all others available in the Monster Manual. Four hours of entertainment involving: roll playing a goblin bard, investigating a murder scene, tracking down a barghest before it strikes again. Applicable to any setting.
Do you want your players to feel like they are in a zombie movie, struggling against a deadly horde that tries to surround them, overpower them, and bear them down to the ground to be devoured? This is an adventure that can threaten even the stoutest of characters, and is not recommended for parties of levels 12 or below unless they are larger than normal. This module is designed to take 4-8 hours of play and cover a single day, depending on the party’s speed of play and how thoroughly they decide to explore. It includes suggestions and some plot hooks that can be used to tie this easily into a variety of long-running campaigns, or it can be run as an indepdent adventure. The players will come upon a sacked town, figure out what happened, track an item whose theft has ominious implications for the region, and explore a partly-flooded old temple to end the threat. It's primarily combat-focused, but there are a few areas where exploration and route choice makes a difference, as well as traps if the party goes for the optional temple treasury. The antagonists in this module are mostly ghasts and ghouls, but the module title and cover page are deliberately selected to not spoil this. These are greater ghouls and ghasts that can challenge higher-level characters, backed up by mobs of lesser ghouls that can surround, paralyze, and devour the weak and unlucky, led by a Warlord whose aura can drive even the stout-hearted into forgetting their plans in a moment of madness.

THRESHOLD! The northernmost town in the Duchy - and your last stop before your adventures begin. Threshold, the gateway to mysterious castles, lost temples, deadly caves and caverns. You have heard the stories and legends, now you wish to see for yourself. This product provides a complete campaign adventure that will take beginning characters from 1st all the way to 3rd level and possibly beyond, drawn from the first nine modules of the B-series adventures. See individual adventure entries for Boss, Common Monster and Items lists. TSR 9190

Something stirs in the dark heart of the Warwood, and in response something stirs in the stars. A simple encounter with bandits on the road leads the PCs to a frightening place where even dreams are deadly. Cultists seek to free the soul of a terrible entity from beyond the stars. The PCs must retrieve the soul vessel of a long-dead evil paladin to stop cultists’ plan from coming to fruition. Pgs. 60-92

Imprisoned in the first layer of Hell a group of unfortunate adventurers must find their way out amidst the chaos of the Blood War. Will they escape before the Lord of the Keep finds them? Well, only time will tell...

A duergar mining expedition has led to a curious find - the entrance to the mythical Forge of Creation, where the first dwarves supposedly created the tools that brought civilization to the world. Their discovery has not gone unnoticed though, as their toiling within the forge has activated a portal to the Elemental Plane of Fire, drawing the attention of the efreeti Camus, Eyes of Midnight. The PCs are caught in a clash between the efreeti sultan and the meddlesome duergar, and must survive threats from each faction and the dangers that lurk within the forge itself!

5e Solo Gamebooks presents Citadel of the Raven, the third in our series of solo adventures. Citadel of the Raven is the sequel to Tyrant of Zhentil Keep, but is also playable as a standalone solo adventure. The first solo adventure in this series is titled The Death Knight’s Squire. At 589 entries, you can expect a lot of variety from this solo quest. There are several main paths your character could take, and numerous encounters and options on those paths (including short sub-threads designed for specific classes), making the number of possible adventures practically endless. Add to that the characteristics of your class, and the numerous variegated combat encounters, and it’s safe to say that no two run-throughs of Citadel of the Raven will be the same.
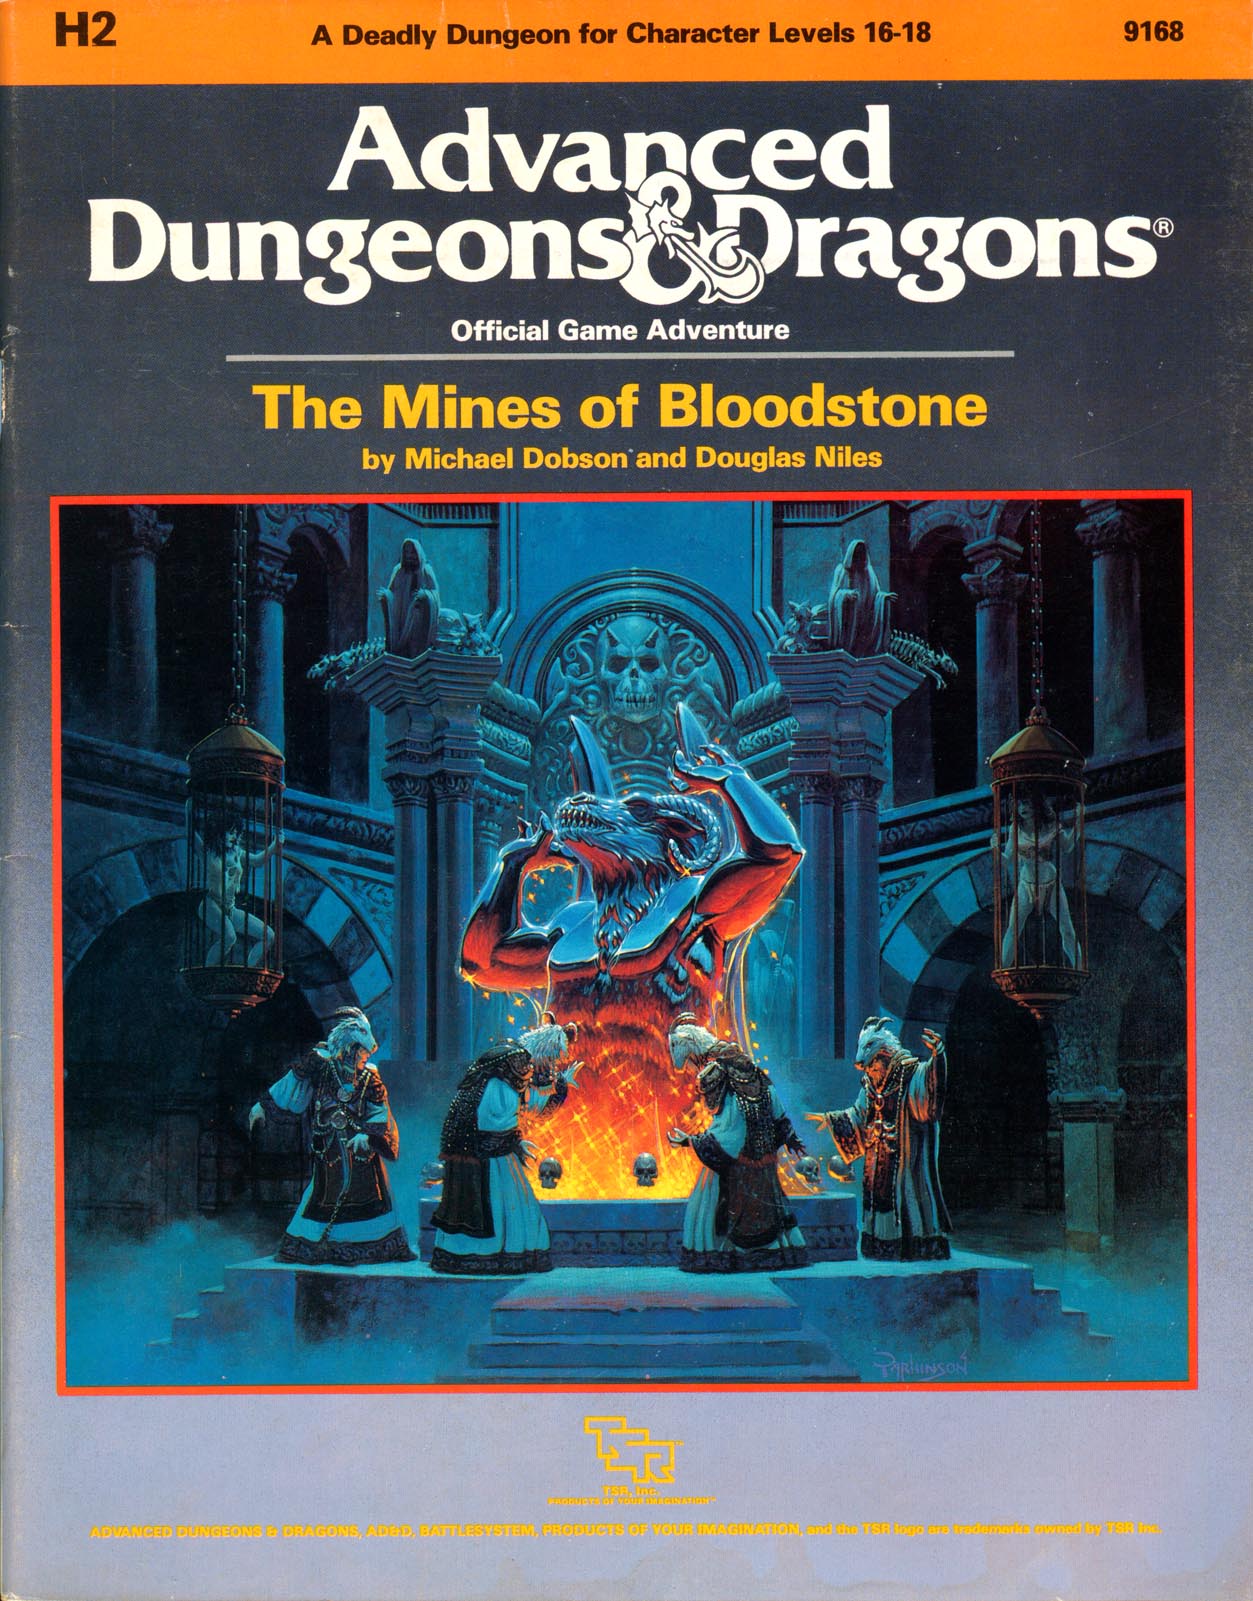
The most deadly dungeon ever devised! High-level characters brave the unexplored corridors of Deepearth to confront perhaps the most feared adversary in the AD&D game. The second chapter of the Bloodstone Pass saga follows the conclusion of the desperate war against the bandit army. A cold and bitter winter drives the villagers to the edge of starvation, and numerous horrors strike the town of Bloodstone Pass. Join the adventure as the heroes explore the depths of the ancient bloostone mines, now inhabited by fearsome demons. There they hope to uncover the fantastic treasures rumored to exist in the unknown darkness. But deep within the mines, all is not what it seems.... This module uses the new rules from the Dungeoneer's Survival Guide and Wilderness Survival Guide. The adventure also includes optional BATTLESYSTEM scenarios fought entirely underground. These supplementary products are not required to play the adventure, however. TSR 9168
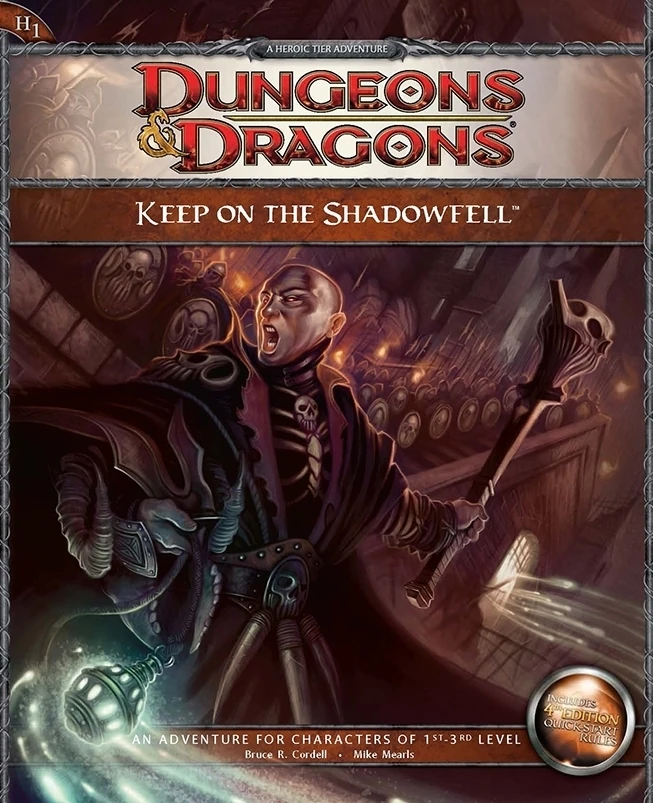
Darkness looms near Winterhaven! Kobold brigands have grown ever bolder in their attacks, marauding the once peaceful town, and a known explorer has been missing ever since their departure to the excavation site of a dragon burial site. When the party investigates, they will discover that the kobold's leader, Irontooth, bears a tattoo of a ram-headed demon. This is a troubling portent, for the townsfolk will report that this can only mean the dread god Orcus, master of death, has an active cult in that ruined keep! It is up to the party to enter the Keep on the Shadowfell and put a stop to the cult's fell machinations before it threatens all the realm. There they will fight the evil priest Kalarel, Scion of Orcus and seal off the vile portal to the dark realms he is master of. Should the heroes seize victory, glory and treasure are sure to be theirs. But first they must endure the challenges of that dreaded KEEP ON THE SHADOWFELL!

This adventure is the ninth part of the Shackled City Adventure Path that began with "Life's Bazaar" (Dungeon #97) Wherein a group of diverse and talented allies learns the folly of not working together against a common foe.

Beneath the blood moon, a dark monastery appears for one night atop a high plateau. Inside its walls, the mighty black lotus flower reaches its full bloom. Can the characters steal inside the monastery, defeat its sorcerous guardians, and claim the blossom before the sun rises? Monastery of the Shadow Sorcerers is a fiendish sword-and-sorcery adventure and includes: -An extra-planar monastery brooding beneath the blood moon -Sorcerer-monks who move like smoke and strike with fire and blade -Combat cards for each monster, PC, and special treasure -High-quality digital maps for use with virtual table tops
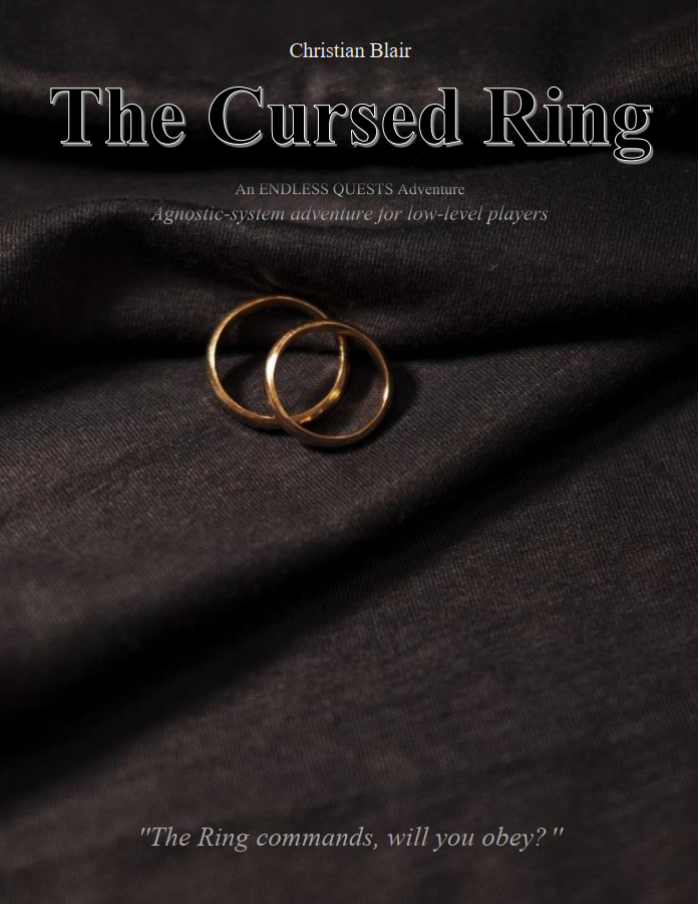
(EQ1) The Cursed Ring is a generic fantasy short adventure for low-level players, themed around puzzle hunting, traps, and monster combat. It is designed to be solved in approximately 5-6 hours, depending on the size of the party and skill of the players. This adventure takes place in a cursed fortress, where they must find a powerful mythical ring capable of granting great power, in exchange for enormous sacrifices. Players must recover the ring and get out of this dangerous place alive.

Yesterday, young Tobias went to investigate an old tomb by himself. Everyone told him it was a bad idea. Everyone was right. Today, you and your companions awaken to a town in chaos. Why is the temple sealed behind a divine shield? Why are children and worshippers trapped within? How do we get inside? What did Tobias do?! Ragged Hollow is a full-service starting town, full of classic creatures and challenges all updated and brought together for newbies and nostalgia-lovers alike. There are goblins and witches in the woods, a house full of traps, a basement of vermin, kobolds in a cave, bandits on the road, riddling ravens, a 50-room temple dungeon, nursery-rhyme monsters, living nightmares, Lovecraftian horrors, and tons of unique items to find. This is a mystery with lots of relevant side-quests around the town. The heroes can investigate the situation, get into the temple, save the innocents, and stop the monsters. And get some loot! ADVENTURE TYPE: Medium Dungeon / Town / Wilderness Adventure DESIGN NOTES This adventure is intended for characters levels 1 to 4. It includes several wilderness areas (forest, hills, mountain), a bustling town, several local mini-dungeons, and one 50-room temple dungeon. Each area contains various encounters and unique items. There are many opportunities for combat, but it is possible for players to explore most areas and complete many interactions without any combat at all, depending on their choices. INCLUDES: Story hooks, dialogue prompts, random encounters, stat blocks, original creatures and treasures, and maps. KEYWORDS: town, village, forest, goblins, goblin market, witches, hags, hills, bandits, ogres, mountain, kobolds, caves, dwarves, temple, clerics, nightmares, demons, riddles, traps, ghosts, fairy tales, Lovecraft, mutant