
What elder evils lurk in the depths of the freezing mountain ruins? Find out in The Stoneheart Ruin! The adventure features: An adventure set in a desolate, wintry mountain landscape. 16 pages full of intrigue and mystery, containing full color maps, plus 2 unique monster stat blocks. Provides a great introduction to Mind Flayer lore and mythos for Tier 1 players. Can easily be set in the Spine of the World for use in Rime of the Frostmaiden. Let your characters test their mettle as they climb and face the ancient dangers lurking in the cracks of The Stoneheart Ruin! “I have no explanation for any of these finds. We heard disturbing noises coming from further within the mountain; thunderous and growling.” Excerpt from a pamphlet, signed: “Koralia Meadring, Anthropologist Extraordinaire” Koralia needs you to investigate her most recent discovery: a ruined cavern deep in the mountains. Her small team of academics did a cursory walk-through and think they've found a big breakthrough! However, they left in a hurry after being frightened by the horrors they heard coming from deeper in the mountain. They escaped and found one of their team was missing - a goliath named Marek. You must climb the mountains and locate the ruin, make certain that it is safe for study by Koralia’s team, and if possible, find and rescue Marek, whose fate is uncertain. Made during the November 2020 RPG Writer's Workshop.

The Puzzling Tiemple of Flummox Heist is a linear dungeon crawl utilizing word puzzles and riddles written in the English language. Challenge your players and their characters with a brainteasing mix of puzzles, combat, and roleplay in this one-shot adventure for characters of 3rd, 4th, 5th, or 6th level which will delight fans of escape rooms and solve-at-home mystery adventures. Characters travel through a mysterious underground temple packed with nine carefully-crafted original puzzles, each one presented as a beautifully illustrated graphic and all woven carefully into the narrative. By doing so they unknowingly prepare themselves for ritual sacrifice by Flummox Heist, a trickster cleric who lurks at the heart of the temple. This unique adventure also features two exciting combat encounters - each with a story-relevant twist to standard monster mechanics - and a set of interesting and original NPCs to create an immersive story for you and your players. The unique puzzles are all designed to be short, self-contained, and satisfying to solve. There's no need for trial-and-error, no grinding through fiddly codebreaking, and no need to pause your game to look up information. Instead, each puzzle is crafted as a complete short challenge with that rewarding ah-ha! moment when the solution clicks. If the characters need a nudge in the right direction, the adventure includes a full Hints Appendix with a series of escalating clues so you can help them without giving away the solution. Of course, full answers are also provided in a Solutions Appendix. Perhaps you're looking for satisfying puzzles to add to your own adventures and campaign? Although this product is a complete one-shot adventure, each of the rooms can also be used independently, allowing you to use this product as a source of puzzles, enigmas, and conundrums which you can easily drop into your own game. Treat your puzzle-loving players and their characters to an amazing crossover of D&D 5E and escape-room-quality conundrums with The Puzzling Temple of Flummox Heist.
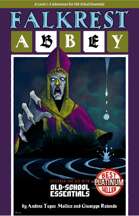
The forlorn Falkrest Abbey in the icy Lune Mountains is where the Queens and Kings of Yore used to be crowned and buried, along with their treasures. According to legends, the Fountain of St. Brynedd still pours its miraculous water somewhere inside. But what caused the fall of the blessed Abbey? Falkrest Abbey is a level 1–3 dungeon adventure for Old-School Essentials. Written by Andrea Tupac Mollica and Giuseppe Rotondo, with original art by Zaira Diana. Content: A 19 room dungeon with exploration, combat, mystery, puzzles and NPCs Encounters and events along the way on the icy Lune Mountains Several hooks and alternate outcomes with possible repercussions on your campaign 3 new monsters 2 new magic items, plus one almighty magic vial of miraculous water Original art by Zaira Diana Map drawn with dungeonscrawl Utility: Treasure & monsters overview sorted by room Interactive hyperlinked map and index Interactive hyperlinked map snippets accompanying room descriptions Printable hand-outs (optional) Extra files: VTT friendly maps without room numbers, monsters, secrets doors etc

The Hag's Hexes is a 66 page guide designed by Dungeon Masters Guild luminaries like JVC Parry and Janek Sielicki alongside rising stars and old stalwarts like Matt Butler, Matthew Gravelyn, and Tim Bannock. It was created with one thing in mind: to make hags more than the sum of their (often meager) Challenge ratings, giving them the mechanics, roleplay potential, and weird magic that can inspire campaigns, lay low kings and warlords, and potentially ensnare unwary Player Characters into campaign-changing curses or long-term bargains that force them into terrible moral quandaries! Split into five chapters, the authors have provided everything a DM needs to terrify their players for years to come. The Bestiary features over a dozen monsters; some are new hags, some are their minions or even their mobile lairs, and one of them -- the Shaitan AKA Desert Hag -- was featured in Monsters of the Guild! Bargains & Curses is a chapter filled with ideas that can kick-start campaigns, threaten valued NPCs, or put Player Characters' very existence and morality at stake. Chapter 3 includes two dozen items of wonderment, weirdness, and dread, ranging from fairy tale-inspired items of whimsy to terribly cursed items of horror. Chapter 4 is titled "Filthy, Vile & Downright Dirty" and provides dozens of roleplaying tips to make hags come alive, new mechanics inspired by and expanding on Volo's Guide to Monsters (coven spell lists, aunties, grandmothers, alternative coven members), and ends with useful combat tactics for each of the hags from the Monster Manual and Volo's Guide, as well as tactics for covens. Finally, Chapter 5 presents five encounter groups (with sub-encounters) to give you quick story seeds and monster lists that you can put together in minutes to create a single encounter or to inspire a full campaign, and ends with three full-length adventures -- each with 3-5 encounters -- that showcase many of the new monsters, rules, magic items, and so on that appeared in earlier chapters. Each of these adventures comes with an encounter map meant to act as inspiration for hag lairs, and they include useful mechanical ideas for terrain effects and descriptive keywords listed directly on the map for added inspiration and easy customization! Designed by Tim Bannock. Written by Matt Butler, JVC Parry, Janek Sielicki, and Tim Bannock. Edited by Matthew Gravelyn and Tim Bannock. Cover Art by Elena Naylor. Cartography by Tim Bannock using Inkwell Ideas' Dungeonographer (Dungeonographer is copyright Inkwell Ideas). Layout & Graphic Elements by Elena Naylor with Tim Bannock. Interior Art by Arcana Games, Bruno Balixa, David Lewis Johnson, Dean Spencer, Earl Geier, Filip Gutowski, Jacob E. Blackmon, Joyce Maureira, Petr Kratochvil, Jayaraj Paul, Brian Brinlee, and Wizards of the Coast.

Far from the nearest town, hidden deep in the forest, lies a marshy, boggy valley. Woodsmen and hunters shun the place—kept away by rumours of a terrible beast lairing within and of a ghost haunting the valley’s boggy mere. But, as well as great danger, treasures magical and mundane may yet lie unclaimed in the valley for three unexplored tombs built by ancient hands, stand amid the mud and reeds. Dare you explore the Shunned Valley of the Three Tombs?

No-one knows why, but many of the villagers of Greenmist have been going insane. Not only that, but something has caused the surrounding environment to transform into fetid swamps. Heroes from far and wide have gone into the swamps to destroy the source of the madness, but none have returned. The truth is that the psychic whispers of an aboleth have invaded the minds of Greenmist's people. The creature called Seedooloo has been using forbidden magic, mad science, and the strange ability of his kuo-toan worshipers to grant himself the power to drive the surface world to insanity. The Call of Seedooloo includes monsters found in Mordenkainen's Tome of Foes.

Dungeon Full of Monsters is a modular megadungeon for use with Labyrinth Lord and other old school fantasy role-playing games. The megadungeon is composed of 50 individual sections, separated into 5 different levels. You can assemble these in any configuration you like, either randomly or not, either before the campaign or on-the-fly in play. You can also use these sectiosn on their own, without reference to the larger dungeon itself. The second half of the book contains dozens of monsters, illustrated in full colour, often with multiple variations and types. Combined with the unique monsters located in specific dungeon sections, this book contains over 150 different monster stat blocks. There are criminal organizations, insane cultists, meddling deities, evil wizards, undead kings, infernal demons and other invaders from beyond the stars, numerous unspeakable horrors and arcane beasts, and even a few rival adventurers. Use these monsters with this dungeon or any other. Specific conversion guidelines for The Nightmares Underneath are also provided.
In the city of Waterdeep rests a tavern called the Yawning Portal, named after the gaping pit in its common room. At the bottom of this crumbling shaft is a labyrinthine dungeon shunned by all but the most daring adventurers. Known as Undermountain, this dungeon is the domain of the mad wizard Halaster Blackcloak. Long has the Mad Mage dwelt in these forlorn depths, seeding his lair with monsters, traps, and mysteries—to what end is a constant source of speculation and concern. This adventure picks up where Waterdeep: Dragon Heist leaves off, taking characters of 5th level or higher all the way to 20th level should they explore the entirety of Halaster’s home. Twenty-three levels of Undermountain are detailed herein, along with the subterranean refuge of Skullport. Treasures and secrets abound, but tread with care!
"The magic in his flying island sputters and fades. Brave adventurers will enter the wizard’s floating workshop, solve the puzzles and unravel its mysteries before catastrophic failure sends the island crashing down to earth." The sequel to Hideous Daylight (but can be run independently). This adventure focuses heavily on puzzle-solving and exploration 19 keyed locations Written for the Old-School Essentials (OSE) rule system

Inside the woods near Burke's Crossing lurks a very real danger. It began as a sense of unease, a feeling of being watched, but now people are disappearing. The lumberjacks who have stayed in the little village talk of ghosts and other superstitions. Or at least they did - until a mysterious statue appeared in a clearing near the logging camp. As if matters weren't strange enough, two mages have arrived and begun hiring armed guards to escort them into these very same woods. Is there a connection, or is it just coincidence? Either way, be prepared! You never know what's out there waiting... and watching. "Eye of Pain" is the first of three Monstrous Arcana adventures featuring the cunning and deadly beholder. If can be played as an individual adventure or as part of the series which continue in "Eye of Doom" and concludes in "Eye to Eye." For four to six characters of levels 4-8.

A minion of chaos has come to the Prime Material Plane from the void of the Far Realms to terrorize and conquer in the name of its masters. The PCs must act quickly to assemble a legendary artefact powerful enough to weaken the minion so it can be defeated. Pgs. 20-47

The deserts of Osirion—land of pharaohs and ancient tombs—hide not just untold wonders, but also unspeakable dangers. When the vast sand dunes part to reveal the ancient pyramid of the legendary Pharaoh of Sphinxes, glory seekers from across many nations race toward it, each fighting to be the first to claim its wonders. But the storied pharaoh doesn't rest quietly within this monument, and his tomb was designed to slaughter any who would dare trespass.

The Frozen Necromancer is a three-part adventure for Fifth Edition that takes player characters from levels 1 to 4. This adventure is the first in a storyline of four modules called The Demonplague that can be used as an entire campaign that takes characters from level 1 to 20. The entire adventure (or just pieces, characters, or encounters from The Frozen Necromancer) can be dropped into any fantasy setting with minimal changes

Uncover a Hidden Legacy A lost passageway on the upper level of the most infamous dungeon in Faerûn has recently been uncovered. When a patron hires a band of adventurers to brave the dangers of Undermountain, a search is on to uncover secrets of an apprentice of the dungeon’s lost creator – Halaster.
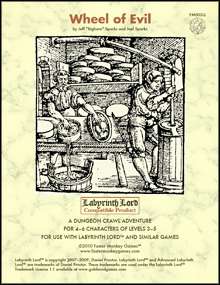
It’s up to your brave heroes to fight off the invading kobolds and save… the cheese?? Well, a job’s a job, and things underground are seldom what they seem. Wheel of Evil is a 16-page adventure for old-school characters of levels 3 to 5, plus a full-color cover, classic maps, and handouts. Compatible with Labyrinth Lord™ and similar games, including the Advanced Edition Companion. "Wheel of Evil" is part of the Eastern Valnwall setting, based on the Known Lands in Labyrinth Lord™! This adventure blends traditional dungeon crawling with unique elements of horror and intrigue, set against the backdrop of a seemingly mundane task turned deadly by the influence of a hidden evil.

The sleepy village of Raven's Lake has a secret: A terrible god lives in the depths of the settlement's namesake. The citizens of Raven's Lake know that something lives in the lake. People who go out on the lake after dark go missing far too often and frequently turn up weeks later with no memory of where they've been. The local church of St. Cuthbert has been abandoned no fewer than seven times in the last two years, each time its lone cleric packing hastily and fleeing town without a word. Adventurers who come to Raven's Lake have a habit of vanishing forever. The truth is that something does indeed live in Raven's Lake but it is far from a deity. It's an exiled aboleth by the name of Zlorthishen. Pgs. 33-36

A streaking comet heralds a wild storm. An ancient temple roars to life with strange and otherworldly chants. Doom is coming to Starspell Mountain. Navigate traps, meet a mad elf, and stop otherworldly threats as you explore the temple on Starspell Mountain. Doom on Starspell Mountain is a one-shot adventure for 3rd-4th level characters made for the world's greatest roleplaying game. The adventure features traps, simple puzzles, and secret passages.
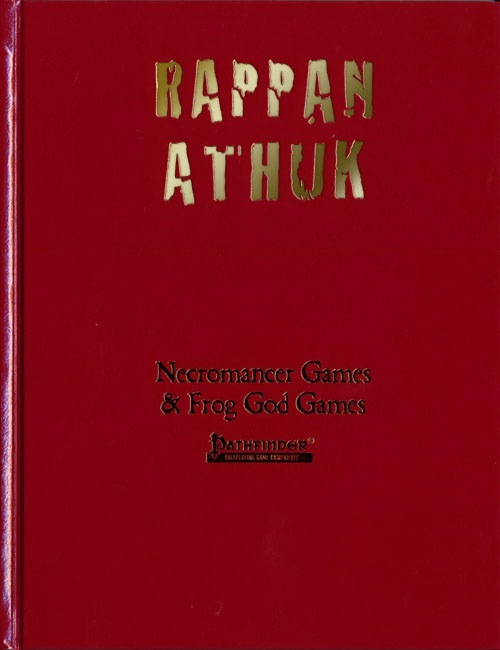
The Granddaddy of All Dungeons Returns! Rappan Athuk, the legendary mega-dungeon by Frog God Games and Necromancer Games is nothing more and nothing less than a good, old–fashioned, First Edition dungeon crawl updated for the Pathfinder Roleplaying Game. Very difficult, Rappan Athuk will truly strike fear into the hearts of the most stalwart adventurers. It offers legions of inventive traps, tricks, strange features, and monsters—many of them never before seen. It affords numerous opportunities for roleplaying, but anyone willing to brave these subterranean halls better arrive ready to rumble, or their lives will be short indeed. Many, many players have lost favored PCs delving into the depths of this dungeon, all the while giggling like children and having the time of their lives. Hundreds, if not thousands of players have combed the halls of Rappan Athuk over the years, seeking treasure and fame, making it one of the best-known dungeon locations the game has ever produced. Even players who have never entered its halls know the term: “Don’t go down the Well!” Also available for S&W and broken into multiple adventures. Also see https://paizo.com/store/byCompany/f/frogGodGames/pathfinderRPG/rappanAthuk for expansions for this product.

The Legend of the Black Monastery Two centuries have passed since the terrible events associated with the hideous cult known as the Black Brotherhood. Only scholars and story-tellers remember now how the kingdom was nearly laid to waste and the Black Monastery rose to grandeur and fell into haunted ruins. The Brothers first appeared as an order of benevolent priests and humble monks in black robes who followed a creed of kindness to the poor and service to the kingdom. Their rules called for humility and self denial. Other religious orders had no quarrel with their theology or their behavior. Their ranks grew as many commoners and nobles were drawn to the order by its good reputation. The first headquarters for the order was a campsite, located in a forest near the edge of the realm. The Brothers said that their poverty and dedication to service allowed them no resources for more grand accommodations. Members of the Black Brotherhood built chapels in caves or constructed small temples on common land near villages. They said that these rustic shrines allowed them to be near the people they served. Services held by the Brothers at these locations attracted large numbers of common people, who supported the Black Brotherhood with alms. Within 50 years of their first appearance, the Black Brotherhood had a number of larger temples and abbeys around the kingdom. Wealthy patrons endowed them with lands and buildings in order to buy favor and further the work of the Brothers. The lands they gained were slowly expanded as the order’s influence grew. Many merchants willed part of their fortunes to the Black Brotherhood, allowing the order to expand their work even further. The Brothers became bankers, loaning money and becoming partners in trade throughout the kingdom. Within 200 years of their founding, the order was wealthy and influential, with chapters throughout the kingdom and spreading into nearby realms. With their order well-established, the Black Brotherhood received royal permission to build a grand monastery in the hill country north of the kingdom’s center. Their abbot, a cousin of the king, asked for the royal grant of a specific hilltop called the Hill of Mornay. This hill was already crowned by ancient ruins that the monks proposed to clear away. Because it was land not wanted for agriculture, the king was happy to grant the request. He even donated money to build the monastery and encouraged others to contribute. With funds from around the realm, the Brothers completed their new monastery within a decade. It was a grand, sprawling edifice built of black stone and called the Black Monastery. From the very beginning, there were some who said that the Black Brotherhood was not what it seemed. There were always hints of corruption and moral lapses among the Brothers, but no more than any other religious order. There were some who told stories of greed, gluttony and depravity among the monks, but these tales did not weaken the order’s reputation during their early years. All of that changed with the construction of the Black Monastery. Within two decades of the Black Monastery’s completion, locals began to speak of troubling events there. Sometimes, Brothers made strange demands. They began to cheat farmers of their crops. They loaned money at ruinous rates, taking the property of anyone who could not pay. They pressured or even threatened wealthy patrons, extorting money in larger and larger amounts. Everywhere, the Black Brotherhood grew stronger, prouder and more aggressive. And there was more… People began to disappear. The farmers who worked the monastery lands reported that some people who went out at night, or who went off by themselves, did not return. It started with individuals…people without influential families…but soon the terror and loss spread to even to noble households. Some said that the people who disappeared had been taken into the Black Monastery, and the place slowly gained an evil reputation. Tenant farmers began moving away from the region, seeking safety at the loss of their fields. Slowly, even the king began to sense that the night was full of new terrors. Across the kingdom, reports began to come in telling of hauntings and the depredations of monsters. Flocks of dead birds fell from clear skies, onto villages and city streets. Fish died by thousands in their streams. Citizens reported stillborn babies and monstrous births. Crops failed. Fields were full of stunted plants. Crimes of all types grew common as incidents of madness spread everywhere. Word spread that the center of these dark portents was the Black Monastery, where many said the brothers practiced necromancy and human sacrifice. It was feared that the Black Brotherhood no longer worshipped gods of light and had turned to the service of the Dark God. These terrors came to a head when the Black Brotherhood dared to threaten the king himself. Realizing his peril, the king moved to dispossess and disband the Black Brother hood. He ordered their shrines, abbeys and lands seized. He had Brothers arrested for real and imagined crimes. He also ordered investigations into the Black Monastery and the order’s highest ranking members. The Black Brotherhood did not go quietly. Conflict between the order and the crown broke into violence when the Brothers incited their followers to riot across the kingdom. There were disturbances everywhere, including several attempts to assassinate the king by blades and by dark sorcery. It became clear to everyone that the Black Brotherhood was far more than just another religious order. Once knives were drawn, the conflict grew into open war between the crown and the Brothers. The Black Brotherhood had exceeded their grasp. Their followers were crushed in the streets by mounted knights. Brothers were rounded up and arrested. Many of them were executed. Armed supporters of the Black Brotherhood, backed by arcane and divine magic, were defeated and slaughtered. The Brothers were driven back to their final hilltop fortress – the Black Monastery. They were besieged by the king’s army, trapped and waiting for the king’s forces to break in and end the war. The final assault on the Black Monastery ended in victory and disaster. The king’s army took the hilltop, driving the last of the black-robed monks into the monastery itself. The soldiers were met by more than just men. There were monsters and fiends defending the monastery. There was a terrible slaughter on both sides. In many places the dead rose up to fight again. The battle continued from afternoon into night, lit by flames and magical energy. The Black Monastery was never actually taken. The king’s forces drove the last of their foul enemies back inside the monastery gates. Battering rams and war machines were hauled up the hill to crush their way inside. But before the king’s men could take the final stronghold, the Black Brotherhood immolated themselves in magical fire. Green flames roared up from the monastery, engulfing many of the king’s men as well. As survivors watched, the Black Monastery burned away, stones, gates, towers and all. There was a lurid green flare that lit the countryside. There was a scream of torment from a thousand human voices. There was a roar of falling masonry and splitting wood. Smoke and dust obscured the hilltop. The Black Monastery collapsed in upon itself and disappeared. Only ashes drifted down where the great structure had stood. All that was left of the Black Monastery was its foundations and debris-choked dungeons cut into the stones beneath. The war was over. The Black Brotherhood was destroyed. But the Black Monastery was not gone forever. Over nearly two centuries since its destruction, the Black Monastery has returned from time to time to haunt the Hill of Mornay. Impossible as it seems, there have been at least five incidents in which witnesses have reported finding the Hill of Mornay once again crowned with black walls and slate-roofed towers. In every case, the manifestation of this revenant of the Black Monastery has been accompanied by widespread reports of madness, crime and social unrest in the kingdom. Sometimes, the monastery has appeared only for a night. The last two times, the monastery reappeared atop the hill for as long as three months…each appearance longer than the first. There are tales of adventurers daring to enter the Black Monastery. Some went to look for treasure. Others went to battle whatever evil still lived inside. There are stories of lucky and brave explorers who have survived the horrors, returning with riches from the fabled hordes of the Black Brotherhood. It is enough to drive men mad with greed – enough to lure more each time to dare to enter the Black Monastery.
Freeport is a fantasy “free city” you can place in a fantastic setting. Its basic premise is a pirate city gone legit… at least on the surface. In truth, the pirate tradition is alive and well in Freeport, but camouflaged by a veneer of respectability. These days the city’s pirates are privateers, legalized pirates Freeport loans out to the highest bidder. You’ll learn more in the short history of the city that follows. This should help give you a taste of the flavor of Freeport before the adventure begins and the given background is all you need to run this adventure. It is an ideal starting place for a new campaign as the player characters find themselves stranded in Freeport after a deal goes sour. A seemingly simple job plunges them into the strange underside of the city, where they uncover secrets worth dying for. Death in Freeport is the first from the Freeport trilogy, together with Terror in Freeport and Madness in Freeport. Synopsis: Death in Freeport drops the player characters into the midst of political and magical intrigue, as the hidden Brotherhood of the Yellow Sign manipulates events to bring its dread god to the world. Freeport is still a bustling center of trade, but evil currents run beneath the surface. There are secrets here, and questions unanswered. The characters will undoubtedly learn there is more here than they expect in a simple seaport. The question is, will that knowledge kill them? As the adventure begins, the player characters (PCs) have just come to Freeport on a merchant ship. While on the docks, the PCs are attacked by a press gang, who mistake them for easy marks. The press gang is handily beaten off; since they are unused to real resistance. A bookish young man named Brother Egil then approaches the PCs. He says that he’s been looking for a group that can take of itself, and that he has a job for them if they are interested: finding a missing librarian. The missing man, Lucius, disappeared two days previously, and Egil is eager to find him. Egil gives the PCs some background on Lucius and his strange behavior. The PCs are then free to investigate: They are likely to visit Lucius’s home, the temple to the God of Knowledge, and an orc pirate ship. This should form a picture of Lucius as a man searching for his own past—who found something he wasn’t counting on. Following a trail of clues, the PCs learn about the Brotherhood of the Yellow Sign. With a little luck, the PCs can trail the cultists back to their hideout, penetrate the lair, and discover secret tunnels underneath it. Deep underground they find degenerate serpent people, and eventually Lucius himself. The librarian has been tortured badly and will die without aid. The PCs also have to deal with the leader of the cult, a man they may recognize from the temple. When the cult priest is slain, they are in for an even bigger surprise. He was not human at all, but a serpent man in disguise. What this means for Freeport only the gods can say.