
Anandak, a red dragon, has taken over an abandoned dwarven stronghold as his lair. He has also assembled together a rough confederation of monsters to act as his bodyguard. Anandak is preparing to enter into an alliance with the Black Prince, the March Lord Draven. The plan is for Anandak's monster allies to terrorize the lands north and east of Knacker Knob while the Black Prince, on pretext of marching to the aid of Knacker Knob, take control of Knacker Knob and the surrounding region. An emissary from the Black Prince, Lord Gonzaga, is currently in the dungeon, and he is in possession of papers that might reveal the Black Prince's treasonous plot. The lair is horribly overcrowded because monsters of all tribes and gangs are gathered to take counsel with the red dragon. Monsters are sleeping in the hallways because there is so little room, and the antagonism between races is at flash point. The PCs may be able to fan these resentments into intermonster battles. League of the Red Serpent is the third dragon's lair to conquer. Part of TSR 1073 The Dragon's Den

A strangely delivered advertisement has led you to a sage named Demetrios. He needs a rare component to complete a desperately needed potion. The journey to retrieve it will take you through a large, unexplored swamp to a ruined keep, the former headquarters of a vile cult that once claimed the lives of many innocent youths. You cautiously accept the mission... To solve the mysteries of "Baltron's Beacon," the characters must excel in handling wilderness, building ruins, traps, puzzles, and new monsters. This adventure, originally designed for tournament use, is now available for your own campaign. TSR 9152

Giants have been raiding the lands of men in large bands, with giants of different sorts in these marauding groups. Death and destruction have been laid heavily upon every place these monsters have visited. This has caused great anger in high places, for life and property loss means failure of the vows of noble rulers to protect the life and goods of each and every subject -- and possible lean times for the rulers as well as the ruled. Therefore, a party of the bravest and most powerful adventurers has been assembled and given the charge to punish the miscreant giants. This module contains background information, referee's notes, two level maps, and exploration matrix keys. It provides a complete module for play of ADVANCED DUNGEONS & DRAGONS, and it can be used alone or as the first of a three-part expedition adventure which also employs DUNGEON MODULE G2 (GLACIAL RIFT OF THE FROST GIANT JARL) and DUNGEON MODULE G3 (HALL OF THE FIRE GIANT KING). TSR 9016

Blinsky's Toyshop is our take on what happens to Blinsky and Piccolo during, or after the Curse of Strahd campaign. Blinsky, the toymaker in Vallaki with the cute monkey wearing a pink tutu, received a large inheritance from a long-time client. The client, Obtavius Swat, a retired adventurer and avid collector of toys, left his entire estate to Blinsky. The estate included coin, precious gems, art, and his collection of toys, some made by Blinsky and others he acquired during his travels. Blinsky used the fortune to pay a wizard to create a small island in the middle of Lake Zarovich, located just outside of Vallaki. He then paid masons and workers to build a fantastic new toyshop, which he designed to be an experience for both the young and old alike. Though the number of children in Barovia was increasing, mostly imparted to the devil Strahd’s downfall, Blinsky wanted to touch the inner child of the adults in the city. He wanted happiness. He wanted smiles. He named the castle Blinsky’s Toyshop of Marvels. One of the toys, a small silver tiara kept in a black satin-lined ivory jewelry box, was such a lovely piece. Blinsky couldn’t stand the thought of leaving it in the box. He already had enough gold and losing the small tiara wouldn’t be a large loss, so he decided to give it to his monkey – Piccolo (see Creatures of the Toyshop). He smiled at the thought of her running around in her pretty, shiny tiara. Sadly, as Barovian luck would have it, trapped inside the tiara is the sole of an evil gnome wizard named Aribetha Strangge. In his old age, Obtavious Swat forgot that he and his fellow adventurers used the tiara to imprison the gnome’s soul. Yesterday, when Blinsky placed the tiara on Piccolo’s head, silver tendrils cascaded from the tiara and into poor Piccolo’s skull, allowing Aribetha to control the monkey. Now, Aribetha has incapacitated Blinsky in the toyshop’s tower, brought many of the toys to life, and imprisoned or killed many of the workers and customers. The adventure includes costumes (which the character may wear), Strahd Hand Puppets, and a possessed Piccolo.

After having one adventure under your belts you set sail to deliver a package across the open seas. A problem with nature causes their vessel to make an unscheduled stop on a small island that was home to a spice dealer for water. Problems ensue on the island and the party quickly discovers they aren’t “feeling themselves”. This item was played at WhosYerCon convention this past year in Indianapolis!

The Sea Witch is a short adventure for four 10th-level characters. The difficulty of the adventure can be adjusted by changing the level of main antagonist (Black Molly, the sea hag pirate) or by altering the number of her ogre servants. To tailor the encounter to groups of different levels, refer to table 4-1 in Chapter 4 of the DUNGEON MASTER’S GUIDE. The adventure is set off a lightly populated coastline known as Misty Bay, but adapts easily to any coastal region in existing campaigns. The sea hag known as Black Molly is a notorious pirate who has plagued the coastal cities for the better part of a decade. A successful Knowledge (local) check (DC 15) will reveal that Molly and her ogre crew have a filthy reputation as merciless killers who delight not only in plundering vessels for their riches, but also in destroying the ships themselves and sending all hands to the bottom of the sea. Now the villain and her followers have seized control of the Old Lighthouse of Misty Bay located off a lightly populated coastline. For generations the lighthouse beacon has protected the fishermen of this region, warning them of the dangerous rocks that lurk just below the level of the high tides. Recently, the hag has put out the beacon, darkening the lighthouse; misery and destruction are sure to follow as ships start to blunder into the rocks. Blackmail is apparently Black Molly’s aim in this venture: She conveyed a message to the nearest shore community, the fishing village of Poisson, demanding the princely sum of 50,000 gp. Until she receives this ransom, she intends to hold the lighthouse and its beacon hostage. The fate of the human keepers who tend the lighthouse is unknown to the seaside communities at this time, but they fear the worst. The Sea Witch is ostensibly a rescue mission: The PCs are pitted against the evil of Black Molly and the brawn of her savage ogre crew. It is the heroes’ task to retake the lighthouse and, if possible, free its captives from the clutches of their jailer. What neither the PCs nor the shore communities yet realize is that while she 1would be pleased to have the gold, Black Molly is in fact after bigger treasure. Molly has no intention of giving up the lighthouse — at least, not until she finds what her master sent her here for. Lying on the sea floor practically at the base of the rock on which the lighthouse sits is the wreck of the war galley Flying Cloud, which according to popular legend was captained by a cleric who wore around his neck an amulet of the planes. Black Molly wants this prize, but so far she hasn’t been able to find it. She’s scoured the wreck without finding any sign of the magic item. Now she’s trying to determine where to search next, for the item might well be somewhere near the wreck. If she can’t find it, she’ll start torturing her captives to find out if they have any useful knowledge about the amulet.

The game is afoot in the royal palace. A thief prowls the dwarven palace, but even more goes on than meets the eye. Set in in a dwarven kingdom, a peace treaty with an aggressive rival kingdom is to be signed with ceremonial gifts exchanged to mark the occasion. However the treaty is put in jeopardy when the ceremonial sword that was gifted to the kingdom is stolen before the signing. The adventure begins when the characters receive a vision that directs them to help the kingdom. They must investigate the mystery of the missing sword, navigating a diverse cast of palace dwarves in order to preserve peace in the kingdom. A tale of intrigue, can the heroes find the sword before it is too late? Pgs. 16-32

The water pounds the base of the cliff with the relentless power of time. Jagged rocks appearing and disappearing in the foam of the sea like gnashing teeth. Above it all on the top of the black cliff sits a small house and the dark light tower. The magistrate has sent your party to investigate why the light has gone dark.
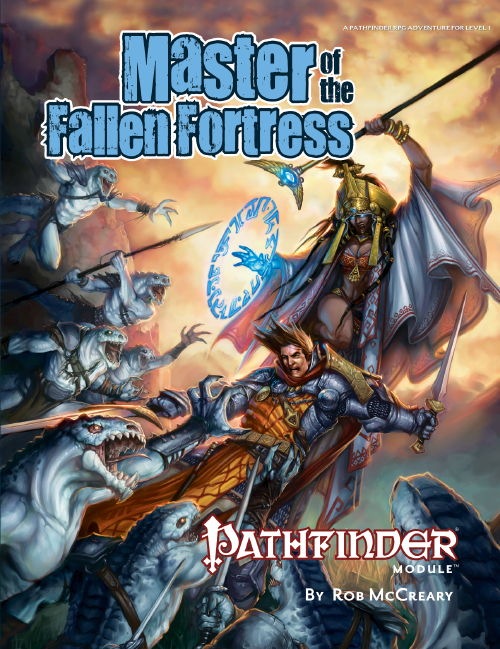
The ruined siege castles outside Absalom have long beckoned adventurers looking to make a name for themselves. Now an earthquake has cracked open one of these fabled ruins, and its lost mysteries and fantastic treasures lie exposed for the first time in centuries. But the tower's empty halls once more echo with living footfalls, and a new master has claimed the Fallen Fortress as his own.
When a petty thief named Hadge gets a lucky break and makes off with a powerful divination focus of the Pathfinder Society's masked leadership, you and your fellow Pathfinders set out to the sparsely populated Taldor frontier to find him and recover the focus. When the local governor tosses Hadge into the brutal Porthmos Prison for a minor crime, your mission suddenly becomes a jail break. Will you free Hadge and uncover the location of the focus before the gangs of Porthmos tear him apart?

Slain in disgrace, reborn in fury, armed to the teeth: Flame returns! Flame is back - and is he mad! The sequel to "Into the Fire" from Dungeon 1. Pgs. 42-63
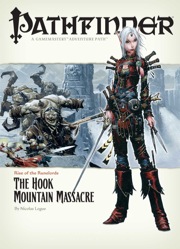
Them Ogres Ain't Right... The Rise of the Runelords Adventure Path continues! The notorious Hook Mountain ogres, known for their violent and savage ways, have slaughtered the soldiers of Fort Rannick. The few surviving rangers need heroes to help them retake this key fortification before the ogres use it as a staging ground for further assaults on the region. Yet why have the ogres chosen now to launch this sudden attack? What sinister force grows in the surrounding wilderness, and what ties to the mysterious Sihedron Rune do the ogres of Hook Mountain hide? Are the rumors of an army of giants massing for war true?

The Triad Series comes to a head with the party be called upon to again save the land. While successes against both the Goat and Lion branches of the triad have been successful, the toughest group, the Dragons, has formed the army and is moving against the forces of good. Can your party meet the force that General Barsoon has assembled?

None know from where the Heresiarch first came, but all remember the night that it did. It rode down from the bleeding stars on a great serpent, hurling bolts of obsidian lightning that shattered the monuments and capitols of every nation. Its infernal army swept aside the defenses of the mortal empires in a single hour, decimating legions once thought to be the invincible fist of humanity's god-kings. Faceless priests - each bearing the symbol of the trident - drifted through the fallen cities and scorched villages on a frigid wind, and when they rose to greet the huddled men and women ringed by their festering, bloated dead, they spoke a single, simple offer: worship the Heresiarch or die. Thousands of crusaders fell tonight so that you might be given this chance. In a last stand that, for the first time, united all of the empires of humanity as brothers and sisters, a way was cleared into an infernal stronghold said to contain a gate to the Heresiarch’s fane. All is silent save for the clangor of distant battle. Surrounded by grim-faced knights and teary-eyed peasants – their hands clasped in desperate hope – you step through the glowing, churning doorway, knowing there will be no help and likely no return. Published by Defy Danger and Save Versus Death

Base of Operations is a short adventure intended for four 5th-level characters. DMs can easily modify the adventure to suit higher- or lower-level adventurers, or larger or smaller parties of adventurers. Simply adding a few monsters to every encounter area makes the adventure more challenging for larger parties, and adding levels to any of the humanoids can make them more of a threat to high-level groups. For low-level adventurers, make the relationship between the two factions within Brightstone Keep more strained, and take away a few monsters from each group. You can remove levels from some of the humanoids in the adventure to make it a lower-level challenge, but it is important that the orc cleric (described in encounter area 8) still have the ability to animate the dead. Still, he can have fewer minions around him when encountered, and that makes him less of a challenge for a lowlevel party.

Expand your game with this collection of 56 NPCs of various Challenge Ratings, thirteen of which include maps and details of their lairs. Add these NPCs as a side-quest, a main villain, a one-shot, a bounty for easy money, or however else you wish. Written by some of the best-selling authors on the Dungeon Masters Guild and outstanding podcasters, each NPC includes an image, a backstory, motives, flaws, and a stat block. Some even include new magic items!

The Ogre Magi of Jade Rock is a companion adventure made to go along with the events unfolding in Folio#16 (WS3 Distant Turtle City). It contains information needed to run a side adventure that will help characters in their journey through Distant Turtle City. The Ogre Magi of Jade Rock has invited the characters to reclaim his lost home, and in turn collect valuable supplies of magical healing that will certainly be required to win the day against the corrupted forces of the city's fortified castle. This adventure is formatted to both 1E & 5E gaming rules.

This deluxe adventure takes heroes into the ruins of Gardmore Abbey, a monastery that was once the base of a militant order of paladins devoted to Bahamut. According to legend, the paladins brought a dark artifact back from a far crusade and stored it in their abbey for safekeeping, and evil forces gathered to assault the abbey and take it back. What the legends don’t tell is that this artifact was actually the Deck of Many Things, a force of pure Chaos. This adventure brings characters into the extensive dungeons beneath the ruins - dungeons that are warped and twisted with the raw forces of Chaos surrounding the cards of the deck.
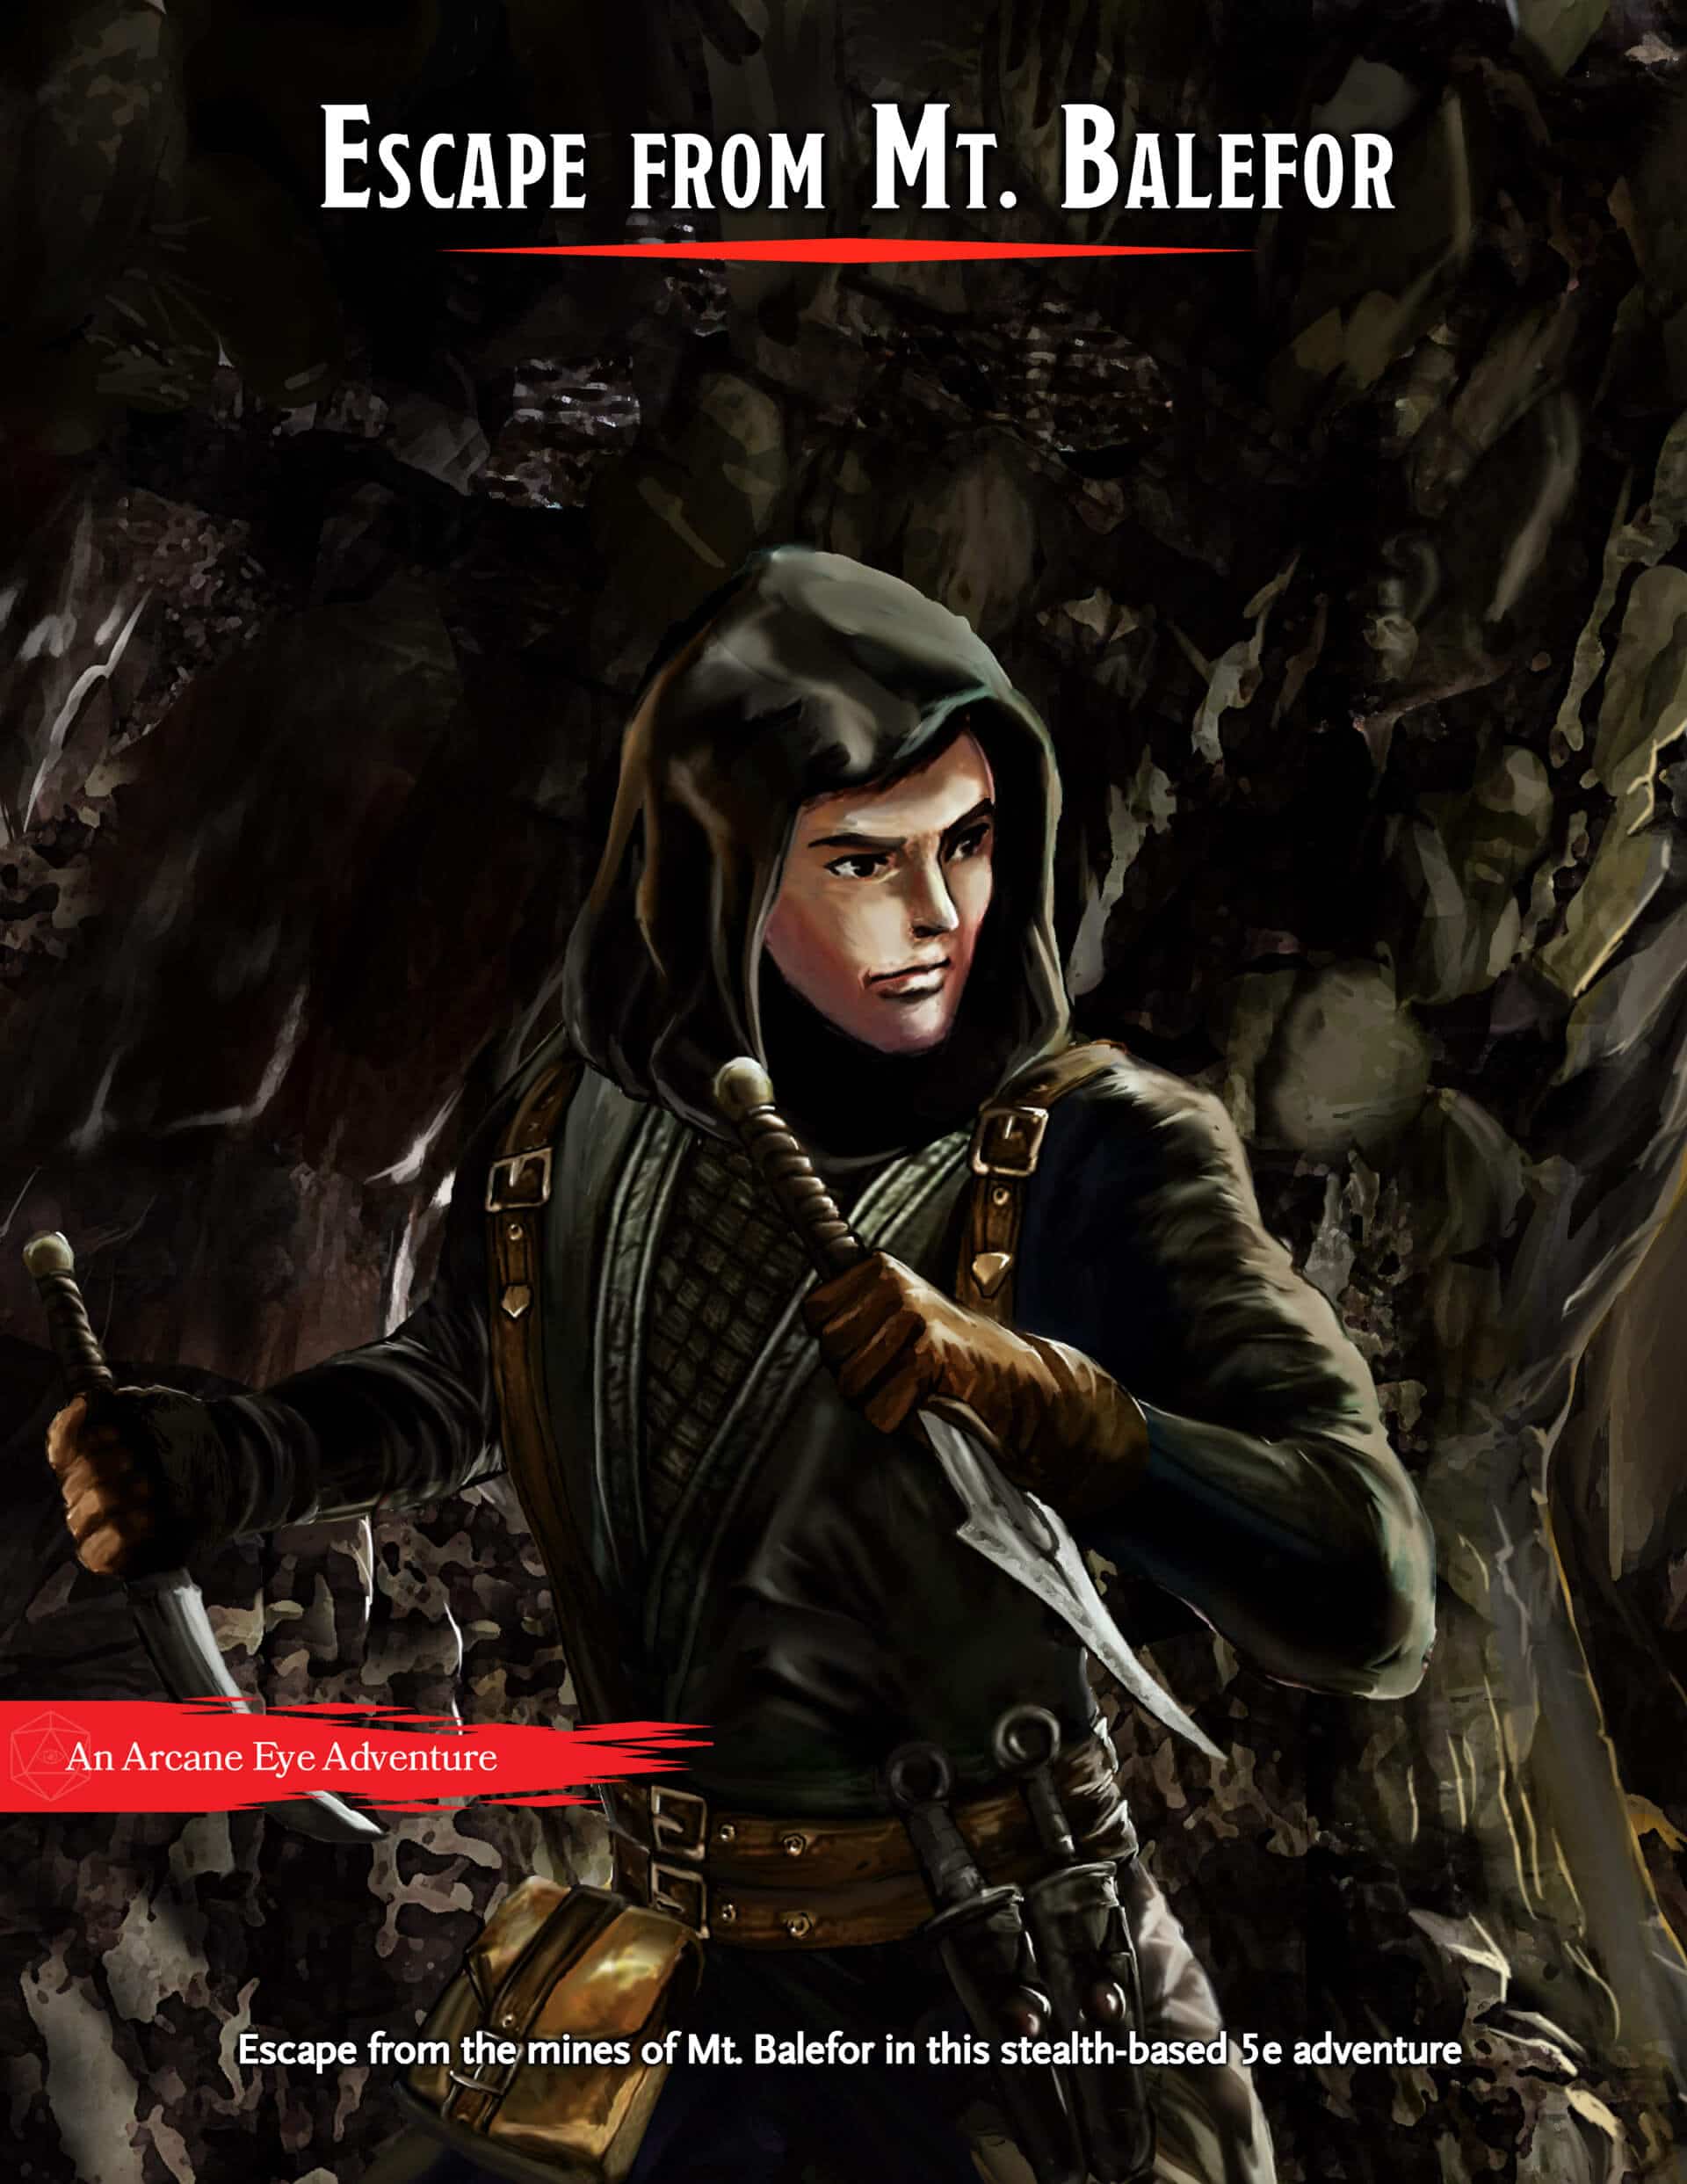
What’s Included Escape from Mt. Balefor is a self-contained 8-10 hour adventure for three to five 5th level characters. This premium module contains a full three-part story, battle maps, and NPC stat blocks. Your Mission Your party of Wood Elves will start in the mines and have to sneak and backstab their way to freedom. There are a number of chances to choose your path, whether you plan to avoid fighting or want to kill every last High Elf in the mines. There will also be a number of ways to affect the world around you if you choose to continue the story after the party escapes from the mines.

Driven by Molo of the Five Wives, this adventure revolves around a test to determine membership into the famed Wizard's Conclave. Does the party have what it takes to pass this test, thus gaing them much needed access to the Conclave's resources? This adventure is formatted to both 1E & 5E gaming rules.