
Ranked in 2004 as the single greatest adventure of all time by Dungeon magazine, this is a compilation of three series of modules: the G series "G1-2-3 Against the Giants" (G1 Steading of the Hill Giant Chief, G2 Glacial Rift of the Frost Giant Jarl, G3 Hall of the Fire Giant King), the D series (D1 Descent into the Depths of the Earth, D2 Shrine of the Kuo-Toa, D3 Vault of the Drow), and Q1 Queen of the Demonweb Pits. The characters begin by attempting to stop giant raids that have become prolific. They find out that the giant alliance is caused by the drow. They then descend into the Underdark in order to find the drow and stop their sinister plan. TSR 9179

Giants have been raiding civilized lands in bands, with giants of different sorts in these marauding group. Death and destruction have been laid heavily upon every place these monster have visited. This has caused great anger in high places, for life and property loss means failure of the vows of noble rulers to protect the life and goods of each and every subject--and possible lean times for the rulers as well as the ruled. Therefore, a party of the bravest and most powerful adventurers has been assembled and given the charge to punish the miscreant giants. Remake of the original series of AD&D adventure.
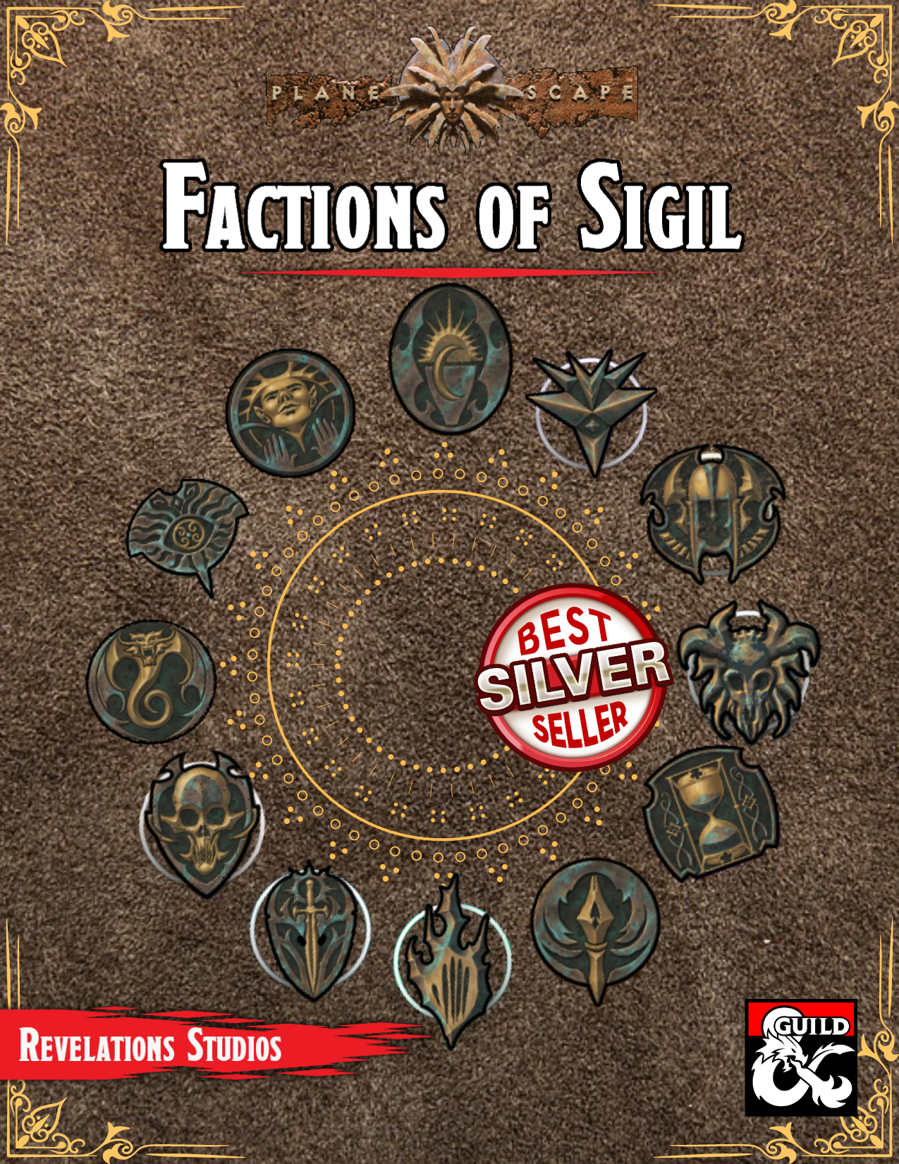
We get it. Factions are an integral part of D&D, but it's not always clear how to use them in your campaigns. Luckily, Factions of Sigil has you covered for each of the twelve main factions found across Sigil and the Outlands! This supplement goes over the various rules and lore around the primary factions found in Sigil and the Outlands, making it easy for any new or veteran DMs to integrate the factions more into the core stories being told, and making them feel more useful for the players that choose to join. In this adventure, the Harmonium in Sigil request the characters travel to Haerton Fort in the Outlands to capture a fugitive, only for the characters to be caught in the middle of a siege!

A storm of unparalleled fury has been ravaging the peaks of the Earthspur Mountains for a tenday, and the Monastery of the Yellow Rose sits in its eye for now. Some monks have fled the monastery to the safety of Mulmaster and beseech you to convince their more obstinate brothers to retreat to the city before the eye of the storm shifts, and the monestary is in terrible danger. Can you brave the elements and convince the monks to escape?

The loss of Skyreach Castle in Hoard of the Dragon Queen was a major setback to the Cult of the Dragon, but still only a setback. The cult is determined to retake the castle and claim Tiamat’s lost treasure buried in its frozen walls and cloudstuff vaults, but they aren’t the only ones. Blagothkus the cloud giant is still the master of Skyreach, and he has gone to the hall of his cousin Brunvild, ice lord of Uldoveld, for the resources to repair and reoccupy the castle. At the same time, the party is dispatched by the Council of Waterdeep to reclaim some of the stolen treasures lost when the castle fell.

In this town, nothing goes like clockwork. A voice in the darkness offered him power, with only one string attached: first he had to find some adventurers. A fiend and minions of the plane of fire have set up shop beneath a small town, and have been attracting evil minions to their lair! In this town of Jenkel, the religious leader (named Broderick) is secretly under the influence of the demon and has been doing her will out of his own greed for power. A tilted pyramid appeared in the town years ago, and is actually the tip of a tower buried in the town. The tower leads to a dungeon and a shrine where the party can fight off the demon and rid the town of the evil influence. Pgs. 18-31
The people of Feycircle believed the fairy ring for which their town was named protected them from the encroaching sands of the Western Wastes. When the ring withered, they learned they were right. Feycircle’s dewflecked pastures and verdant forests succumbed to the Wastes in an instant. Feycircle sank deep into the sands and was soon occupied by a tribe of fanatical dust goblins, a herd of dogmoles, and the giant worms that caused the blight. The PCs may explore the keep—the only structure remaining in the dusty sinkhole now called the "Pit of the Dust Goblins." Inside the keep is an entrenched gatekeeper who can divulge that two children remain in town, imprisoned by the goblins. The dust goblins have summoned and imprisoned a selang—a shadow fey—inside the blighted fairy circle. The goblins fear open combat and have laced the sunken keep with traps, and would sooner parley than fight.

Lots of stronghold assaults and shipboard travel/encounters in this one. This adventure's deep political basis might be seen as an introduction for the domain-focused adventures of Companion-level play. This adventure is for use with the Dungeons & Dragons Basic, Expert, and Companion Rules, and includes the intrigue of engaging with nobility's lands and agendas. Intro: All is not well in the kingdom of Vestland. Not only is the king dead and the holy Sonora Crown missing, but the heir to the kingdom was lost at birth and no on knows where to find him. As if this wasn't bad enough, the forces of the Ethengar Khanate, never on the best of terms with Vestland, are now massing on the borders, hoping to take advantage of Vestland's plight. To complete the rosy picture, traitors from within also threaten to speed the downfall of the High Kingdom. Sounds like a job for you. You must find the long-lost heir to the kingdom and recover the Sonora Crown, the mystical device without which a king cannot be crowned. Standing in your way are traitors and spies from within and invaders from without the kingdom of Vestland. Time is running out! Can you save Vestland from disaster? TSR 9218

This third installment of the Aumvor saga includes: ● 19 encounters ● Stats for Living Zombies (converted from 3.5e) ● and an introduction to the tower The adventure continues as your PCs make their way to the upper reaches of the tower and learn of the danger involved in moving deeper into Aumvor's dark realm. For centuries Aumvor the Undying has fed upon the life force of innocent folk who stumbled upon his portal traps. For centuries he has planned for and prepared for the eventual return of Netheril as a power in the world. That hope has now faded, and he has returned to his vault to regain strength and begin anew. Even now, he is deep in his tower vault plotting. 𝐁𝐞 𝐬𝐮𝐫𝐞 𝐭𝐨 𝐜𝐡𝐞𝐜𝐤 𝐨𝐮𝐭 𝐓𝐡𝐞 𝐓𝐨𝐰𝐞𝐫 𝐨𝐟 𝐁𝐨𝐧𝐝𝐚𝐠𝐞 𝐩𝐚𝐫𝐭 𝟏 “𝐀𝐮𝐦𝐯𝐨𝐫𝐬’ 𝐖𝐞𝐥𝐜𝐨𝐦𝐞” 𝐚𝐧𝐝 𝐩𝐚𝐫𝐭 𝟐 “𝐅𝐚𝐧𝐞 𝐨𝐟 𝐭𝐡𝐞 𝐉𝐚𝐢𝐥𝐞𝐫𝐬”.

𝐓𝐡𝐢𝐬 𝐢𝐬 𝐭𝐡𝐞 𝐭𝐡𝐫𝐢𝐥𝐥𝐢𝐧𝐠 𝐟𝐢𝐧𝐢𝐬𝐡 𝐭𝐨 𝐭𝐡𝐞 𝐓𝐨𝐰𝐞𝐫 𝐨𝐟 𝐁𝐨𝐧𝐝𝐚𝐠𝐞 𝐟𝐞𝐚𝐭𝐮𝐫𝐢𝐧𝐠: ● Eight deadly encounters ● More deadly traps ● The water maze ● and Aumvor himself! Will your PCs escape with their lives or stand and face Aunvor and put an end to his deadly game?

This AD&D scenario is designed to be a humorous departure from regular adventuring. The "heroes" are a fellowship of monsters on a quest to recover a magical item for an orc chieftain whom they have displeased. Having lost the map given to them, they must gain entry to a frontier outpost - probably by sneaking through sewers - and recover the map from a locked safe in the commanders quarters. Once they again have the map, the monsters must travel overland to an abandoned elven witches' temple on the shore of a mountain lake, where they will find the object of their quest. Pgs. 23-32

You are a Dragon Wing captain aboard the Storm Chaser, a huge levitating Skycastle fueled by powerful arcane forces and electrical energy harnessed from storms. When a hostile castle appears from behind a large cloud bank, you are tasked to lead a team to infiltrate the enemy stronghold and take it down from the inside. The forces aboard the fast-approaching threat would overwhelm the combatants and defenses of the Storm Chaser; failure is not an option. Dragon Wing is a battle focused one-shot designed for 3-5 players of roughly 10th level. With beautifully designed maps and a fully guided sequence of rooms and areas, your players will infiltrate the giant stronghold, tackle intricate puzzles and tough combat scenarios with an array of monsters.
The town of Proskur has been cut off from the rest of the kingdom of Cormyr by a terrible storm, just as its people begins to suffer from a feinting sickness. Now the crops are failing. Are these the acts of a vengeful god? Or something more sinister? While aiding the good peoples of Cormyr in their plight against goblin hordes, the restless dead, a band of cut-throat pirates and the wilds of the Gritstone Moorland, the adventurers must investigate the true cause behind these calamities while uncovering a century old past, following in the footsteps of a legendary band of knights. Will they bring the fight to the evil hag, Bad Blood Hattie in her accursed Bloodtower lair? Or doom Proskur to become a blighted ruin?

The Characters come across an ancient wizard's tower. The nearby keep has been reduced to rubble over the ages, but the tower is in perfect condition. It is surrounded by an impenetrable force field that cannot be breached - not even by the ghost of the long-dead wizard, who has been trapped within for centuries. Surely there must be great treasure within this magical abode. But how to get to it?

A 26-page low level adventure for OSE and other OSR rpgs. "The swamps? Oh, that's a long time since someone got out of there. Vines and crocodiles they say in the big city. But down here we don't believe everything they say up there. Everyone knows what's up with the swamp! The hydra is hungry! We tried to hunt it down last year... that's how i got this wooden stump! What? you? killing the Hydra? well... i didn't make you out for the brave type, that's all..." -Old Mika, fisherman of Gren Against the Hydra The swamps near Gren are infested with strange creatures preying on travellers, the hydra has begun her yearly hunt and the river woman’s daughter has vanished. Last year the neighbouring towns have all gathered together to mount an expedition inside the swamp, but none returned. With nothing more to do priests, druids and citizen have gathered a 2000 gold pieces to clean out the swamp and save the river woman’s daughter from certain death. The adventure comes with detailed tables to explore the swamps, a complex dungeon riddled with encounters, treasure and lore for you to explore. Handouts are also included in the adventure pdf, for you to give to your players and excite their imagination.
Called by the Elder Elemental Eye to serve, four corrupt prophets have risen from the depths of anonymity to claim mighty weapons with direct links to the power of the elemental princes. Each of these prophets has assembled a cadre of cultists and creatures to serve them in the construction of four elemental temples of lethal design. It is up to adventurers from heroic factions such as the Emerald Enclave and the Order of the Gauntlet to discover where the true power of each prophet lay, and dismantle it before it comes boiling up to obliterate the Realms.

The Tower. Standing on a grassy hilltop, it seems unremarkable from a distance. Two stories high, cylindrical, thatched roof. Simple and idyllic. There's even a whisper on the breeze, or maybe a thought in the back of your mind: There's nothing to see here. What brought you in the first place? Just turn around and go back. Those that venture nearer find that it's much more than meets the eye. The closer you get, the taller the tower seems to be... until standing at its base, the tower rises dozens of floors and pierces the sky. Do you have the courage to enter the unknown sanctum? What could possibly await you within? Gather your allies and find out!

The Sea Witch is a short adventure for four 10th-level characters. The difficulty of the adventure can be adjusted by changing the level of main antagonist (Black Molly, the sea hag pirate) or by altering the number of her ogre servants. To tailor the encounter to groups of different levels, refer to table 4-1 in Chapter 4 of the DUNGEON MASTER’S GUIDE. The adventure is set off a lightly populated coastline known as Misty Bay, but adapts easily to any coastal region in existing campaigns. The sea hag known as Black Molly is a notorious pirate who has plagued the coastal cities for the better part of a decade. A successful Knowledge (local) check (DC 15) will reveal that Molly and her ogre crew have a filthy reputation as merciless killers who delight not only in plundering vessels for their riches, but also in destroying the ships themselves and sending all hands to the bottom of the sea. Now the villain and her followers have seized control of the Old Lighthouse of Misty Bay located off a lightly populated coastline. For generations the lighthouse beacon has protected the fishermen of this region, warning them of the dangerous rocks that lurk just below the level of the high tides. Recently, the hag has put out the beacon, darkening the lighthouse; misery and destruction are sure to follow as ships start to blunder into the rocks. Blackmail is apparently Black Molly’s aim in this venture: She conveyed a message to the nearest shore community, the fishing village of Poisson, demanding the princely sum of 50,000 gp. Until she receives this ransom, she intends to hold the lighthouse and its beacon hostage. The fate of the human keepers who tend the lighthouse is unknown to the seaside communities at this time, but they fear the worst. The Sea Witch is ostensibly a rescue mission: The PCs are pitted against the evil of Black Molly and the brawn of her savage ogre crew. It is the heroes’ task to retake the lighthouse and, if possible, free its captives from the clutches of their jailer. What neither the PCs nor the shore communities yet realize is that while she 1would be pleased to have the gold, Black Molly is in fact after bigger treasure. Molly has no intention of giving up the lighthouse — at least, not until she finds what her master sent her here for. Lying on the sea floor practically at the base of the rock on which the lighthouse sits is the wreck of the war galley Flying Cloud, which according to popular legend was captained by a cleric who wore around his neck an amulet of the planes. Black Molly wants this prize, but so far she hasn’t been able to find it. She’s scoured the wreck without finding any sign of the magic item. Now she’s trying to determine where to search next, for the item might well be somewhere near the wreck. If she can’t find it, she’ll start torturing her captives to find out if they have any useful knowledge about the amulet.
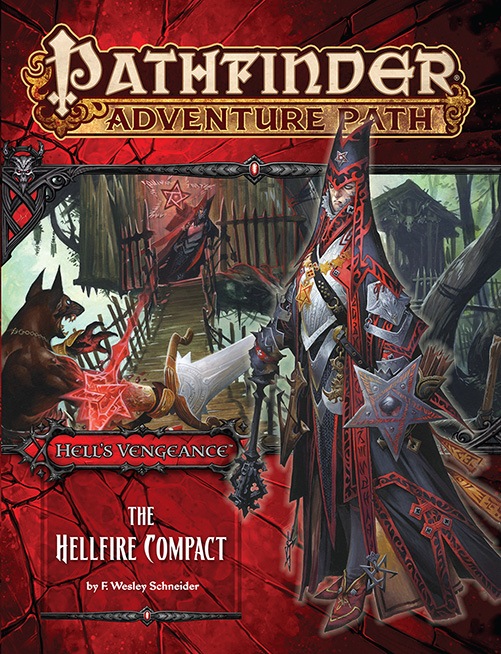
The Hell's Vengeance Adventure Path begins with "The Hellfire Compact," an exciting new adventure in which the players take the roles of evil characters in the diabolical empire of Cheliax! A paladin of Iomedae and knight-errant of the Glorious Reclamation comes to the town of Longacre, inspiring the citizens to join the uprising against the Thrice-Damned House of Thrune. First as amoral mercenaries, then as retainers of the wicked archbaron of Longacre, the evil adventurers must move quickly to put down the insurgency and keep the town from falling to the knight's rebellion.

Blinsky's Toyshop is our take on what happens to Blinsky and Piccolo during, or after the Curse of Strahd campaign. Blinsky, the toymaker in Vallaki with the cute monkey wearing a pink tutu, received a large inheritance from a long-time client. The client, Obtavius Swat, a retired adventurer and avid collector of toys, left his entire estate to Blinsky. The estate included coin, precious gems, art, and his collection of toys, some made by Blinsky and others he acquired during his travels. Blinsky used the fortune to pay a wizard to create a small island in the middle of Lake Zarovich, located just outside of Vallaki. He then paid masons and workers to build a fantastic new toyshop, which he designed to be an experience for both the young and old alike. Though the number of children in Barovia was increasing, mostly imparted to the devil Strahd’s downfall, Blinsky wanted to touch the inner child of the adults in the city. He wanted happiness. He wanted smiles. He named the castle Blinsky’s Toyshop of Marvels. One of the toys, a small silver tiara kept in a black satin-lined ivory jewelry box, was such a lovely piece. Blinsky couldn’t stand the thought of leaving it in the box. He already had enough gold and losing the small tiara wouldn’t be a large loss, so he decided to give it to his monkey – Piccolo (see Creatures of the Toyshop). He smiled at the thought of her running around in her pretty, shiny tiara. Sadly, as Barovian luck would have it, trapped inside the tiara is the sole of an evil gnome wizard named Aribetha Strangge. In his old age, Obtavious Swat forgot that he and his fellow adventurers used the tiara to imprison the gnome’s soul. Yesterday, when Blinsky placed the tiara on Piccolo’s head, silver tendrils cascaded from the tiara and into poor Piccolo’s skull, allowing Aribetha to control the monkey. Now, Aribetha has incapacitated Blinsky in the toyshop’s tower, brought many of the toys to life, and imprisoned or killed many of the workers and customers. The adventure includes costumes (which the character may wear), Strahd Hand Puppets, and a possessed Piccolo.