
The company discovers the Easterly Inn, a piece of the Shire in the land of the Beornings. But the Wild is still the Wild, and it takes more than Hobbit cooking to keep adventures at bay; in no time, the companions find themselves involved in the search for a missing trade caravan. Their quest will put them on the road to the High Pass, and see them go over hills and under hills. Published by Cubicle7

An original one-shot adventure designed for 3-6 level 3 characters. SUMMARY: A recent archaeological expedition in Icewind Dale has uncovered a remarkable discovery: the Spine of the World mountain range is, in fact, the actual spine of a great giant. The discovery confirms an ancient legend, that giants as tall as mountains once roamed the Forgotten Realms. Lead archaeologist Silja Stengravar knows the truth. Centuries ago, a lich, threatened by the giants’ ancient elemental power, banished their race to an abandoned planet known as Kaiva. The lich was defeated, but its curse remains, protected by its minions in the heart of Garagai Mountain. Held captive to the curse, the giants are suspended in time, unable to roam free and claim Kaiva as their own. Silja’s discovery has summoned the portal to Kaiva. Will adventurers brave the perilous journey through the hostile and awe-inspiring planet to destroy the curse and reawaken the giants? DETAILS: 2-4 hour session for 3-6 players Play-tested material Unique items and mechanics Printable cards 16-page campaign guide Enjoy the adventure? Share your experiences with me! Hashtags: #SleepingGiantMountain #GiantsOfKaiva
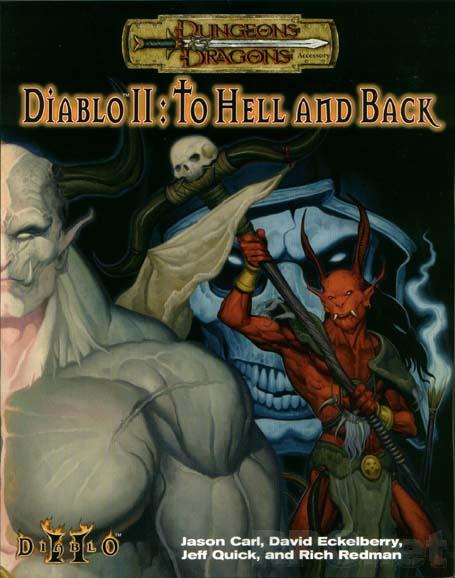
Bringing Diablo II to the tabletop. The legendary Diablo and Diablo II computer games come to life with the release of the tabletop Diablo II: To Hell & Back roleplaying adventure. All a player needs is the Dungeons & Dragons(r) Player's Handbook (0786915501-8/00) to accompany the Diablo II game. Every level and all 4 acts of the computer game are represented in the tabletop mega-adventure, which will also include 64 pages of monsters, information for levels 1-30, and over 60 maps!

Escape from Elturel is a 6-8 hour Dungeons & Dragons adventure for characters of levels 1-2, for use as an introduction to Baldur's Gate: Descent into Avernus. Pilgrims and travelers flock to the holy city of Elturel to bask in the light of its second sun. But when the Companion starts to malfunction, the characters must escape the doomed city before it is pulled down to the Nine Hells. In the aftermath, a caravan of refugees needs their help to find a safe haven in that notorious hive of scum and villainy, Baldur's Gate! The adventure has everything you need to start a new campaign in Elturel, including: - a new adventure hook for Descent into Avernus - short introductory encounters set during and after the fall of Elturel - a skill challenge for escaping Elturel as it is pulled down to Avernus - resources, encounters, travel activities, and NPCs for a caravan to Baldur's Gate - notes for transitioning into Descent into Avernus - two creature and NPC stat blocks - a map pack with two maps by Dyson Logos Escape from Elturel also includes suggestions for combining this adventure with Burial in Baldur's Gate if you want to run a mixed party of characters from Elturel and Baldur's Gate.

While the PCs continue the quest for the missing pages of the Codex of Gamber Dauch they find the lands of Count Elam. The ruler has recently been informed of an agricultural problem with a herd of Anhkheg tearing up the lush farmland. Further investigation will uncover darker secrets in the area, and those involving Drow and Derro!

This area of adventure is a continuation from FV1 – Jeopardy Caverns and picks up where the party left off. If your party discovered the “back door” this is where it leads. It also offers an opening that flanks Jeopardy Caverns that has a perilous rope bridge to navigate! This area provides multiple smaller adventures and was utilized to get the party from different adventures. Portions of this adventure can be used as fillers in your own campaign. I hope you enjoy it as much as my players did!

To Hell and Back Again is the perfect adventure for new players and veterans looking to experience Dungeons & Dragons in a new way! It's written as a solo adventure, where choices have gigantic consequences, but it also provides balanced rules to play with a group or a Dungeon Master as well! This 80 page adventure features: - A heart-pounding origins story that fits perfectly as either a prequel to Descent Into Avernus, a stand-alone adventure, or into your ongoing fantasy campaign. - Beloved characters like Lulu the hollyphant, Mad Maggie and her redcap gang, the archdevil Zariel, and many others brand new to this adventure. - Infernal War Machines, and exciting encounters with unique stat blocks. - Innovative Destiny and Traits mechanics that make your choices really matter. - A ton of possible outcomes that will fuel your character's many adventures to come! - Four gorgeous sample characters, with interactive character sheets designed to be new-player friendly so that you can jump right into the story if you'd like. - A community survey when you finish so that you can see how your outcomes and choices compared to other players!
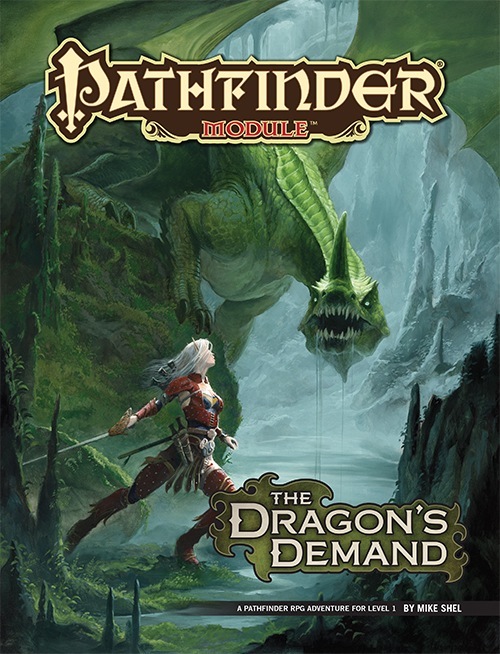
Founded by a famous dragonslayer, the small town of Belhaim has become a sleepy rural community just off the beaten path, a settlement where everyone knows everyone and strangers are the talk of the town. But when Belhaim’s peace and quiet is shattered by the sudden collapse of the last standing tower of its founder’s castle, things quickly bloom out of control. Why were there bodies of kobolds amid the rubble? What’s the sinister secret behind the strange sounds of flapping wings in the night? And what’s happened to local wizard Balthus Hunclay, who’s not answering knocks on his door? The collapsed tower had long been an eyesore to the cantankerous old man—could he have had something to do with its destruction? And what of the rumors of strange stirrings in nearby Dragonfen? Has Belhaim’s ancient draconic nemesis returned?

The caravan master Santos Boromite was personally assaulted and his Euriduis, the symbol of caravan power, was stolen. The item signifies full authority over all legs of the caravan and in the wrong hands would wreak havoc. You have been summoned to speak with the Governor Lando Shardo at once to save Timel yet again! Can you find the bandits responsible for the theft and bring them to justice. Timel wants a caravan traffic and unless this matter is taken care of quickly that won't happen. Just when you think you have it figured it out it turns out you were wrong!
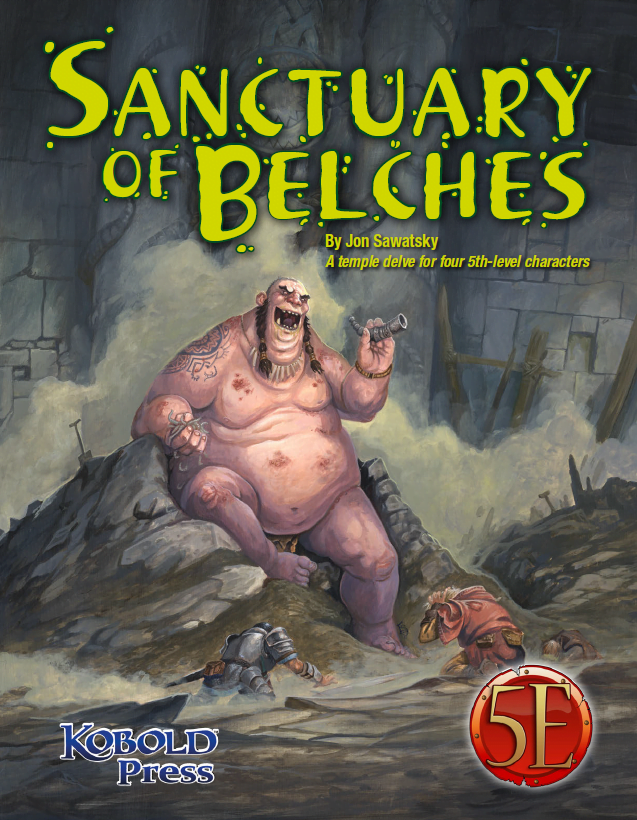
The trouble began several weeks ago when a duergar excavation team went to work in a long-abandoned temple. Drawn to the temple by stories of riches and artifacts, the duergar hired several giants as laborers before cracking the temple’s sealed doors. The largest of the giants, a loathsome Thursir mutant named Huppo, used his acidic vomit to expedite tunneling into the temple’s collapsed hall of worship. Then, Huppo found the horn—an unusual instrument made from a single piece of stone, with a mouthpiece so intricate only a master carver could have made it. The horn became the giant’s obsession. Seeing only the horn’s potential sale value, the dwarves demanded Huppo turn it over to them, but Huppo refused. To force compliance, the dwarves stopped feeding the gluttonous brute, but Huppo had already found his own source of food; in deep areas of the temple, worms were chewing out of the rocks, and Huppo ate them by the fistful. He also played the horn. Then, after several days of blowing the horn and devouring the strange worms, Huppo released a belch so noxious the dwarves had no choice but to lock him in a sealed chamber and carefully consider their next move. The horn’s call, however, had caught the attention of passing nomadic orcs. They set up camp outside the temple entrance in the hope of finding the horn and its player. That’s the current situation at the temple: the giant refuses to stop blowing the horn and belching out deadly clouds of stomach gas; the dwarves are frightened and edgy while their leader is obsessed with malevolent whispers; orcs are threatening to overrun the place; and the population of worms grows steadily as something awakens deep in the stone beneath the sanctuary of belches.

The Sword of the Dales, an icon of the Dalelands symbolizing the unity and strength of the people, has reappeared! Created by Shraevyn the weapons-mage hundreds of years ago, the lost Sword had become nothing more than a fantastic children's tale - until now. A group of warriors led by Randal Morn, rightful ruler of Daggerdale, rushed to the Sword's resting place to recover it, but dark forces awaited them, and Randal and his men fell to an ambush. Only one man escaped, yet he brought with him the hope that Randal Morn yet lives. Resolved to rescue his leader, that lone survivor turned to the great Elminster of Shadowdale for aid. But Elminster is gone, off plane-hopping while the fate of Daggerbale hangs in the balance. Hence, it is up to Lhaeo, scribe to the old mage, to find a group of heroes who have mettle enough to face down the menace which claimed Randal Morn and his hearty followers... This is the first of three adventures that grant player characters the opportunity to determine the fate of Daggerdale. The saga continues with "The Secret of Spiderhaunt" and concludes with "The Return of Randal Morn." TSR 9484

All the PCs did was help a dwarf recover his magic ring. So how did they end up in the middle of a tragic love triangle? The Ring of Truth is a short adventure for 2nd level PCs. Includes a 5th edition version of the necrophidius, a classic monster from the 3rd edition Fiend Folio.

This scenario picks up where the Ga Mantse Tombs left off. As your party delves deeper into the natural caverns they begin to uncover more and more unusual amphibian creatures in their path. With the amount of bad guys you’ve found in the tunnels it is hard to imagine what will be at the end! This adventure is the perfect segway to a much larger problem in the lands beneath Mellowmarble.

So you want to be a Mage of High Sorcery? To join the esteemed organization, you must travel to the Tower of Wayreth and undertake the most important event in your life—the harrowing Test of High Sorcery! If you can survive where so many aspiring mages have failed, you will forever bind your soul to the Gods of Magic and gain access to untold arcane secrets. The Test of High Sorcery is the perfect adventure for new and veteran players looking to experience Dungeons & Dragons in a new way! It is a solo adventure, where your choices have meaningful consequences, but it also provides balanced rules to play with a group or a Dungeon Master. This 154-page tome features: - A sprawling adventure that fits perfectly as an expansion to any Dragonlance campaign, Dragonlance: Shadow of the Dragon Queen, or as a stand-alone replayable experience - A tale full of sorcerous intrigue, featuring many new characters alongside iconic favorites like Fistandantilus, Takhisis, Fizban the Fabulous, and the Gods of Magic - Innovative Destiny and Trait mechanics make your choices really matter—and ensure every mage’s Test of High Sorcery is a unique experience - Over 60 possible outcomes to determine which Order of High Sorcery you join and provide compelling new plot hooks for your character during future adventures - Dozens of unique locations with rich stories and sorcerous challenges that Dungeon Masters can use to create their own version of the Test of High Sorcery - New magic items and stat blocks, with mechanics that support clever use of enemies’ weaknesses and the environment against them - Four gorgeous sample characters, with interactive character sheets designed to be new-player friendly so that you can jump right into the story - A detailed primer on the history of Krynn and how it relates to the Mages of High Sorcery - A community survey when you finish to let you see how you compare to other mages taking their Tests of High Sorcery

Ever been on a long running campaign and in one of the sessions one or a few players couldn’t make it? This adventure was made to be used as sort of a filler episode to fix that. Made for a small party of 1st-4th lvl characters and to be played in a single session. Story summary - The Gold Knife Bandits, a gang formed by a former army squadron that deserted. They are remarkably loyal to each other and are known in the area for attacking army caravans and camps. However, after several months of unfortunate loots. They decided to house a cultist of Beshaba and do what he asks to take away the curse of misfortune the gang is obviously under. Unfortunately, that includes using some members of the party as a sacrifice. The party will find the bandits cavernous hideout, clear through it, face the cultist, the Bandit's old boss, or both! All in a day’s worth of adventuring.

The newly ordained Bishop Martin has called upon your group to deliver a message across the sea. While somewhat beneath your status, the new bishop was a former adventurer of some renown. Along the way to the southern reaches the party will find themselves dropped off at the wrong port and unable to speak to the locals…and that’s just the beginning! The party will need to find the pasha, get valuable information from him to assist the new bishop, and finally get back home. This adventure goes with FT – Antioch – Kingdom of Nirack.

A wealthy sea-trader hires the PCs to solve a pirate problem and recover stolen supplies. Almost 100 pirates have made base in a treacherous cove. When the PCs arrive, most of the pirates are at sea on a mission. A large host of pirates remain in the base and force PCs to be creative with their approach, as a direct attack would be met with an overwhelming swarm of pirates. Unknown to the player's as they scheme is that the ship will soon return with its massive crew. The treasure cave is guarded by the dead sailors foolish enough to try and steal from the captain, who is the only one who can enter the cave safely. Players must be creative to deal with the pirates in the base and the approaching ship while still securing the plundered supplies in the treasure cave.

For many years folks have gazed into the churning black vapors of the Shadow Rift and wondered at the horrors that might lie within. Some have speculated that it might be a realm of the doomed, where tortured spirits suffer the hours of eternity. Others have speculated that it might be an empty domain, waiting for the arrival of a master who is evil enough to claim it and shape it in his own image. Ever the mysterious Vistani do not know what secrets are hidden in the depths of this gaping chasm. Now, the time has come for the veil of Shadows to be parted. Loht, king of the shadow elves, has reclaimed the mighty Sword of Arak. With this relic, he intends to set in motion a plan that has taken thousands of years to form. He will throw open that vary gate of darkness and invite one of mankind's greatest enemies to walk the land of the living. And if he is not stopped, the rivers of Ravenloft will run red with the blood of the innocent. The adventure can be played independently or in conjunction with the Ravenloft Adventure Servants of Darkness. TSR 1163
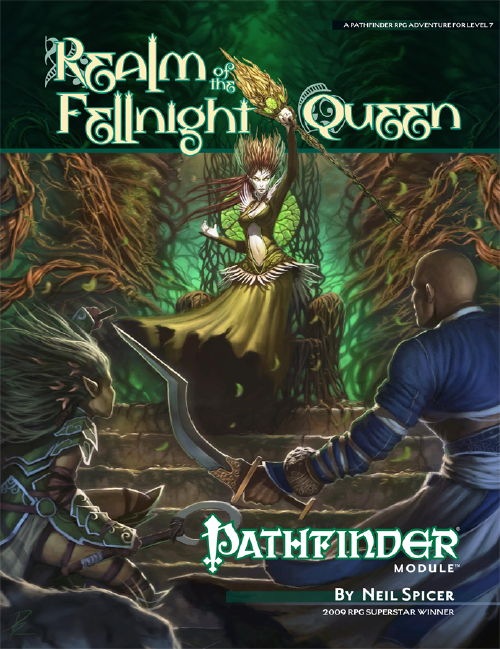
Deep in the forest, something is stirring. An evil fey sorcerer, cast out of the First World millennia ago by her own kin, has found a way to break through the ancient walls of her prison, and carries with her a vengeance too deep to be sated. For the quiet Andoren town of Bellis, busy celebrating a long-awaited marriage, it's a time for joy and laughter. Yet the forest that's always sheltered it is growing dark, and things are moving in the heart of the woods...

The Hardest of Hearts is a gothic horror adventure for 4-5 characters of 5-6th level. It can be played over the course of 6-8 hours and should roughly take one playing session if the party is quick, or two if the party is progressing slowly. This is the first part of the Carnival of Lost Souls campaign. It can also be played as a standalone adventure. The Hardest of Hearts features: - Exciting journey through the cold wilderness of Lamordia, which features a special travel system and survival rules - Exploration of the old mansion which has been taken over by the vicious local gang - the Corpse Collectors - Several custom diseases to challenge your players - Moral dilemma at the end of the adventure which the characters will have to solve - New custom monsters to make combat encounters truly memorable and exciting - High-quality maps, also available in universal vtt format Look out for the next adventures in the Carnival of Lost Souls series: Dementlieu: Dance with the Devil, Kalakeri: The Forbidden Temple and Valachan: Hunter’s Moon! They will be released over the course of the next two months. Once all four adventures are out, we will also release a special Campaign Guide, which will explain in detail how to best set up and play the campaign. However, if you want to start your campaign right now, don’t worry - we have included a short appendix at the end of each adventure which will explain the basics!