
He wanted a scabbard - but got the shaft. If the book is to believed, there's a magical sword - completely unguarded! - ripe for the taking. This short adventure starts with the players finding a diary describing the final resting place of Hrothgar and his powerful intelligent sword. In a quest for the sword, the players investigate a small cavern system and find the sword in a gelatinous cube. Pgs. 32-37

The Holdfist Mountain range hosted many battles during the Troll Wars and during the dark years many villages, shrines, and castles were destroyed. When the fighting was over the villages were rebuilt so that farmers could resupply the duchy and the former strongholds were lost to the sands of time. One of these forgotten areas is the Church of Scakla and is said to be home to lost magical items...

Deenus was a necromancer that was put out of business a quarter century ago by a group of adventurers. Despite their success, the delvers were never able to discover the dungeon entrance. Your new benefactor may have information on that…

Rumors and legends surround a hidden temple dedicated to the god of Magic, Ileaeni. This lost shrine is supposed to be in the Border Hills but no one, not even a legendary general has been able to locate this famed location. While long rumored to hold a supply of magical items no proof exists of this temple aside from notations in old scrolls. Myth or real you and your party are interested in exploration and treasure…this sounds like it may be right up your alley.

The first part of the Dreams of Red Wizards adventure path originally published for the D&D NEXT Playtest. Following the events Ghosts of Dragonspear Castle, a new set of adventurer's will see some of the repercussions of that adventure. This adventure is intended to be continued in the Dead in Thay adventure (Note that they Dead in Thay 5e adventure featured in Tales from the Yawning Portal is missing a significant portion of interlude that links Scourge of the Sword Coast to the events within the Doomvault). The adventurers arrive when Daggerford is crowded with refugees from outlying lands. Goblins, gnolls, and orcs have been raiding the countryside. Now, food is scarce and tension is high. Blame for a theft has fallen on the refugees, and the Duke of Daggerford has forbidden more of the displaced from coming into town. After overcoming difficulties to enter Daggerford, the characters learn more about the raids. As they fight against the humanoids and delve deeper in the darkness that encircles Daggerford, the characters learn of Bloodgate Keep. After a final fiendish ambush, they’re ready to confront the real threat to the area. DM Note: This adventure points the adventurers strongly towards Bloodgate Keep but that location does not appear until the Dead in Thay adventure; at several points the party may feel drawn to explore that location rather than continue their investigations around Daggerford. However, since Bloodgate Keep is only eluded to as a source of great evil power, it can serve to easily segue to an entirely different adventure path. As a NEXT Playtest adventure, Scourge of the Sword Coast uses milestone leveling and the included stat blocks for creatures do not necessarily match or even appear in the 5e Monster Manual, nor do they have XP values or challenge ratings. In some places it will reference rules used in the Playtest but dropped or changed in the 5e release, these are unlikely to substantially impact gampley with 5e rules.

This high level adventure returns the PCs to Helvana. A recent adventure has netted the party some Adamant, a rare ore in Filbar that is excellent for constructing weapons of amazing quality. As you arrive in Vorshmorgan to locate a smith you quickly discover there are problems in town. The scenario was designed to give upper level players a challenge and pits them against one of the most feared creatures in the land!

The Haunted Hamlet and other hexes details four unique modular locations for your game. Made for old school essentials, but can easily be used with other old-school systems or even 5E. The four locations detailed in the zine focus on gameable content and being easy to use at the table. The locations are not connected to one another and can be sprinkled onto your campaign map however you like, or run as one shots. The PDF is graphic and art heavy and utilizes random tables and other tools to make it easier for GMs to run in a pinch. Details: 40 pages Single column text 8.5 x 5.5 aspect Black & White Bookmarks Four hex locations Random tables A rival NPC party A sky merchant A one page town Two hirelings

Sometimes only a hint of an adventure is given to players and more information is required. In FV12 - Monteleone Chariot this is just such a case. As the party reaches town they begin to hear of a mysterious relic from the past civilization and both information and backers must be investigated. Will your party be able to determine facts from fables? Whose interest will they serve in their investigation or will they just try and locate the item for themselves?
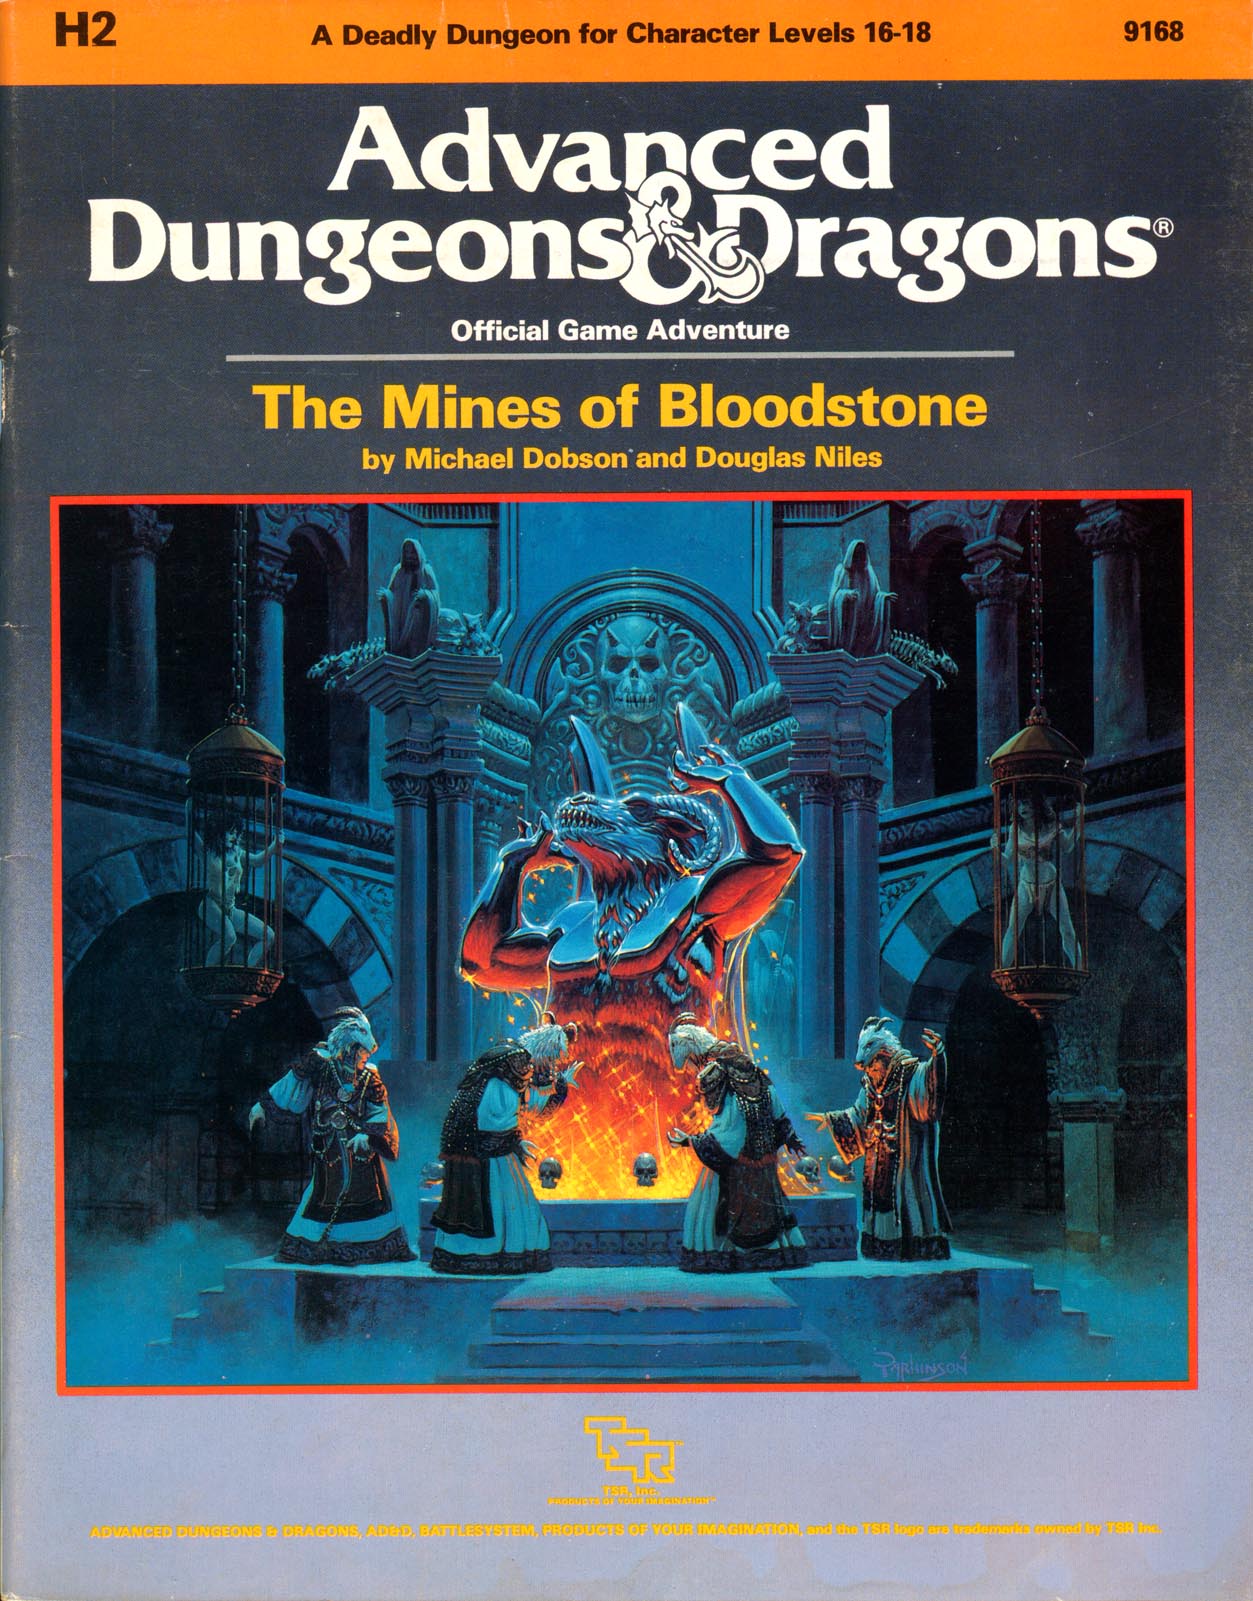
The most deadly dungeon ever devised! High-level characters brave the unexplored corridors of Deepearth to confront perhaps the most feared adversary in the AD&D game. The second chapter of the Bloodstone Pass saga follows the conclusion of the desperate war against the bandit army. A cold and bitter winter drives the villagers to the edge of starvation, and numerous horrors strike the town of Bloodstone Pass. Join the adventure as the heroes explore the depths of the ancient bloostone mines, now inhabited by fearsome demons. There they hope to uncover the fantastic treasures rumored to exist in the unknown darkness. But deep within the mines, all is not what it seems.... This module uses the new rules from the Dungeoneer's Survival Guide and Wilderness Survival Guide. The adventure also includes optional BATTLESYSTEM scenarios fought entirely underground. These supplementary products are not required to play the adventure, however. TSR 9168

A group of young islanders have been snubbed by the village elders as they move off to protect their island. Their dispair doesn't last long as they quickly find themselves facing foes of their own! After boarding a small fishing boat the group quickly finds themselves sucked into the swirling currents where adventure finds them! The original PCs are included!

This adventure picks up where AS1 – Artifact of Gegios left off. You return to the city of Gegios to divide treasure and determine what the strange wand is. Your return trip may have given you a clue in that travel to the east causes it to vibrate less while moving in a western direction causes it to shake more. What is the significance of this anomaly? Is your party ready to find out? Bring your water wings folks you’re probably going for a swim!

After checking local pawn shops and the library you have discovered information on an old Adurite noblewoman who possessed a magical mask. The woman had suffered a facial injury and commissioned a magical face shield to hide her wound. Having never heard of the item you believe it is probably in the ruins near Ugus Horrus where she lived. With no other leads at the moment you gear up and decide to embark on the search for this item!

The mountains are the border between our kingdom and the realm of the fire giants. Look far eastward. See how the peaks turn black? Their forges must burn night and day to mark the mountains so. Some mornings, sunrise dims from the smoke and soot. Long have we watched the pass and tallied our fortunes at its stillness. Recently, though, there are signs our luck is turning. Fiery orbs sail through the night skies and land too near these woods. Scouts report deep craters shrouded in smoke and ash. One sits a mere hour’s walk from this outpost. I fear the enemy makes ready some terrible weapon . . .

After basking in the glory of your accomplishments, you learn of a problem with a caravan attack. A group of possibly Goblins have brazenly attacked the Hamlet of Kako, burning it to the ground. The information comes from a local farmer that witnessed the carnage. Pack your gear…time to go back to work in the Principality of Lockerbie!
The PCs follow the trail of some particularly competent kobold thieves to the lair of a dragon cult deep in the swamp. There they discover efforts underway to grant sentience to the skeleton of a powerful red dragon once named Flame. Eventually the PCs determine that trouble has returned to the Western Mountains in the form of a band of fire giants ruled by a clone of the original red dragon named Flame.

As a future hero, your master has given you one last task to complete before releasing you from your training - delivering a message. Knowing that you are about to start your career on your own is exciting and this task should be a simple one. A two day trip to congratulate Lord Siklos on the wedding of his daughter and you will control your own destiny. Little do you realize that something has gone terribly wrong at the ceremony! This adventure setting was designed for 1st/2nd Edition AD&D for the Filbar Campaign for a solo/low level adventurer and DM.

Eurich Gunshoff IV, Count of Kleaves, is beset by powerful enemies. The King to the north has laid waste his holdings beyond the Tot River and even now threatens the river castles. Only the coming winter holds him at bay, giving the Count time, if only a little, to muster his strength. Long have the people of Kleaves worshiped the gods of the south, and it is to these people that he turns, striking a bargain with the powerful King of Kaymor. In exchange for a precious gift the Kayomarese promise to aid Eurich and his people, but it is Eurich’s charge to deliver the prize. He can spare few troops, and with spies all about he cannot be too careful. The prize he sets in a wagon in a caravan and as escort he calls upon those who dwell upon the fringes of society, adventurers who seek fame, gold and glory. They are charged to cross the wilderness and deliver the wagons safely. But the road is fraught with danger. Walls of stone block the road and winter upon the open plains carries dangers beyond the biting cold. But more than stone and frost, the end promises fire without comfort. Designed in 3 parts Giant’s Rapture offers overland travel, dungeon, and intrigue and pits the character’s wits against the open road and one another.

The Plains of Dorack are generally controlled by the evil mage Faltor the Demented who resides in his magically created fortress. The Onyx Spire rises in the middle of the Great Plains and the land around it has been cleared for miles so that its owner can keep an eye on his domain. He employs a large number of humanoids as well as humans, and rules out of fear and intimidation. While the powerful mage does not need it personally he finds that having so many minions allows him time for personal research. Those who have met the secretive mage know immediately they are in the presence of great evil.

When a harsh winter turns uneasy neighbors into bitter rivals, or worse, Granny Grimsicle sees an opportunity to spread her unique brand of horror in Hrokstead. Short on food themselves and exhausted from their adventures, our heroes arrive in the frontier settlement to find that something is very wrong. Can they get to the bottom of the threat, and make it out alive? This title stands as a one-shot, but also plants seeds for the ongoing Hags of Hoarfrost anthology. It works great as a supplement to Icewind Dale: Rime of the Frostmaiden, or placed into your own homebrew setting, or run as a standalone adventure. This module includes a detailed battle map and a monster token for use on Virtual Tabletops, and player handouts presented as standalone images for easy distribution to your online players.

“The Lost Mines of Karak” is the sequel to “The Shadow Rift of Umbraforge” and the fourth part of the Scales of War adventure path. After the player characters' success in "Siege of Bordrin's Watch" and "The Shadow Rift of Umbraforge", they have garnered something of a reputation in the city of Overlook. They are introduced to a wealthy patron that believes there is a connection between a shadar-kai arms dealer (from the previous two adventures) and a long lost dwarven mine. The patron wishes the PCs to find and secure the mine in order to use its wealth and resources to defend the city. The party then must travel through a wasteland and desert to find this mine. Once they have, they must fight through the hordes of monstrous creatures that inhabit it and defeat the Queen of the Drylands - a powerful naga. Pgs. 56-93