
For years the Count of Durwall Keep ruled over the land fairly and with justice. That ended during the Bloodrayne Conflict when the castle was felled by troops loyal to General Bloodrayne. In the many years that followed the triangular keep has fallen into a sordid state of disrepair. The keep used to hold mighty coffers of treasure for the Count and for the Emperor as well. A stronghold was built under the keep to secure said treasure and perhaps some treasure may still remain in the depths of its dungeons. Recently it’s been said that the Snaggletooth tribe of kobolds has seized the fortress and is using it as their home. It is also rumored that there may still be undiscovered treasure located in the dungeon of the keep. Faint echoes of the missing Orb of Ruler ship are still heard.
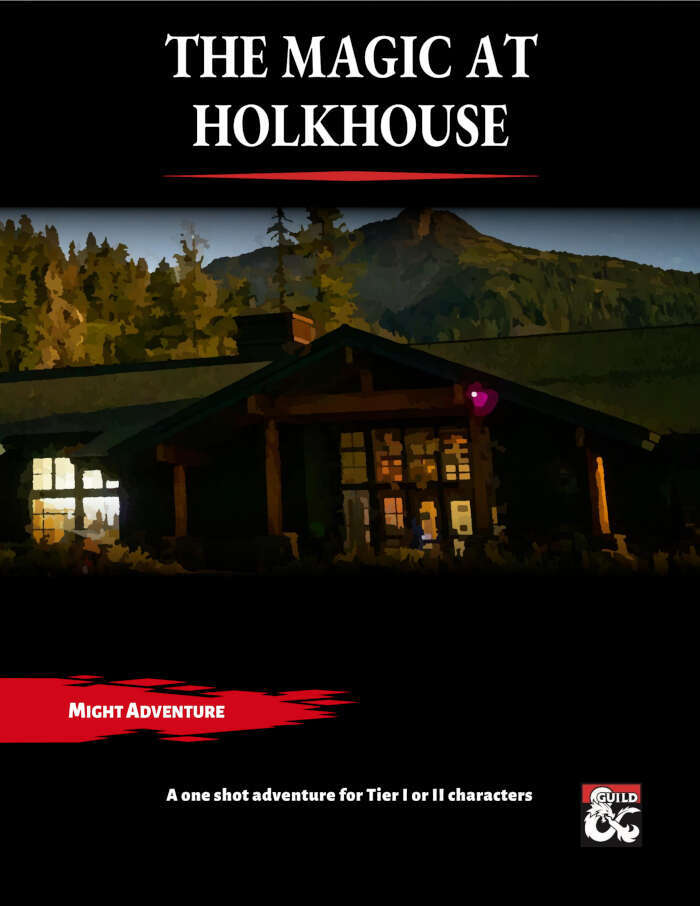
A plug in or one shot adventure that can be used as part of a larger campaign or run as a one shot for 4-5 Tier I or II characters (scalable for tier III characters) set in the Forgotten Realms. Thie adventure contains multiple stat blocks and encounters for various play styles. The characters have made their way to Holkhouse in the Mere of Dead Men looking for secret treasure, but they stumble on a different treasure entirely. There are orcs here, and they have partnered with an even greater creature to use magic and alchemy to produce even more dangerous versions that can conquer the Sword Coast. The adventure comes with the following: 12page PDF adventure file. 1 Regional Map of the Mere of Dead Men 5 Parchment style DM and Player maps ready for VTT use 5 Printer friendly DM and Player maps ready for VTT use 1” diameter tokens ready to be cut out for use in person as well as files for use in a VTT

"Proudfoot’s Trials“ is a D&D5e one shot adventure for 3 to 6 players on level 1-3. The playing time is about 3-6 hours. It is an adventure for beginners, so it contains a few tips for the DM on how to handle various situations. The adventure also offers: - Social interaction - Wilderness challenge - Combat encounters - Traps - Riddles - Adjustment suggestions for higher levels - Sketches - City map "Proudfoot’s Trials“ can also be adapted into an established group and campaign. It provides a varied, but not too complicated plot and can be used to create an enjoyable evening for your group.

What is the Lost Lands? The Lost Lands is the home campaign world of Necromancer Game's and Frog God Game's own Bill Webb. This campaign has been continuously running since 1977. Many of the adventures published by Necromancer Games and Frog God Games are directly inspired by this campaign. They have evolved over the decades, and more material continues to flow from it as the dice keep rolling. Sages and wizards of legend speak of the Lost Lands—many of the players who have lived and died in Bill's campaign over the years now have a place in history (in the books). Frac Cher the dwarf, Flail the Great, Bannor the Paladin, Speigle the Mage, and Helman the Halfling are well known to the fans of Bill's work. This is the game world, and these are the adventures in which the players of these famous characters lived and died. Hundreds of players over the past 35 years have experienced the thrills and terrors of this world. The Sword of Air is the centerpiece of the Lost Lands. Currently, this epic tome consists of several parts: 1. The Hel’s Temple Dungeon—kind of like Tomb of Horrors on crack. This six-level, trap-and-puzzle infested dungeon formed the basis of Bill's game through his high school and college years. Clark Peterson’s very own Bannor the Paladin spent several real life months in the place, and, sadly, finished the objective. This is where the fragments of the fabled Sword of Air can be found…perhaps. 2. The Wilderness of the Lost Lands extending to the humanoid-infested Deepfells Mountains and providing detail about the nearby Wizard’s Wall. This so-called “wall” was raised by the archmages Margon and Alycthron harnessing the Spirit of the Stoneheart Mountains to raise the land itself, creating a massive escarpment to block invaders from the Haunted Steppes. These archmages are actual player characters from the early 1980s who live on in the legends of the Lost Lands. Over 70 unique encounter areas are detailed, and each one is a mini-adventure in itself. New wilderness areas may be added based on bonus goals described below! 3. The Ruined City of Tsen. Legend has it the city was destroyed by a falling meteor. This place forms an aboveground dungeon area the size of a city, with over 100 detailed encounter areas. It’s a very dark place…even at noon. 4. The Wizard’s Feud—This campaign-style adventure pits the players in a long-running series of intrigues and battles between two archmages. Which side will they take? Their actions all play into the overall quest, and could well determine which side wins. Law and Chaos are not always what they seem, and if the wrong decisions are made, the entire ordeal could fail. Remember, one of the wizards WANTS Tsathogga to win. 5. New monsters, new demons, new spells, and new rules for various aspects of play. 6. The Tower of Bells. This dungeon is the result of the workshop Bill ran at PaizoCon 2013, where the participants assisted him in building an old-school dungeon. Visit the tower and discover the secrets of the “artist” within. Beware: those entering may never come out!

This module is especially for a party of elven PCs, level 8+. The Feadiel clan's Tree of Life is dying. As the bravest and strongest elves in the clan, you must undertake the challenge of the elders: seek out the source of the disease and destroy it. If you fail, the Tree of Life will surely perish, and all your family with it. The quest is great and you may die on the journey, never to find the cause of the disease. The journey will take you to the deepest part of ancient Selinar, Elvenhome, to find the guarded grave of the first Treekeeper... TSR 9166

Katha is a fully built city with nearly a hundred NPCs, dozens of shops, and many different factions all vying for power over this growing city. Katha is a growing city-state that can expand (or regress) in any direction depending on the choices of your group. It can easily suit any party of any size or level but is designed for mid-level parties with money to spend. The city will grow (or shrink) and change at the party's every move, making it a city full of potential. The document also includes a map and key for the city, four stat blocks for two major NPCs, a new monster, a boss fight, and a dungeon map. Katha is designed to be placed into any setting with only minor alterations. Advice for how to fit Katha into your setting is provided throughout the document. Included is also a plotline that can span anywhere between four and ten sessions. The Cult of the Storm, a mysterious and millenarian cult, hopes to bring about the end of the world so that it may be reborn. Several of the groups and NPCs in Katha are secretly working for the Cult. Will your party realize that they are accidentally helping them in time to stop the Cult from assembling the four parts of the weather control artifact and starting The Storm? The plot will also develop the city and reward your party not with wealth, but with property and the ability to build what they want and invest their time and energy into growing Katha.
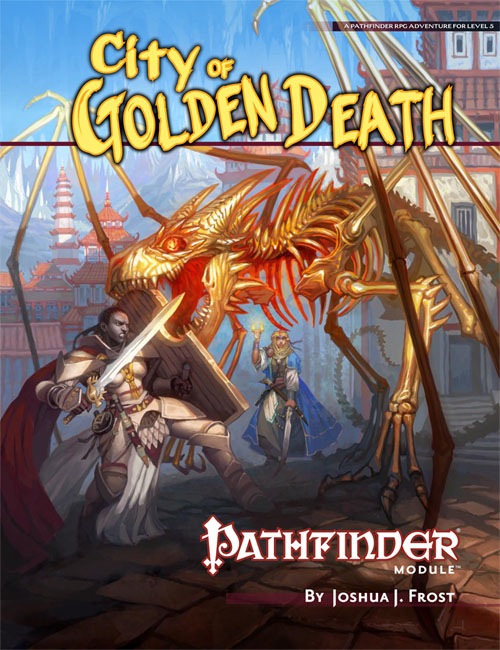
In the center of Lake Encarthan looms the dreaded Isle of Terror, accursed land of mystery and treachery. Hidden within the island's negative energy storms, the secret treasure city of the wizard-king Tar-Baphon has lain sealed for centuries. Now masked cultists have opened the golden city of Xin-Grafar to claim the wealth of the legendary city for the Living God Razmir. Can the PCs track the cultists through the poisoned swamps and blasted wastelands of the Isle of Terror to the City of Golden Death itself? And what forgotten dangers will oppose them as they struggle to prevent a dark faith from spreading across the world? Part 3 of the Price of Immortality trilogy.

For years the Verbeeg clan on Clover Island has lived peacefully with the human settlement of Corsair Bay. A peace treaty has remained in effect that both groups attested to and have lived by. Recently the annual tribute that is to be paid to the giants has not come and now the giants are preparing for battle. Can your party go and act as an envoy to the giants or will they choose to go to war against them?

This week’s Filbar offering is an introductory level adventure pitting fresh adventurers against a variety of opponents. As they head out to make a name for themselves the young group will first need to pass by the Horn of Delmar. This mountain landmark was once home to a mighty fortress felled centuries before hand. While many have adventured to the top they have returned ravaged with injuries and reports of strange and foul creatures. This adventure features an old tower, bandits, undead, and an old dungeon complex for those who search hard enough.

As fledgling adventurers, your group is looking for anything to increase their fame and line their pockets with gold. Upon crossing the countryside your group comes to Creedo’s Trail a small thorp in the Duchy of Starryshade. Upon arrival in town you find an inn to stay indoors finally and a job opportunity hanging at the Bagel Inn purporting an “easy job” for a “big reward”. The poster is reputedly a crone or witch who has need for some components for an experiment she is currently working on. Easy job AND big reward…what’s not to like!

While the PCs continue the quest for the missing pages of the Codex of Gamber Dauch they find the lands of Count Elam. The ruler has recently been informed of an agricultural problem with a herd of Anhkheg tearing up the lush farmland. Further investigation will uncover darker secrets in the area, and those involving Drow and Derro!

As you begin your adventuring career you find that your stomach rules your initial steps. After finding the small community of Morgesh where word of a haunted/cursed/dangerous manor house is gained. As you find a few new associates, you opt to clear out this blight on the area. Hopefully the drunkards won’t cause you too much of a headache…

Far below the Fields of Petrichor is a vast cavern containing the skeletal remains of a long-dead Sonorous Titan, a whale-like beast that once floated through the skies of a lost age. Amongst the bones are ravines and grottos home to bizarre creatures and lost treasures that are as beautiful and valuable as they are deadly. Ghostly shapes swim through the air. Glowing mushroom groves hide frightened creatures. And the Titan’s bones sing sadly as an ambitious wizard and his weary hirelings dig for its precious marrow... ADVENTURE TYPE: Small Sandbox Dungeon DESIGN NOTES: This adventure is intended for characters levels 5 to 8. It includes several wilderness areas, a ruined village and a mining camp to explore. Each area contains various encounters and unique magical items.There are many opportunities for combat, but it is possible for players to explore most areas and complete many interactions without any combat at all, depending on their choices. INCLUDES: Story hooks, dialogue prompts, creature stat blocks, original creatures and treasures, and dungeon overview map. KEYWORDS: Grave, skeleton, ghost, undead, wizard, miner, puzzle, mushroom, myconid, hag, witch, social, curse, mutation, mutant, soul, insect, termite, scorpion, bat, monk, beetle, chicken

The king summons the heroes to investigate the death of a knight, and the final fate of the king's long-missing son. The knight and his entire order was killed by a Dragon! Yay we get to fight a dragon in the first issue of Dungeon Magazine! Much travel over many different terrain types featuring avalanches, volcanoes spewing lava, and many random encounters (not detailed here) before the heroes reach their real goal: A lake with a ruined wizard's tower and dragon's cave. Opens with a particularly byzantine Background section for the DM involving a prince you never meet, pirates you never meet, knights you never meet, and deep gnomes you never meet. See Out of the Ashes in Dungeon #17 for sequel to this adventure. Pgs. 42-60

The fourth installment of the Filbar Dual (FD) series is The Hunt for Charon and picks up where the FD3 - Crisis at Marstan left off. Your pair of intrepid adventurers is off to find out who orchestrated the attack at Marstan. When the previous adventure concluded they discovered a note mentioning a “Charon” as behind the attack and the humanoid raiders. This adventure will see if the pair can find and defeat this person/humanoid and protect the area once and for all.

The wizard Kavorquian is dead. But certain items belonging to his adopted son were in the wizard's keeping at the time of his demise. Now someone must venture into the silent vaults of Kavorquian's stronghold and recover the missing property. Queen's Harvest picks up its story where B11, King's Festival, left off. It can be played as a sequel to that adventure or as a complete adventure in itself. It is tailored for beginning Dungeon Masters and players and contains helpful hints on adventuring and the land of Karameikos. The story develops simply, but ultimately leads the player characters into the nether reaches of Penhaligon's politics to confront Ilyana Penhaligon, mad pretender to the throne! TSR 9261

Shall you claim the glory of heroes, or accept your doom? You have raised the ire of the goblin warlord, and now you flee his kingdom with war parties hot on your trail. You must reach the borderland town of Felsentheim, for if you do not, no alarm will sound to hearken the coming of the Dogs of War and your bodies will lie in the forest grass, forgotten by all but the worms! Shall you claim the glory of heroes and warn the people or accept your doom and suffer death in the Treklant? Enter again the World of Inzae, where all things slip into the Maelstrom, and from hence true heroes are born.

The characters, members of the Clifftop Adventurers’ Guild, have been tasked with acquiring the Chains of Mur’taal, an artifact tied to Thelanis, by their guild handler, Lhara. This artifact is the latest in a series that Provost Nigel Faurious has commissioned the Clifftop guild to retrieve for him. The adventure starts when the characters arrive in Rhukaan Draal via Orien caravan. They’re given a chance to explore a small portion of the city before they head to a local bar to meet their contact provided by Lhara. Accompanied by a local guide, they make their way to the Seawall Mountains, where they’ll have to follow clues and their intuition to find the Valley of the Hero, which conceals the artifact that they’ve been hired to obtain. In order to earn the artifact, characters must first pass three tests laid before them by the Story: The Test of Courage, the Challenge of Wisdom, and the Trial of Honor. Once they finish the tests and collect the artifact, the party heads back toward Rhukaan Draal. But there are Marguul forces in the area, and they don’t intend to let the heroes escape with a priceless piece of their folklore…

Curator Pierce has reported that the House of Knowledge was the victim of an assault and theft. Three days ago, brigands entered the building famous for housing the Tomes of Rummell. They attacked the Stewards of Knowledge, and made off with three books. Each of the missing texts was written by a different author and each is said to contain works of arcane power. The call has gone out for heroes to retrieve these items and bring those responsible to justice!
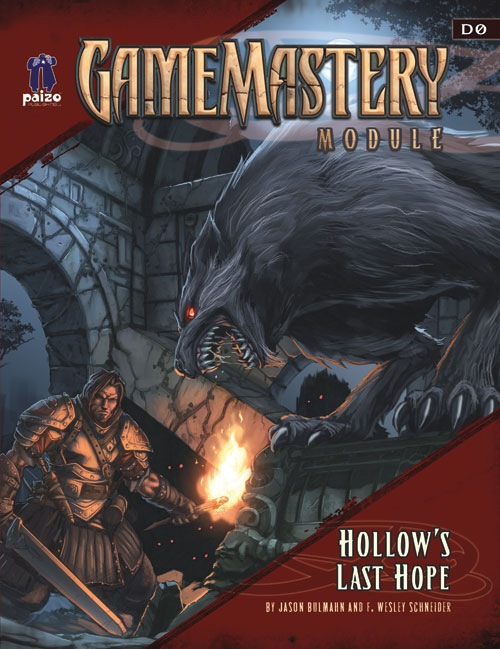
The town of Falcon's Hollow needs a miracle. The plague has come to the town of Falcon's Hollow, and not even the town's priest can abate its wretched course. With the coughs of the sick and the wails of the dying echoing through town, the local herbalist uncovers a cure, but she needs some brave heroes to retrieve the ingredients. Finding the cure means risking the dangerous Darkmoon Vale, infiltrating a witch's haunted hut, and delving the ruins of an abandoned dwarven monastery.