
After saving Earl Feva D'Auvay’s bacon at Curwood, the ruler has graciously offered his waterside retreat to the party. A few days of rest and relaxation will help you recover from the hazards the undead group caused. With servants waiting on you hand and foot you enjoy the easy life. A few days into your vacation the Earl’s new toy arrives, a glass bottomed boat. After taking it out for a quick spin you quickly discover that Crater Lake holds the ruins of an old city. It would appear that your vacation will give way to your curiosity…

A famous relic hunter seeks adventurers to help her find caches of treasure hidden by the now-defeated followers of the Cult of the Dragon. Her maps and notes may lead the way to great wealth—or a terrible death. And do other parties have designs on the treasure as well?

This 4 to 6 hour module goes from Saltmarsh to Baldur's Gate in a race against time. A dark vision warns of a terribly cataclysmic event in Baldur's Gate and the characters are hired to deliver supplies before its too late. This adventure can be adjusted for any Tier 1, 2, or 3 party. It is intended to help usher characters from the Saltmarsh area to Baldur's Gate, just in time for Descent into Avernus. A challenging voyage they should give them a wild ride with new challenges at sea.
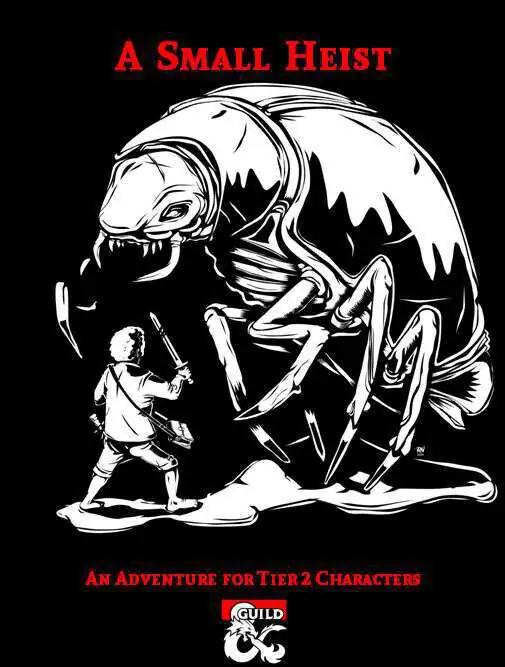
Honey, I shrunk the adventurers! In this adventure, the player characters take on the simple task of stealing a book from a wizard's home while he is away. It's a simple in-and-out heist where nobody gets hurt. The catch? His house is warded, and the only way through the wards is to be the size of a bug. The party's spells shrink to fit their size, so there's no easy way across the back yard to the house. Once in the house, the miniature characters must find their way to the library while avoiding the attention of the house staff, pests, the dust-collecting elementals, and the most dangerous foe of all: The wizard's cat familiar. This adventure is intended for a party of four 7th to 10th level characters.

The Kierhammer clan of dwarves pride themselves as excellent excavators, but the respective families are not without friction. While clearing the entrance to the tomb of an ancient king, tensions rose following the death of one of the Kierhammers, who seemingly fell accidentally. It is your job to ensure the clan stays united, and when disease strikes, to make sure resources are managed properly, so that the mission is complete and you all return alive. A wicked force, however has other plans...
Freeport is a fantasy “free city” you can place in a fantastic setting. Its basic premise is a pirate city gone legit… at least on the surface. In truth, the pirate tradition is alive and well in Freeport, but camouflaged by a veneer of respectability. These days the city’s pirates are privateers, legalized pirates Freeport loans out to the highest bidder. You’ll learn more in the short history of the city that follows. This should help give you a taste of the flavor of Freeport before the adventure begins and the given background is all you need to run this adventure. It is an ideal starting place for a new campaign as the player characters find themselves stranded in Freeport after a deal goes sour. A seemingly simple job plunges them into the strange underside of the city, where they uncover secrets worth dying for. Death in Freeport is the first from the Freeport trilogy, together with Terror in Freeport and Madness in Freeport. Synopsis: Death in Freeport drops the player characters into the midst of political and magical intrigue, as the hidden Brotherhood of the Yellow Sign manipulates events to bring its dread god to the world. Freeport is still a bustling center of trade, but evil currents run beneath the surface. There are secrets here, and questions unanswered. The characters will undoubtedly learn there is more here than they expect in a simple seaport. The question is, will that knowledge kill them? As the adventure begins, the player characters (PCs) have just come to Freeport on a merchant ship. While on the docks, the PCs are attacked by a press gang, who mistake them for easy marks. The press gang is handily beaten off; since they are unused to real resistance. A bookish young man named Brother Egil then approaches the PCs. He says that he’s been looking for a group that can take of itself, and that he has a job for them if they are interested: finding a missing librarian. The missing man, Lucius, disappeared two days previously, and Egil is eager to find him. Egil gives the PCs some background on Lucius and his strange behavior. The PCs are then free to investigate: They are likely to visit Lucius’s home, the temple to the God of Knowledge, and an orc pirate ship. This should form a picture of Lucius as a man searching for his own past—who found something he wasn’t counting on. Following a trail of clues, the PCs learn about the Brotherhood of the Yellow Sign. With a little luck, the PCs can trail the cultists back to their hideout, penetrate the lair, and discover secret tunnels underneath it. Deep underground they find degenerate serpent people, and eventually Lucius himself. The librarian has been tortured badly and will die without aid. The PCs also have to deal with the leader of the cult, a man they may recognize from the temple. When the cult priest is slain, they are in for an even bigger surprise. He was not human at all, but a serpent man in disguise. What this means for Freeport only the gods can say.

When a Thayan research expedition returns from the Glacier of the White Wyrm with only two survivors that are reduced to whispering about an ancient pyramid under the ice, perhaps it is time to discover just what scares the life out of a nation of necromancers. The events of DDEP2 Mulmaster Undone resulted in terrible geographic upheaval all around the southeastern region of the Moonsea. Massive landslides, earthquakes, tidal waves, and gnashing tornados devastated the land and the city of Mulmaster was nearly scrubbed from the face of Faerun. Fortunately, these events also revealed previously hidden artifacts—trinkets, mostly—from the ancient Netherese all around the city. The Thayans have long held an interest in the port city and wasted no time in assisting in the rebuilding efforts. They simply asked that a blind eye be turned to their archaeological interests, and in return they would continue to spend their own resources (at no expense to the Mulmasterites or even the High Blade) to rebuild the city, bigger and better than before. It wasn’t long before their interests paid off with the discovery of a research laboratory beneath the Glacier of the White Worm, far to the east of Mulmaster and nestled in the mountains. The Thayans sent a sizable expeditionary force but only two acolytes returned. The visiting Zulkir has found this particularly troublesome, and with the assistance of Rastol Shan, the head of the Cloaks, has arranged for a mercenary force to perform a more pointed investigation of the area. In return the Thayan noble has promised significant compensation. Upon arrival at the dig site, the characters are quick to discover that the laboratory hides ancient and palpable evil. The purpose of the facility can be discerned with careful investigation, and the effect of the still-active fragment of the Dark Obelisk has empowered (some may say attracted) servants of the Worm that Walks. Danger and death await, certainly, though the characters always have the option of running away and living to fight another day…

When her father goes missing, a young adventurer has no other choice than to gather her friends and head for the city of Loudwater. Soon after she gets swept away in an obscure design threatening to drag the entire region into chaos and war. At the heart of this mystery, lies not only her father, but the long-forgotten history of her once-despised family and a primordial beast influencing events from the shadows, moving her family like pieces on a chess board. Visit www.perfumersdaughter.com for more information. You can also address me directly on The Perfumer's Daughter Q&A on Facebook. All battlemaps and dungeons are free to download for use in digital platforms (such as roll20) on the aforementioned site.

The Tale of The Haunted Ravine is a Hex Crawl Adventure of Exploration that can be used for any game system but was designed for use with D&D 5e. A Hex crawl map and random roll tables are used to create surprising encounters and mysteries for your players to interact with. Wild necrotic magic, magical mutations, undead, lost souls, and demons all cloaked in a fog fog-choked landscape; forsaken by the gods and scarred by the battle fought here long ago. Will your adventurers survive and escape the Haunted Ravine? Or will they join the legions of cursed souls imprisoned in this corrupted land?

Refugees in Mulmaster have had a fairly tough time, and that was before the disappearances. The few that return have been changed, refusing to believe that they were even missing. You have been asked by Mulmaster’s nobility to find the source of the disappearances and put an end to them. This adventure premiered at AMERICA's Cup 2018 in New Zealand.
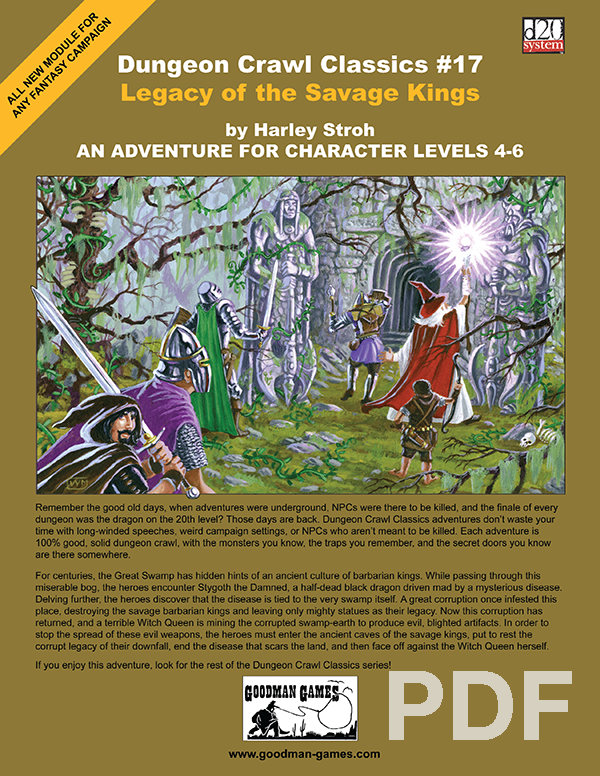
For centuries, the Great Swamp has hidden hints of an ancient culture of barbarian kings. While passing through this miserable bog, the PCs encounter Stygoth the Damned, a half-dead black dragon driven mad by a mysterious disease. Delving further, the heroes discover that the disease is tied to the very swamp itself. A great corruption once infested this place, destroying the savage barbarian kings and leaving only mighty statues as their legacy. Now this corruption has returned, and a terrible Witch Queen is mining the corrupted swamp-earth to produce evil, blighted artifacts. In order to stop the spread of these evil weapons, the heroes must enter the ancient caves of the savage kings, put to rest the corrupt legacy of their downfall, end the disease that scars the land, and then face off against the Witch Queen herself.

The Kroth Magg hobgoblins run the trade city of Glip Dak in the Troll Hills of Thar. From there they have taken control of the trade routes along the northern Moonsea. A young noble has been captured for refusing to pay their tariffs and his house looks to hire adventurers to rescue him.
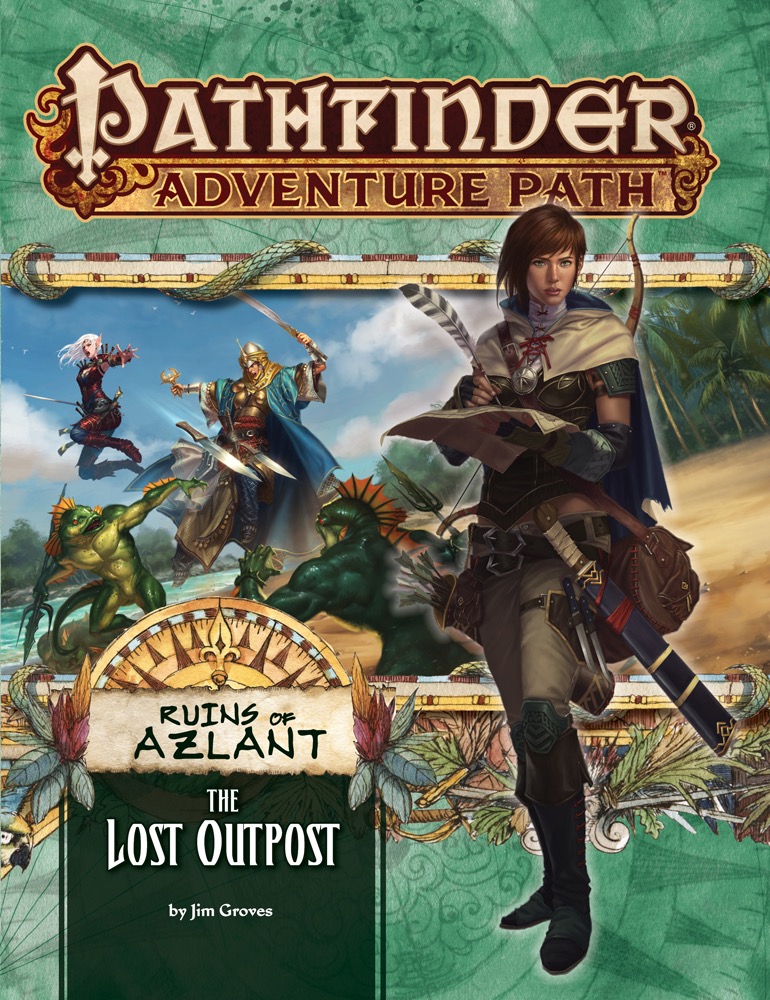
Trouble in Paradise The Ruins of Azlant Adventure Path begins with the adventurers standing on the deck of a ship ready to make landfall at their new home. However, dread settles in as they notice that the colony is empty and abandoned. Tasked with uncovering the whereabouts of the prior group of colonists, the adventurers go ashore and explore the deserted settlement. Uncovering strange evidence leads the adventurers across the island, where they encounter two survivors who can give them clues as to the fate of the rest of the first wave of settlers. Can the adventurers survive long enough to discover what truly befell the fledgling colony?

A simple hunt for a werewolf, or so we thought. Find its lair and slay the beast. No use for wolfsbane or other superstitions. Silver and magic would win the day. A worthy challenge, but nothing horrific, surely. Yet we never expected what we found in the Graenseskov, and our hubris cost us dearly... 𝐓𝐡𝐞 𝐁𝐞𝐚𝐬𝐭 𝐨𝐟 𝐆𝐫𝐚𝐞𝐧𝐬𝐞𝐬𝐤𝐨𝐯 is an 80-page bookmarked Ravenloft® adventure for characters of 1st-4th levels focused on mystery and exploration. It can be used in conjunction with 𝐂𝐮𝐫𝐬𝐞 𝐨𝐟 𝐒𝐭𝐫𝐚𝐡𝐝, either as an introduction to Barovia or adapted as a side quest, as part of the original expanded Ravenloft setting, or it can be used as a stand-alone horror adventure-setting. 𝐓𝐡𝐞 𝐚𝐝𝐯𝐞𝐧𝐭𝐮𝐫𝐞 𝐡𝐨𝐥𝐝𝐬 𝐚𝐩𝐩𝐫𝐨𝐱𝐢𝐦𝐚𝐭𝐞𝐥𝐲 𝟏𝟔 𝐭𝐨 𝟐𝟒 𝐡𝐨𝐮𝐫𝐬 𝐨𝐟 𝐠𝐚𝐦𝐢𝐧𝐠 𝐰𝐢𝐭𝐡𝐢𝐧 𝐢𝐭𝐬 𝐩𝐚𝐠𝐞𝐬, and potentially much more for groups embracing an investigative style of play. In the mists at the edge of Count Strahd von Zarovich’s realm lies the Graenseskov, a land of deep woods and bleak hills overrun with wolves. A Beast haunts these misty lands, leaving bloody corpses and terror in its wake, the product of a hag’s curse placed upon the boyar’s manor. But the Beast is no arbitrary killer. The PCs find themselves drawn into the mystery of uncovering the Beast’s identity and breaking the hag’s curse before the Beast’s final victim gurgles their last breath and the Beast is beyond any hope of redemption. Requires the 𝐃𝐮𝐧𝐠𝐞𝐨𝐧 𝐌𝐚𝐬𝐭𝐞𝐫'𝐬 𝐆𝐮𝐢𝐝𝐞 and the 𝐌𝐨𝐧𝐬𝐭𝐞𝐫 𝐌𝐚𝐧𝐮𝐚𝐥. This is a 63 Mb ZIP file containing a watermarked PDF of the updated adventure, a PDF with handouts, a PDF DM's cheat sheet, and PNG files of the Graenseskov region map for the DM and players. 𝐅𝐞𝐚𝐭𝐮𝐫𝐞𝐬: • The DM (or the Tarokka) determines the guilty suspect and their motives, offering a different experience for each group’s play-through. • A vivid cast of characters with a NPC index. • Escalating random encounters, special events, and techniques for DMing a mystery. • New monsters: black annis hag & loup du noir. • All units given in SI & metric. • Handouts and maps for DMs and players. • DM's cheat sheet with quick prep notes, clue checklist, handy Tarokka tables, tips on running the Beast, and a decision point flowchart. 𝐓𝐡𝐞 𝐓𝐨𝐦𝐞 𝐒𝐡𝐨𝐰 May 16, 2016 DM's Guild Pick of the Episode! Thanks James! http://www.thetomeshow.com/e/round-table-119-giants-and-the-talented-bestiary/ 𝐂𝐇𝐀𝐍𝐆𝐄 𝐋𝐎𝐆 𝐉𝐮𝐥𝐲 𝟐, 𝟐𝟎𝟏𝟔 𝐔𝐩𝐝𝐚𝐭𝐞: The big update! Fixed several editing and grammar errors, including an error in Appendix D, and the repeated paragraph on page 12 (page 13 in new document). Added a new special event - Hanging the Vistani - to Chapter 1 which ties together several dangling plot threads. Clarified "Adjusting the Adventure" & added Werewolves in the Mist to the "Adventure Hooks" in the Introduction. Added two pieces of thematic filler art. 𝐀𝐩𝐫𝐢𝐥 𝟏𝟖, 𝟐𝟎𝟏𝟔 𝐔𝐩𝐝𝐚𝐭𝐞: Added a DM's cheat sheet PDF to the zip file.

This introductory level scenario brings a new group of players into an area formerly controlled by the Tunnmaa Dynasty. This group of rulers was rich in gold and gems before collapsing. It is well known that their kings, known as Ga Mantse, were buried in underground barrows that are well hidden and protected by traps. A few days ago a group much like your own found one of these hidden tombs and attempted to investigate. Sadly for them they were not up to the task. Can your party succeed where they failed?

"...Night fell again on the ancient keep, whatever had been relegated to life below the surface for so many years finally finding its way to the streets and only the Company of the Ivory Scimitar has a chance to stop it." Follow the exploits of the Company of the Ivory Scimitar as it starts from nothing to become the greatest Mithel company in history. Brave the dangers within the intelligent labyrinth of the mad fey Mithelvarn. Fight enemies both above and below ground, enter the wildlands, wage war against an insidious corruption, and finally take the plunge into a sunken dungeon. Can you and your players find a way to outwit your competition for the ultimate prize, immortality, or will the Infernal Machine win out and destroy the entirety of Roslof Keep? This fully compiled mega-adventure is compatible with 1E and 5# mechanics and will take characters from 1st level through the mid-teens. For beginners and experts, players and DMs, this book provides all a gaming group needs to run the complete Roslof Keep Campaign including new races, monsters, dungeons, side-adventures, and more. Will you be the first to conquer mad fey Mithelvarn's Labyrinth? Contains: ROS1 Beneath Roslof Keep ROS 1.5 Welcome to House Aldenmier ROS2 Tremors in the Machine ROS 2.5 Test of the Tower ROS 3 The Curse of the Violet Corruption! ROS 3.5 Dire Run to House Fleetwood! ROS 4 Glade of the Burning Dead ROS 4.5 Hammer's Fall in Anarchy ROS 5 Deep Dive in the Flooded Halls! ROS 5.5 The Mithel Company Champion ROS 6 Realms of Madness and Despair! ROS 6.5 The Final Banner Races of the Nameless Realms, 1E & 5E blank Character Sheets, Iconic Characters These adventures are formatted to both 1E & 5E gaming rules.

A haunted house, a missing person, and a hint of wild fey magic. In the kingdom of Norland in the Moonshae Isles, King Keethan rules by the will of Torm the True, though in Glen Dourn folk still hold true to the old ways—a dense and layered folklore of monsters and tales to frighten children. It is to this remote valley that Keethan bids you make haste to seek out signs of his beloved cousin, Lady Sorcha Hannigard. Sorcha vanished on her wedding day three years ago, sending her groom and neighbours alike into mourning. But where can she have gone? The only remaining clues to this mystery lie in her abandoned mansion home, where powers less wholesome have now taken up residence. The Dread Coven will not give up what they know so easily, although they will strike a bargain if you’re willing to pay the price in pain.

The adventures in Dalentown continue in The Darkness Beneath Dalentown. Workers in the town’s sewers have stumbled upon the long abandoned halls of the dwarves that once settled beneath this region. What they’ve found is a haunted library. What they’ve woken is something far more sinister! The Darkness Beneath Dalentown features hordes of oozes, undead, and demons festering for years in an ancient dwarven mining stronghold. Now, they are slowly working their way to the surface, and the folk of Dalentown are in dire peril!

Riches beyond imagination await! Buried decades ago, the great treasure of the notorious Captain Jadescale is waiting at the Mistcliff. Though the exact location of the treasure is unknown, it’s said that the owner of the Shore of Dreams has clues about the location, although nothing is ever that straightforward when it comes to treasure. Can you unearth the secrets of the treasure of Captain Jadescale or will you be undone by its mystery? This 3 - 6 hours adventure features: • 18 pages full with social encounters, dungeon crawling, puzzles and a hint of mystery • custom art and handouts for your players • custom map with a DM and a player version • custom TashMob paper miniatures • new monsters, npcs & magic items A Dungeons & Dragons adventure for characters of level 5 to 7.

Baron Rajiram’s forces have secured the Nelanther Isles and have scoured the Sword Coast for treasures. Now they have begun to explore a mysterious island that recently just popped into existence nearby. SEER seems to believe that an aboleth artifact is their goal. It is up to the adventurers, in competition with the baron, as well as aboleths, the Kraken Society, and the mysterious caretaker of the island, to locate the Eye of Xxiphu and avert catastrophic disaster.