
High tide is coming in in this week’s encounter: Sea Trolls in the Net, a tongue-in-cheek combat encounter about a troll troubling fishermen and getting tangled up in their net. This encounter works best when it can add flavor to a grim, seaside locale as a random encounter the adventurers stumble across while exploring. While exploring a blighted shoreline on some forsaken coast, the adventurers find a sea troll feasting upon fishing nets full of freshly caught fish while their fishermen flee from the shore.

A proud paladin’s quest for glory against marauding orcs ends in tragic failure with his disappearance and presumed death. Worse still, an artifact of his faith entrusted to him has gone missing. Can the adventurers reclaim the artifact and force an end to the hostilities, or will the brightest beacon of good in the Western Heartlands be extinguished? Pgs. 28-43

All ocean voyages are fraught with peril, yet a voyage to the infamous Isle of Dread might seem to some old salts to be a deliberate goading of the gods of the sea. Many of those who have attempted the voyage before managed to return to civilization often choose not to speak of the trials they experienced on that dangerous route, yet those whose lips can be loosened by a draught of grog whisper amazing stories... tales of pirates, sea monsters, terrifying storms, and perhaps most harrowing of all, of a strange and sinister land without land, a floating graveyard of dead ships mired in a sargasso the size of an island. This place has many names, but its most well-known may be it's most apt - Journey's End. "The Sea Wyvern's Wake" is the third chapter of the Savage Tide Adventure Path, a complete campaign consisting of 12 adventures appearing in Dungeon magazine. For additional aid in running this campaign, check out Dragon magazine's monthly "Savage Tidings" articles, a series that helps players and DMs prepare for and expand upon the campaign. Issue #350 of Dragon magazine features a regional guide to the seafaring environs the PCs can expect on the journey to the Isle of Dread. It’s time to bid farewell to the city of Sasserine as the PCs board the Sea Wyvern for a 3,000-mile voyage south into the uncharted waters of the Vohoun Ocean. Their destination: the Isle of Dread. Pgs. 16-48

Within an ancient necropolis a pool of alien slime grasps the minds and bodies of the people of Exag with wispy tendrils of madness. Those transformed by its power invariably seek the crypt, but what fell power draws them there? Part two of the Seeds of Sehan campaign arc. Pgs. 26-41
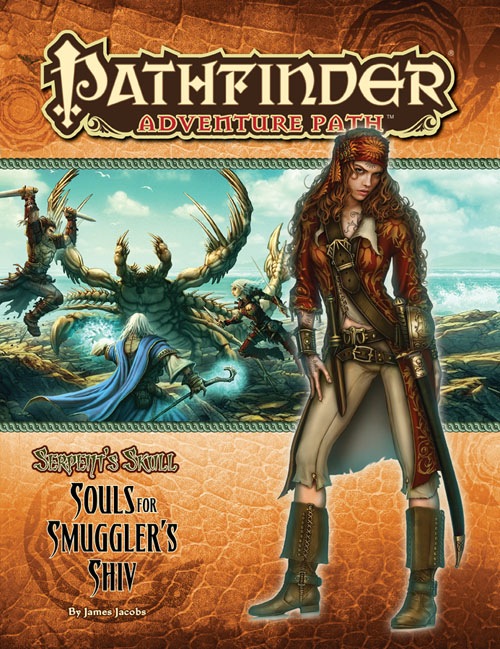
A deadly storm shipwrecks the passengers and crew of the Jenivere upon infamous Smuggler’s Shiv, an island off the coast of the jungle realm of Sargava. If they’re to have any hope of escaping the notorious pirates’ graveyard, the survivors will need to band together to outwit the isle’s strange beasts and legendary menaces. But can the PCs unite the swift-to-squabble castaways, especially when several seem to have mysterious goals of their own? And does Smuggler’s Shiv hide secrets even deadlier than its desperate denizens? This is part one of the Pathfinder Adventure Path "Serpent's Skull", but can be played as a standalone adventure that lasts approximately 10 four-five hour sessions. Great for first time dungeon masters. This is not a seafaring adventure. The PCs are shipwrecked on an island for the entire duration. This adventure ends with (hopefully) the PCs finding a way off the island (reaching level 3). It is therefore a great starting adventure with a definitive conclusion. After this module, you can continue with part two or change into your own homebrew.
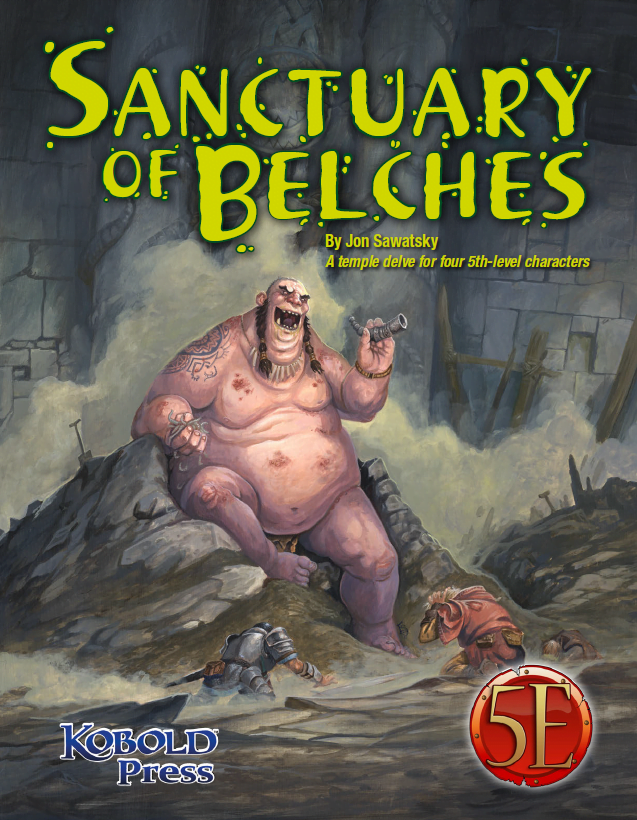
The trouble began several weeks ago when a duergar excavation team went to work in a long-abandoned temple. Drawn to the temple by stories of riches and artifacts, the duergar hired several giants as laborers before cracking the temple’s sealed doors. The largest of the giants, a loathsome Thursir mutant named Huppo, used his acidic vomit to expedite tunneling into the temple’s collapsed hall of worship. Then, Huppo found the horn—an unusual instrument made from a single piece of stone, with a mouthpiece so intricate only a master carver could have made it. The horn became the giant’s obsession. Seeing only the horn’s potential sale value, the dwarves demanded Huppo turn it over to them, but Huppo refused. To force compliance, the dwarves stopped feeding the gluttonous brute, but Huppo had already found his own source of food; in deep areas of the temple, worms were chewing out of the rocks, and Huppo ate them by the fistful. He also played the horn. Then, after several days of blowing the horn and devouring the strange worms, Huppo released a belch so noxious the dwarves had no choice but to lock him in a sealed chamber and carefully consider their next move. The horn’s call, however, had caught the attention of passing nomadic orcs. They set up camp outside the temple entrance in the hope of finding the horn and its player. That’s the current situation at the temple: the giant refuses to stop blowing the horn and belching out deadly clouds of stomach gas; the dwarves are frightened and edgy while their leader is obsessed with malevolent whispers; orcs are threatening to overrun the place; and the population of worms grows steadily as something awakens deep in the stone beneath the sanctuary of belches.

Hurry! Hurry! Hurry! Step right up, ladies and gentlemen, and behold the greatest circus in the land! Behold the skilled mummers performing at The Stage; you’ll literally feel like you’re part of the play! Thrill to the death-defying acts (and audience) in the two rings under the Big Top! Laugh at the antics of the baleful buffoons, harmful harlequins, and malevolent merrymakers of Clown Alley! Gaze in wonder at the wild beasts of the Menagerie, (just make sure you know which side of the bars you’re on)! All this and more, for the small price of a single admission, to Bitterbark’s Magnificent Circus! The circus is in town! But there’s something not quite right about it. There are rumors of missing children, evil plots, and more. Can you discover the secrets hidden inside Bitterbark’s Magnificent Circus? Intended as a stand-alone adventure, but there are notes on how to include it as part of the Castle of the Mad Archmage mega-dungeon adventure. Published by BRW Games

A perfect side-quest adventure for a party based in Phandalin or after completion of Lost Mines of Phandelver. Unravel the malevolent mysteries of Knacker’s Knothole! A party of four to six 5th level characters meet Knacker, the ancient awakened grandfather oak, who was introduced in Volo’s Vetted Vendors. He has a request: one of his cherished death’s heads is missing and he implores the party to find out what happened to it. Although Knacker suspects the people of Phandalin, the party’s investigations ultimately reveal a much more sinister threat. The party must investigate the disappearance while an unseen foe attempts to thwart their efforts with ambushes and misdirection. It is not long before there are more disappearances, and the party must use its ingenuity to prevent open hostilities. This adventure is part of a new series based on Volo’s Vetted Vendors and Elminsters Excellent Establishments. It can be played as the final part in this series, and it is also ideally suited to a party that has just completed Lost Mines of Phandelver. This is a 5-7 hour adventure that will advance the party to 6th level. This full-color 60-page adventure includes: * 29 pages of adventure content. * 2 pages of convenient NPC summaries. * 8 beautiful maps suitable for use with any VTT (separate files are included for all maps, including both high- and low-resolution versions). * Many random tables including adventure hooks, customers at Knacker’s Knothole, rumors, random encounters, chase complications and battle events. These tables can provide inspiration for other adventures and campaigns as well! * 20 pages of monster and NPC stat blocks.
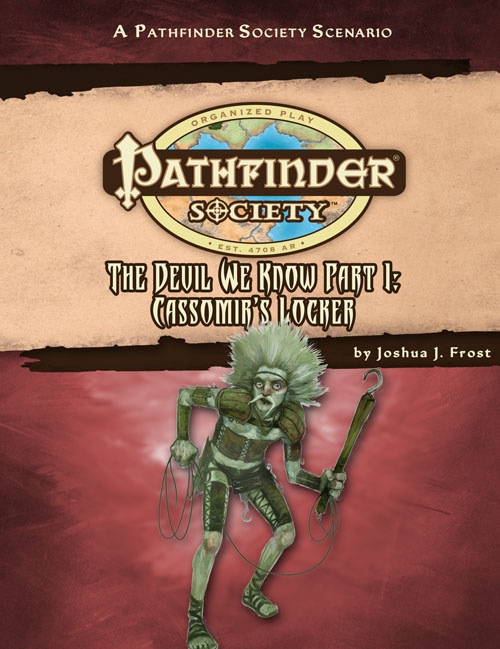
Part 2 of the "The Devil We Know" campaign arc. Cassomir's Locker is a Pathfinder Society Scenario designed for 1st to 7th level characters (Tiers: 1–2, 3–4, and 6–7). The Pathfinder Society dispatches you to the catacombs called Cassomir's Locker to find the source of a rat cult breeding monstrous vermin. After clearing Cassomir's dank sewers and delving into the dirty dungeons below, will you find the artifact that powers Cassomir's Locker or bring about the destruction of Taldor's most important port?

The Proving Glade is a one-shot adventure meant for parties or duets. Your characters arrive in a small settlement that has a big problem. The forest, its lifeblood, has seemingly withdrawn its bounty. Others have gone in, only to return hours later confused about how they got out. Will your party have the wherewithal to navigate the treacherous forest, pass its surprising tests, and uncover what’s truly going on? I wanted a forest adventure that felt alive and busy. I also didn’t want every encounter to be solved with the swing of a sword. The Proving Glade is about questioning value, morality, judgement, and redemption. This adventure was written as part of the Summer 2019 RPG Writer's Workshop. We also submitted In the Heart of the Forest. While these two adventures are not necessarily connected, they both involve navigating difficult and dangerous scenarios in a forest and could naturally be strung together. This Product Includes -A 3 to 4 hour one-shot designed for parties or 1-1 play. -A new Sidekick stat block: Daelin Hoofbane, ranger extraordinaire. -A new custom creature: the mysterious and powerful Alseiad, a glade nymph of incredible beauty. -2 new maps: One region map for the forest around Quaervarr near Silverymoon and one battle map for The Hydra's Mire.

The fabled sword of Selfaril is told to bestow wisdom and power upon whomever wields it, so naturally its discovery has caused quite a stir in Mulmaster. All of this is complicated when a masked benefactor claims to not only know the truth about the blade, but also how it can be used to benefit the oppressed people of Mulmaster. Can it truly change Mulmaster for the better?

Your party has just spent the better part of the day travelling in dismal weather and you've just located an appropriate place to camp when, out of the drizzle filled sunset, the terrifying screams of a woman can be heard through the patter of rain through the trees. Great! You're cold, miserable, and now you have the moralistic compulsion to investigate and render assistance to a damsel in distress. What you don't realize is that morals and damsels always means more trouble than what you may be willing to pay. Will your party survive long enough to see the dawn through the Screams at Sunset?

In the bitter cold of a land mired in eternal winter, hunters take the shape of wolves to better kill their prey. They stalk the snow-filled forests on paws of deadly silence. Powerful and swift, these evil shapechangers roam the land at will, murdering those who oppose them and plundering the weak. At the head of this pack paces the great Black Wolf of the Wood. Is this murderous beast the underling of Gregor Zolnik, the boyar who rules this waste? Seeking to extend his conquests by any means he can, Gregor has cowed the land of Vorostokov by relying on ruthless strength and savagery. Are your player characters clever enough to survive against villains who are stronger, faster, and fiercer than any they've ever encountered? The Black Wolf awaits your answer in the biting cold.... TSR 9419
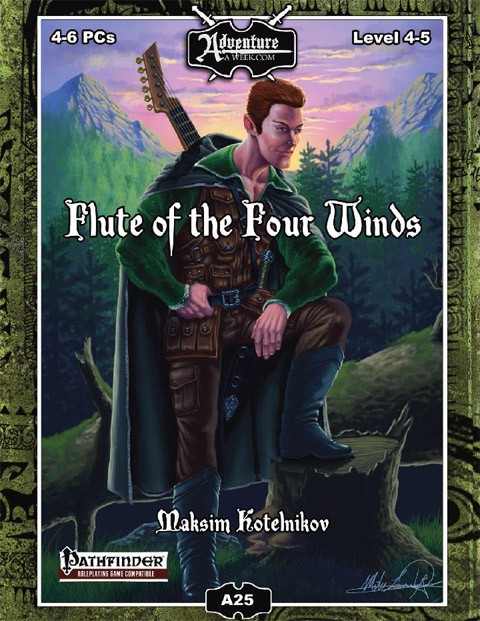
The majestic tree of the Four Winds grew in the forest west of the village of Rybalka, revered by the Vikmordere druids of the Snoqua tribe for its power to control the weather and hold balance with nature. When the Klavek Kingdom invaded the area, a powerful druid named Manahzo transferred the essence of the tree into a magical flute to keep its power safe from the threat of the militaristic Empire. Entrusted with the flute by the Snoqua, he and his wife sought to hide the flute from the reach of the invaders. As they fought the Klavek military they found themselves forced into an old cave system in the mountains of the Vikmordere Valley where they faced not only the Klavek soldiers, but ancient primal horrors. While Manahzo kept the flute out of the invaders hands, he lost his wife in the battle. Manahzo now seeks revenge on the Klavek Kingdom and its citizens located in the village of Rybalka. The PCs find themselves in the midst of an attack on Rybalka by Manahzo and a group of rogue Snoqua warriors. They must fight beside the citizens of Rybalka to repel the attack, and then seek out the Snoqua to find a means to deal with Manahzo and his rogue companions. In the forests outside Rybalka they will face a demonic wolf ally of Manahzo’s before finally engaging him in a direct battle as he executes a final attack on Rybalka. Even if the PCs succeed in defeating Manahzo, the threat does not end as his thirst for vengeance continues even after his passing in the form of haunt on the village. Directed by the Snoqua on how to end the haunt, the PCs must venture to the caves where Manahzo’s wife died to confront the ancient horrors that were responsible for her demise and recover her body in order to give her a proper burial to calm Manahzo’s vengeful spirit once and for all and bring peace to the village of Rybalka. Also included in “Flute of the Four Winds”: Roleplaying opportunities to interact with various NPCs in Rybalka, the heart of the Aventyr campaign setting Two new monsters – The hive-minded Tunnel Horrors and their carnivorous primal kin, the Anglers High resolution encounter maps in a new location, the coal mines north of Rybalka

The streets of Baldur’s Gate run red with blood. Old blood. The blood of Hellriders. Someone or something is punishing the children for the sins of the father and it’s time to put it to an end. Who and where is Gharizol? Part Three of the Betrayal is in the Blood series of adventures. A Two-to-Four-Hour Adventure for 1st through 4th Level Characters (APL 3).

This Adventure is based on the web comic series, Table Titans. It is set in the same village that part of the comic takes place in, however the path of the adventure does not follow the story line set in the comics. There are familiar elements that are a wink and a nod to fans of the comic, but it is a unique story. The adventure is set around the village of Haverford, currently beset by an unknown [i]Terror[/i] that has resulted in many many deaths in the surrounding forest. The adventures have arrived at this once peaceful hamlet and if they discover the source of the [i]Terror[/i] plaguing the region they will be handsomely rewarded. The Terror of Haverford is a starter adventure. Characters will advance from level 1 to 4 if completed. This adventure has both social and combat encounters, as well as combat encounters that can be solved socially. If characters aren't thorough in their investigations they will be taken by surprise by what lies ahead.

Set for initial level PCs, this short scenario utilizes a shortcut through a mountain range. The players are in a hurry to get to town for an adventuring opportunity and all they need to do is get through a crevice. Unfortunately for the new delvers, the gap is home to a trio of bandit brothers and other obstacles!

Within the jungles of Chult is a vast expanse of ash. While a red dragon is known to reside deep within the Land of Ash and Smoke, it is far from the deadliest of its denizens. Deeper still is a pit filled to the brim with pure evil. None who have sought out its secrets have survived to tell its tale. Will you be more successful than they?

City of the Dead A 4th Level adventure for 4-6 players A strange thief wandered into Waterdeep and stole from the wrong person. Now, he has died of “natural causes” on his visit to the City of Splendors. Having no known friends or relatives, he was hastily buried, along with his possessions, at Waterdeep’s Cemetery (The City of the Dead) in The Road’s End Tomb. While the PCs are dining in the taproom at The Dripping Dagger Inn, they are approached by a stranger who claims that the unknown man had stolen a necklace from his employer, and he needs the adventures to reclaim it. Unfortunately, the thief’s fresh corpse has been pilfered by a dire evil with unknown motives. What starts off as a simple recovery mission, turns into a fight for survival in the City of the Dead. The Adventurers must solve the mystery and destroy the evil that lurks beneath the cemetery, if they are to succeed in their quest and escape with their lives!
This dungeon is a tower inhabited by a goblin tribe, who is performing a ritual to gain the aid of their god. This adventure is perfect for any adventuring group. It pushes adventurers to be more thoughtful about their decisions, especially before and during combat. It is perfect for a one-shot but is meant for a starting dungeon for the players to go from level 1 to level 2.