
For years, the knights of Mendev have held back the evil locked inside the Worldwound, a vast, demon-tainted landscape. Every few years, they anoint a new protector, a sacred guardian charged with pitting his will against the teeming hordes bent on devouring the very souls of the living. This year, something has gone horribly wrong, and now a bloodthirsty demonic army has overrun the ancient fortress, and threatens to pour into the surrounding countryside.

The town of Ylraphon on the border of the Flooded Forest has been targeted by the yuan-ti. One of them has uncovered an ancient ritual to change the people of the area called the Old City into their servants. Can the adventurers stop the yuan-ti in time? The whole of the Moonsea may be at risk if they fail. Published by Mount Ogden Gaming Company.

The ship makes its way into the Corsair Mists, a region of the Halo Ocean said to devour ships and drive sailors mad. Somewhere in the oppressive fog, the White Ship awaits, but before the Adventurers can make it to their final desination, they must overcome the challenges of the mist. The fell necromancer Molo of the Thirteen Wives is still out there, still seeking to find his key to immortality and power that could jeopardize the entire Nameless Realms, and only the fearless crew can stop him. Join a sea elven ritual to hunt megalodon sharks, explore a long-cursed alchemist's tower made of blue crystal, and journey to the forge of Hyperion, Titan of Fire, himself. This adventure is formatted to both 1E & 5E gaming rules. Also available in PDF.

This module is designed for characters who have made their way through the Freeport Trilogy. Characters new to Freeport are at disadvantadge, however. Hell in Freeport sends the characters to the depths of the Hell as pawns of an undead duke. When they discover the truth of their mission, they must race against a sinister clock to save two cities. Act 1 kicks off with a battle against a cornugon on the Freeport docks. The characters are hailed as heroes for defeating the fiend, and are summoned to the Church of Retribution to help in the battle against Hell. Tee old inquisitor who greets them is actually Jalie Squarefoot, an infernal lich who took this form to search for the perfect cat's-paw. Squarefoot wants to take the souls of Freetown, a city in Hell, but must first get around a contract poin: he can't take the city until the Tyre tower clock-now stopped- strikes midnight. He sends the party to Devil's Cry, an inslan off the coast of Freeport, with instructions to close the gate to Hell hidden inside. In truth, he knows the party will be transported straight to the Third Circle when they try. Inside Devil's Cry the party finds the remnants of a great battle fought between an invading devil's army and the Church of Retribution, and battle their way past undead defenders until they reach the gate itself and unwittingly trigger it. Act 2 begins with the party in a twin of the complex they explored in Devil's Cry, but now they are deep in Hell. They fight their way back to the cavern entrance, only to find that they are not on the Prime anymore. When they voyage back their homeport, they instead find themselves in Freetown, a city of scaped slaves in a dark mirror image of Freeport. Once in Freetown, they make the acquaintance of the city's mayor Wycleffe-a servant of Jalie Squarefoot-who persuades them to go on a quest to Tyre to restart the tower clock. They travel the Styx to the Eight Circle and fight their way into a long-buried vity, and then into the tower clock itself. They restart the clock and begin the trip home, but are waylaid by devils and taken prisioner. Act 3 opens with the party naked and in chains in the infernal prison called the Forge. They learn that Jalie Squarefoot and Wycleffe have duped them, and that the supposed rebels of Freetown are actually its protectors. The characters must escape or win their freedom in the gladiator pits before the tower clock they restarted destroys both Freetown and their home city of Freeport. They battle back to Freetown, taking revenge on their captors in the process, and capture the city from Wycleffe with the help of the rebels. Finally it falls to the PCs to enter the tower clock and stop it and Jalie Squarefoot before the fiend's plan can come to fruition. After being tricked and manipulated throughout the adventure, the party finally has their revenge on the duke and his minions.

Part 1 of an Expert-level quest into a hostile wilderness. This adventure takes place in the Known World of the D&D game, as outlined throughout the D&D game rule books and modules. The DM may find it useful to consult the Companion and Masters Sets, as well as most of the X-series of Expert Set modules. D&D Expert Set module X9, The Savage Coast, would be especially helpful, as Tortles of the Purple Sage could easily serve and continue that module's direction and plot like, adding a previously undescribed area (the Great Northway) to the Known World. The DM may also place the areas and events of this adventure within an existing campaign setting, as long as the geographical areas of the campaign match those set forth here. Pgs. 40-62

Continue your duet campaign or add something new! Wake up in a druid colony and embark on a quest for trust and truth with plenty of political intrigue, hidden plots, and exciting combat along the way! Second Glance picks up where our first adventure, First Blush, left off and invites the PC to explore their world, test their growing abilities, and get to know their mysterious crystalline companion. However, this adventure can be inserted into any campaign setting and scaled accordingly. Second Glance is part of D&D Duet’s mission to bring you high-quality, ready-to-play material that supports adventuring parties of 1 Player and 1 DM. This adventure is written for a second-level character in a one-on-one 5th edition D&D campaign. It lets the PC explore a druid grove and observe its mysterious residents before traveling to a too-perfect town with twisted secrets. They’ll take on a calculating magistrate, addled cleric, and dark forest creatures but find that other, more ancient mysteries lie in wait just beneath the surface. Everything you need for your own two-person game is inside! This product includes: -A 2nd or 3rd-level adventure adaptable to any setting -Stat blocks for FOUR new creatures and three NPCs -A region map, two settlement maps, and two site maps to aid the PC’s investigations -A fully realized town complete with shops, fleshed out NPCs, and places to explore -Side-quests for curious adventurers or those fond of gold and magical items -Detailed backstory for the ancient warrior sheltered inside the PC’s treasured amulet -A custom magical item And helpful tips for DMing a one-on-one game This adventure is perfect for those looking to begin or continue their duet campaign. It could also serve as a story hook, session zero, or multiclassing narrative for a PC who wants to become a druid. Published by D&D Duet.

"Long ago the Wizards of the world discovered the Afterglow Sea, a new magically charged plane of existence that lay beyond the Veil of the Elemental Plane of Water. It was from this magical well that they drew their supremacy, but some among them sought more raw energy, and surmised another darker and more powerful plane existed beyond the Elemental Plane of Shadow..." The black-heart necromancer Molo of the 13 Wives has discovered the existence of the Veil of Shadow and has set about to once again make contact, threatening the entire world in the process. So it is that a group of adventurers has been hired by the Wizards of the Taux to find Molo before he can bring about this cataclysm, but he has a head start. Molo has gone south across the sea, and a ship, the Coral Stranger, has been outfitted to try and catch him. Can the adventurers survive the trails of the southern ocean, solve the mysteries of corrupted dinosaur islands, brave the shadow-touched port of Distant Turtle City, and overcome the legendary Corsair Mists where Hyperion, Titan of Fire, is said to hold court over sea creatures the likes of which the world has never seen? Even if they can overcome all these obstacles, there is still the White Ship, death vessel of ancient Uthoria and closest contact point to the Veil of Shadow, and Molo himself... Compiling the full White Ship Campaign adventures series from Folio 14-19, as well as over half a dozen supplemental mini-adventures and the Ports of the Nameless Realms supplement, this is a true monster of a sea-based dungeon and lost island crawl. The adventure will take characters from 1st -12th level in an epic island hopping campaign! Contains: WS1 The Isle of Jade WS1.5 The Pearl of Madness WS1.6 Tomb at the Dragon Spine WS1.7 Candon Shaman of the Dark Fen WS2 The Forgotten Plateau WS2.5 The Ruins of Alaxar WS3 Distant Turtle City WS3.5 Pirate Lords of the Dark Sargasso WS4 Samurai's Fall WS4.5 The Final Stand of the Fallen Leaf WS5 The Shattered Tower WS5.5 The Sunken City WS6 Duel on The White Ship WS6.5 The Ghost Tower Ports of the Namless Realms Volume 1&2, Iconic Characters Also Available: WS2.6 Lost among the Crystals WS3.6 The Ogre Magi of Jade Rock These adventures are formatted to both 1E & 5E gaming rules.

A dark shape emerges from the shadow of Castle Ravenloft. A flash of lightning reveals the sneering countenance of Count Strahd von Zarovich. His eyes burn with eternal hunger and a contempt for life. From a narrow balcony, he peers out into the drizzling twilight at the few sad lights of the village below and mutters a single name: "Ireena..." Based on the classic adventure by Tracy and Laura Hickman, the Expedition to Castle Ravenloft campaign adventure updates the original 1st Edition "Ravenloft" module, retaining the Gothic flavor and familiar elements while expanding and reimagining some of the locations to create a deeper, richer adventure experience. This adventure is designed for characters of levels 6, bringing them up to level 10, and features a new, easy-to-use combat encounter format. This book also presents new magic items, feats, and prestige classes for player characters. For use with these Dungeons & Dragons core books: Player's Handbook, Dungeon Master's Guide, Monster Manual.
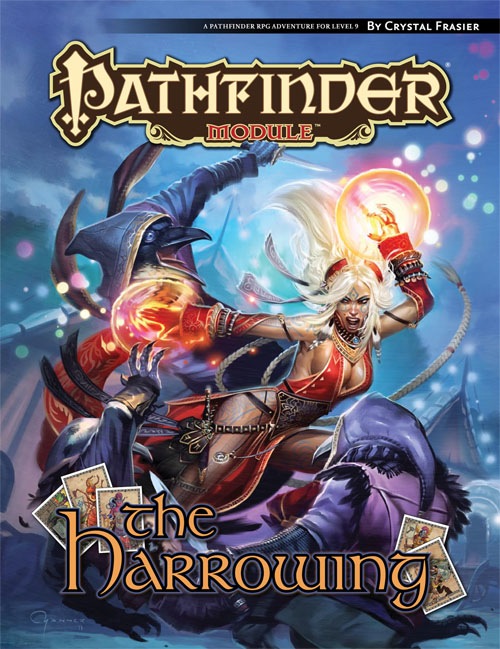
Varisian fortune-tellers from across Golarion use the mystic harrow deck to read fate and predict the future, but few have ever mastered the mysterious harrow to such a degree as Sonnorae, a long-dead bard from the Age of Darkness. Fearing her collection of stories would be lost when she died, she created a demiplane within her own harrow deck to contain them. Over time, these stories took on lives of their own, and melded with the images on the cards themselves. But not all stories have happy endings, and the storykin who inhabit the Harrowed Realm have their own motivations and plots for power or even escape into the real world.

Figgy Puddin' Steals Christmas is a short adventure Designed for use with Shadowdark RPG. The adventure is designed for three to six characters of low to mid experience. The anticipated run-time is 2- to 4-hours. There's a bit of roleplay in this adventure, which may extend the playtime. Adventure Background A traveling jester known as Figgy Puddin’ and her Coal Smudge Gang have stolen Christmas presents and now hold them for ransom. While safe and secure in her lair, she awaits either a payment of an outrageous ransom, or a crew of heroes to claim the presents after they navigate her not-so-festive lair. What's the Adventure? After you introduce the hook, the adventure occurs in Figgy Puddin's lair - a refurbished kobold bunker consisting of eight rooms. As the characters explore the linear dungeon, they encounter new creatures, complete challenges, and are tested about their Christmas knowledge. However, the final confrontation with the naughty Figgy Puddin' could make for a very Unhappy and Unmerry Christmas for our heroes, the children of Thistleton, and their parents. Who Is Figgy Puddin’? Figgy Puddin’ was once a happy jester who loved Christmas. For years she traveled the realm, bringing fun and festive cheer to villages and children while preparing the way for Santa. However, times have become tough, and entertainment doesn’t always pay as well as one would like. As Figgy prepares for retirement, she’s learned she doesn’t have enough gold to last. During this time, she’s also decided that Santa doesn’t know who she is, let alone appreciate the work she puts in every year. Using her savings, extortion, blackmail, and other nefarious means, she’s convinced several mechanical geniuses and arcane specialists to help her refurbish her underground bunker with wondrous effects, creatures, and tests.

A minion of chaos has come to the Prime Material Plane from the void of the Far Realms to terrorize and conquer in the name of its masters. The PCs must act quickly to assemble a legendary artefact powerful enough to weaken the minion so it can be defeated. Pgs. 20-47

A Villain with a Vison A stolen jewel leads to the heart of the swamp, where one man’s thirst for vengeance threatens to destroy an entire town. Pgs. 68-92

Deep blue mists of the night swirl over the sands of Raurin, the incomparable Desert of Dust. As the cool night air drains the heat from the sand, you and your friends huddle around your campfire, glancing nervously at the giant pyramid in the distance. Gradually, the winds change direction, bearing a thin streak of white mist toward you from the pyramid. It swirls and takes shape as a faceless man dressed in ancient robes and an ornate head-piece; moonlight shining through his ghostly body and robes, he lifts his arms toward the pyramid and speaks. It was magic that conveyed you all to Bralizar, and an ancient map that guided you through the pass in The Dustwall. But it was, after all, the tales that finally brought you to this place - tales of endless wealth, of spirit-guarded pyramids, of crystalline obelisks, of gemstones with mysterious properties. Now, as the haunted voice of the spectre before you begins his tale, you wonder if the treasure and the quest are worth the price...perhaps your very lives. Are you really the heroes of the prophecies, those who will overcome the foretold tests, and those for whom the treasure awaits? It is time to search your hearts before you venture further into the Desert of Desolation. An epic adventure includes the revised Desert of Desolation series plus totally new adventures within Raurin, a desert wilderness set in the Fabulous Forgotten Realms TSR 9199

The characters, members of the Clifftop Adventurers’ Guild, have been tasked with acquiring the Chains of Mur’taal, an artifact tied to Thelanis, by their guild handler, Lhara. This artifact is the latest in a series that Provost Nigel Faurious has commissioned the Clifftop guild to retrieve for him. The adventure starts when the characters arrive in Rhukaan Draal via Orien caravan. They’re given a chance to explore a small portion of the city before they head to a local bar to meet their contact provided by Lhara. Accompanied by a local guide, they make their way to the Seawall Mountains, where they’ll have to follow clues and their intuition to find the Valley of the Hero, which conceals the artifact that they’ve been hired to obtain. In order to earn the artifact, characters must first pass three tests laid before them by the Story: The Test of Courage, the Challenge of Wisdom, and the Trial of Honor. Once they finish the tests and collect the artifact, the party heads back toward Rhukaan Draal. But there are Marguul forces in the area, and they don’t intend to let the heroes escape with a priceless piece of their folklore…
Freeport is a fantasy “free city” you can place in a fantastic setting. Its basic premise is a pirate city gone legit… at least on the surface. In truth, the pirate tradition is alive and well in Freeport, but camouflaged by a veneer of respectability. These days the city’s pirates are privateers, legalized pirates Freeport loans out to the highest bidder. You’ll learn more in the short history of the city that follows. This should help give you a taste of the flavor of Freeport before the adventure begins and the given background is all you need to run this adventure. It is an ideal starting place for a new campaign as the player characters find themselves stranded in Freeport after a deal goes sour. A seemingly simple job plunges them into the strange underside of the city, where they uncover secrets worth dying for. Death in Freeport is the first from the Freeport trilogy, together with Terror in Freeport and Madness in Freeport. Synopsis: Death in Freeport drops the player characters into the midst of political and magical intrigue, as the hidden Brotherhood of the Yellow Sign manipulates events to bring its dread god to the world. Freeport is still a bustling center of trade, but evil currents run beneath the surface. There are secrets here, and questions unanswered. The characters will undoubtedly learn there is more here than they expect in a simple seaport. The question is, will that knowledge kill them? As the adventure begins, the player characters (PCs) have just come to Freeport on a merchant ship. While on the docks, the PCs are attacked by a press gang, who mistake them for easy marks. The press gang is handily beaten off; since they are unused to real resistance. A bookish young man named Brother Egil then approaches the PCs. He says that he’s been looking for a group that can take of itself, and that he has a job for them if they are interested: finding a missing librarian. The missing man, Lucius, disappeared two days previously, and Egil is eager to find him. Egil gives the PCs some background on Lucius and his strange behavior. The PCs are then free to investigate: They are likely to visit Lucius’s home, the temple to the God of Knowledge, and an orc pirate ship. This should form a picture of Lucius as a man searching for his own past—who found something he wasn’t counting on. Following a trail of clues, the PCs learn about the Brotherhood of the Yellow Sign. With a little luck, the PCs can trail the cultists back to their hideout, penetrate the lair, and discover secret tunnels underneath it. Deep underground they find degenerate serpent people, and eventually Lucius himself. The librarian has been tortured badly and will die without aid. The PCs also have to deal with the leader of the cult, a man they may recognize from the temple. When the cult priest is slain, they are in for an even bigger surprise. He was not human at all, but a serpent man in disguise. What this means for Freeport only the gods can say.

Ratmen of the Dead Oak is a companion adventure made to go along with the events unfolding in Folio #8 (DF1 The Patina Court). It contains the information needed to run a side advenute during the events of The Hidden Valoria Campaign. You haven't truly been inducted into the culture of Valoria unless you've had dealings ith the mysterious Ratmen. Now, a problme has emerged from an infamous tree in the Patina and only the characters have the unique skills required to deal with it both diplomatically and martially. This adventure is formatted to both 1E & 5E gaming rules.

The End of the World Is at Hand! A hideous death cult has seized control of an ancient artifact-monument known as Tovag Baragu. The power behind the cult is the Old One himself, Iuz the Evil, demonic master of an empire. He's on an all-or-nothing quest for supremacy over the world—and the heavens beyond. To stop him, heroes must face horrors never dreamed of, journeying to a shadowed city where Death rules and the living cower. Here, Iuz will achieve his mad dream by destroying the imprisoned master of that alien citadel: Vecna, the mightiest lich, an immortal demigod. Two items exist with the power to stop Iuz—the Eye and the Hand of Vecna—but using them carries fantastic risks. Not even the gods know what will be unleashed when these items are fully activated. Die Vecna Die! takes the heroes from the Greyhawk campaign to the demiplane of Ravenloft and then to the Planescape city of Sigil. However, none of the material from those settings is required for play. TSR 11662

THRESHOLD! The northernmost town in the Duchy - and your last stop before your adventures begin. Threshold, the gateway to mysterious castles, lost temples, deadly caves and caverns. You have heard the stories and legends, now you wish to see for yourself. This product provides a complete campaign adventure that will take beginning characters from 1st all the way to 3rd level and possibly beyond, drawn from the first nine modules of the B-series adventures. See individual adventure entries for Boss, Common Monster and Items lists. TSR 9190

𝐓𝐡𝐢𝐬 𝐢𝐬 𝐭𝐡𝐞 𝐭𝐡𝐫𝐢𝐥𝐥𝐢𝐧𝐠 𝐟𝐢𝐧𝐢𝐬𝐡 𝐭𝐨 𝐭𝐡𝐞 𝐓𝐨𝐰𝐞𝐫 𝐨𝐟 𝐁𝐨𝐧𝐝𝐚𝐠𝐞 𝐟𝐞𝐚𝐭𝐮𝐫𝐢𝐧𝐠: ● Eight deadly encounters ● More deadly traps ● The water maze ● and Aumvor himself! Will your PCs escape with their lives or stand and face Aunvor and put an end to his deadly game?
A one-shot adventure for level 1 characters, in which the party must investigate a series of mysterious happenings at an old, abandoned manor house on the outskirts of a small town.