
The Dwarven clans are in chaos, and a powerful host of goblins stand poised to sweep over the land in a wave of death and terror. Only the Axe of the Dwarvish Lords- one of the most powerful weapons ever created by the dwarven race- holds the key to ultimate victory against the massing humanoids. Can the PCs brave the labyrinth of an abandoned dwarven stronghold to find the Axe? TSR 11347

The Legend of the Black Monastery Two centuries have passed since the terrible events associated with the hideous cult known as the Black Brotherhood. Only scholars and story-tellers remember now how the kingdom was nearly laid to waste and the Black Monastery rose to grandeur and fell into haunted ruins. The Brothers first appeared as an order of benevolent priests and humble monks in black robes who followed a creed of kindness to the poor and service to the kingdom. Their rules called for humility and self denial. Other religious orders had no quarrel with their theology or their behavior. Their ranks grew as many commoners and nobles were drawn to the order by its good reputation. The first headquarters for the order was a campsite, located in a forest near the edge of the realm. The Brothers said that their poverty and dedication to service allowed them no resources for more grand accommodations. Members of the Black Brotherhood built chapels in caves or constructed small temples on common land near villages. They said that these rustic shrines allowed them to be near the people they served. Services held by the Brothers at these locations attracted large numbers of common people, who supported the Black Brotherhood with alms. Within 50 years of their first appearance, the Black Brotherhood had a number of larger temples and abbeys around the kingdom. Wealthy patrons endowed them with lands and buildings in order to buy favor and further the work of the Brothers. The lands they gained were slowly expanded as the order’s influence grew. Many merchants willed part of their fortunes to the Black Brotherhood, allowing the order to expand their work even further. The Brothers became bankers, loaning money and becoming partners in trade throughout the kingdom. Within 200 years of their founding, the order was wealthy and influential, with chapters throughout the kingdom and spreading into nearby realms. With their order well-established, the Black Brotherhood received royal permission to build a grand monastery in the hill country north of the kingdom’s center. Their abbot, a cousin of the king, asked for the royal grant of a specific hilltop called the Hill of Mornay. This hill was already crowned by ancient ruins that the monks proposed to clear away. Because it was land not wanted for agriculture, the king was happy to grant the request. He even donated money to build the monastery and encouraged others to contribute. With funds from around the realm, the Brothers completed their new monastery within a decade. It was a grand, sprawling edifice built of black stone and called the Black Monastery. From the very beginning, there were some who said that the Black Brotherhood was not what it seemed. There were always hints of corruption and moral lapses among the Brothers, but no more than any other religious order. There were some who told stories of greed, gluttony and depravity among the monks, but these tales did not weaken the order’s reputation during their early years. All of that changed with the construction of the Black Monastery. Within two decades of the Black Monastery’s completion, locals began to speak of troubling events there. Sometimes, Brothers made strange demands. They began to cheat farmers of their crops. They loaned money at ruinous rates, taking the property of anyone who could not pay. They pressured or even threatened wealthy patrons, extorting money in larger and larger amounts. Everywhere, the Black Brotherhood grew stronger, prouder and more aggressive. And there was more… People began to disappear. The farmers who worked the monastery lands reported that some people who went out at night, or who went off by themselves, did not return. It started with individuals…people without influential families…but soon the terror and loss spread to even to noble households. Some said that the people who disappeared had been taken into the Black Monastery, and the place slowly gained an evil reputation. Tenant farmers began moving away from the region, seeking safety at the loss of their fields. Slowly, even the king began to sense that the night was full of new terrors. Across the kingdom, reports began to come in telling of hauntings and the depredations of monsters. Flocks of dead birds fell from clear skies, onto villages and city streets. Fish died by thousands in their streams. Citizens reported stillborn babies and monstrous births. Crops failed. Fields were full of stunted plants. Crimes of all types grew common as incidents of madness spread everywhere. Word spread that the center of these dark portents was the Black Monastery, where many said the brothers practiced necromancy and human sacrifice. It was feared that the Black Brotherhood no longer worshipped gods of light and had turned to the service of the Dark God. These terrors came to a head when the Black Brotherhood dared to threaten the king himself. Realizing his peril, the king moved to dispossess and disband the Black Brother hood. He ordered their shrines, abbeys and lands seized. He had Brothers arrested for real and imagined crimes. He also ordered investigations into the Black Monastery and the order’s highest ranking members. The Black Brotherhood did not go quietly. Conflict between the order and the crown broke into violence when the Brothers incited their followers to riot across the kingdom. There were disturbances everywhere, including several attempts to assassinate the king by blades and by dark sorcery. It became clear to everyone that the Black Brotherhood was far more than just another religious order. Once knives were drawn, the conflict grew into open war between the crown and the Brothers. The Black Brotherhood had exceeded their grasp. Their followers were crushed in the streets by mounted knights. Brothers were rounded up and arrested. Many of them were executed. Armed supporters of the Black Brotherhood, backed by arcane and divine magic, were defeated and slaughtered. The Brothers were driven back to their final hilltop fortress – the Black Monastery. They were besieged by the king’s army, trapped and waiting for the king’s forces to break in and end the war. The final assault on the Black Monastery ended in victory and disaster. The king’s army took the hilltop, driving the last of the black-robed monks into the monastery itself. The soldiers were met by more than just men. There were monsters and fiends defending the monastery. There was a terrible slaughter on both sides. In many places the dead rose up to fight again. The battle continued from afternoon into night, lit by flames and magical energy. The Black Monastery was never actually taken. The king’s forces drove the last of their foul enemies back inside the monastery gates. Battering rams and war machines were hauled up the hill to crush their way inside. But before the king’s men could take the final stronghold, the Black Brotherhood immolated themselves in magical fire. Green flames roared up from the monastery, engulfing many of the king’s men as well. As survivors watched, the Black Monastery burned away, stones, gates, towers and all. There was a lurid green flare that lit the countryside. There was a scream of torment from a thousand human voices. There was a roar of falling masonry and splitting wood. Smoke and dust obscured the hilltop. The Black Monastery collapsed in upon itself and disappeared. Only ashes drifted down where the great structure had stood. All that was left of the Black Monastery was its foundations and debris-choked dungeons cut into the stones beneath. The war was over. The Black Brotherhood was destroyed. But the Black Monastery was not gone forever. Over nearly two centuries since its destruction, the Black Monastery has returned from time to time to haunt the Hill of Mornay. Impossible as it seems, there have been at least five incidents in which witnesses have reported finding the Hill of Mornay once again crowned with black walls and slate-roofed towers. In every case, the manifestation of this revenant of the Black Monastery has been accompanied by widespread reports of madness, crime and social unrest in the kingdom. Sometimes, the monastery has appeared only for a night. The last two times, the monastery reappeared atop the hill for as long as three months…each appearance longer than the first. There are tales of adventurers daring to enter the Black Monastery. Some went to look for treasure. Others went to battle whatever evil still lived inside. There are stories of lucky and brave explorers who have survived the horrors, returning with riches from the fabled hordes of the Black Brotherhood. It is enough to drive men mad with greed – enough to lure more each time to dare to enter the Black Monastery.

Upon the horse plains of Nova Vaasa, the Koshka Bluffs rise from the earth like gigantic, misshapen tumors. They give up stone to feed the sheer walls of Castle Faerhaaven, but lately they have yielded stranger objects: figurines, coins, and other odd artifacts, which curse those foolish enough to claim them. Now, the ancient priestess Sachmet has awakened from a timeless sleep to come and take them back.... TSR 9452

In this small 14 page adventure module, help the small village of Bull's Creek and a druidic grove! When a powerful nature spirit gets sick and lashes out, heroes are needed. Can your players stand up to the sickness that seeks to kill not only the organism that is the forest but, everyone else around too? Secret Grove of the Forest Goddess- a 5e SRD adventure for levels 1, 3 or 5. In James Grammaticus' Dungeon Short series, James explores fantasy worlds and settings in short bite-sized one shot adventures that be used on their own, can spring off into a larger campaign, or can be used as a side-adventure in a campaign. Featuring an entire dungeon, town, and forest exploration, Secret Grove of the Forest Goddess has everything you need to give your players a great introduction to the game.

“Gorgoldand’s Gauntlet” takes place in a cave network in the side of a cliff overlooking a lake and can be inserted easily into any campaign. Gorgoldand’s Gauntlet is a site-based adventure with a pre-dominance of puzzles and traps. The PCs discover a map leading to the Gauntlet and explore it looking for treasure. They test their strength and wits against various traps and puzzles created by a gold dragon who converted a cave network into a proving ground to surreptitiously test the abilities of local adventuring bands. If they make it all the way to the end of the Gauntlet, they’ll have the chance to fight a dragon construct made of the dungeon's treasure hoard and have the chance to gain access to a magic item that can have a significant impact on their adventuring careers. Pgs. 39-51

Encounters in the Savage Wilderness contains 19 encounters / mini-adventures, a few new creatures and items, and downloadable maps. We've also added suggestions on how to use the encounters in Eberron.

Kalzok the Minotaur pirate discovered an old smuggler's hold on a tiny island in the Nelanther Isles, not far from Nemessor. The island sits amid a dangerous archipelago encircled with scores of hidden shoals that is avoided by all but the most daring or foolish navigators. The area's waters are notorious for claiming the ships of unwary sea captains who tried to steer through the gauntlet of hidden reefs. This offering includes an overview of Kalzok's island along with the details of Kalzok's hidden lair.

The village of Gyles has been taken over by Ajax's forces, but after weeks of occupation, the War Dogs are becoming impatient with its newly appointed ruler. They weren’t made for watching over a bunch of villagers, they were made for action! The heroes arrive, seeing the devastation these monsters have caused and lives they’ve ruined, and realize they can offer them just what they need. Will they turn their Ground Commander against his master, or will they stand and fight them all, against impossible odds?
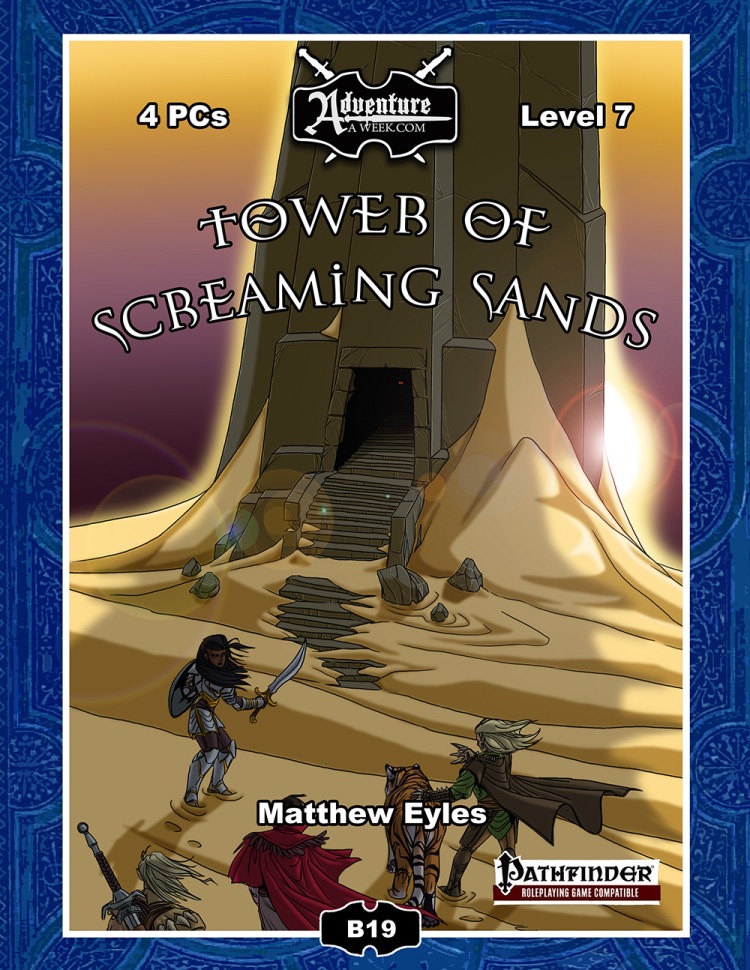
Deep within the blasted desert wastes a mysterious black tower has been sighted. The structure is not marked on any known map and has not been seen in this location by travellers in the region, yet there it stands. The adventurers set out to explore this ancient, isolated tower that appears ripe for the plundering. Within they face a gauntlet of insidious traps and supernatural horrors. The deeper the adventurers delve, the more secrets of the tower’s origins they uncover. The tower’s sinister creator does not rest easy in his arid grave – the adventurers must face him if they are to survive the Tower of Screaming Sands. Also included in “Tower of Screaming Sands”: Five deadly new traps: The Chamber of Ten Thousand Teeth, The God’s Grasp, Chamber of Flooding Sand, Hall of Arcing Blades and Descending Stone Block. A new monster – the scorpion swarm. Rules for whirlwinds, a new magical hazard GM tips for running overland travel.

This adventure is about fighting monsters and being heroic. It’s also about discovering hidden and forgotten secrets, and then using those secrets later to the heroes’ advantage. The heroes will fight lizardfolk and hawklords, undead and basilisks, and some strange and malevolent creatures from a plane beyond Orden. The heroes will have the opportunity for a handful of negotiations which can be hugely influenced by piecing together secret information uncovered earlier in the adventure. Combat encounters in the adventure are built to generally take at least 3 rounds, sometimes more - they can be complex! The heroes will be expected to spin multiple plates at the same time! The adventure reward an average of 12, but as many as 20 Victories. Depending on your experience running and your table’s experience playing Draw Steel, how many side objectives the heroes follow, as well as a bunch of other factors, it could run around 20 to 32 hours of playtime. In the Tullow Vale of Vasloria, a centuries old town is built around a weathered statue said to seal away an ancient evil. Ajax's Hawklords bombard and lay waste to the town, stealing the statue, and in the chaos, the pitiless Deatheye Yslansh and her lizardfolk minions abduct the citizens! Can you save the people of Ivywatch before they are put to the Deatheye's fell purpose? And what or who exactly have the Hawklords unsealed? This adventure is about fighting monsters and being heroic. It’s also about discovering hidden and forgotten secrets, and then using those secrets later to the heroes’ advantage. The heroes will fight lizardfolk and hawklords, ogres and basilisks, and some strange and malevolent creatures from a plane beyond Orden. The heroes will have the opportunity for a handful of negotiations which can be hugely influenced by piecing together secret information uncovered earlier in the adventure. Combat encounters in the adventure are built to generally take at least 3 rounds, sometimes more - they can be complex! The heroes will be expected to spin multiple plates at the same time! The adventure will reward an average of 8 to 18 Victories. Depending on your experience running and your table’s experience playing Draw Steel, how many side objectives the heroes follow, as well as a bunch of other factors, it could run around 20 to 32 hours of playtime. The adventure contains: - 12+ combat scenes, including a boss battle. Most combats have objectives beyond just “kill everything” - 2-3 montage tests - 1 small, safe location to take respites in, full of NPCs with opinions - 1 big, complex, puzzle-y negotiation - 10 new custom treasures and titles, and other player rewards - A brief setting primer to Tullow Vale

The strangest things wash up on the beach sometimes. The inhabitants of the Acitoff coastline are accustomed to storms, but last week the largest hurricane ever recorded swiftly struck a 60-mile stretch of coastline. The first day after the hurricane, mysterious bodies started floating to surface. They bore the symbol of the feared pirate, Jaggertooth Grin! Now it is up to the adventurers to locate the pirate ship and claim the treasure. The adventurers will have to fight the creatures of the deep in this primarily underwater adventure. Pgs. 3-14
/pic3143465.png)
Once a powerful proponent of Law, the Archmage Tazimack the Red was eventually driven mad by a fear of mortality. As he slipped into insanity his retirement home began to reflect the chaotic bent of his mind. Long after Tazimack’s unnaturally animated body has disintegrated, his manor house remains as a shadow cast by a twisted intellect. Can the characters bring order to this chaos?
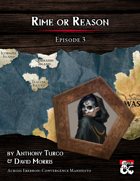
Provost Nigel Faurious’s research has revealed the location of an icy spire near the eastern side of Icewhite Island. The Provost needs the Hoarfrost Flower, an artifact found inside this spire, to make his Convergence Manifesto a reality. Eager to complete his work as quickly as possible, the Provost previously paid for an expedition from the Deathsgate Guild to explore the icy spire at the same time the Clifftop Guild surveyed the Shining Valley in the last adventure. The Deathsgate expedition’s ship, the Nightwood Cask, was destroyed by the cold of the Risia manifest zone. They made it to the island on lifeboats and headed to the spire, hoping to use it as shelter until someone from the Deathsgate Guild comes to rescue them. The spire’s builders are long gone and forgotten, but their traps and magic remain. Mror archeologists once found this place while in search of their ancestors that many believe hailed from the Frostfell. Only their camp remains in the foyer of the spire, where the party from Deathsgate waits. While the Deathsgaters’ supplies dwindle, they argue among themselves on their next steps. Should they try and make it to shore and hope their ship somehow survived, continue to wait, or delve deeper into the spire to complete the task they were hired for?

The loss of Skyreach Castle in Hoard of the Dragon Queen was a major setback to the Cult of the Dragon, but still only a setback. The cult is determined to retake the castle and claim Tiamat’s lost treasure buried in its frozen walls and cloudstuff vaults, but they aren’t the only ones. Blagothkus the cloud giant is still the master of Skyreach, and he has gone to the hall of his cousin Brunvild, ice lord of Uldoveld, for the resources to repair and reoccupy the castle. At the same time, the party is dispatched by the Council of Waterdeep to reclaim some of the stolen treasures lost when the castle fell.

The people of Orașnou are desperate. The village is on the brink of starvation and has little chance of surviving the harsh winter. Even if they had enough food and supplies, Lord Strahd’s taxes are due, and the ruler of Barovia does not accept excuses as payment. The Burgomaster and others in the village have recently learned of a wealthy estate that might have enough resources to solve both of Orașnou’s problems. It is a temptation he cannot afford to resistor can he? Part Nine of Misty Fortunes and Absent Hearts

A long-simmering merchant conflict has turned into a war of assassination, and the PCs are called in to prevent an attempt to murder the daughter of one of the merchants. They lead her yuan-ti would-be killer on an overland chase through a canyon called Ehlonna’s Scar, which contains surprises of its own.
This starting adventure for 5E is designed to introduce new players and give them a taste of the core aspects of D&D. Over the course of a single session the heroes will journey to the dungeon where the evil kobolds have taken hold and rescue the kidnapped baby before the kobolds welcome their new draconic overlord. Included are first level character sheets so you can get started right away.

Kelick’s Crossing is a frontier town set on side of the mighty Saint Torgoth’s Causeway. The bridge expanse over the river allows adventurers and traders an easy above water crossing into the frontier. While it has a well-trained guard staff that controls passage across the bridge and protecting the citizens. This setting offers an excellent frontier town where PCs can replenish gear and sell their hard fought loot.
Some ports are more dangerous than the storm. It's alive, it's hungry, it's growing. And you're on the menu. Alone, out in the wilds with a savage winter storm bearing down on you, you need shelter to survive. You stumble through the trees and smell wood-smoke. Ahead you spot the small fortified trading outpost known as Jacob's well. You're not the only traveller to find themselves stranded here in the teeth of the storm. The only problem, someone has bought something with them, it's alive, it's growing, it's voracious and you are all on the menu. Think Aliens and The Thing and you're on the right track. Has potential to be scaled to suit a group of adventurers. Pgs. 8-23

Escape from Elturel is a 6-8 hour Dungeons & Dragons adventure for characters of levels 1-2, for use as an introduction to Baldur's Gate: Descent into Avernus. Pilgrims and travelers flock to the holy city of Elturel to bask in the light of its second sun. But when the Companion starts to malfunction, the characters must escape the doomed city before it is pulled down to the Nine Hells. In the aftermath, a caravan of refugees needs their help to find a safe haven in that notorious hive of scum and villainy, Baldur's Gate! The adventure has everything you need to start a new campaign in Elturel, including: - a new adventure hook for Descent into Avernus - short introductory encounters set during and after the fall of Elturel - a skill challenge for escaping Elturel as it is pulled down to Avernus - resources, encounters, travel activities, and NPCs for a caravan to Baldur's Gate - notes for transitioning into Descent into Avernus - two creature and NPC stat blocks - a map pack with two maps by Dyson Logos Escape from Elturel also includes suggestions for combining this adventure with Burial in Baldur's Gate if you want to run a mixed party of characters from Elturel and Baldur's Gate.