
Will your party survive the frostbite Frostbite Gauntlet? A sequel to The Great Trial, this module is an arctic, highly challenging gauntlet focused on exploration and combat, planned for fours 10th-level characters. The adventure can be also run as a one-shot or as part of any campaign for that level. For more information on The Great Trial, see at the end of this page. The module is divided in two parts: Chapter 1 The gauntlet itself, the party will be taken to a demi-plane against their will and from there, they have a simple goal: leave. However, a powerful undead guardian will make things difficult. The party needs to find some of the sources of power of Deathwings, the guardian, to weaken it and have a chance against it. Chapter 2 After leaving, the group will arrive at a cave complex made of stone and ice. A ancient dracolich names Icingdeath will chase the party, squeezing through the tight tunnels, always on the party' heels. Once out, the party is greeted by Aenor and offered their rewards.

Bloodpurge, a bayou village in the Flooded Forest, has come under siege by malevolent powers. Many hunters in this shanty-town have gone missing. Desperate folk murmur rumors of evil lurking in the willow groves.

Elven Tower presents a compilation document of all the content for DMs running Out of the Abyss module. This guide has been very well received by the DMs community. I have gotten great response during the creation of this content. The guide is over 60 pages long and contains hoards of information, guides, suggestions, and general information for DMs running this module. It now has clickable table of contents and bookmarks for all the different chapters for easy navigation. There are maps for Gauntlgrym, Sorcere Tower, Vizeran's Tower, Karazikar's Maw as well as some very needed flowcharts and infographics to better understand the adventure. The guide also features some maps drawn by me (Elven Tower) to supplement the missing illustrations for important locations.

Experience this totally wicked two-hour adventure for 3-6 characters levels 5-10 from the fantabulous minds of Anthony Joyce and Oliver Clegg! Whoa! You’ve just killed Strahd but his body remains?! How can this be?! Lead your party on a retro journey through Castle Ravenloft to collect five pieces of a powerful artifact known as the Pentaforce to summon a powerful entity that can put an end to Strahd’s reign once and for all! Experience the rad music of the 1980’s as it guides you from room to room, confronting horrors like the Brunch Club, Ghost Hunters, thrilling zombies, Ricky Roll, the Loonies, Prom (Barovian Winter Fantasy ‘86), a flash-dance off with hags, aerobics with undead, Jeremy Krawfjord, Kris Purkens, and much more! This 1980’s inspired PDF is professionally designed and illustrated by Gordon McAlpin (Creator of Death by Goblins!). Inside you’ll find hyperlinks to each creature and their stat blocks on D&D Beyond accessible for free! This PDF also includes hyperlinks to a curated “Weekend at Strahd’s” playlist on Spotify so you can wow your players and relive the epic music of the 1980’s as you put an end to the reign of Strahd von Zarovich! This adventure does not require players to have played Curse of Strahd, nor does it spoil anything in Curse of Strahd. This adventure is designed to play casually as a one shot in a tubular party atmosphere, it’s soooo bodacious. P.S. One player plays as Strahd’s corpse...yes, you read that correctly...one lucky player gets to play the entire time as the corpse of Strahd! Oh, and the player that dies the most wins a crayon drawing of Frankenstein Ronald Reagan. Enjoy!
The characters are introduced to the coup occurring in Whitehorn and are tasked with warning a friend, whose family is involved, about it. (characters can choose one instrument as a reward)

Stars Over Stormwreck is a short adventure for four to five characters with an Average Character Level of 4. This product is designed to act as a bridge adventure between the Dungeons & Dragons Starter Set adventure Dragons of Stormwreck Isle and the Spelljammer: Adventures in Space adventure Light of Xaryxis. Dragons of Stormwreck Isle takes characters from 1st level to 4th level, while Light of Xaryxis begins at 5th level. During Stars Over Stormwreck, the characters travel from Stormwreck Isle to the city of Luskan, with the challenges of that journey taking them from 4th to 5th level and preparing them to enter the adventure in Light of Xaryxis. This adventure assumes you already own both the D&D Starter Set: Dragons of Stormwreck Isle and the Spelljammer: Adventures in Space boxed set. About the Adventure As a new group of heroes engages with the challenges and revelations of Dragons of Stormwreck Isle, the discovery of a mysterious relic from another world suggests that even greater adventures lie ahead. After their Stormwreck trials are done, the characters take sea passage to Luskan on the trade ship the Western Wind, hoping to learn more about the mysterious egg that’s come into their possession. The trip will not be easy, though, as an attack by sea-elf cultists, the threat of mutiny, and the escape of dangerous creatures from the ship’s hold all threaten to cut short the party’s journey. And all the while, strange storms of shooting stars appear across the night sky like some sort of prophecy—but of coming glory, or of imminent destruction? Stat blocks are included, as well as an Astral Sea Encounter Generator Appendix and a Wildspace Generator Appendix, supplying you with new DM tools for your Spelljammer campaigns.
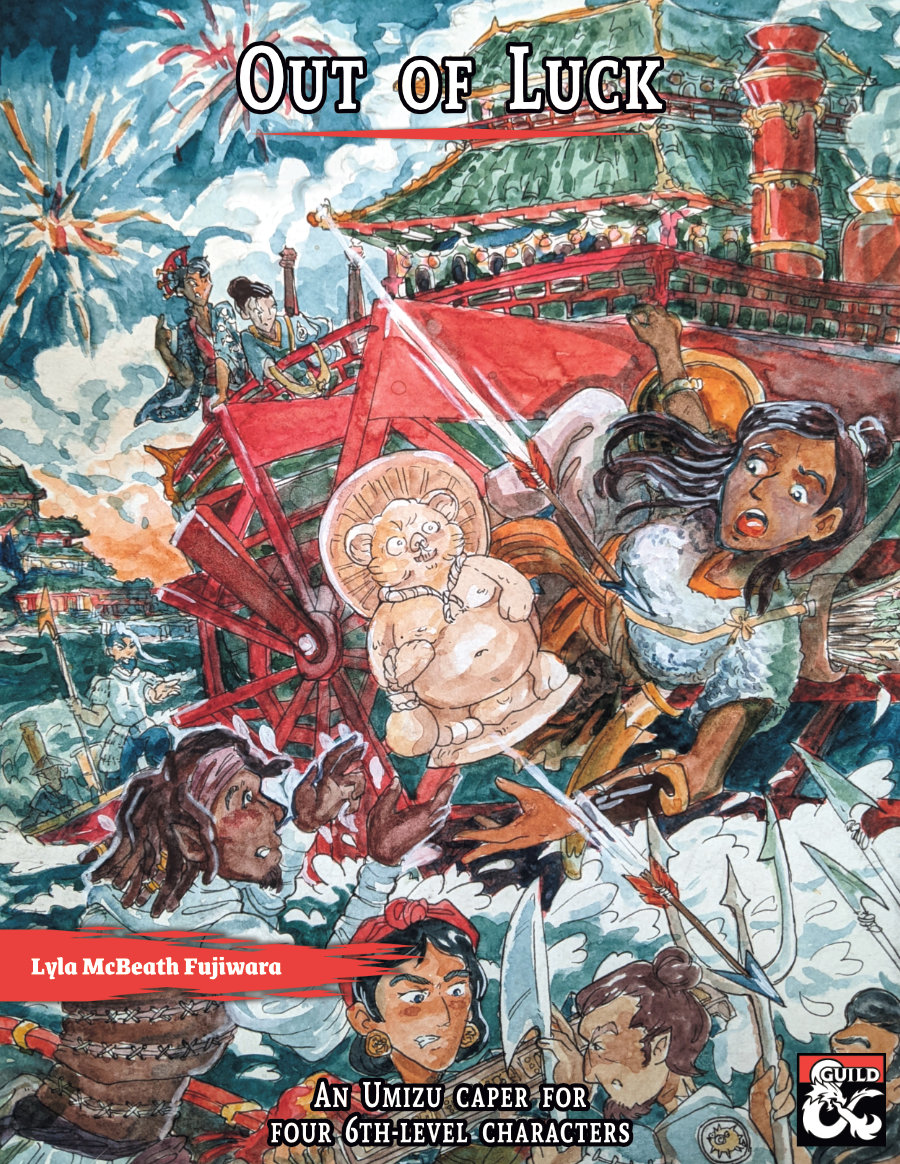
Take down a brutal crime boss in this one-shot heist with hijinx and heart. Explore Umizu, a seedy coastal steampunk city-state inspired by pre-modern Japan. Umizu is a Radiant Citadel locale that never got a full adventure--until now! Out of Luck features a cursed tanuki statue, a baby’s birthday party, and a steamboat fireworks battle! This one-shot includes everything you need to run a memorable caper: - Full-Color VTT-compatible steamboat bathhouse maps (DM and Player versions) - 8 Hand-drawn portraits and tokens for monsters and NPCs - Player handouts, a suspicion tracker, and three new stat blocks - Compatible with the Radiant Citadel or the Golden Vault; run as a one-shot or as part of a campaign - Thoroughly playtested and reviewed; over 30 players and DMs have gone through the adventure - A printer-friendly version Synopsis The Independent Merchants of Bright Moon Pier are sick of the Safe Oceans Society’s protection racket. After negotiations turn violent, the merchants opt for subterfuge. They hire the characters to infiltrate Boss Yashima’s birthday for her infant daughter and trick Yashima into accepting a cursed artifact, the Idol of Misfortune. Will this be a clean caper, or will the characters find themselves out of luck?

A Level 3 Adventure of Cheese, Chaos, and Theatrical Villainy by Infinite Initiative They mocked him. They laughed at his flat notes. Now… they shall taste the encore. The cheese goblins are back—and this time, they’re organized. After a botched tavern attack interrupts a bard’s performance, the players are swept into a tale of sabotage, dairy-fueled traps, and one goblin-warlord with a flair for the dramatic. Beneath a ruined manor, General Gruyère is preparing his final act—and the party has front-row seats to the madness. Inside the Adventure: A non-linear dungeon full of gooey hazards, goblin antics, and show-stopping setpieces The Floor is Fondue – cross a molten cheese basin or get scorched! Magical traps, secret passages, and oddball puzzles A final boss fight on a goblin stage… with Gruyère mid-monologue Includes new stat blocks and a magical item: Gruyère’s Quill of Cruel Prose This is a chaotic, flavorful one-shot designed to be silly, dangerous, and delightfully theatrical. Part of the Thirsty Tiger Tales series by Infinite Initiative.
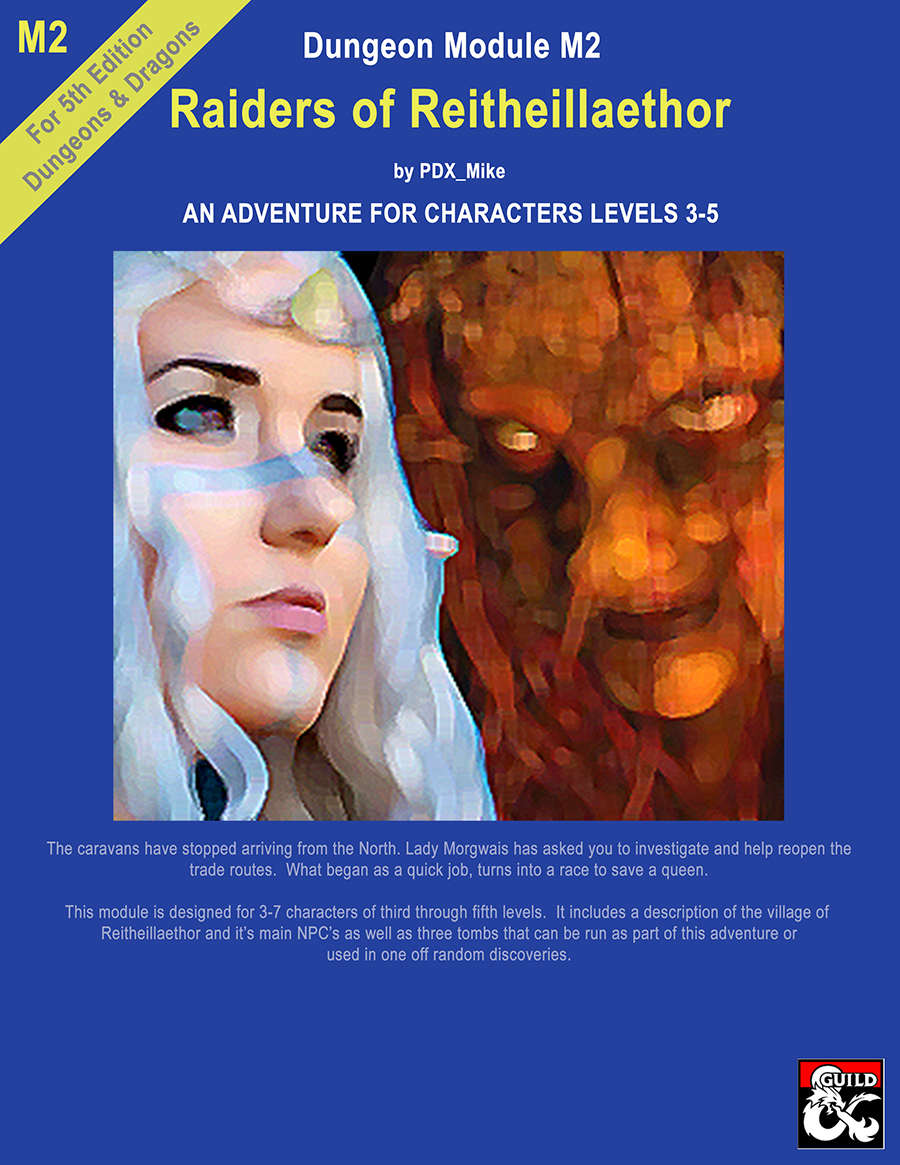
This is the second of the "High Forest Factbook" adventures series. The caravans have stopped arriving from the North. Lady Morgwais has asked you to investigate and help reopen the trade routes. What begins as a quick job turns into a race to save a queen. This module includes a detailed description of the Elven village of Reitheillaethor including it's NPCs. It can be run either as a continuation of the adventure started in "Menace of Merric", as an extended stand alone adventure or the three individual tombs included in it can be run as short one-off adventures.

After the first expedition to locate an ancient tomb was prematurely ended by monsters, the Search and Locate Treasure Consortium is doubling down. Camp established, they are looking for adventurers to make their dreams come true, but the leader of the Consortium is hiding something. Will the characters be able to avoid the Man Slayer tribe that destroyed the first expedition, help Larazmu settle his internal struggles, and locate the tomb that they have been searching for without getting into Moor Trouble?

A galvanice weird has torn apart an Izzet laboratory in the Blistercoils. The weird’s path of destruction leads to Tin Street where the weird was spotted being subdued and taken aboard the notorious Palace of Pain’s Pleasures, a mobile Cult of Rakdos performance stage. To return the weird to its proper owner and discover the mystery behind its bizarre behavior the party must brave The Palace of Pain’s Pleasures! The Palace of Pain’s Pleasures is a 2-hour Guildmasters' Guide to Ravnica adventure for 2nd - 3rd level characters. Picking up where Off to a Weird Start left off, this adventure is designed to be part of an ongoing campaign. For Dungeon Masters who wish to incorporate The Palace of Pain’s Pleasures independently from the ongoing story, 20 Adventure Hooks (two for each guild) are included, giving The Palace of Pain’s Pleasures flexibility for one-shot play or for inclusion in your own campaign! The Palace of Pain’s Pleasures contains: A new location that is also a magical construct. New trinket tables for the Cult of Rakdos. A new NPC antagonist (or contact), Ophyira, the star performer of the Palace! Two new magic items. One new spell. Discover the secrets of The Palace of Pain’s Pleasures TODAY!

You’ve come to the wild frontier outpost of Ylraphon, a town rebuilt from destruction and now ruled by adventurers, to pass on a proud noblewoman’s final wish to her dungeon-raiding heirs. Yet the young heroes of House Marsh have delved too deep. Can you rescue them from a trap filled ruin, vengeful assassins, and a mysterious entity that turns its attackers into its defenders? The suggested run time is 4 hours, but in practice needed much longer. Ideal for open ended play. Lots of background information - bordering on too much.

Accused of impersonation and kidnapping, a pair of old sisters have found refuge in Abermoor. In their wake, they have left a trail of blood, and are pursued by a bounty hunter. Hired for their expertise, the adventurers have joined the pursuit. A Two-Hour Adventure for 1st-4th Level Characters Wretches is a stand-alone adventure that premiered at Kumoricon in Portland, Oregon in October of 2017

This is a reclamation of the classic Mexican horror story designed to keep young adventurers wary of their curfews, La Llorona. In this tale, adventurers will face perilous encounters with beings that lurk in the shadows, and uncover what might have happened to drive a woman long ago to transform into a nightmarish legend.

The Ghost Tribe of Orcs were driven from their home under Wyvern Tor by some terrible evil. They marched to Phandalin and attacked only to be defeated. Then, the heroes journeyed to the orc’s former settlement beneath Wyvern Tor and found the source of the orc’s sardonyx and the umber hulk that drove the orcs out. Now, the party has to go deeper to deal with the terror from the Underdark that caused all of this excitement.

This one-shot, horror-themed adventure is set on the lightning rail of the world of Eberron! Will your party of 6th-level adventurers be able to rescue an innocent before it all comes crashing down!? Nightmare on the Mournland Express features: An example lightning rail to explore. Updated 5th edition rules for running all sorts of encounters on the lightning rail. A bestiary appendix containing 9 stat blocks, including dragonmarked NPCs and nightmarish monsters! Enough material to run an alternate scenario: a train heist!

Many centuries ago, the dwarven kingdom of Sarphil stretched out across the Galena Mountains east of the Moonsea. They dug for the precious metals hidden beneath the rocky terrain, and they established numerous cities and settlements to aid in their excavation and manufacturing efforts. This was during the early days of Myth Drannor, the elven kingdom in the forest of Cormanthor, and the dwarves and elves initially clashed as each sought resources and expanded their territories. Myth Drannor and Sarphil eventually settled their differences, and many dwarves moved into the elven city to offer their services and expand their knowledge. In the Galena Mountains, Sarphil continued to flourish. Unfortunately, these days of prosperity did not last long. The last great king of Sarphil was lost in the dwarven city of Mount Throndor, beneath the mountain peak of the same name, and Sarphil withered under bitter clan disputes since no single family could claim legitimate lineage over the fragmented kingdom. What happened under Mount Throndor has been a mystery for thousands of years. Many attempts have been made to reclaim the lost riches and legacy of the last Sarphilan king, but powerful wards have prevented intrusion under the mountain, wards erected by the dwarves of Sarphil. Were the wards built to keep outsiders from intruding – or to keep something inside from escaping? An enterprising dwarven leader wants to find out, but she is going to need some help from a band of heroes. Horrors of Mount Throndor is a Dungeons & Dragons adventure of exploration, darkness, and terror featuring a lost dwarven city overrun by forces from the Far Realm and the journey to cleanse it once and for all. The adventure is designed for a group of 11th-level characters, and successful completion of the adventure should put the characters at 16th level. Here There Be Monsters Mount Throndor has become infested with madness from the Far Realm. During their journey to penetrate the ward and through the city itself, the characters are going to face gibbering horrors, unpredictable slaadi, fanatic stone giant cultists, degenerate star spawn horrors, mutant derro, undead dwarves, and countless golems. The ancient breweries of Mount Throndor have produced alementals who slither in the darkness, and a great dwarven war juggernaut named Big Hans stomps through the city. Legendary Villains and Epic Moments Though it has been sealed, Mount Throndor is not empty. The characters have opportunities to meet, interact with, and (likely at least) combat against powerful foes within the legendary dwarf city. A dwarf lich, a Far Realm spider goddess, an iron-encased demilich, and a melted flesh derro warlock monstrosity all await, along with a mind-bending force - Great Cthulhu! The characters have a chance to face an avatar of Great Cthulhu in the dwarven depths in the final confrontation of the adventure to free Mount Throndor and rid Faerun of a Far Realm invasion! An Adventure of Exploration Mount Throndor is a big, sprawling complex, a dwarven city with two major strongholds, a bridge system spanning a massive underground lake, and a deep mining complex. The scale is difficult to grasp and convey. Previous examples of adventures featuring these elements have included maps - usually lots of them, great spawling maps connected at ends to make huge subterranean dungeons. It is the classic image of a D&D dungeon crawl, and the map is a key component to its visualization. However, in this adventure, the maps are handled differently. There are certain areas, ususally outside the dwarven city itself, that include maps that are suitable for use at the game table, either in theater of the mind style or grid-and-miniatures. Mount Throndor itself is presented with an abstract map, and exploring it utilizes the exploration procedure outlined in Appendix A. Characters traverse the huge subterranean system using this abstract system, and during their travels they are going to run into random encounters and sites with more interesting and complex encounters.

Sometimes protecting the cargo is easy but getting the pay not so much. The Bottle has been waiting on the docks for two days, no one has come down and no one dares to go up to see what happened and that is your ship, that is the ship that is going to take you and your cargo across the sea.
Genius rogue artificer Ichabod Russet hired ten of his most brilliant colleagues to collaborate and build the greatest automaton yet invented: a clockwork beholder. He dreamed their invention would catapult him into stardom and wealth. In a secret mountain laboratory under Ichabod's direction, each scientist devoted themself to developing one ray for the creature's mechanical eyes -- but when the mysterious tenth ray was added to the automaton, it became too powerful. The clockwork beholder broke free during QA testing and destroyed half the lab. Only a few of the artificers escaped to tell the tale, and for the most part, they're keeping their mouths shut.

A fiend lurks among the Black Blade goblins. A shapeshifting barghest fashioned by the General of Gehenna to exact revenge on all goblin-kind. It’s aim: to kill as many goblin leaders as possible… A masked goblin approaches the party asking for help. Two tribe leaders are dead. But a rival for chief has control of the crime scene. Will the party discover the barghest among the goblin ranks? Can they stop this imposter before it strikes again? Adventure Overview The adventure’s story is spread over 4 parts and takes approximately 4 hours to play. The adventure begins with a Call to Action scene. Part 1: Goblin Politics. Krill sends his emissaries to implore help from any strong intermediary. The party is asked to investigate the murder of Thrawn in Dringly’s lair. This is Story Objective A. Part 2: The Opposition. Gain entry into Dringly’s lair and investigate the murder of Thrawn. Gather enough evidence to find the killer. This is Story Objective B. Part 3: To The Lair! Now that the players have determined the barghest (Yeep) is to blame, they need to get to Krill’s lair quickly as he is in imminent danger. This is Story Objective C. Part 4: The Barghest.When the players arrive at the lair, they need to get to Krill and expose and defeat the barghest. This is Story Objective D. Adventure Background A barghest named Yeep has begun its onslaught of attacks against the Black Blade goblins. Starting with Chief Gnar, then his second in command Thrawn, the barghest is moving methodically down the line of command. Krill is now chief. But he has some problems: Two leaders of the Black Blades are dead. Who killed them and why? Is he next? Dringly, the next in command, has decided to take his lair for himself, declaring himself Chief of the Black Blades. Who are the Black Blades? The Black Blades are a tribe of goblins in the local area. They are known for dipping their blades in a dark black substance. It is rumored these blades are poisonous. The Black Blades regularly attack passersby on the road to rob them. The Black Blades have two lairs, one run by a chief who leads the whole tribe, and another overseen by a boss lieutenant. The Black Blades have a well-established pecking order which is how Krill stands to become chief. The next in line is Dringly, who has also declared himself chief and wants Krill dead. Krill suspects that there is something suspicious about two leaders being killed within a day of each other, but he has already burned Gnar’s body without any investigation. He needs to investigate the body of Thrawn, but it is in Dringly’s lair. Krill wishes to avoid direct confrontation with Dringly at the present for three reasons: 1) Any violence would only kill his own tribe members and further divide the lairs. 2) He believes there is still hope for negotiation to reunite the Black Blades. 3) He believes that if he were to attempt negotiations himself, Dringly would kill him. This adventure features: Two maps. Ready for your favorite Virtual Tabletop. A full color pdf. A black and white pdf. One custom monster, a reprint of barghest, all others available in the Monster Manual. Four hours of entertainment involving: roll playing a goblin bard, investigating a murder scene, tracking down a barghest before it strikes again. Applicable to any setting.