
While Maeshi province revels in the festival spirit, clouds gather over the political scene. Two warlords are vying for control of this otherwise peaceful place, and you are guests of one of them. Sun Temple officials have offered complete support to the faction which successfully travels to Ito-jo Castle (said to hold relics of great importance to the Sun Temple), brings them back safely, and returns them to the Inn of the Globefish. The plan is laid before you. You are to leave immediately under secrecy for the castle of the Ito clan, also known as the Seven Swords clan. Find the relics, and return them to the renowned inn Doi no Fugu. Extreme caution is needed here, for your warlord's rival must not hear of this! Is the castle really haunted? What lies in the caverns beneath it? Will Korimori's troops discover your plan and try to wrest the relics from you, should you even get that far? What will you find at the Inn of the Globefish? Come, honorable stranger - the Seven Swords await! This module contains an extended adventure in four parts: Ito-Jo, The Ghost Castle Beneath The Ghost Castle A Day In The Country Yakuza's Honor TSR 9186

Step right up, ladies and gentlemen... A carnival of laughs, thrills - and terror. "Sometimes an adventure comes along that tackles a particular idea or theme so well that it pretty much closes the door on other submissions of its kind. Such is the case with 'The Jingling Mordo Circus.' Owner and ringleader Max Mordo, an evil wizard, uses the circus as a front for his kidnapping schemes and his magic to turn his victims into sideshow monsters. It’s the first and only circus Dungeon has published." - Christopher Perkins Pgs. 48-63

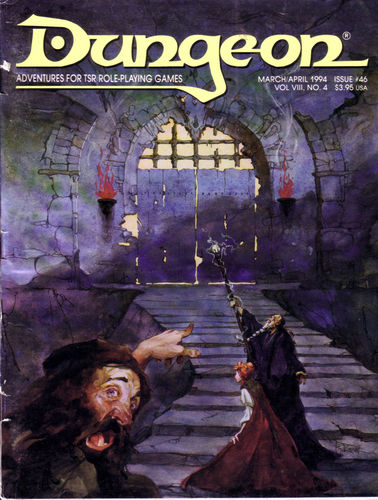
The Heroes are relaxing in an inn when they hear a scream, rushing outside they find that a local merchant has been kidnapped! The merchant's wife saw the assailants drag him into an alley, where the heroes give chase. Following the villains through a maze of natural fissures, tunnels, and ancient ruins they encounter a number of monsters, traps, and puzzles. Eventually they make their way to the kidnappers hideout, where they confront the kidnappers in a final climatic battle to rescue the merchant and uncover a criminal gang.
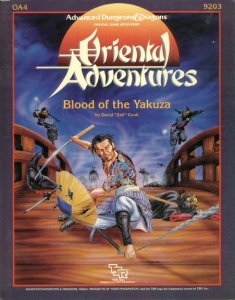
In the port city of Nakamaru, the masks of deceit and treachery embroil the entire city. Plots and counterplots, loyalties, revenge...all can be found in this city of Wa. You have been thrust amidst this cauldron of intrigue. You must pick your loyalties with care. Will you side with one of the yakuza gangs in their secret battle for control of the streets? Will you throw your fate into the political whirlwind that surrounds the powerful families of Nakamaru? Will you sohei battle his rivals for the hearts of the people? Blood of the Yakuza is an adventure for use in your Oriental Adventures campaign. It includes a colorful map of Nakamaru and descriptions of the major NPCs, districts, and factions of the city. All of these make Nakamaru an exciting and dangerous place for adventure! TSR 9203

Players encounter the Everlasting, murderous assassins who destroy the mighty from the shadows. Infiltrate their mountain fortress and destroy the grandfather of Assassins before the Grand Caliph falls prey to their knives. TSR 9431
A plague has struck Waen Fawr, leaving hundreds dead, the city lawless and in crisis. The plague seems to drive those affected to violent, manic behaviour and the city militia have their hands full. Smoke shrouds the city as buildings burn, bandits and looters roam the streets amid the chaos. This adventure comes with tiles to create a city map as the players explore. Tables of rumours and random encounters are provided, as well as detailed location-based encounters. Pgs. 28-48

A hidden trail leads through a swamp to a dilapidated shrine. A profound evil is nearby. The shrine is either to a powerful dead thief, or a god of thieves. A cool, simple little puzzle protects some treasure. Just cash! No items. A short interlude designed to be dropped into an ongoing adventure. Pgs. 61-63
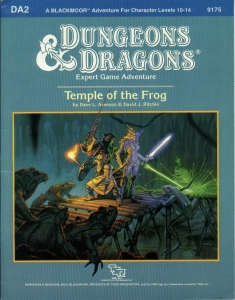
Green Death... That's what old hands call the Great Dismal Swamp. For centuries, this tangled maze of sluggish watercourses, stagnant ponds, and festering marshes has defended Blackmoor's southwestern frontier. Large armies and smaller parties have disappeared altogether inside its vast, dripping, claustrophobic corridors. Among those who have dropped from sigh in this arboral hell is young Rissa Aleford, one of Blackmoor's most important leaders. Carried off to the sinister City of the Fron, she is now being held by the eccentric Monks of the Swamp. By making the baroness captive, the deranged monks have serioulsy weakened Blackmoor at a time when enemies already threaten it from all sides. Yet, even as the Froggies gloat, the king of Blackmoor dispatches a small band of bold adventures to the rescue. Deep into the Great Dismal Swamp they must go - far from sunlight and sanity - there to seek and save the swamp, there to find the Temple of the Frog. TSR 9175

The characters are summoned by the Norse gods to track down two dwarves, one of whom has made a weapon for the giants to use against the gods. The mission takes the characters to Jotunheim, on the plane of Gladsheim, to take the god-slaying weapon from the giants.

Introductory adventure for Dark Sun, included in the original box set. PCs start on a slave caravan but are freed when it is attacked. With limited equipment and water, they must cross the desert to an oasis then save a druid. As with many Dark Sun adventures, uses a flip book providing 24 maps and illustrations for players. Combines combat encounters with survival encounters, where the treasure may just be food or enough water for another day.

An Arch-Mage who can kidnap a dragon is one tough Arch-Mage. Definitely not for those who are afraid of heights. An evil archmage, Ezoran, has kidnapped a dragon in order to discover the means to seize control of a cloud giant's castle. The adventures are tasked with rescuing the dragon by the dragon's mate. The adventure revolves around tracking and navigating through dense jungle and working through a cloud giant's fortress. Pgs. 50-63

This is the first of the three adventures that comprise the Bleak House campaign. It brings the heroes into Ravenloft (if they aren't there already), introduces them to Rudolph van Richten, and starts them on the long trail that eventually brings them to the door of the manor knows as Bleak House Included in Bleak House: The Death of Rudolph van Richten TSR 1141

The beginning adventure to the Dragonlance, War of the Lance series of adventures, upon which the Dragonlance novels are based. The companions meet in the Inn of the Last Home to discover a barbarian couple with a mysterious staff. The PCs journey to discover the staff's history which leads them to a ruined temple to the Forgotten Gods. Includes a full map of Xak Tsaroth and overland maps, some color. Art by Jeff Easley. TSR 9130

The final confrontation with the giant, King Snurre, and the entry of mighty adventurers into the caverns under his stronghold (DUNGEON MODULE G3, HALL OF THE FIRE GIANT KING) discovered the Dark Elves, the Drow, had instigated the giant alliance and its warfare upon mankind and its allied races. This module contains background information, a large-scale referee's map with a matching partial map for players, referee's notes, special exploration and encounter pieces, a large map detailing a cavern area, encounter and map matrix keys, and an additional section pertaining to a unique new creature for use with this module and the game as a whole. A complete setting for play of ADVANCED DUNGEONS & DRAGONS is contained herein. This module can be played alone, as the first part of a series of three modules (with SHRINE OF THE KUO-TOA, D2, and VAULT OF THE DROW, D3), or as the fourth part of a continuing series of modules which form a special progressive campaign scenario (DUNGEON MODULES G1, G2, G3, D1, D2, D3, and Q1, (QUEEN OF THE DEMONWEB PITS). TSR 9019

For a long time you have heard legends about the Island of Vacros; when you were only a child, the stories about evil minotaurs were used to scare you into behaving. Now you are grown, and you no longer believe children's stories. But King Trueon of Cathos is worried: his daughter Princess Lydora has been kidnapped, and he has found clues that she has been taken to the ancient and evil island of Vacros. You have heard rumors that a large and dangerous mazework lies beneath the surface of the island - a mazework that is guarded by minotaurs. Of course many rumors are false, but then again... The Maze of the Riddling Minotaur is the second in a series of invisible ink modules: using the invisible ink pen included in this module, you may play the adventure by yourself. After you have played the solo version, you have not used up the module: instructions are provided as to how you may change the solo version into an exciting group adventure! TSR 9060

An interesting and atypical adventure in its writing style. For one the module contains insightful "When things go Wrong" sections and DM guidance for sticking close enough to the rails for the story and fun's sake. Lots of DM hints about how to handle PCs' choices. Overall the story is fine too - a traditional hook, a mystery, some twists. There's a tower, a surprise pocket-dimension context, and a dungeon. It's mirror of life trapping, isn't it? Well, yes and no. People go in, and they don't come out. Nor can you talk with anyone inside. Somehow, that's not quite the way you remember those mirrors work. This Skarda fellow showed up a few years ago with a band of raiders, and no one in the land has been safe since then. Whole villages have disappeared into this Skarda's mirror. Your band is approached by relatives of one of the victims?and adventurer like yourselves. You have to get into that mirror of whatever-it-is, find this man, and get him out in one piece. The reward is more that adequate. Only problem is, no one out here can tell you what to expect once you get in? or even how to get there. TSR 9188

Watch your step. Out-of-this-world adventure. An odd box falls by a watch tower and its up to the party to discover what it is and why its here. Pgs. 22-29
In this adventure, the heroes face the sinister Baron Metus, the vampire who took the life of Van Richten's son, Erasmus. Metus, with Daclaud Heinfroth, has been doing the bidding of the ghost of Madame Radanavich in her quest to destroy Rudolph van Richten. But Metus has his own reasons for seeing van Richten destroyed as well. Included in Bleak House: The Death of Rudolph van Richten TSR 1141

His name is Conan, and no man can stand before him in battle." "Conan the Conqueror" by Robert E. Howard In an age long ago, there existed a hero - Conan. With fiery will, he slashed his name across the ancient lands of Hyboria. It was a time when bravery, trickery, and magic decided men's fates, and a steel sword could make the difference between life and death. For the daring, strong, and clever, there were fortunes to find and lands to rule. Travel back to this with Conan and his companions, Juma, Valeria, and Nestor. Travel back to defeat the dark horrors of his land! TSR 9123

After hiring a group of brave adventurers to help him "acquire" a beholder specimen, the mage Velinax disappears! Rumors blame an insidious thieves' guild called the Unblinking Eye for this turn of events. Why would the Unblinking Eye wish to "take care" of the mage? Why does the guild want to speak to anyone involved with Velinax? Finally, what dark goal does the guild truly intend to accomplish? Finding out the answers to these questions will lead doughty adventurers straight through the shadows of a crafty thieves' guild and onto the threshold of an even deeper and more dangerous darkness. "Eye of Doom" is the second of three adventures featuring the nightmarish beholder. It can be played as an individual mission or as part of the series that began with "Eye of Pain" and concludes in "Eye to Eye." TSR 9530