
Though small, Seawell is a prosperous trading town with a good location on the coast. Next to it is a long peninsula that features mostly swamplike terrain. The inhabitants of this peninsula include tribes of lizardfolk, plus several kinds of reptiles and amphibians. Most of these creatures don't bother the town, and Seawell's militia is experienced at repulsing raids by the more aggressive lizardfolk. A large reef extends the entire length of the peninsula on the side away from Seawell. This great wall of coral is a favorite site for fishermen, but it has always presented a serious hazard to ships approaching from that direction. Thus, about 45 years ago, the people of Seawell built a lighthouse on a small promontory near the reef, about 200 yards from the shoreline. Operated by a family that lived inside it, this lighthouse ensured that ships could easily steer clear of the reef. A few weeks ago, ships stopped arriving from that direction. Three ships are now overdue, and the people of Seawell have begun to suspect foul play. Thus far, however, they have not been able to investigate because of increased raiding by the lizardfolk. Something has stirred them up, and the town militia has been too busy repulsing raids to mount an expedition to the reef. Wreck Ashore is a short D&D adventure for four 1st level player characters (PCs). The scenario takes place on and around a swampy peninsula that juts out from a longer stretch of coastline. Along one side of this peninsula stretches a dangerous reef. Just offshore on the reef side stands a lighthouse built to warn ships of the danger. At the base of the peninsula on the side away from the reef is a small port town called Seawell.

The Fortress of the Yuan-Ti describes a fortress build into a cliff side and the slave village outside. The Adventure is the third of three but can easily be played by its self. The adventure revolves around the players discovering the dark plot to revive the demon Sertrous and then stopping it. The adventure describes the outside, inside, and hanging towers of the fortress. The adventure concludes in a forth extra-planer tower were you fight the boss. It also includes 4 sidetracks from portals that explain how they get the materials for the ritual. Final part of the Barrow of the Forgotten King series.

E2, following up on Death's Reach, the PC's first travel to Sigil following the smuggled remains of the primordial Timesus. The pursuit then leads into the Abyss, through the White Kingdom to face Doresain, the Ghoul King, exarch of Orcus. The module certainly is epic, placing the PCs up against powerful monsters like greater demons, death knights, and a demilich. It may be frustrating that the PCs arrive too late to disrupt the plot (have to allow for the finale in the next adventure) but taking out Orcus' right hand ghoul may be satisfying. Includes a skill challenge for crossing a portion of the Abyss For environments, City refers to Sigil.
A cold winter wind blows from the Scourge Mountains, but its origins are not of this world. And with it come horrifying stories of a fey who walks the land. Cold, beautiful, and deadly, she turns every mortal she touches into a statue of ice, and she seems determined to blanket the entire north in a blanket of frost. It is the Winter of the Witch…and if the archfey Koliada is not stopped, it could be the world’s last. “Winter of the Witch” starts with the PCs receiving an urgent but somewhat cryptic message from the skeletal knight, Sir Keegan. They find the skeletal knight a helpless victim of an aggressive interrogation by an undead minion of Orcus and his demonic thugs, who are attempting to extract the location of something called the Sun’s Sliver from the stubborn knight. The PCs fight their way into deep ruins, defeat the demon lord’s toadies, and retrieve the Sun’s Sliver. Once the PCs have recovered the Sun's Sliver, they must confront the Winter Witch in Winter's Heart, the witch's icy sanctum in the Feywild. Only there can they confront the cold-hearted archfey and save a section of the world from a wintery doom.
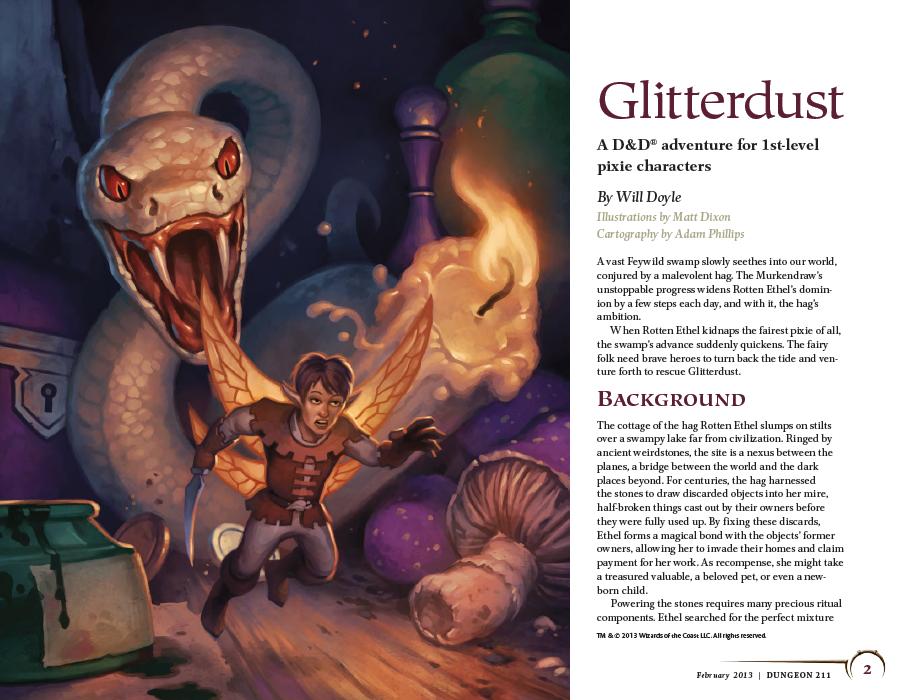
A vast Feywild swamp slowly seethes into the mortal world, conjured by a malevolent hag. The Murkendraw's unstoppable progress widens Rotten Ethel's dominion by a few steps each day, and with it, the hag's ambition. When Rotten Ethel kidnaps the fairest pixie of all, the swamp's advance suddenly quickens. The fairy folk need brave heroes to turn back the tide and venture forth to rescue Glitterdust.

A four-hour adventure for 5th-10th level characters. The enemy is revealed, but time short and if you are not successful in your mission to Mount Baratok, love will never die. Part fourteen and the finale of Misty Fortunes and Absent Hearts. In an effort to locate the evil witch Esmae Amarantha, the party must work to enable a tarot card reading by Jeny Greenteeth, a quixotic hag. However, finding casters to aid Jeny in her ritual is its own ordeal, and even if they succeed, there is still the task of venturing to Esmae's ritual site and putting a stop to her plans.

The Alchemist's Eyrie takes the characters into a fortified dwarven tower, where they are sent to recover some needed items. When they arrive, they discover the tower has been captured recently by a warband of renegade lycanthrope dwarves. Between the interlopers and the remaining traps set by the late owner, the characters may find themselves in deep, despite the lack of head clearance.

To stop a devastating rampage of giants across the land, the party must venture into the lair of the stone giant thane Arnak to uncover the truth about why he has broken his peace with the neighboring dwarves. In the process, they will have the opportunity to retrieve important symbols of the fight against the giants and uncover a dangerous excavation. The adventure is part of the "Against the Giants" series originally by Gary Gygax, hence the writing credit.

Stonefang Pass wends its way through the mountains of the Stonemarch, home to brutal tribes of orcs. The time has come to clear the pass and gain a foothold, so that it can be used for trade between the town of Winterhaven and the lands beyond the mountains. Brave adventurers are needed to rid the pass of monsters and liberate Stonefang Keep from the orcs. Who’s up for the challenge?

As the story goes, worshipers of Bahamut and worshipers of Gruumsh spent years warring. As the dead piled up, a Bahamut faithful crafted a weapon of devastating power. Most of the inventor’s peers balked at its use, but some felt it was justified. Those few who used the weapon were twisted into mad, dark beings by its corrupting power. The rest of Bahamut’s flock locked them and the weapon away in a dungeon prison. The dungeon and its terrible secret were long forgotten—until a group of rakshasas happened across the ancient tale. Now they seek the weapon for their own designs. Pgs. 132-137

A group of mysterious, sea raiders— capable of appearing from out of nowhere, striking, and disappearing— has terrorized a group of coastal states for some time. Now the leader of the states has asked the characters to infiltrate the raiders, find out how they operate, and put a stop to their activities. But once the heroes join the raiders, things aren’t as clear as they were led to believe. Will they succeed at their mission? Or join the raiders themselves? Pgs. 54-82

"And they bade their slaves, 'Build unto us tombs to rival the palaces of the gods, for there shall we live or lives and sleep our deaths in splendor.' And the people of Maru-Qet wore their fingers down, broke their backs, burst their hearts to obey. Indeed they raised up great tombs to rival the palaces of the gods. And their masters were well pleased, for it was as gods they saw themselves." The brown dragon Urum-Shar lurks in a strange tomb, plotting schemes only a wyrm of incredible power could understand. Expanding on content from Draconomicon: Chromatic Dragons, this adventure takes the heroes into Urum-Shar’s dark and trap-filled lair, where they will eventually face the powerful dragon herself. The dungeon heavily employs the use of traps, with fewer monsters. The upper tomb consists of a great puzzle of twelve rooms, and the lower tomb contains the dreaded Urum-Shar, an ancient brown dragon and heir to the lost draconic empire of Maru-Qet. The dungeon has special protections against scrying and other divinations, as well as teleportation. Pgs. 55-90

No Loose Ends is a mini-adventure that has a single encounter, based on a group of orcs (or ogres based on level) setting up an ambush for the players by setting up a fake bridge that they attempt to collapse under the players before attacking. The cloak of elvenkind is optional, it is included only in the higher level adjustments. Pgs. 17-18

In The Standing Stone, a tiefling sorcerer named Dyson discovers a circle of standing stones constructed centuries ago by druids to hold their annual rituals; the druid community was later destroyed by the great dragon Ashardalon. Dyson uses the magic of the stones to replace people with animals transformed into humanoid form, loyal to him. Dyson encounters the player characters in the village of Ossington and tries to manipulate them into eliminating the remaining enemies standing in his way.
An ettin has begun terrorizing the hamlet of Newkeep, stealing cattle and smashing homes—and flattening anyone who tries to stop him. Meanwhile, a mysterious riddle has appeared on the walls of the local shrine—a riddle which may hold the key to vanquishing the ettin.

The rough ground on the outskirts of the village of Col Fen once served as a graveyard for an evil temple destroyed long ago. A recent disturbance released some of the ancient evil buried here, and now the dead in this graveyard are beginning to walk. Several villagers have already vanished and more will die if the undead are not put to rest. Pgs. 56-63
Kravenghast Necropolis is hidden in a valley that was formerly part of a now dead city. It consists of a small cemetery that sits atop an abandoned necromancer's laboratory. The necropolis has been refitted as a temple to Vecna, the undead God of secrets. The mausoleum in the cemetery contains a secret spiral staircase that leads to the underground laboratory. The temple is populated by a twisted cult of Vecna, led by the lich-priest Mauthereign. Pgs. 96-103
In the city of Waterdeep rests a tavern called the Yawning Portal, named after the gaping pit in its common room. At the bottom of this crumbling shaft is a labyrinthine dungeon shunned by all but the most daring adventurers. Known as Undermountain, this dungeon is the domain of the mad wizard Halaster Blackcloak. Long has the Mad Mage dwelt in these forlorn depths, seeding his lair with monsters, traps, and mysteries—to what end is a constant source of speculation and concern. This adventure picks up where Waterdeep: Dragon Heist leaves off, taking characters of 5th level or higher all the way to 20th level should they explore the entirety of Halaster’s home. Twenty-three levels of Undermountain are detailed herein, along with the subterranean refuge of Skullport. Treasures and secrets abound, but tread with care!

A long, perilous ocean journey behind them, the crew of the Sea Wyvern finds itself shipwrecked on the Isle of Dread. Their destination lies well over 150 miles to the south, miles heavy with the threat of the island's terrible inhabitants. Yet the unknown enemies are far more sinister, for more than just dinosaurs hunt the vast jungles. Before long, a cunning fiend picks up their trail, and its duplicitous master demands their sacrifice. "Here There Be Monsters" is the fourth chapter of the Savage Tide Adventure Path, a complete campaign consisting of 12 adventures appearing in Dungeon. For additional aid in running this campaign, check out Dragon's monthly "Savage Tidings" articles, a series that helps players and DMs prepare for and expand upon the campaign. Issue #352 of Dragon explores the Isle of Dread in detail, providing a complete ecology of the island and the writing of Larissa Vanderboren. This article can be used as a player handout to represent the journals the group recovered from the Vanderboren family vault in the first adventure in the Campaign. Shipwrecked on the Isle of Dread! Faced with a dangerous journey, the PCs must escort a ragged band of castaways through monster-infested wildlands in order to reach the safety promised by the colony of Farshore on the isle’s southern tip. Pgs. 32-60
Vorgansharax rules Phlan, using the Cult of the Dragon to extend his noxious gaze. But the green dragon seeks far more than control of the beleaguered town – ultimate power is nearly within reach. Will he reactivate the Pool of Radiance and ascend to greater prominence amongst his kind? A sequel to DDEX1-10 Tyranny in Phlan and Part Two of Under Emerald Claws.