
The first part of the Dreams of Red Wizards adventure path originally published for the D&D NEXT Playtest. Following the events Ghosts of Dragonspear Castle, a new set of adventurer's will see some of the repercussions of that adventure. This adventure is intended to be continued in the Dead in Thay adventure (Note that they Dead in Thay 5e adventure featured in Tales from the Yawning Portal is missing a significant portion of interlude that links Scourge of the Sword Coast to the events within the Doomvault). The adventurers arrive when Daggerford is crowded with refugees from outlying lands. Goblins, gnolls, and orcs have been raiding the countryside. Now, food is scarce and tension is high. Blame for a theft has fallen on the refugees, and the Duke of Daggerford has forbidden more of the displaced from coming into town. After overcoming difficulties to enter Daggerford, the characters learn more about the raids. As they fight against the humanoids and delve deeper in the darkness that encircles Daggerford, the characters learn of Bloodgate Keep. After a final fiendish ambush, they’re ready to confront the real threat to the area. DM Note: This adventure points the adventurers strongly towards Bloodgate Keep but that location does not appear until the Dead in Thay adventure; at several points the party may feel drawn to explore that location rather than continue their investigations around Daggerford. However, since Bloodgate Keep is only eluded to as a source of great evil power, it can serve to easily segue to an entirely different adventure path. As a NEXT Playtest adventure, Scourge of the Sword Coast uses milestone leveling and the included stat blocks for creatures do not necessarily match or even appear in the 5e Monster Manual, nor do they have XP values or challenge ratings. In some places it will reference rules used in the Playtest but dropped or changed in the 5e release, these are unlikely to substantially impact gampley with 5e rules.

This is the introductory adventure in the Bugger's Mill campaign. It introduces the characters to the village of Oak Mill along edge of Border Forest and has them hunt down a local arsonist, as well as assist with putting out a forest fire.

A small adventure that can be used as part of a larger campaign or run as a one shot for 3-4 Tier I or II characters. A small urban adventure set in Waterdeep with various hooks to extend beyond this adventure. A character needs to repay the debts he accumulated in life, but now his family isn’t so keen to just let someone take what they are owed. This family may have more sinister secrets that they wish to keep hidden.

As the Red War rages and Mulmaster burns, the Cult of Glaugrax sunders the arcane bindings on their alien master, unleashing an ancient evil that threatens to sink the Factions' evacuation efforts. Can you thwart them before the City of Danger is swept away in the wake of Fenaria's revenge? Part 3 of The Neverdusk Trilogy. A Four-to-Six Hour Adventure for Tier 3 Characters. Optimized for APL 13. The long-awaited Conclusion to the tale that started with Ooze There?, an ENnie Awards 2019 nominee in the Best Organized Play category! This adventure is Part 3 of "The Neverdusk Trilogy", and it brings the tale of Fenaria Neverdusk, Sovad Klim, and the mysterious Cult of Glaugrax to a close! Fenaria's Gambit (a.k.a. Ooze Left?) debuted at Doujin Market Online/RPG Day Singapore 2020, a digital convention held by the D&D AL Singapore Community. This v1.01 package includes: - Full color cover art by digital painter Koh Jia Wei (Firons), with art inserts for key scenes in his unique style. - A high quality digital map pack for key encounter locations, in both Black & White and Full Color by digital artist Ryan Tan Chen Wayne (Ryzwayne). - An image by Ryzwayne demonstrating Sovad's ingenuity with the wall of stone spell in his Bonus Objective (Yes, we know he has fans). - A three (3) page cheat sheet with Jason's personal tips for running Fenaria's Gambit.

𝐓𝐡𝐢𝐬 𝐢𝐬 𝐭𝐡𝐞 𝐭𝐡𝐫𝐢𝐥𝐥𝐢𝐧𝐠 𝐟𝐢𝐧𝐢𝐬𝐡 𝐭𝐨 𝐭𝐡𝐞 𝐓𝐨𝐰𝐞𝐫 𝐨𝐟 𝐁𝐨𝐧𝐝𝐚𝐠𝐞 𝐟𝐞𝐚𝐭𝐮𝐫𝐢𝐧𝐠: ● Eight deadly encounters ● More deadly traps ● The water maze ● and Aumvor himself! Will your PCs escape with their lives or stand and face Aunvor and put an end to his deadly game?

Elven Tower presents a compilation document of all the content for DMs running Out of the Abyss module. This guide has been very well received by the DMs community. I have gotten great response during the creation of this content. The guide is over 60 pages long and contains hoards of information, guides, suggestions, and general information for DMs running this module. It now has clickable table of contents and bookmarks for all the different chapters for easy navigation. There are maps for Gauntlgrym, Sorcere Tower, Vizeran's Tower, Karazikar's Maw as well as some very needed flowcharts and infographics to better understand the adventure. The guide also features some maps drawn by me (Elven Tower) to supplement the missing illustrations for important locations.

Azaketh, a sly and industrious devil, prepares his revenge against his bitter enemy Zirkex. Naturally, the mortals affected by his schemes are mere pawns to further his goals. It is up to the heroes to stop Azaketh in his tracks before he takes control of a powerful weapon – Logrimm’s Tower Golem. The Tower Golem is an adventure designed for 3-7 2nd to 4th level characters and is optimized for five characters with an average party level (APL) of 3. It's the second and final chapter of the saga about Logrimm’s Tower Golem. The first chapter The Soulmonger isn't necessary to play The Tower Golem but it sets up the villian Azaketh and introduces NPCs that can help the characters conquer the Tower. The focus of The Tower Golem is set on roleplaying and interesting fights. In theory, the Tower is an infinite web of rooms and portals that the characters may never escape. However, eventually, the characters reach the end for one final encounter. You can change, interweave, or exchange the different parts as you see fit. There are several proposals and fully fleshed out levels in this document, but you may add your own adventures to the list!

An exiled cultist and his kobold minions are spotted searching for long-forgotten ruins in the Dragonspire Mountains. Rumors say he looks for a precious gift to give a fearsome dragon that dwells there. What he hopes to attain with his gift is unknown, but can't be good for the citizens of Phlan.

A tale of dreadful draconic sibling rivalry, this adventure is designed with ease of Dungeon Mastering in mind. Inspired by products such as The Lost Mines of Phandelver and 1991 Easy to Master Introductory Black Box it aims to provide a compelling story which will engage players while making that story easy to tell. It has prompts and advice on how to run each encounter making it ideal for beginning Dungeon Masters or Dungeon Master's ready to move on to the next tier of play.
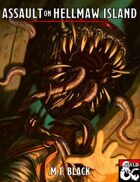
Hellmaw Island is a place of legend, a hidden fortress protecting the greatest treasures in the world. Rumour says it is guarded by wicked traps, bizarre and terrifying monsters, and maddening enchantments. Our heroes have been tasked with penetrating this mysterious stronghold, and they will find it to be stranger and more dangerous than anything they have encountered before. Assault on Hellmaw Island is a 5th Edition Dungeons & Dragons adventure for characters of levels 5-10. It will take 4-8 hours to complete.

The PCs begin in the port city of Luskan, where they're hired on by a caravaning merchant to perform guard duty for the long, dangerous journey over the Spine of the World Mountains. If the heroes do well, they reach the small town of Targos, where they hear rumors of a dead mage's lost tower out on the tundra. In order to find it, the PCs must overcome numerous obstacles but may find allies in the peoples of the Ten-Towns region, including a barbarian prince, a sly halfling, and a unique ranger. Not all is as it seems, though, nor can all smiling faces be trusted. Can the PCs separate the truth from the lies, locate the Accursed Tower, determine all its secrets, and survive?
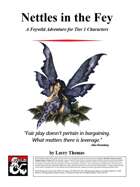
An inexperienced eladrin leader leaves herself dangerously exposed to her enemies. An exiled hag schemes to rebuild her army. A bog troll conspires to overthrow. A child is kidnapped. PCs find themselves in the middle of a power struggle between competing forces, each seeking to dominate the feywild territory known as the Unbound Regions. Trapped in the feywild until they complete the quest, the adventurers must deal with the curious culture of the fey by striking deals, battling opponents, and ultimately deciding which competitor they will support.

Yonder lies the Shrine of Lucien Harpell, greatest mage of this or any other age. In the arts of golemancy, artificery and necromancy, his equal has never been known, nor will be again. Cursed are those who enter this tomb. Cursed are those who look upon this statue. Cursed are those who seek his riches. Know that your demise is certain – your lives will be short, and your deaths slow. Read this, fools, and despair! The Shrine of Lucien Harpell is the stuff of legends - full of hideous traps and strange monsters, but guarding fabulous treasures. It was lost for generations beneath the grim and lonely Starmetal Hills, but has now been found again. Will any dare enter? Little Shrine of Horrors contains over 20 encounters and is full of puzzles, tricks, traps, roleplaying and combat. Do your players have what it takes to outwit Lucien Harpell?

When a Thayan research expedition returns from the Glacier of the White Wyrm with only two survivors that are reduced to whispering about an ancient pyramid under the ice, perhaps it is time to discover just what scares the life out of a nation of necromancers. The events of DDEP2 Mulmaster Undone resulted in terrible geographic upheaval all around the southeastern region of the Moonsea. Massive landslides, earthquakes, tidal waves, and gnashing tornados devastated the land and the city of Mulmaster was nearly scrubbed from the face of Faerun. Fortunately, these events also revealed previously hidden artifacts—trinkets, mostly—from the ancient Netherese all around the city. The Thayans have long held an interest in the port city and wasted no time in assisting in the rebuilding efforts. They simply asked that a blind eye be turned to their archaeological interests, and in return they would continue to spend their own resources (at no expense to the Mulmasterites or even the High Blade) to rebuild the city, bigger and better than before. It wasn’t long before their interests paid off with the discovery of a research laboratory beneath the Glacier of the White Worm, far to the east of Mulmaster and nestled in the mountains. The Thayans sent a sizable expeditionary force but only two acolytes returned. The visiting Zulkir has found this particularly troublesome, and with the assistance of Rastol Shan, the head of the Cloaks, has arranged for a mercenary force to perform a more pointed investigation of the area. In return the Thayan noble has promised significant compensation. Upon arrival at the dig site, the characters are quick to discover that the laboratory hides ancient and palpable evil. The purpose of the facility can be discerned with careful investigation, and the effect of the still-active fragment of the Dark Obelisk has empowered (some may say attracted) servants of the Worm that Walks. Danger and death await, certainly, though the characters always have the option of running away and living to fight another day…
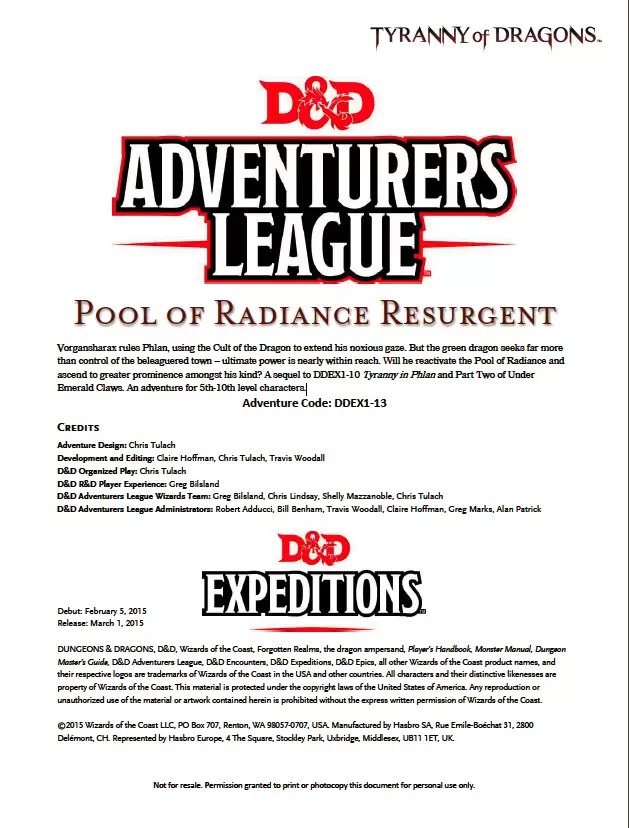
Vorgansharax rules Phlan, using the Cult of the Dragon to extend his noxious gaze. But the green dragon seeks far more than control of the beleaguered town – ultimate power is nearly within reach. Will he reactivate the Pool of Radiance and ascend to greater prominence amongst his kind? A sequel to DDEX1-10 Tyranny in Phlan and Part Two of Under Emerald Claws.

A haunted house, a missing person, and a hint of wild fey magic. In the kingdom of Norland in the Moonshae Isles, King Keethan rules by the will of Torm the True, though in Glen Dourn folk still hold true to the old ways—a dense and layered folklore of monsters and tales to frighten children. It is to this remote valley that Keethan bids you make haste to seek out signs of his beloved cousin, Lady Sorcha Hannigard. Sorcha vanished on her wedding day three years ago, sending her groom and neighbours alike into mourning. But where can she have gone? The only remaining clues to this mystery lie in her abandoned mansion home, where powers less wholesome have now taken up residence. The Dread Coven will not give up what they know so easily, although they will strike a bargain if you’re willing to pay the price in pain.

"A well-written adventure through a mansion filled with dark secrets." The party is recruited by an innkeeper to recover a flower from a nearby mansion. He is an alchemist and he is running short on his supply of the Midnight Violet. Town rumors warn the party to stay away. But, that's unlikely given that your heros are mighty and brave. While exploring the mansion, the adventurers will learn the story of the family that once lived there and what caused their demise. That is...if they live that long. Two new creatures and one new magic item are introduced in this adventure.

An Adventurers League Con-Created Content Module. Tier 1, 2-4 Hours. (Compatible with Homebrew games too!) May I have the next 100 words to convince you to purchase this adventure? **PITCH BEGINS!** This module features three ways to play: join the Knights of Holy Judgment, the Cult of Zariel, or the forces of Chaos as you search for a lost Angel of Tyr, Ser Vindictus. Play like it is 1990 and experience the first Adventurer’s League module to use 16-bit art for maps, tokens, NPC portraits, and magic items! Each purchase includes the PDF, Fantasy Grounds module, four maps, 15 tokens, comic art for the backstory, and an imaginary high five from the author. Make a DC 92 Wisdom saving throw. On a success, reroll! On a failed save, buy this adventure! **PITCH ENDS!** Author’s note: This is part one of a two part Tier 1 series. I plan to make future Verses if these do well and people like them. Thanks for looking at my adventure and please leave an honest review! -Anthony Joyce (Twitter: @Thrawn589) All artwork was commissioned and commercially licensed for this module. Pixel Art by: Joaquin Reymundo "Dsurion" (Twitter: @Dsurion) Comic Art by: James Gifford (Twitter: @Mrjamesgifford) Fantasy Grounds Module by: Chris Jernigan

Aumvor is aware of the intruders and sends a warning with a powerful fire ball. Satisfied that the party has lost interest, Aumvor returns to his vault where he can safely leave his remains and travel the planes in search of greater power. Perhaps the PCs that survive the blast may have the upper hand. Growing closer to the final chapter, the party of adventurers will find that the only way out is into the tank for a swim. Aumvor the Undying has hidden here in this dungeon for centuries, waiting for his chance to resurface as the emperor of Netheril. The time has passed slowly and Aumvor’s powers are waning. He has hidden phylacteries well, but what use will they be if he has no vessel I which to dwell. Aumvor makes a final effort to kill the party before returning to his vault to wait in ambush for them. In “𝐏𝐚𝐫𝐭 𝟓 The Lower Tower”, you will find the secret at the bottom of the tower, 16 exciting and deadly encounters, and a lot of zombies floating in cadaver soup. Ever fight zombies while swimming and dodging specters? Here is your opportunity. Also coming soon, Roll 20 Map Pack for The Tower of Bondage.

The Ghost Tribe of Orcs were driven from their home under Wyvern Tor by some terrible evil. They marched to Phandalin and attacked, only to be defeated. Now the heroes will go beneath Wyvern Tor to discover the terror that chased out the orcs and perhaps find the source of the orc’ssardonyx. Journey to Beneath Wyvern Tor is the third of four parts in the After Lost Mine series. It will play out the journey to the orc’s former cave settlement and then into the darkness beneath. Part IV will have the party deal with the terror from the Underdark that drove out the orcs.