
The yuan-ti anathema, Hessatali, calls out to his yuan-ti faithful from his prison in the Abyss. His network of vipers has uncovered the ruins of ancient Ss’tatha’lass and the Fane of Hessatali, a fountain of pure venom that will return the demi-god to life. Above the buried ruins of Ss’tatha’lass, yuan-ti agents have moved to control the politics of Scornubel. The characters fall into a complex yuan-ti plot that spans the breadth of the realm, pits the heroes against the forces of the Abyss, and explores the culture of the yuan-ti.
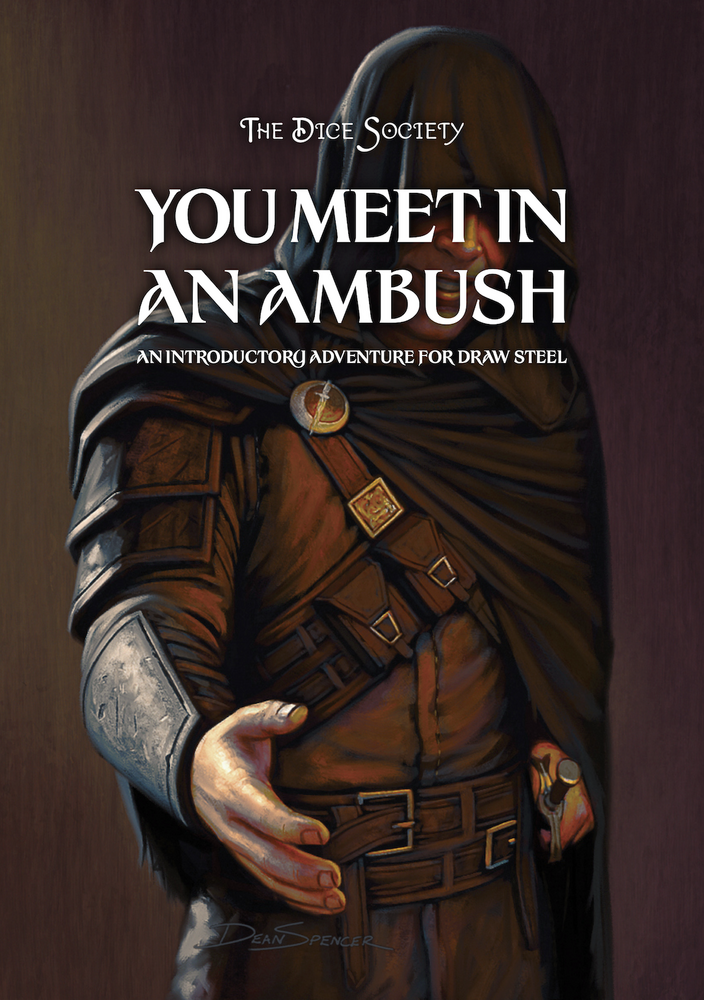
This one-shot takes about 3 to 4 hours to complete and is optimized for four to six 1st-level heroes. It works as a gentle introduction to new Draw Steel players, demonstrating the main mechanics that make up the game one at a time. The characters are locally famous heroes who were recruited by Basil, a mutual acquaintance, former Courser operative, and current tavern keeper. An old friend of his needs help on some Courser business, so the heroes must meet on the Red Boar tavern and wait further instructions. What they don't know is that the Coursers have been compromised; their leadership is now controlled by Ajax the Invincible! Under Ajax's command, the Coursers's main function has become to get rid of any obstacles to the tyrant overlord's imminent invasion of Blackbottom. The heroes' "mission" is actually just one of several ambushes taking place in the city to kill those who pose a threat to Ajax's rule.
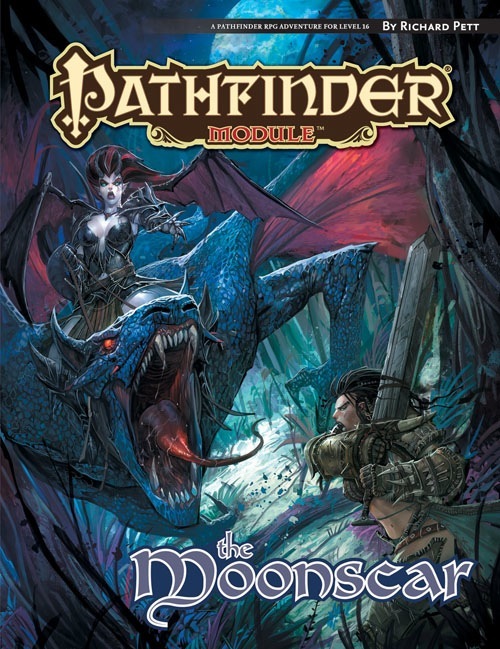
For millennia, a complex plot has brewed in a demonic jungle on the surface of the moon—a plan by the patient and sinister succubi of the Moonscar to kidnap and brainwash the people of Golarion. Now a long-dormant portal linking the moon to Golarion has returned to life, accelerating the demon queen’s designs. Only the brave PCs can venture to the surface of the moon, navigate the treacherous Abyssal jungle called the Moonscar, and delve into the depths of the Insatiable Queen’s subterranean palace of torture, seduction, and depravity.

Moonless Night is an adventure module composed of short adventures which are compatible with both the first and second editions of the Advanced Dungeons and Dragons game. The adventures are designed with novice players and dungeon masters (DMs) in mind; more experienced gamers may find the action too scripted, the dangers too forgiving, and the plot too linear for their tastes. In such a case, the DM is encouraged to expand, revise, and delete as necessary.

Meaningful decisions, unexpected twists and memorable characters are the foundations of this dark 4-hour adventure for 5th to 10th level characters. A chance encounter on an unassuming road leads to a dangerous and lucrative opportunity. But what seems simple on the surface turns out to be much more below. Thrust into a world where every enemy has an enemy and everyone has their own dark motive, the only chance to survive is to ally with the right foe. Sometimes “doing the right thing” comes only in shades of black. Six Summoned Swords is a stand-alone adventure that begins on the side of the road leading to Phlan and can be easily accessed by any adventurers traveling through the Moonsea region. In addition to a world full of intrigue and complex character choices, purchasing this adventure includes: An Official Adventurers League magic item certificate Printable portrait cards with roleplaying tips for important NPCs Gridded reference maps for combat encounters Condition icons to help track character status Special Certificate Holder ideal for event play NEW: Season 8 Item Unlock Handout - prints 9 to a page, one for every player! * Looking for an adventure to run at your special game day or convention? This adventure includes a “certificate holder” that features specially created art of the adventure’s magic item. When printed in colour and on card stock, it perfectly frames the official AL magic item certificate from this adventure and makes for an unforgettable souvenir. About the Swords Below the Moonsea Saga The saga consists of three adventures, with this adventure serving as a stand-alone prelude. The series continues with Six Striking Swords and Six Swords Unbound, the two of which should be played in tandem.

To Find the Immortals! The all-powerful Immortals have vanished! The quest to locate them has led across the Atlass Ocean and the land of Shahjapur, where moguls hunt tigers, un-touchables respectfully avoid higher castes, and holy fakirs perch immobile for years on end. In this land of shrines and elephants and shapeshifting assassins, resolution may lie at the end of the mysterious "Emerald River." But no one knows the location of this river and no map shows its bed. Does the answer lie within the Temple of Eight Sweet Winds? Hopefully so, for time grows short. The Immortals themselves must be found and enlisted - to stave off the approaching cataclysm called: NIGHTSTORM! Nightstorm is the third adventure for the D&D Hollow World Campaign Set. The Hollow World boxed set is required to play. This 65-page adventure fits easily into your existing campaign, either as a stand-alone adventure or part of the history-spanning Blood Brethren trilogy. These three lined modules can be played in any order - but the adventure ends here! This adventure is designed for four to six characters of levels 8 to 10. Easily Adaptable to the AD&D Game! TSR 9311

Yegor Bonecruncher is the most ferocious hill giant in the land. When he begins terrorising the small village of Frickley, the inhabitants have only one hope - the legendary warrior, Jahia Giantslayer. The PCs undertake a dangerous trek through the High Forest to find her, battling wild fey magic all the way. But can Jahia live up to her own legend?

While strolling through the streets of Kak you notice a pair of men laying in the alley. Upon closer inspection you notice that one of the dead men has a unique tattoo. Peering closer you notice that this man, dressed as a pirate, has a tattoo of an island with an “x” on it! Once this tattoo is discovered the PCs will need to locate a ship to head off on a treasure hunt. Finding a ship captain that is familiar with Xodus Isle will not be difficult but trusting the captain…well that’s a different story entirely.

After a series of successful exploits you and your associates decide it is time for a nice vacation. You pull into the large city of Breckengarden to take a few weeks off when you are approached by a courier. After a clandestine meeting you are informed that several well-known adventurers have been disappearing and the party has been asked to resolve the issue. The bigger problem is the likely source of the kidnappings is the master of the Cloud Giant kingdom that floats above the ground!

While camping in the wilderness, the characters find a tracker surrounded by wolves. Once the heroes dispatch the beasts, the tracker reveals that she is seeking aid in the fight against the darkness enfolding her community, Silver Lake. Should the characters help, they find the village terrorized by lycanthropes that hail from a tiny island rising from the mist-shrouded lake.The island is a fey crossing, and heroes who set foot on it find themselves in the Feywild, where a war is brewing; the lycanthrope clans are at each other’s throats, and many are turning their feral eyes outward to the rich lands beyond their secluded valley. To avert an unimaginably savage war, the heroes must rescue a werewolf lord from his captors and expose the conspiracy that threatens to drench the Feywild in blood...

Children and a cleric have been kidnapped from a small coastal town by undead creatures who crawled out of the sea. Defend the Captain's Folly Tavern, investigate the mystery, swim through underwater caverns, and fight the monstrous denizens of the deep in order to save the kidnapped civilians! This adventure includes: 4 New Monsters, 4 New Magic Items, A Seafaring Skill Challenge, & Complications for an Underwater Chase Encounter!

After being singled out by a mad prophet as the ones who must defeat the Brine Witch, the PCs are hired to uncover the secret of the plague of curses. This is the first of a series of connected adventures contained within Return to Freeport. All six adventures together should take characters from 1st to 12th level. Adds a new creature template: Sand-blighted
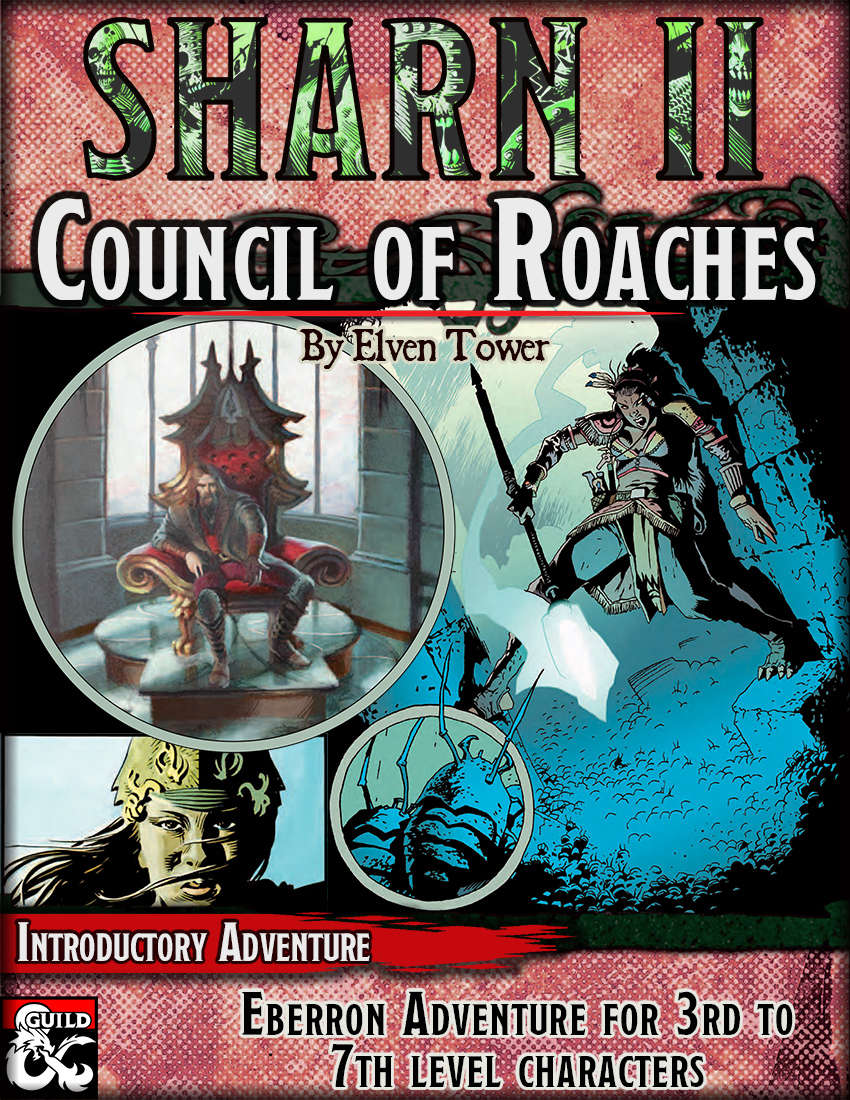
A roach thrall has infiltrated Sharn's highest circle of power, the council, and few have noticed. It's up to our adventurer's, with a little help from a perceptive councilor, to rid Sharn of the growing infestation.

Lost in the Forest of Gloom is a short spooky quest

A fiend lurks among the Black Blade goblins. A shapeshifting barghest fashioned by the General of Gehenna to exact revenge on all goblin-kind. It’s aim: to kill as many goblin leaders as possible… A masked goblin approaches the party asking for help. Two tribe leaders are dead. But a rival for chief has control of the crime scene. Will the party discover the barghest among the goblin ranks? Can they stop this imposter before it strikes again? Adventure Overview The adventure’s story is spread over 4 parts and takes approximately 4 hours to play. The adventure begins with a Call to Action scene. Part 1: Goblin Politics. Krill sends his emissaries to implore help from any strong intermediary. The party is asked to investigate the murder of Thrawn in Dringly’s lair. This is Story Objective A. Part 2: The Opposition. Gain entry into Dringly’s lair and investigate the murder of Thrawn. Gather enough evidence to find the killer. This is Story Objective B. Part 3: To The Lair! Now that the players have determined the barghest (Yeep) is to blame, they need to get to Krill’s lair quickly as he is in imminent danger. This is Story Objective C. Part 4: The Barghest.When the players arrive at the lair, they need to get to Krill and expose and defeat the barghest. This is Story Objective D. Adventure Background A barghest named Yeep has begun its onslaught of attacks against the Black Blade goblins. Starting with Chief Gnar, then his second in command Thrawn, the barghest is moving methodically down the line of command. Krill is now chief. But he has some problems: Two leaders of the Black Blades are dead. Who killed them and why? Is he next? Dringly, the next in command, has decided to take his lair for himself, declaring himself Chief of the Black Blades. Who are the Black Blades? The Black Blades are a tribe of goblins in the local area. They are known for dipping their blades in a dark black substance. It is rumored these blades are poisonous. The Black Blades regularly attack passersby on the road to rob them. The Black Blades have two lairs, one run by a chief who leads the whole tribe, and another overseen by a boss lieutenant. The Black Blades have a well-established pecking order which is how Krill stands to become chief. The next in line is Dringly, who has also declared himself chief and wants Krill dead. Krill suspects that there is something suspicious about two leaders being killed within a day of each other, but he has already burned Gnar’s body without any investigation. He needs to investigate the body of Thrawn, but it is in Dringly’s lair. Krill wishes to avoid direct confrontation with Dringly at the present for three reasons: 1) Any violence would only kill his own tribe members and further divide the lairs. 2) He believes there is still hope for negotiation to reunite the Black Blades. 3) He believes that if he were to attempt negotiations himself, Dringly would kill him. This adventure features: Two maps. Ready for your favorite Virtual Tabletop. A full color pdf. A black and white pdf. One custom monster, a reprint of barghest, all others available in the Monster Manual. Four hours of entertainment involving: roll playing a goblin bard, investigating a murder scene, tracking down a barghest before it strikes again. Applicable to any setting.

The ruined wizard tower in the Marsh of Chelimber may hold a clue to defeating the super-intelligent hill giant, Bad Fruul, and prevent him troubling the town of Parnast. To find the tower, adventurers must overcome the watery magic of the fetid marsh and discover or clear a route to the ruins of a previously lost tower.

The Precept of a Paladin order has called upon your group to do a favor. Recent initiates have gone to their island pilgrimage where the greatest member of their order is buried. Their vessel is long overdue and the commander feels they may have experience vehicular issues and no cause for 'major' alarm. A vessel has been obtained for you to head that way. Currently the other Paladins are all busy on assignment.

This 4 hour module takes the characters from a hidden cove near the Moonsea to hidden tunnels leading under the Glacier of the White Worm. What starts as a recovery mission leads to the uncovering of a much more sinister plot. Optimized for a group of level 7's (APL 7), this adventure can be adjusted for any Tier 2 party. Inside you'll find: * Three battlemaps * Introducing the ice encrusted skeleteon, a hardier version of the standard skeleton for colder climates.

Goblins of the Malauth tribe have occupied a dwarven crypt in the Nether Mountains. When a dwarf from the hamlet of Hilltop goes missing, his brother enlists adventurers in Rauvin Vale to head up to the tomb and discover what happened to him. An introductory adventure for 1st level characters.

A supernaturally powerful storm, mudslides, and agitated dinosaurs are the least of the worries in the tropical village of Mora. The village's spiritual leader, the Zombie Master, has gone missing, and now undead rise from sodden graves and the village matriarch lies dead, murdered by her own son. What dire menace awaits in the flooded catacombs below? Set on the infamous Isle of Dread.