
Abridged description from DriveThruRPG.com: From award-winning RPG podcaster John Grana comes a new supplement for the Pathfinder RPG: a sprawling goblin warren and the tribe that inhabits it, fleshed out in full detail and turned into a campaign setting for goblin player characters. Within Bloodmoon Goblins is all the information a gamemaster needs to bring a goblin campaign, full of action and intrigue, to life.
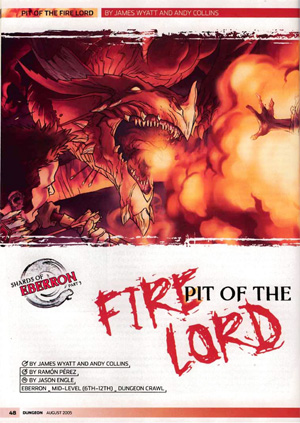
A madman hidden deep below Sharn plans to tear open a portal to the Sea of Fire. Can a band of heroes reach him in time to save the city from conflagration? The city of Sharn bakes in the grip of an intense heat wave. For most citizens, the temperature is nothing more than an annoyance. The scholars of the city know the heat is a sign of something more -- Fernia, the plane of fire, has drawn near. For one insane sorcerer, the heat is a sign that his revenge is at hand as he prepares to drown the city in a lake of fire. "Pit of the Fire Lord" is part three of the three-part Shards of Eberron Campaign Arc. Pgs. 48-59

It was supposed to be a simple job... A strange merchant offers you a simple job – pick up and deliver cargo. You have three days to get it a mere fourteen miles through the city. How hard could it be? A Simple Job is a journey through the city of Anduria, a cascading series of events that takes the heroes to explore strange locales and bargain with even stranger creatures. What secrets does the city hold, buried away for countless centuries?

Your sleek cloudskate skims across the Skysea. It is midnight. All day long, the glass sea soaked up the scorching desert sunlight. Now, that heat lifts your ship a few inches off the glass and fills its sails. The only sound you hear is the soft swish of the diamond-edged rudder as it cuts a path across the Skysea. One thousand years ago, the wizard Martek knew that you would come to find his Sphere of Power. Now, one of his glowing Star Gems shows you the way. The starlight, reflected in the glass beneath you, flickers peacefully. Suddenly, the Skysea before you bursts up into a thousand shards of splintered glass, showering into the moonlight! A horrible creature is silhouetted against the moon. You strain against the rudder to keep your ship upright. Too late! Your cloudskate tips onto one runner, and then tumbles over, skidding to a stop on the glass. As your companions struggle to right the ship, you turn and face the monster. You must hold the creature back to give them time. Without the ship, none of you can get off the glass before the sun rises in the morning. Martek's prophecy spoke of heroes, tests, and dangers. Are you the heroes? What are the tests? What dangers and riches lie ahead? This adventure can be played by itself, or as the third and final part of the Desert of Desolation series. For character levels 7-9. TSR 9054

To arms! To arms! The battle lines are drawn as desert men and inhuman tribes wait poised to strike on the fertile and rich lands of the east. The call has gone out through the civilized lands. The armies have been raised to match the invading foes from the west. Nobles and peasants have joined swords to greet the foes. But Fate or Chance has decreed another role for a small few. No glorious banners will wave on their march. No squadrons of knights will charge at their word. Instead, they will fight the war with stealth, secrecy, and cunning. The risks they will take are great, but the fates of both armies lie with them. It begins one night for your party far from the fighting. Suddenly you are entrusted with the most dangerous mission of the war. Can you cross the Sind Desert, occupied now by enemy armies, to find the Great Pass? Can you find the one known only as The Master? What will you do if you find him? So begins your adventure in The Master of the Desert Nomads, the first module of a two-part adventure that can be concluded in the exciting Temple of Death or played entirely on its own. Can your party do what must be done? TSR 9068

This module contain three handy encounters for the time your players have to face a mighty river. The encounters are varied and can be faced with violence or wits, wathever you players choose to. The encounters leads from one to the other so you can run the three in the same session if you are lucky or you can save some for another river. The encounters are adjusted for characters level 1, level 3 or level 6. "You reach the bank of the river but the bridge is not there, your calculations were a little of. The river runs strong and wildly. What do you do?" -------------------------------------------- Este módulo contiene tres útiles encuentros para cuando tus jugadores se encuentren con un poderoso río. Los encuentros son variados y pueden ser enfrentados con violencia o con ingenio, lo que tus jugadores prefieran. Los encuentros pueden encadenarse uno tras el otro así que puedes tener la posibilidad de utilizar lo tres en la misma sesión o guardar alguno para algún otro río. Los encuentros están ajustados para jugadores de niveles 1, nivel 3 o nivel 6. "Leegan a la rivera y el puente que estaban esperando encontrar no está allí. Sus calculos fueron erroneos. El rio corre rapido y salvaje. ¿Que hacen?"

This material was originally published as two separate adventures, D1: "Descent into the Depths of the Earth" and D2: "Shrine of the Kuo-Toa." Contained herein are referee notes, background information, maps, and exploration keys intended for use with the Advanced Dungeons & Dragons rules. The adventure can be used alone or as part of an extended adventure that begins with G1-3: "Against the Giants" and continues with D3: "The Vault of the Drow" and Q1: "Queen of the Demonweb Pits." TSR 9059

The final confrontation with the giant, King Snurre, and the entry of mighty adventurers into the caverns under his stronghold (DUNGEON MODULE G3, HALL OF THE FIRE GIANT KING) discovered the Dark Elves, the Drow, had instigated the giant alliance and its warfare upon mankind and its allied races. This module contains background information, a large-scale referee's map with a matching partial map for players, referee's notes, special exploration and encounter pieces, a large map detailing a cavern area, encounter and map matrix keys, and an additional section pertaining to a unique new creature for use with this module and the game as a whole. A complete setting for play of ADVANCED DUNGEONS & DRAGONS is contained herein. This module can be played alone, as the first part of a series of three modules (with SHRINE OF THE KUO-TOA, D2, and VAULT OF THE DROW, D3), or as the fourth part of a continuing series of modules which form a special progressive campaign scenario (DUNGEON MODULES G1, G2, G3, D1, D2, D3, and Q1, (QUEEN OF THE DEMONWEB PITS). TSR 9019
A venom maw hydra lair suitable for four or five 10th-level characters. The Red Craw Marsh, so called because of the delicious and plentiful red crayfish that live in the area, is a boon to the nearby village. More than a few intrepid souls brave the swamp each season to collect the crayfish. They either sell the crayfish to local establishments or ship them to nearby cities, where they earn a good price as the crayfish is a delicacy among the wealthy. The villagers have established a tentative peace with a clan of trollkin that inhabit the swamp. The crayfish collectors pay a small fee to the trollkin, who allow them to ply their trade in the marsh without (much) interference. It is a tense but profitable relationship for all involved. A powerful creature has moved into the marsh, however, threatening the delicate balance. When a venom maw hydra decided to move to the area of the marsh between the human and trollkin villages, it brought along a number of creatures that worship and serve it. This hydra and its allies have killed some of the crayfish hunters and some of the trollkin. Each side, unfortunately, believes that the other has broken the truce, thus stirring up animosity and putting both groups on the verge of war.
The 13th Circle is an epic battle with one of the archfiends of legend, the demon Baphomet. Designed for Tier 3-4 characters (levels 15-17) and set in the Dread Domain of Kachelior, the adventure requires the party to navigate the mysterious and maddening mazes that protect the demon's castle, and battle fiends of all kinds to reach his throne room. But will they discover the truth of his machinations? Word has spread through the small collection of towns within the Grey Shade that a cult of Baphomet has been preparing something for their master within his palace. The players will travel to Baphomet’s palace, and make their way through the massive forest maze that surrounds it. They will find the corpse of one of the previous heroes enshrined near the center which hints towards the true purpose of the cultists. They will then have to infiltrate the dread palace either stealthing or fighting their way through the defenses. They then must make it past Baphomet’s Lieutenant, Aphalos, the Godeater. The characters defeat Aphalos or persuade him to leave his master to his fate. Once they enter the chamber, Baphomet’s plan is made clear. He wishes to create a maze within time, thus trapping this world in the same cycle of pain and doom as before.

This adventure is designed for the D&D Adventures League Season 5 - Storm King’s Thunder campaign, and is meant to enhance your party’s connection to important events and NPCs. While it is intended for a party of around 6th level, the nature of the quest is such that it fits easily with a higher level as well. It will put your players in contact with Felgolos, the bronze dragon that is encountered in Chapter 9 of D&D Adventures League Season 5 - Storm King’s Thunder, as well as the ancient dragon Iymrith, who plays a prominent role in the main plot. Of course, you can also change names and locations to make this adventure fit into any other campaign world – as long as it has dragons and deserts. Enjoy!
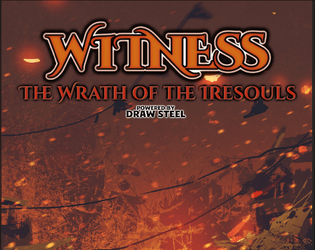
A storm brews above Nexarin, a town known for its perfect weather, bountiful harvests, and always-clear water. However now, flames cover the street, earthquakes level buildings, and a rotted stench fills the air. A wicked void mage attempts to use the town’s power for his own gain. None can stand against him and his legion of wrathful elementals… Get ready to Draw Steel! In this unofficial 1st-level adventure for the MCDM RPG Draw Steel, fight through never-before-seen elementally imbued Iresouls as you save Nexarin, discover powerful artifacts that convey boons you can use throughout the rest of the adventure, and face down the fearsome void mage Lord Cawlmire. This product contains: - An adventure that takes 6-10 hours to complete and that is designed for 4 players (with suggestions to adjust for more or fewer players) - 12 brand new statblocks, including 4 minions, a powerful Void Mage, and Iresouls for all 7 elements - 5 encounter maps specially designed for Draw Steel, each with unique and interactive terrain effects - Encounter sheets for each encounter, helping the Director with quick references to statblocks, terrain effects, and combat objectives - 2 unique treasures, including a Void Amulet for spellcasters designed to grow with you through adventures - Rules for rebuilding Nexarin after the events of the adventure, and lasting benefits for doing so

Untamed by the laws of man, the Giantdowns region remains a buffer zone between the ruined empire of Anuire and its northern neighbor, the Rjurik Highlands. The Great Downs themselves are the stuff of legend: Giants, they say, are buried beneath the mounds, awaiting some call to rise and battle once more. But in the meantime, other forces threaten the Downs. A new awnshegh, the humanoid known as Ghuralli, strives to make his small kingdom a rival to the neighboring Gorgon's Crown. His armies of humanoids, giant-kin, and monsters stand ready to strike at the few human settlers brave enough to live in the shadow of the Great Downs. The Rjurik settlers need a leader, someone who can defeat Ghuralli and forge a kingdom out of their scattered clans. They need someone to step forth and become King of the Giantdowns. This 64-page adventure accessory contains detailed information on the Giantdowns region, the people, monsters, and places that can be found within, and several adventures for beginning and experienced characters alike TSR 3142

The penninsula of Wa is no place to visit. The land is poor, the people wary and suspicious. Yet this quiet backwater has been the site of strange disturbances - mysterious disappearances and omens of dire events to come. Why do the animals of Wa disappear, only to return a short while later? Who are the Blue Kumi bandits, and why are they so active? Why do the black geese fly into the Jusofu Mountains? And what fell creature lurks along the southern coast of Wa? Or does the stench of corruption emanate from the Celestial Bureacracy itself? Could the danger, unchecked, grow great enough to doom all living creatures in Kara-Tur? Which clues will lead to the truth, and which are merely traps for the unwary... Test of the Samurai will take the players across the Wa peninsula and to the unknown land of Qui. They will encounter such legendary beasts as the feng huang (phoenix) and the chi'-lin (unicorn) as they attempt to discover the secrets of Wa. Test of the Samurai is a scenario for the Oriental Adventures supplement to the AD&D game. It is set in Kara-Tur, the oriental world in the Forgotten Realms. Although Test of the Samurai follows the events of module OA6, Ronin Challenge, it is an independent adventure for five to eight characters of levels 6-9. TSR 9258

"It was already a freezing morning when you set out for the legendary Castle of Madness – the mysterious castle that is said to emerge from blizzards once every seven winters. " In this short treasure hunt for one 2nd level player, you'll brave an frigid mountain, an icy cave, and a haunted castle to bring home a pile of loot. Written as a digital gamebook, you will keep track of your character's hit points, spells, and inventory on your character sheet, and keep track of enemies using your own scratch paper. The game will play GM and all enemies.

“The Lost Mines of Karak” is the sequel to “The Shadow Rift of Umbraforge” and the fourth part of the Scales of War adventure path. After the player characters' success in "Siege of Bordrin's Watch" and "The Shadow Rift of Umbraforge", they have garnered something of a reputation in the city of Overlook. They are introduced to a wealthy patron that believes there is a connection between a shadar-kai arms dealer (from the previous two adventures) and a long lost dwarven mine. The patron wishes the PCs to find and secure the mine in order to use its wealth and resources to defend the city. The party then must travel through a wasteland and desert to find this mine. Once they have, they must fight through the hordes of monstrous creatures that inhabit it and defeat the Queen of the Drylands - a powerful naga. Pgs. 56-93

In an age obscured by mist and memory, Sir Galen the Brave and his knights struck down the Drake of Crestmoor with steel and flame. But as the years turned, and the heroes returned to dust, their deeds faded into myth. Doubt lurked where awe once dwelled, and in time, the bards sang of lesser deeds. In the hollows of the wilderness, the stones of their forgotten tomb crumbled beneath ivy and shadow. The Cursed Knights of Crestmoor is a short dungeon crawl for four characters of levels 1-2 using Shadowdark RPG ©. The adventure is designed to be easy to run for new game masters. Players should not be cavalier in their approach to this dungeon. There are threats in the tomb which could easily kill foolhardy player characters. Long ago a band of knights led by Sir Galen slew the black dragon known as the Drake of Crestmoor - a malevolent creature whose true name was Morghast the Black. With his dying breath, the dragon cursed Galen and his friends that they would never find rest in death. Today, the once well-kept tomb has fallen into ruin. Some time ago a band of kobolds moved into the subterranean mausoleum and began using it as a base of operations. More recently, a lizardfolk shaman named Kall’eth and his warband arrived and took over, pressing the kobolds into their service. Kall’eth came to Galen’s tomb to recover the knight’s Fireblade - a sword of dwarvish make used to slay Morghast long ago. The tomb is crawling with kobolds, lizardfolk, and the restless husks of Galen and his compatriots. A magic sword, a missing wedding ring, and plenty of adventure await you in…The Cursed Knights of Crestmoor!

Figgy Puddin' Steals Christmas is a short adventure for three to six characters, and optimized for 2nd level characters. We also include Scaling Suggestions, allowing you to run this adventure for lower- or higher-level characters. We anticipate a run-time of 2- to 4-hours. There's a bit of roleplay in this adventure, which may extend the playtime. Adventure Background A traveling jester known as Figgy Puddin’ and her Coal Smudge Gang have stolen Christmas presents and now hold them for ransom. While safe and secure in her lair, she awaits either a payment of an outrageous ransom, or a crew of heroes to claim the presents after they navigate her not-so-festive lair. What's the Adventure? After you introduce the hook, the adventure occurs in Figgy Puddin's lair - a refurbished kobold bunker consisting of eight rooms. As the characters explore the linear dungeon, they encounter new creatures, complete challenges, and are tested about their Christmas knowledge. However, the final confrontation with the naughty Figgy Puddin' could make for a very Unhappy and Unmerry Christmas for our heroes, the children of Thistleton, and their parents. Who Is Figgy Puddin’? Figgy Puddin’ was once a happy jester who loved Christmas. For years she traveled the realm, bringing fun and festive cheer to villages and children while preparing the way for Santa. However, times have become tough, and entertainment doesn’t always pay as well as one would like. As Figgy prepares for retirement, she’s learned she doesn’t have enough gold to last. During this time, she’s also decided that Santa doesn’t know who she is, let alone appreciate the work she puts in every year. Using her savings, extortion, blackmail, and other nefarious means, she’s convinced several mechanical geniuses and arcane specialists to help her refurbish her underground bunker with wondrous effects, creatures, and tests. To fund her retirement, she’s taken extreme measures to make some quick gold — holding Christmas presents for ransom.

Stormy seas rock your vessel, tossing her about like a toy in the jaws of a hound. Thunder rolls in the distance. Then, an arc of lightning splits the sky, and the sound like an exploding fireball all but bursts your eardrums. Your mainmast, struck by lightning, burns, splinters, and topples onto the deck like a felled oak. The last thing you hear is the cracking of wood as the deck explodes into splinters, and the ship is torn asunder. All goes black. You awaken in shackles, half-submerged in water, and surrounded by salmon-pink coral. You survived, but what fate awaits you now? The sound of soggy footsteps echo down the hallway. A creature approaches with an answer. This week’s encounter is Coral Colosseum, a combat encounter in which the characters must prove themselves as worthy gladiators to escape the clutches of a ruthless sahuagin baron. This encounter can serve as a follow-up to Encounter of the Week: Sharkfin Shipwreck, or as a stand-alone mini-adventure. It could also serve as an introduction to Ghosts of Saltmarsh, which releases on May 21st, 2019.

Upon the horse plains of Nova Vaasa, the Koshka Bluffs rise from the earth like gigantic, misshapen tumors. They give up stone to feed the sheer walls of Castle Faerhaaven, but lately they have yielded stranger objects: figurines, coins, and other odd artifacts, which curse those foolish enough to claim them. Now, the ancient priestess Sachmet has awakened from a timeless sleep to come and take them back.... TSR 9452