In a small hamlet, things are strangely becoming tidy in the night. Far from being pleased, the citizens are alarmed by these events. A local painter has gone missing, as has a travelling scholar. What is going on here?
What the living forget, the dead remember forever. For some, duty and revenge are stronger than death. Pgs. 4-7
Explore a cult-ridden village in this adventure for 2nd-level characters set in the world’s greatest roleplaying game! Syra Fallbrook, a talented blacksmith, is due to be executed. Her only crime was trying to prevent the Cult of the Engine from taking and sacrificing her daughter, Ariadne, in a dark ritual beneath the town. The party find Bleakwash a closed off and inhospitable town, with zealous cultists and downtrodden citizens so tightly entwined that nobody trusts anybody else, and nobody can be trusted. Eventually, the quest takes them to the dungeon beneath the town, a dank, sodden crypt where the cult’s enigmatic leader seeks to awaken The Engine Of Salvation. This second-level adventure is perfect for new DMs and players alike. Visit the grim portside town of Bleakwash, save Syra and her daughter, investigate a dark cult, and do battle in the salt-crusted catacombs! Included in this adventure: A quest to clear a town of corrupting influence. An open-ended investigation in a full town map. Broken, sea-washed catacombs. 5 random encounters to support you during travel. Approx. 4 hours of fun. A gripping adventure for 2nd-level players. Visit the grim shores of Bleakwash for a holiday you'll never forget!

A One-on-One Competition Module for Thieves Level 8 Your peaceful evening has been interrupted by an unusual request. As a thief, your skills are unmatched, but can you rise to the challenge of thieving for a powerful and frightening wizard? Do you have a choice? The Gem and the Staff is a special One-on-One competition module designed for one player and on Dungeon Master. The Module contains two separate scenarios, so you can switch roles with the other player after the first adventure. Scoring sheets and encounter summaries are provided for each adventure to make running competitions quick and simple. Character figures and a map book are also provided to help visualize the adventures. The player's maps are designed so you can see the rooms as they would appear. Complete DM's Maps are included. TSR 9050

Dracula, the Lord of Shadow and Darkness, has covered the land in shadow and dispatched armies of monsters and undead from his magical castle. His armies threaten to overrun major cities and plunge the world into a literal Dark Age. The last of the vampire-hunting clan that traditionally opposed him has disappeared, and still the armies advance. He must be stopped. If that's not enough motivation, it is well-known that his castle is full of magical items and great riches... but also great danger. If you've ever wanted D&D and Castlevania to meet, look no further. This adventure is exactly what you wanted. Every area of the castle poses different and unique challenges to keep the party engaged and on their toes. Written for the DM as a ready-to-run adventure, it is designed for four to six characters. The adventure starts at level 3 at the outer defenses of the castle, and ends with the party advancing to level 13 after defeating Dracula in an epic battle. The adventure includes documentation to help even a new DM succed, including suggestions for how to run each of the area "boss" monsters in combat. There are approximately 50 new enemies and over 3 dozen new magical items. It also comes with a list of suggested music for many areas of the castle, and a 25-page campaign log recounting an actual tabletop play-through of this adventure from the DM's perspective.

A group of Azer were captured and brought here long ago to create a powerful weapons that ensured a long dead king’s victory in a bloody war. For some time they obeyed, churning out weapons and crafting monuments in the king’s honor, but as time went on, animosity towards the king grew stronger and stronger. The Azer betrayed the king, using the might of their “perfect” weapons to strike his men down before retreating to their forge and closing it off from the rest of the world. They have been locked a away in solitude for some time now. The entrance to this bunker has been uncovered though, and it is up to a brave group of adventurers to travel down into this place and see what they have been up to for all of these years. This dungeon has rules to modify all encounters for a group of players levels 3 through 6 and is intended for a party of four. If you have more players, feel free to adjust the difficulty up one level for each additional player or simply tune the monsters to your needs. This dungeon contains many original enemies, a unique puzzle, and an environment that is meant to inspire awe to the wonders of crafting. They are in a place of flame and metal, so a dwarf should feel at home while elves may be uncomfortable.
"The Dark Forest" is an elder shadow drake lair suitable for four 8th-level characters. This adventure can be completed in one session. A hidden grove within a dark forest has been home to a tribe of alseids for generations. The tribe's most recent leader and spiritual heart was an alseid shaman called Riatha the Raven. Within the grove lies an ancient ring of standing stones atop a burial mount. Here, Riatha conducted sacred nature rites to honor and bless the forest and the tribe. During one of these ceremonies, the ground rumbled and a column of dense black energy shot straight up from the burial mound and into the night sky. Thick darkness enveloped the area, and the suddenly blinded alseids heard terrible roars. An instant later, the darkness dissipated to reveal a mysterious pool ringed with skulls among the standing stones. Two large, dragon-like creatures with black scales and burning red eyes glared at the confused alseids. One the ground lay the body of Riatha, deathly still. Terror and chaos followed as the creatures brought swift and sudden death, killing most of the alseid tribe members with razor-sharp teeth and deadly, black breath. The alseids that survived the inital, bloody attack fled into the forest. They counterattacked a few hours later, desperate to reclaim their grove and recover the body of their beloved leader, but the attempt was a fiasco and they were quickly driven off. Now, the few remaining alseids hide in the forest, frightened and unsure of what to do next.

Deep below the surface lies an ancient beholder city called Ilth K'hinax. In times past, hundreds of beholders called it home - until simmering rivalries within their society exploded into warfare. The few survivors fled, leaving the city deserted for hundreds of years. However, the story of Ilth K'hinax's glory was passed down from one generation of beholders to the next. Now, after countless years of self-imposed exile, the beholders are back! After securing the city, the hive mother of Ilth K'hinax implemented a plan to wipe out all the beings living above it. Unfortunately for the beholders, several facets of the hive mother's plan have been revealed through the exploits of a party of adventurers. Now, this group of heroes must meet eye to eye with Ilth K'hinax's newest occupants in an effort to stop the hive mother's pernicious plan! "Eye to Eye" is the last of three adventures featuring the nightmarish beholder. It can be played as an individual mission or as part of the series that began with "Eye of Pain" and continued in "Eye of Doom." TSR 9536

For 1000 years, the Pyramid of Amun-re has lain undisturbed. Now the ghost of the once-great Pharaoh pleads with adventurers to venture into his tomb, foil the devious traps within, and free his soul. A classic dungeon crawl, with mazes and quality lore. No one has ever returned from the tomb of Amun-re: his Star Gem must still lie unclaimed! You will need all your cunning, imagination, strength and magic -- just to survive! TSR 9052
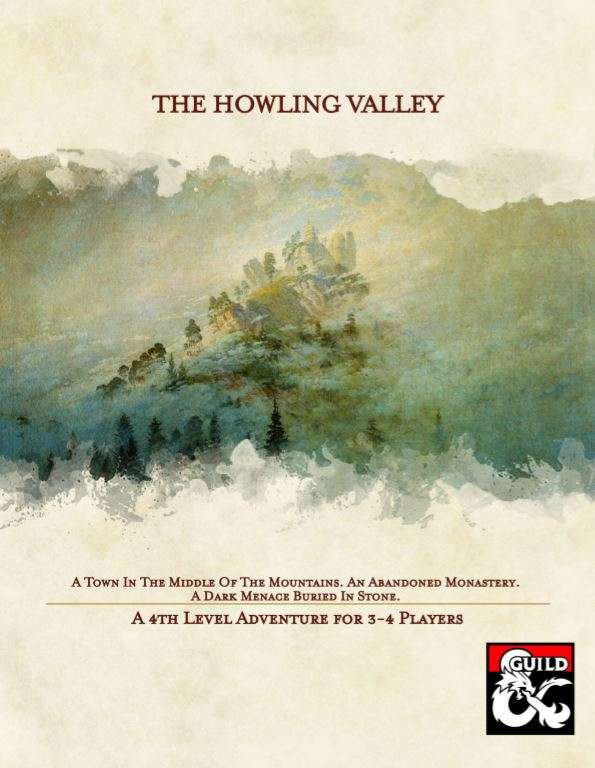
A cry for help by a small village in the Howling Valley. An abandoned monastery on top of the mountain. Hordes of undead pouring into the realms. A mad mage with bad intentions. Will you be able to put an end to the unfortunate events in the valley?

A mysterious adventurer stumbles into an inn in the night, looking for an escort to the nearest temple. Before the night is over, he inexplicably disappears, leaving a trail of corruption leading into the nearby woods as packs of twisted forest creatures emerge to plague travellers. Pgs. 83-89
A Giant Ransom is a short adventure for four 11th-level characters. There are opportunities for diplomacy, stealth, and combat, based on the choices the PCs make, so any mix of classes is appropriate. The adventure can be set in any campaign world, in a frontier region near glacier-covered mountains. In the story thus far, the PCs have been tasked by Duke Ambrinigan, a local lord, to recover a stolen statue of a golden lion. The lion was stolen in transit by frost giant raiders, and was to be ransomed back to the Duke for 10,000 gp. The PCs were sent to perform the exchange. The giants, however, were attacked by the white dragon Whildenstrank, who stole the statue and retreated to his lair in the middle of a nearby glacier. The PCs encountered the remaining giants, and then set off westward toward the dragon's lair. They traveled across the flat part of the glacier, encountering the frost giant ranger Velg the Dragon Tamer, as well as some burrowing bulettes. Then they braved the hazards of frost worms and remorhaz in the Ice Canyons: a maze of twisting passageways surrounding the black spire of rock that the dragon calls home. The PCs now stand at the edge of an open space, looking at the towering edifice in front of them.
In this level 5 adventure for three to five players, a suspicious death brings our adventurers to the village of Degorod on the night of an annual festival. Celebrations turn into chaos as an unknown force abducts villagers from above. The group must investigate the cause and, in the end, decide who to help. Pgs. 101-107
En garde! "Go away, or I shall taunt you a second time!" A duchess recruits the party to deal with a monstrosity. Pgs, 60-67

The party approaches the Dwarven Kingdom of Narol'Duun, where things are far different than in your typical dwarven empire. The first major difference is that Narol'Duun is split into three distinct categories of dwarven tribes based on the main type of ore that they mine and refine. The dwarves take on characteristics of these ores - the Cobalt Dwarves having a tinge of blue to their hair, the Copper Dwarves having tough skin and beards of shining reddish-brown, and the skin of the Iron Dwarves is a deep grey in color. These dwarves engage in trade and drink, but the one thing that they are sure to never do is breed outside of their respective tribes. To be found in a relationship with a dwarf of another tribe is to be exiled to the surface - a punishment worse than death for most of these dwarves. On this particular adventure, the party finds themselves caught up in a case of forbidden love between a royal member of the Cobalt Dwarf family - Nadom Glintstone - and a simple merchant woman from the Copper Dwarf tribe by the name of Lajeera Copperfist. They have been doing their best to keep their love a secret for they both know the risks, but the Cobalt King, Norgith Glintstone, has suspicions and is deeply afraid of the damage such a scandal could have on his family's reputation. He doesn't want to draw any attention to the situation, so it is difficult to find a dwarf of his own tribe that could look into it further, so when the party comes along he sees it as a perfect opportunity. He will hire the party to look into the situation with Nadom, offering grand rewards in exchange for the truth if they can provide proof. The party will be torn between multiple threads of possibility in this adventure – telling Norgith the truth about his son's affair with Lajeera, helping Lajeera to permanently change her form to that of a Cobalt Dwarf so they can be together, or perhaps even trying to end the tribalistic ways of the dwarven kingdoms all together. This is a heavily role-playing based adventure, perfect for those who would rather talk their way through a difficult situation than cut their way through it, but there is still some combat along the way depending on the party’s choices. This story will decide if love can win out against all odds or if the temptation of coin is greater than the happiness of others.

In the far reaches of the world, under a lost and lonely hill, lies the sinister Tomb of Horrors. This labyrinthine crypt is filled with terrible traps, strange and ferocious monsters, rich and magical treasures, and somewhere within rests the demilich. Remake of the original AD&D adventure.

Be Ready with the Snapping Line... Just about every community, big or small, civilized or seedy, has at least one popular tavern. Folks may go there to relax or to look for work, to celebrate or to mope, to learn the latest or to forget. And while some may be willing to travel far from the comfort of their favorite watering hole in search of adventure, in the seaside town of Saltmarsh, they may not have to. At the Snapping Line Inn and Tavern: * Enjoy food, drink, gossip, a darts competition, and maybe a rousing bar fight. * Participate in a gambling night. Watch out for pirates! * Stop a dark ritual to save an innocent—and yourselves. * Come to the rescue when there’s an accident by the pier—and the predators arrive. Four linked encounters around a pier-side tavern for characters of levels 5-10. Playable individually, scattered throughout another campaign, or together as a four-to-six-hour adventure.

Up here in the mountains, the sun sets fast. The path has narrowed yet again as it diverts into this small slot valley. A gentle stream parallels the path; it’s pretty, but the smell of rotting vegetation dissuades from lingering long. In the lengthening shadows, birdsong seems oddly muted. As the forest clears a bit up ahead, a small manor upon a little pond comes into view. The birds have gone completely still. K1: Night at Fausen’s Manor is an investigative adventure designed for player characters around 3rd level. The players have been invited by the reclusive Lord Fausen to dine with him and discuss a job; Fausen is troubled by odd bumps and sounds in the night, something has been interfering with his mail, and recently his butler, Grimly, has disappeared. The players investigate during a night at the manor, where dark secrets lurk around every corner. Published by Coldlight Press

The adventure takes players from a town devastated by an unexpected flood, through a drowned land where nature is turned upside down and desperate families cling to the roofs of their ruined homes, hiding from the monstrous products of a disordered world, through the strange tomb of an ancient race, to a profundal zone, hidden for millennia and now exposed, and finally to the Observatory itself, an eerie abandoned treasure palace, where they will encounter a pale and unexpected terror which will seek to claim their lives. The adventure is suitable for a lucky mid-range party, a stupid high-level party or an exceedingly clever low level party. It is difficult, with a meaningful possibility of character death. Should you find them, and defeat their guardians, the treasures of an ancient culture will be yours. At the final point of the Observatory is a glimpse of another world. Published by False Machine Publishing

"Deeptown lies in the shadow of mountains, a town where anything is for sale if you can only meet the price. But in the wild surrounding valleys of the Deeps, it's the bandits who make the darkest deals - and their ambition comes at a cost far greater than the contents of any wayward caravan. You and your team have just been handed a new job: disrupt a meeting between a bandit lord and his mysterious new allies. At a remote mountain villa, you will strike hard and fast and leave terror in your wake. They give you the tools. You provide the talent. Survive, and you'll be well rewarded. Fail, and you'll pay the price. You've got three days to raise some hell." This was one of the first third party adventures under the OGL for 3rd edition published by Atlas Games under the Penumbra line. The attack on the mansion is not a dungeon crawl, but feels like a commando raid aided by some unique magic items.