
Anamdael is a small town remarkable only for its peacefulness. However, the town harbors a dark secret: Long ago, a resident entered into a pact with a Night Hag, whose services come at a price. Travelers who once gave little thought to Anamdael now hear rumors of a strange cult in its woods. Your party is hired to locate and return a missing person, last known to be traveling to Anamdael. Before you may enter “Mother’s” land, you face your first test. Your responses determine more than you know and set the stage for an eerie adventure.
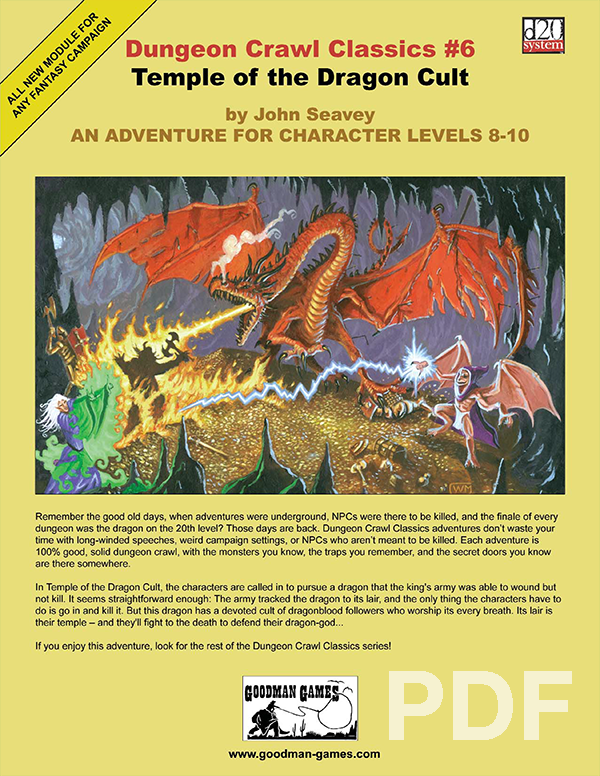
In Temple of the Dragon Cult, the characters are called in to pursue a dragon that the king’s army was able to wound but not kill. It seems straightforward enough: the army tracked the dragon to its lair, and all the characters have to do is go in and kill it. But this dragon has a devoted cult of dragonblood followers who worship its every breath. Its lair is their temple — and they’ll fight to the death to defend their dragon-god…

Figgy Puddin' Steals Christmas is a short adventure for three to six characters, and optimized for 2nd level characters. We also include Scaling Suggestions, allowing you to run this adventure for lower- or higher-level characters. We anticipate a run-time of 2- to 4-hours. There's a bit of roleplay in this adventure, which may extend the playtime. Adventure Background A traveling jester known as Figgy Puddin’ and her Coal Smudge Gang have stolen Christmas presents and now hold them for ransom. While safe and secure in her lair, she awaits either a payment of an outrageous ransom, or a crew of heroes to claim the presents after they navigate her not-so-festive lair. What's the Adventure? After you introduce the hook, the adventure occurs in Figgy Puddin's lair - a refurbished kobold bunker consisting of eight rooms. As the characters explore the linear dungeon, they encounter new creatures, complete challenges, and are tested about their Christmas knowledge. However, the final confrontation with the naughty Figgy Puddin' could make for a very Unhappy and Unmerry Christmas for our heroes, the children of Thistleton, and their parents. Who Is Figgy Puddin’? Figgy Puddin’ was once a happy jester who loved Christmas. For years she traveled the realm, bringing fun and festive cheer to villages and children while preparing the way for Santa. However, times have become tough, and entertainment doesn’t always pay as well as one would like. As Figgy prepares for retirement, she’s learned she doesn’t have enough gold to last. During this time, she’s also decided that Santa doesn’t know who she is, let alone appreciate the work she puts in every year. Using her savings, extortion, blackmail, and other nefarious means, she’s convinced several mechanical geniuses and arcane specialists to help her refurbish her underground bunker with wondrous effects, creatures, and tests. To fund her retirement, she’s taken extreme measures to make some quick gold — holding Christmas presents for ransom.

Decades ago a group of adventurers saved the town of Logan’s Bluff from a humanoid incursion. While the battle ended in a victory, the cost was high when the party lost a valued member of their group. In his honor his comrades and grateful citizens built a tomb over his final resting spot. In the decades since the battle peace has reigned but has recently waned with the advent of more humanoid sightings. Some have wondered if Forstal’s tomb is drawing the humanoids back for revenge.
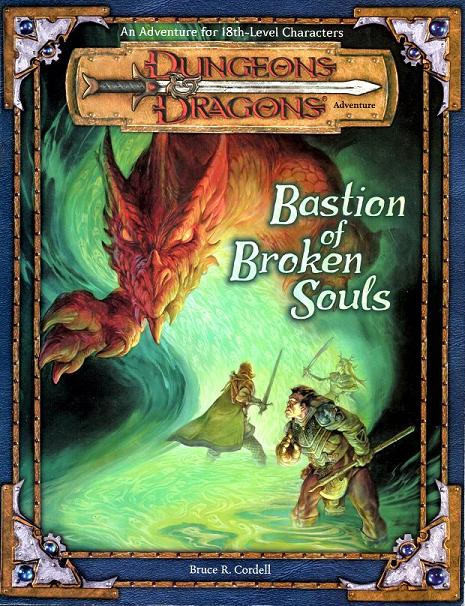
The Blood of Ancient Battles Rises An eternal demonic war draws dangerously close to an end, threatening the balance of all existence. At the crux of this chaotic feud resides a legendary terror fixated upon immortality at any cost. Only the most powerful heroes can hope to defeat a force that lies beyond the influence of the gods. "Bastion of Broken Souls" is a stand-alone adventure for the Dungeons & Dragons game. Designed to challenge 18th-level D&D heroes, it pits them against some of the most powerful beings in the multiverse. This adventure is the last element in a collection of adventures designed to take characters from beginner to advanced levels of play (although no previous adventure need be played to play this one). "Bastion of Broken Souls" features an additional 16 pages of content for the same price as most of the previous adventures in the series. WOTC 88167

The people of Northwood’s Rest need help. Winter is coming, and something’s been slaughtering the livestock. Surely it must be the orcs of the Northwood! Heroes are needed to hunt them down. Will you answer the call? Welcome to Hunted! The latest adventure from the critically acclaimed platinum best-selling author Tony Petrecca. Hey, that’s me! I’ll stop with the 3rd person talk now. My last release, Killer Kobolds, was all about unadulterated, non-stop run and gun action, and quite purposefully contained absolutely no moral quandaries. Its theme was simple - Kidnapping Kobolds needed killing… now go! The result was an absolute blast, but with Hunted! I wanted to explore notably different themes. With Hunted! Exploration, investigation, and role play go hand in hand with unexpected twists and turns to present an adventure I’m quite proud of. Worry not, action hounds, as there’s plenty of combat to be had, but with Hunted! mindless murder hobo’s need not apply. Set in the frontier town of Northwood's Rest, a simple thorpe on the edge of a forest, Hunted! lends itself to easy insertion into any campaign setting and would make an excellent side quest for Storm King's Thunder. With direct tie ins to Acererak, Hunted! fits naturally within any Tales of the Yawning Portal campaign. Scaled for a party of 4-6 adventurers of levels 5-7, Hunted! can be easily tweaked to accommodate parties of lesser or greater strength. Featuring gorgeous cartography by Ennie award winner Elven Tower Cartography, beautiful art, a bevy of new creatures, new locations, several potential plot twists and a fun new magic item, Hunted! should provide six to ten hours of outstanding Dungeons and Dragons 5th Edition adventuring fun.

The power of prophecy is given to few. Wise are they who guard this gift well, for those who thirst after such knowledge are not always men of principle. Bastion of destiny, the Tower of the Heavens stands silhouetted against the star-studded night sky. From within his darkened observatory, perched like an eyrie on the highest turret, a figure in white charts the course of a shooting-star as it disappears behind the snow-capped peaks of the Tegefed mountains. The old man smiles grimly to himself; the event foretold has come to pass! Power, glory, riches - it takes years to acquire them. The uncanny accuracy of their predictions has brought all these and more to the sages of the Tower of the Heavens. But what is hard to win is often easier to lose, and the future of the tower now hangs in the balance. For it is written that the day of reckoning draws nearer when a star falls.... TSR 9120
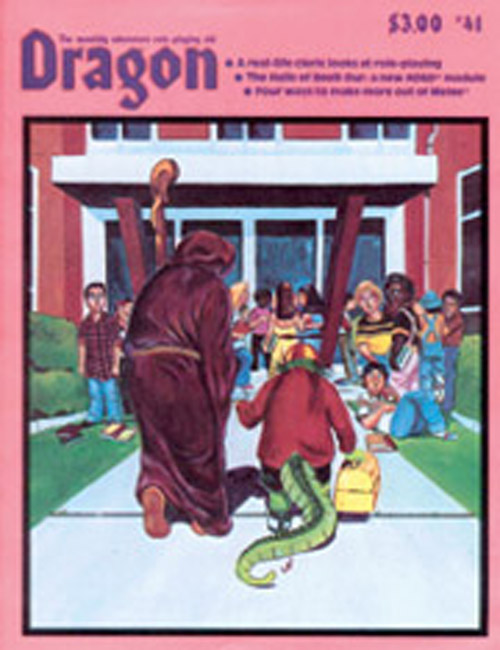
Built into what was thought to be an inactive volcano, the Halls of Beoll-Dur were created as an isolated training ground for dwarven clerics. However, upon their mountain shaking itself awake the dwarves discovered that they shared the mountain with something far more sinister. Few escaped to tell of the massacre as an horde of salamanders rising from the fiery depths, claiming the halls for their king. Now the temple sits desecrated, waiting for the day that hero's will purify it of the evils within. Pgs. M1-M16

INTRODUCTION Some say the world is dying. Others say the desert is growing. In either case, merchants and princes always desire new ways to cross the Great Sand Sea. Today, someone has found a way to fly over it. Who will tempt fate and join the maiden voyage of the Desert Angel? No one knows what dangers or treasure have lain hidden in the heart of the desert for all these eons. If you survive, you will be the first. ONE-SHOT This adventure is intended as a one-shot, but it can easily be inserted into a campaign. Any time your players wish to travel to a distant city, you can simply say there is a large desert in their way, but luckily there is a new flying ship they can travel on. Good luck with that! DESIGN NOTES This adventure is intended for low-level characters (1-3). It is primarily geared for social encounters and combat. It runs 2 to 5 hours. Players ride a flying ship across the desert. Monsters attack. Passengers plot treachery. Mysterious locations appear. You can keep the tone serious or play up this ridiculous sequence of disasters for laughs.

A fiend lurks among the Black Blade goblins. A shapeshifting barghest fashioned by the General of Gehenna to exact revenge on all goblin-kind. It’s aim: to kill as many goblin leaders as possible… A masked goblin approaches the party asking for help. Two tribe leaders are dead. But a rival for chief has control of the crime scene. Will the party discover the barghest among the goblin ranks? Can they stop this imposter before it strikes again? Adventure Overview The adventure’s story is spread over 4 parts and takes approximately 4 hours to play. The adventure begins with a Call to Action scene. Part 1: Goblin Politics. Krill sends his emissaries to implore help from any strong intermediary. The party is asked to investigate the murder of Thrawn in Dringly’s lair. This is Story Objective A. Part 2: The Opposition. Gain entry into Dringly’s lair and investigate the murder of Thrawn. Gather enough evidence to find the killer. This is Story Objective B. Part 3: To The Lair! Now that the players have determined the barghest (Yeep) is to blame, they need to get to Krill’s lair quickly as he is in imminent danger. This is Story Objective C. Part 4: The Barghest.When the players arrive at the lair, they need to get to Krill and expose and defeat the barghest. This is Story Objective D. Adventure Background A barghest named Yeep has begun its onslaught of attacks against the Black Blade goblins. Starting with Chief Gnar, then his second in command Thrawn, the barghest is moving methodically down the line of command. Krill is now chief. But he has some problems: Two leaders of the Black Blades are dead. Who killed them and why? Is he next? Dringly, the next in command, has decided to take his lair for himself, declaring himself Chief of the Black Blades. Who are the Black Blades? The Black Blades are a tribe of goblins in the local area. They are known for dipping their blades in a dark black substance. It is rumored these blades are poisonous. The Black Blades regularly attack passersby on the road to rob them. The Black Blades have two lairs, one run by a chief who leads the whole tribe, and another overseen by a boss lieutenant. The Black Blades have a well-established pecking order which is how Krill stands to become chief. The next in line is Dringly, who has also declared himself chief and wants Krill dead. Krill suspects that there is something suspicious about two leaders being killed within a day of each other, but he has already burned Gnar’s body without any investigation. He needs to investigate the body of Thrawn, but it is in Dringly’s lair. Krill wishes to avoid direct confrontation with Dringly at the present for three reasons: 1) Any violence would only kill his own tribe members and further divide the lairs. 2) He believes there is still hope for negotiation to reunite the Black Blades. 3) He believes that if he were to attempt negotiations himself, Dringly would kill him. This adventure features: Two maps. Ready for your favorite Virtual Tabletop. A full color pdf. A black and white pdf. One custom monster, a reprint of barghest, all others available in the Monster Manual. Four hours of entertainment involving: roll playing a goblin bard, investigating a murder scene, tracking down a barghest before it strikes again. Applicable to any setting.

Every year, the small town of Whitetree has to sacrifice a child as tribute to a fiery salamander slaver, Zassan. The players must pursue the slaver, attempting to stop him and retrieve his precious cargo before it’s too late!

For years the Count of Durwall Keep ruled over the land fairly and with justice. That ended during the Bloodrayne Conflict when the castle was felled by troops loyal to General Bloodrayne. In the many years that followed the triangular keep has fallen into a sordid state of disrepair. The keep used to hold mighty coffers of treasure for the Count and for the Emperor as well. A stronghold was built under the keep to secure said treasure and perhaps some treasure may still remain in the depths of its dungeons. Recently it’s been said that the Snaggletooth tribe of kobolds has seized the fortress and is using it as their home. It is also rumored that there may still be undiscovered treasure located in the dungeon of the keep. Faint echoes of the missing Orb of Ruler ship are still heard.

Continue your duet campaign or add something new! Wake up in a druid colony and embark on a quest for trust and truth with plenty of political intrigue, hidden plots, and exciting combat along the way! Second Glance picks up where our first adventure, First Blush, left off and invites the PC to explore their world, test their growing abilities, and get to know their mysterious crystalline companion. However, this adventure can be inserted into any campaign setting and scaled accordingly. Second Glance is part of D&D Duet’s mission to bring you high-quality, ready-to-play material that supports adventuring parties of 1 Player and 1 DM. This adventure is written for a second-level character in a one-on-one 5th edition D&D campaign. It lets the PC explore a druid grove and observe its mysterious residents before traveling to a too-perfect town with twisted secrets. They’ll take on a calculating magistrate, addled cleric, and dark forest creatures but find that other, more ancient mysteries lie in wait just beneath the surface. Everything you need for your own two-person game is inside! This product includes: -A 2nd or 3rd-level adventure adaptable to any setting -Stat blocks for FOUR new creatures and three NPCs -A region map, two settlement maps, and two site maps to aid the PC’s investigations -A fully realized town complete with shops, fleshed out NPCs, and places to explore -Side-quests for curious adventurers or those fond of gold and magical items -Detailed backstory for the ancient warrior sheltered inside the PC’s treasured amulet -A custom magical item And helpful tips for DMing a one-on-one game This adventure is perfect for those looking to begin or continue their duet campaign. It could also serve as a story hook, session zero, or multiclassing narrative for a PC who wants to become a druid. Published by D&D Duet.

Figgy Puddin' Steals Christmas is a short adventure for three to six characters, and optimized for 2nd level characters. We also include Scaling Suggestions, allowing you to run this adventure for lower- or higher-level characters. We anticipate a run-time of 2- to 4-hours. There's a bit of roleplay in this adventure, which may extend the playtime. Adventure Background A traveling jester known as Figgy Puddin’ and her Coal Smudge Gang have stolen Christmas presents and now hold them for ransom. While safe and secure in her lair, she awaits either a payment of an outrageous ransom, or a crew of heroes to claim the presents after they navigate her not-so-festive lair. What's the Adventure? After you introduce the hook, the adventure occurs in Figgy Puddin's lair - a refurbished kobold bunker consisting of eight rooms. As the characters explore the linear dungeon, they encounter new creatures, complete challenges, and are tested about their Christmas knowledge. However, the final confrontation with the naughty Figgy Puddin' could make for a very Unhappy and Unmerry Christmas for our heroes, the children of Thistleton, and their parents. Who Is Figgy Puddin’? Figgy Puddin’ was once a happy jester who loved Christmas. For years she traveled the realm, bringing fun and festive cheer to villages and children while preparing the way for Santa. However, times have become tough, and entertainment doesn’t always pay as well as one would like. As Figgy prepares for retirement, she’s learned she doesn’t have enough gold to last. During this time, she’s also decided that Santa doesn’t know who she is, let alone appreciate the work she puts in every year. Using her savings, extortion, blackmail, and other nefarious means, she’s convinced several mechanical geniuses and arcane specialists to help her refurbish her underground bunker with wondrous effects, creatures, and tests. To fund her retirement, she’s taken extreme measures to make some quick gold — holding Christmas presents for ransom.
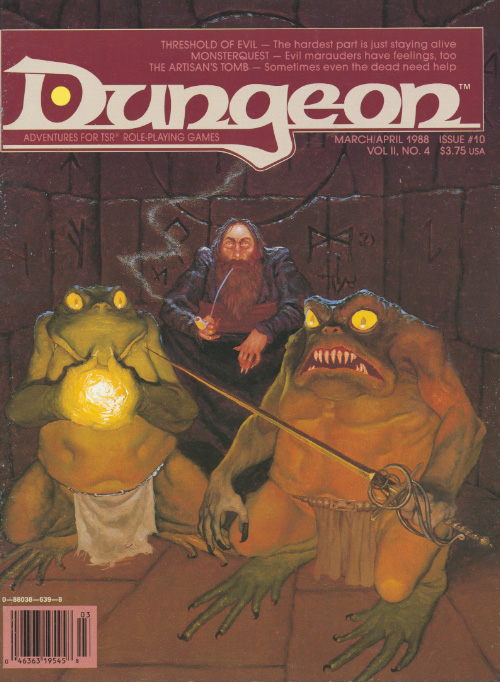
This AD&D scenario is designed to be a humorous departure from regular adventuring. The "heroes" are a fellowship of monsters on a quest to recover a magical item for an orc chieftain whom they have displeased. Having lost the map given to them, they must gain entry to a frontier outpost - probably by sneaking through sewers - and recover the map from a locked safe in the commanders quarters. Once they again have the map, the monsters must travel overland to an abandoned elven witches' temple on the shore of a mountain lake, where they will find the object of their quest. Pgs. 23-32

The Thieves Guild Ebonclad has welcomed its newest team to the fold, assigned to the Keeper Reese Kincaid for instruction. The recruits are green, but capable. Their Keeper has devised a job for them to assess their talents. If his new team is successful, he gets some insight as to how his new Scraps operate, in addition to scratching something off his to-do list. If they die trying, well, then Reese has one fewer thing to worry about. The party must track down the slum thief Dale E’ssio, and reclaim valuables marked for the guild. Should anything unfortunate happen to Dale, there must be no evidence tracing things back to Ebonclad. The mission will require the party to enter Kintalla’s sewers to ultimately confront Dale E’ssio in a ruined slum house. Characters may have to explore the city while trying to get a lead on him.

The valley of Haven was a peaceful land. Its crops were abundant, its citizens prosperous. Elves, Dwarves, Halflings, and Humans lived together in harmony. Hidden away in the heart of the Thunder Mountains, Haven was a safe place to live. The rivers were sweet and pure; the weather was pleasant and warm. Something terrible has come to pass in Haven - terrified refugees speak of a fabulous ruby uncovered in the mountains and a catastrophe that befell the palace. Whatever the cause, Haven now lies in chaos. Raiding bands of orcs, goblins, and hobgoblins terrorize the countryside. The disaster happened so suddenly that the citizens are confused and helpless. Without their leaders, who are trapped in the palace, they have no courage to fight back. The situation has become desperate. TSR 9044

Far north of the Denali homeland is the Archipelago of Tyr and home to dangerous seafarers. Tyr is well-known as the land of the Minotaur that does allow some foreigners to visit albeit with less than perfect hospitality. Originally used as a one-shot with the Denali campaign characters, King Pellet sent the party north to investigate a trade deal and look into reports of some type of incendiary weapon…

After hunting for the Pirates of Ebor along the coastline, you witness a strange event. A great colossus is seen as you travel along the coastline and you are informed that it is the “Artifact at Gegios”. As you put into port, you make inquiries and decide to investigate further, after all, an artifact is usually useful! Is your party strong enough to uncover the truth of this legend?

*THIS IS A D&D NEXT/5E PLAYTEST ADVENTURE* Imani, a Turmishan wizard and former adventurer, seeks the aid of heroes to infiltrate Dretchroyaster’s lair and recover the Diamond Staff of Chomylla—the key to powerful magic and wisdom locked away for thousands of years. In addition to his own sagely interest in the lore of lost Uvaeren, Imani recognizes the dangers of such powerful magic falling into evil hands. The dracolich has secured the staff in his lair’s cen- tral chamber, using ancient wards of protection that can be bypassed only by four artifact-idols once belong- ing to a cult of Bhaal. Each group of adventurers enters the dungeon through a different section of the dun- geon—a forgotten temple of Bhaal, a vast underground lake, a troglodyte village, or Dretchroyaster’s vaults. Dretchroyaster’s lair is no simple set of caverns and ancient ruins. It sits atop a source of great power and energy, which the dracolich and his Cult of the Dragon allies hope to use to unlock the secrets of the staff. Only by undertaking a unified assault against Dretchroyas- ter’s lair can the adventurers hope to recover the Diamond Staff and survive the dracolich’s fury. The adventurers must make their way through the lair and recover the Bhaalite idols that will help unlock the Diamond Staff, all the while dealing with the lair’s creatures and avoiding the dracolich as he pur- sues intruders. Entering the Chamber of the Diamond Staff, the heroes must overcome its magical wards and claim the staff before being slain by the dracolich and his servants.