
Social conflict and negotiations, combat, random encounters, treasure, and dungeon delving — all the elements of a classic D&D adventure in 4 hours. Don’t be put off by the 80+ pages! Half of it is maps and character sheets! Goblin Trouble is a short adventure for four 1st level characters. Written for the Dungeon Masters who are running their very first game, it is full of useful advice and tips on how to prepare for the sessions and how to run the game, easing everyone into the game mechanics along the way More advanced Dungeon Masters and players have the option to use extra options for most encounters that make the game a bit more challenging and fun. In the adventure, the party visits a small village in the Green Forest. There they learn about nasty goblins that terrorize anyone who enters too far into the forest... Is the party up to the challenge? This adventure is also a perfect choice for Dungeon Masters who are looking to expand Lost Mines of Phandelver. With this purchase you’ll get: A beautifully-illustrated 4-hour adventure in PDF format Four unique color maps in both Player and DM versions. All the maps are available as separate files, so they’re easily imported into Roll20 or another VTT. A special Adventure Tracking Sheet that helps you prepare for the game and track your progress 12 ready-to-play, slightly simplified 1st-level characters with backstories so you and your players can immediately jump into the adventure! The players also get a short guide that helps them choose the perfect hero for them. Goblin trouble must be solved. Time to set off on a grand adventure! Would you like to know what the supplement looks like inside? Click the preview under the cover picture above!

When a group of archaeologists put out a call for adventurers to help them escort a valuable artefact back to civilization, nobody expects anything out of the ordinary. However, our heroes have more than mere bandits to deal with at Havel’s Cross... Undead monsters roam the night and an ancient artefact stirs within a long forgotten temple. Getting to the bottom of the mystery will require a strong sword-arm and an even stronger stomach.
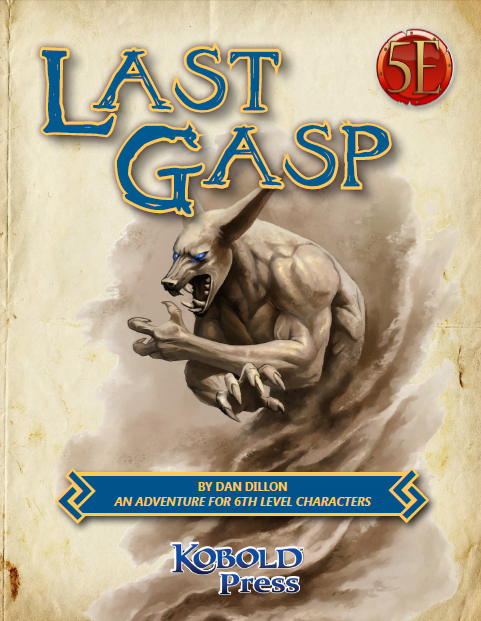
Last Gasp is an adventure set in a desert setting, exploring the cursed tomb of an ancient king of great magical power, a magical river, and includes both deadly combats and mysteries to confound tomb-robbers. Seek out the riches of a king, and may fortune favor you!

Six murders in a single night! A major city in the Forgotten Realms is rocked by a series of gruesomely bizarre deaths of notable citizens. What mysterious murderer could have slain six people in different corners of the city? Why did the criminal leave a playing card at each scene? Could a high-stakes card game that happened ten years ago explain the goings-on? And, most importantly, is the goddess of misfortune personally involved?

A malicious and virulent force possesses the Vermyr Woods. The local wild-life has fled; known paths have mysteriously vanished or shifted; and locals have been found hanging dead from trees yet their eyes watch... they always watch. The hopes of the people are dwindling quickly. Believing that evil harpies have afflicted the woods, brave Captain Harkin set forth to serve them righteous justice! Even the mighty druid Algalor is nowhere to be found. Time passes and their worries compound. Why have the harpies attacked? What is the fate of Algalor and Captain Harkin? What is this mysterious evil that plagues the Vermyr woods? Who is Cartman's dad? The heroes will stumble into this mystery as they travel to Homid. They will discover the truth of the harpies as well as the fate of the heroes who safeguarded this region by delving deep into a forest labyrinth that feels alive! Will it consume them or will they be strong enough to defeat the evil at its core! Published by: Paper Dragon Tales
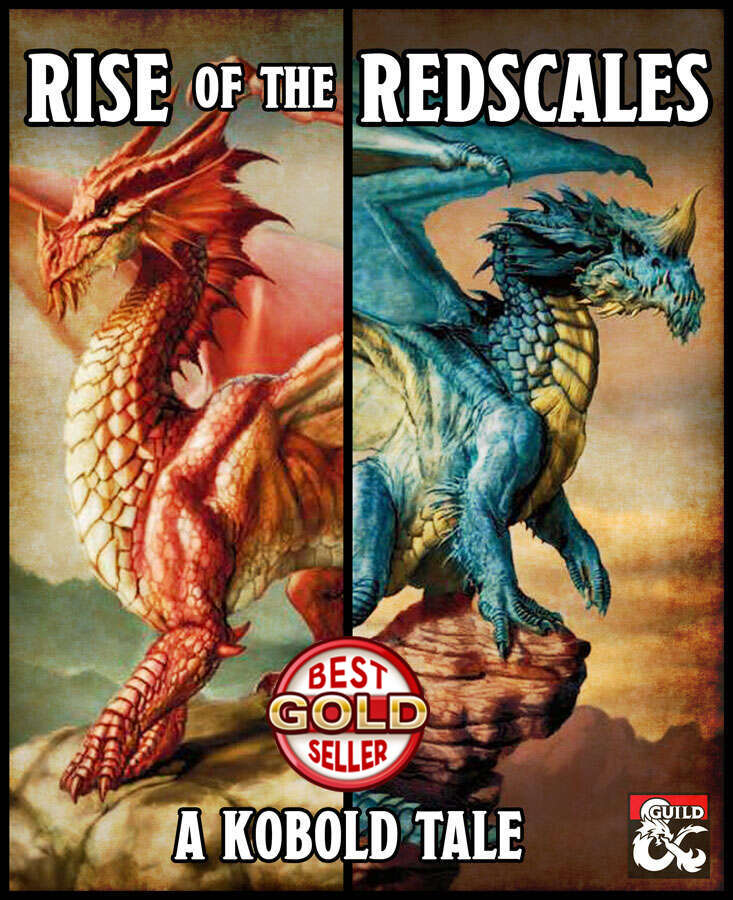
Two feuding kobold tribes have been left alone in their dragon queen's lair. Without supervision, surrounded by the wealth of nations and piles of magical artifacts. How long before things devolve into utter chaos? Set inside an enormous dragon's lair, the adventure allows players to take control of the best and brightest among the kobold tribe known as the Redscales. Their entire lives they have been the Dragon Queen's minions and her lair's caretakers. But the Dragon Queen has been gone for some time now and an ancient feud with another kobold tribe (the Bluescales) is about to be a rekindled. And the trap- and treasure-filled lair is to become their battleground. The gameplay is a mix of roleplaying, involving some tough moral choices (well, tough for kobolds), solving puzzles and wacky combat with kobolds wielding powerful ancient artifacts. There is an abundance of magic items, specially chosen for their potential to lead to hilarious situations.

A long, perilous ocean journey behind them, the crew of the Sea Wyvern finds itself shipwrecked on the Isle of Dread. Their destination lies well over 150 miles to the south, miles heavy with the threat of the island's terrible inhabitants. Yet the unknown enemies are far more sinister, for more than just dinosaurs hunt the vast jungles. Before long, a cunning fiend picks up their trail, and its duplicitous master demands their sacrifice. "Here There Be Monsters" is the fourth chapter of the Savage Tide Adventure Path, a complete campaign consisting of 12 adventures appearing in Dungeon. For additional aid in running this campaign, check out Dragon's monthly "Savage Tidings" articles, a series that helps players and DMs prepare for and expand upon the campaign. Issue #352 of Dragon explores the Isle of Dread in detail, providing a complete ecology of the island and the writing of Larissa Vanderboren. This article can be used as a player handout to represent the journals the group recovered from the Vanderboren family vault in the first adventure in the Campaign. Shipwrecked on the Isle of Dread! Faced with a dangerous journey, the PCs must escort a ragged band of castaways through monster-infested wildlands in order to reach the safety promised by the colony of Farshore on the isle’s southern tip. Pgs. 32-60

Ranked in 2004 as the single greatest adventure of all time by Dungeon magazine, this is a compilation of three series of modules: the G series "G1-2-3 Against the Giants" (G1 Steading of the Hill Giant Chief, G2 Glacial Rift of the Frost Giant Jarl, G3 Hall of the Fire Giant King), the D series (D1 Descent into the Depths of the Earth, D2 Shrine of the Kuo-Toa, D3 Vault of the Drow), and Q1 Queen of the Demonweb Pits. The characters begin by attempting to stop giant raids that have become prolific. They find out that the giant alliance is caused by the drow. They then descend into the Underdark in order to find the drow and stop their sinister plan. TSR 9179

Infiltration of a ruined archive; the players--beseeched by a mysterious psionic calling--work to uncover the machinations of the Nalar and hopefully free their captive held far below...

This is an introductory adventure to Eberron and Sharn. It is written for 3-6 characters of levels 1 to 5. This adventure showcases the versatility of urban adventures in Sharn. The adventure takes a party of characters from the lowest and more dangerous parts of the city, the lower wards and The Depths, to the highest and most exclusive neighborhoods in the upper wards and the Skyway. This adventure has it all. There are roleplaying opportunities, underground exploration, interesting NPC's, a flying chase scene on flying vessels, and a BBEG with enough charisma to captivate any player.

FQ3- Outpost of the Humanoids is the third adventure for the Filbar Quest Series. As you make your way to a meeting with the Baron of the Knolls you come across a roadside inn and a pair of old adventurers that have a small task for you near some old abandoned ruins. Sounds easy enough right? For some reason it never is easy, especially in Filbar!

What was supposed to be a simple prisoner transfer grows complicated when the PCs arrive at a prison that’s recently come under new management.

As you begin your travels to fame and glory you have discovered the road is actually paved mostly with dirt and boredom. You have heard of the caravan attacks at Feastelburg and have begun to make your way to fame and fortune. As light begins to fade from the sky you have come upon a sign welcoming you to the small lake community of Crystal Shores. What appears to be a smoldering funeral pyre is near the lake’s edge and a small group of children play near the road. Your journey to the caravan raiders is halfway there. A few more days and you will begin your life as adventurers!

A Slumbering Serpent Hidden in the thick rainforest of Serpent Isle is a crumbled yuan-ti citadel. These foul snakefolk have been dormant for decades, but have been awoken in order to fill out some foul prophecy. Delving deep into their most sacred temple; Oss’Ithek, is the only way to uncover the dark secret which they hold so dear. Do you have the nerve to face the serpent?

An expansion on the original Tomb of Horrors with plot and explanation. Contains a facsimile of the original adventure. The Dark Intrusion is causing the dead to rise from their graves. This is linked to a being known as the Devourer. Following the trail of Desatysso, a wizard who followed a similar quest, the players must enter the Tomb, and beyond that, the cursed City that Waits and the Fortress of Conclusion.

A fiend lurks among the Black Blade goblins. A shapeshifting barghest fashioned by the General of Gehenna to exact revenge on all goblin-kind. It’s aim: to kill as many goblin leaders as possible… A masked goblin approaches the party asking for help. Two tribe leaders are dead. But a rival for chief has control of the crime scene. Will the party discover the barghest among the goblin ranks? Can they stop this imposter before it strikes again? Adventure Overview The adventure’s story is spread over 4 parts and takes approximately 4 hours to play. The adventure begins with a Call to Action scene. Part 1: Goblin Politics. Krill sends his emissaries to implore help from any strong intermediary. The party is asked to investigate the murder of Thrawn in Dringly’s lair. This is Story Objective A. Part 2: The Opposition. Gain entry into Dringly’s lair and investigate the murder of Thrawn. Gather enough evidence to find the killer. This is Story Objective B. Part 3: To The Lair! Now that the players have determined the barghest (Yeep) is to blame, they need to get to Krill’s lair quickly as he is in imminent danger. This is Story Objective C. Part 4: The Barghest.When the players arrive at the lair, they need to get to Krill and expose and defeat the barghest. This is Story Objective D. Adventure Background A barghest named Yeep has begun its onslaught of attacks against the Black Blade goblins. Starting with Chief Gnar, then his second in command Thrawn, the barghest is moving methodically down the line of command. Krill is now chief. But he has some problems: Two leaders of the Black Blades are dead. Who killed them and why? Is he next? Dringly, the next in command, has decided to take his lair for himself, declaring himself Chief of the Black Blades. Who are the Black Blades? The Black Blades are a tribe of goblins in the local area. They are known for dipping their blades in a dark black substance. It is rumored these blades are poisonous. The Black Blades regularly attack passersby on the road to rob them. The Black Blades have two lairs, one run by a chief who leads the whole tribe, and another overseen by a boss lieutenant. The Black Blades have a well-established pecking order which is how Krill stands to become chief. The next in line is Dringly, who has also declared himself chief and wants Krill dead. Krill suspects that there is something suspicious about two leaders being killed within a day of each other, but he has already burned Gnar’s body without any investigation. He needs to investigate the body of Thrawn, but it is in Dringly’s lair. Krill wishes to avoid direct confrontation with Dringly at the present for three reasons: 1) Any violence would only kill his own tribe members and further divide the lairs. 2) He believes there is still hope for negotiation to reunite the Black Blades. 3) He believes that if he were to attempt negotiations himself, Dringly would kill him. This adventure features: Two maps. Ready for your favorite Virtual Tabletop. A full color pdf. A black and white pdf. One custom monster, a reprint of barghest, all others available in the Monster Manual. Four hours of entertainment involving: roll playing a goblin bard, investigating a murder scene, tracking down a barghest before it strikes again. Applicable to any setting.

An adventure site for 3-5 characters of levels 3-4. Featuring two new monsters from the forthcoming guide, The Hag's Hexes! Seven fully developed encounter areas! It's National Gumdrop Day on February 15th, and the forthcoming release entitled THE HAG'S HEXES has a candy hag and its candy-coated minions, so we're releasing this exclusive, seven-encounter adventure site featuring two new monsters -- the enticing Gumdrop Ooze and the cursed Crul -- to celebrate!

The promises of glory and the chance of riches draws you to Blasingdell, a small village near the infamous Stone Tooth. Within the rocky mountain lay the dwarven stronghold Khundrukar and the fabled Forge of Fury, to which a chance encounter provides you with the location of a hither-to unknown entrance. Are you brave enough to explore this mystery? Will it lead you to wealth or to your doom?
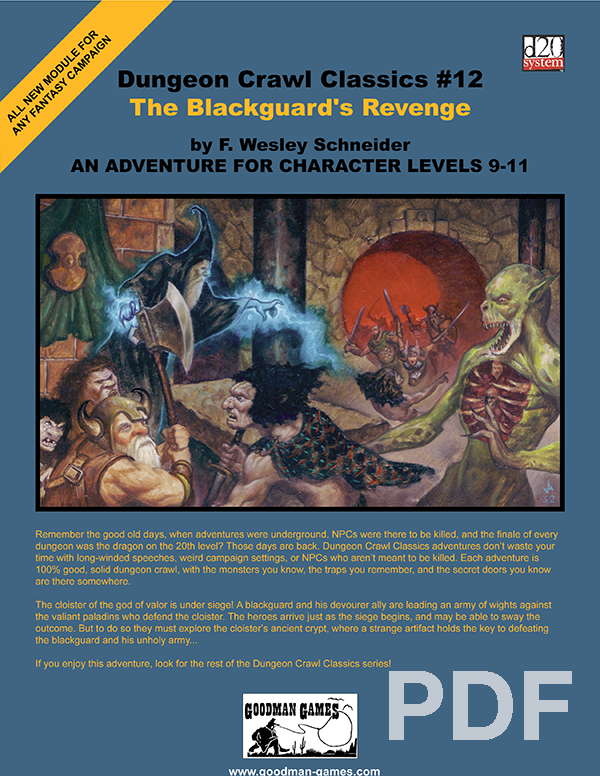
When the heroes come into town, word arrives that a nearby cloister of the god of valor is under siege by an army of undead. The adventurers travel to help defend the bastion of paladins, only to discover that these undead are actually ancient enemies of the paladins’ order. They have discovered a way to exact vengeance for slights committed centuries ago, but to finish their plan they must breach the cloister’s catacombs! Can the heroes battle them to the catacombs and defeat their horrific blackguard champion?

East of Beregost, nestled in the outskirts of the Wood of Sharp Teeth, Durlag’s Tower has intrigued and yet stymied adventurers for decades. Stuffed full of mechanical traps and arcane wards, and rumored to be inhabited by fiends, very few have managed to extract any REAL treasure from the former home of Durlag Trollkiller. However, a powerful item in the ancient fight against the giants is said to be housed there, and the cloud giant Baron Rajiram has committed significant resources toward recovering it. After a pleasant tea in her garden, Seer calls upon you to beat him there and put a stop to his efforts! Sequel to Durlag's Tower.