
Dracula, the Lord of Shadow and Darkness, has covered the land in shadow and dispatched armies of monsters and undead from his magical castle. His armies threaten to overrun major cities and plunge the world into a literal Dark Age. The last of the vampire-hunting clan that traditionally opposed him has disappeared, and still the armies advance. He must be stopped. If that's not enough motivation, it is well-known that his castle is full of magical items and great riches... but also great danger. If you've ever wanted D&D and Castlevania to meet, look no further. This adventure is exactly what you wanted. Every area of the castle poses different and unique challenges to keep the party engaged and on their toes. Written for the DM as a ready-to-run adventure, it is designed for four to six characters. The adventure starts at level 3 at the outer defenses of the castle, and ends with the party advancing to level 13 after defeating Dracula in an epic battle. The adventure includes documentation to help even a new DM succed, including suggestions for how to run each of the area "boss" monsters in combat. There are approximately 50 new enemies and over 3 dozen new magical items. It also comes with a list of suggested music for many areas of the castle, and a 25-page campaign log recounting an actual tabletop play-through of this adventure from the DM's perspective.

The tomb of the ancient barbarian prince Hammon has overlooked the village of Hammon's Creche for centuries. None have ever pierced its haunted portals, and the bones of all who have dared circle the hilltop surrounding the tomb. Yet rumours persist of fabulous treasure buried with the prince, including his legenedary axe, armour, and shield. But recently, miners who dug into the base of Hammon's Tor were never heard from again, and villagers whisper that the mines are now haunted by barbarian spirits. Could a new way have been found into the tomb? And what of the sightings of white-clad figures near the mine entrance? An adventure for four characters of 7th level. For 5th edition Dunegons and Dragons. This adventure features the 5th edition write ups of: blood amniote, caryatid column, crypt chanter, dread warrior, mohrg, the swordwraith template, the tombwarden template, and the umbral creature template. Additionally, the adventure includes a 5th edition version of three homebrew legacy magic items.

"Night falls on the Border Kingdoms, a land rife with conflicts and schemes, where lords, counts, dukes, kings, and emperors rise, proclaim themselves, and are swept away with the speed and regularity of waves crashing upon a shore. As you settle in for the evening at a quaint little roadhouse by the name of Harker’s Cleaver, all seems quiet. Were the stories of this turbulent region just that, or have the Border Kingdoms yet to reveal their true nature?" A Two-Hour Adventure for 1st and 2ndLevel Characters The tavern the characters are staying at are attacked by skeletons. Where have they come from and why have they attacked?

Fresh off the adventure trail your party takes refuge at the small caravan stop at the Village of Tomore. There your party hears a bard tell the tale of “Tarlac Keep” which was laid siege to by two dragons and a horde of humanoids. While the mighty keep fell the subsequent military action was enough to quell further issues. By the end of the tale your group feels that a real estate deal may be in the making for you….

Many centuries ago, the dwarven kingdom of Sarphil stretched out across the Galena Mountains east of the Moonsea. They dug for the precious metals hidden beneath the rocky terrain, and they established numerous cities and settlements to aid in their excavation and manufacturing efforts. This was during the early days of Myth Drannor, the elven kingdom in the forest of Cormanthor, and the dwarves and elves initially clashed as each sought resources and expanded their territories. Myth Drannor and Sarphil eventually settled their differences, and many dwarves moved into the elven city to offer their services and expand their knowledge. In the Galena Mountains, Sarphil continued to flourish. Unfortunately, these days of prosperity did not last long. The last great king of Sarphil was lost in the dwarven city of Mount Throndor, beneath the mountain peak of the same name, and Sarphil withered under bitter clan disputes since no single family could claim legitimate lineage over the fragmented kingdom. What happened under Mount Throndor has been a mystery for thousands of years. Many attempts have been made to reclaim the lost riches and legacy of the last Sarphilan king, but powerful wards have prevented intrusion under the mountain, wards erected by the dwarves of Sarphil. Were the wards built to keep outsiders from intruding – or to keep something inside from escaping? An enterprising dwarven leader wants to find out, but she is going to need some help from a band of heroes. Horrors of Mount Throndor is a Dungeons & Dragons adventure of exploration, darkness, and terror featuring a lost dwarven city overrun by forces from the Far Realm and the journey to cleanse it once and for all. The adventure is designed for a group of 11th-level characters, and successful completion of the adventure should put the characters at 16th level. Here There Be Monsters Mount Throndor has become infested with madness from the Far Realm. During their journey to penetrate the ward and through the city itself, the characters are going to face gibbering horrors, unpredictable slaadi, fanatic stone giant cultists, degenerate star spawn horrors, mutant derro, undead dwarves, and countless golems. The ancient breweries of Mount Throndor have produced alementals who slither in the darkness, and a great dwarven war juggernaut named Big Hans stomps through the city. Legendary Villains and Epic Moments Though it has been sealed, Mount Throndor is not empty. The characters have opportunities to meet, interact with, and (likely at least) combat against powerful foes within the legendary dwarf city. A dwarf lich, a Far Realm spider goddess, an iron-encased demilich, and a melted flesh derro warlock monstrosity all await, along with a mind-bending force - Great Cthulhu! The characters have a chance to face an avatar of Great Cthulhu in the dwarven depths in the final confrontation of the adventure to free Mount Throndor and rid Faerun of a Far Realm invasion! An Adventure of Exploration Mount Throndor is a big, sprawling complex, a dwarven city with two major strongholds, a bridge system spanning a massive underground lake, and a deep mining complex. The scale is difficult to grasp and convey. Previous examples of adventures featuring these elements have included maps - usually lots of them, great spawling maps connected at ends to make huge subterranean dungeons. It is the classic image of a D&D dungeon crawl, and the map is a key component to its visualization. However, in this adventure, the maps are handled differently. There are certain areas, ususally outside the dwarven city itself, that include maps that are suitable for use at the game table, either in theater of the mind style or grid-and-miniatures. Mount Throndor itself is presented with an abstract map, and exploring it utilizes the exploration procedure outlined in Appendix A. Characters traverse the huge subterranean system using this abstract system, and during their travels they are going to run into random encounters and sites with more interesting and complex encounters.

Local villagers whisper of a mysterious place deep in the marsh - a place shrouded in mist and dotted with barrow mounds, ruined columns, and standing stones. The tomb-robbers who explore beneath the mounds - or rather the few who return - tell tales of labyrinthine passages, magnificent grave goods, and terrifying creatures waiting in the dark. Are you brave (or foolish) enough to enter Barrowmaze? Barrowmaze Complete (BMC) is a classic megadungeon for use with any old school fantasy role-playing game. BMC includes everything in Barrowmaze I and II in the same book in addition to new material, art, layout, and cover art by Ex-TSR artist Erol Otus. Barrowmaze Complete will keep your players on their toes and your campaign going strong. BMC is brought to you by the Old School Renaissance (so don’t forget your 10’ pole). This edition includes art by the aforementioned TSR artists Erol Otus, as well as Tim Truman, Jim Holloway. New old-school artists include Peter Pagano, Cory Hamel, Stefan Poag, Zhu Bajie, Stephan Thompson, and others.

After a restful time in Queen’s Point you begin to hear rumors of some “lost city” being discovered. After speaking with some of the locals and visiting the library you become intrigued. Apparently Harvick was abandoned during the plague years and its riches were never recovered. Along with the regular valuables one would find in an abandoned city, it is rumored that an ancient artifact or two may also be present. Sounds like it’s time to strap on the adventuring gear and take a look around.

Ducklings. It's not too late too close this page, and go and find an adventure about happy-go-lucky halflings, or emotionally stable young adventurers. This is not that story. You can still walk away, and find some other engagement that your players will forgive you for running. Open this little document, and you will be introduced to the wretched streets of Elysium. Home of aberrations, mystery and futile quests for meaning in the drowned streets of the tortured city. Escape is unlikely. Enjoyment fleeting. I implore you, turn away and don't look back. Mind flayers stalk streets plagued by invisible death. Curses bubble from ancient evils sleeping beneath the water. Questions lead to questions, which evolve into answers you will only regret asking for. Go whilst you still can. There is nothing here for you but death. Prologue: Welcome to Elysium Chapter One: The Crooked House Chapter Two: The Broken Prison Chapter Three: The Temple of the Gaunt Silhouette Chapter Four: The Grand Library Chapter Five: The Adamant Asylum Chapter Six: The Dancing Spider Chapter Seven: The Undercity An adventure for characters of level 15+ Contains: An introduction to Elysium, a Ravenloft domain filled with eldritch mystery and drowned secrets, including Life In Elysium, The Rule Unspoken and the Marks of Horror that set Elysium apart. Guidance on Madness in Elysium, with Elysian Madness tables for your horror/amusement. A list of Elysian locations, some of which will be expanded in later releases. Elysian random encounter tables, day & night. An Elysian Wild Magic table, miserable magic items and tragic trinkets. The first installment - The Crooked House, in which we meet the Duchess and her parade of dead husbands. The seconf installment - The Broken Prison, where the shadows of gods walk amongst men The third installment, The Temple of the Gaunt Silhouette, where broken fragments of reality are reached by strange avenues. The fourth installment, The Grand Library, where the things we wanted to forget prove impossible to truly banish. The fifth installment, The Adamant Asylum, where medicine and madness meet. The sixth installment, The Dancing Spider, in which there is no rest for the wicked. The seventh installment, The Undercity, where your worst suspicions are confirmed. Three new character backgrounds: the Eldritch Detective, the Information Broker and the Tempter of Fate. The long-suffering Elysian character race, with two subraces. The first One Page Woes collection, included here for your convenience, which contains thirteen reasons to be thoroughly miserable.

The Frozen Necromancer is a three-part adventure for Fifth Edition that takes player characters from levels 1 to 4. This adventure is the first in a storyline of four modules called The Demonplague that can be used as an entire campaign that takes characters from level 1 to 20. The entire adventure (or just pieces, characters, or encounters from The Frozen Necromancer) can be dropped into any fantasy setting with minimal changes

The Cult & the Tribe Lizards and Goblins and Demons, Oh My! DUNGEON MODULE T1: THE CULT & THE TRIBE Goblins weilding magical blue fire are attacking the peaceful lizardfolk in the swamps near Timbertown. They've come to the humans for help, and Baron Ferrand needs heroes to head into the swamp and find out what's happening. As if that wasn't enough, demons are roaming the countryside, summoned by cultists of the Fraternity of Tharos, one of whom is secretly an important person in the town. Can you help the lizardfolk and keep the town safe?

The Ruins of Alaxar is a companion adventure made to go along with the events unfolding in Folio #15 (WS2 The Forgotten Plateau). It contains the information needed to run a side adventure that will help characters in their exploration of the Sacred Plateau. Smoke still rises from the ruinds of the once mighty citadel of the Corsairs of Uthoria. Now, amid the ruins, the characters find that a deadly force still lurks, and they must end it if they are to find the new location of their quest's last hurdle, the Necrotic Pearl! This adventure is formatted to both 1E & 5E gaming rules.
The Temple of Tesh-Yatra is a setting-neutral dungeon delve for a party of 6th level adventurers, inspired by the classic funhouse dungeons of yesteryear. The dungeon takes 6-10 hours to fully explore. It features a high proportion of non-combat encounters: puzzles, exploration, and the occasional deadly centrifuge. The ungodly fusion of a mad scientist’s lab and a planar temple, the dungeon includes an encounter that can launch your players into the Nine Hells – for a price... The Temple of Tesh-Yatra includes two new constructs to use in your game: the sinister Maimers, and the enigmatic Skorverra; as well as a new magic item: the Amulet of Tesh-Yatra, an artisan’s dream! The Temple of Tesh-Yatra also comes with a VTT battlemap (transparent PNG format). The Temple of Tesh-Yatra was originally set in the Outlands, as an extraplanar dungeon. But given its self-contained nature and the Temple's age, it is well-suited to any wildnerness, and would work equally well seeding a hex crawl.
All ocean voyages are fraught with peril, yet a voyage to the infamous Isle of Dread might seem to some old salts to be a deliberate goading of the gods of the sea. Many of those who have attempted the voyage before managed to return to civilization often choose not to speak of the trials they experienced on that dangerous route, yet those whose lips can be loosened by a draught of grog whisper amazing stories... tales of pirates, sea monsters, terrifying storms, and perhaps most harrowing of all, of a strange and sinister land without land, a floating graveyard of dead ships mired in a sargasso the size of an island. This place has many names, but its most well-known may be it's most apt - Journey's End. "The Sea Wyvern's Wake" is the third chapter of the Savage Tide Adventure Path, a complete campaign consisting of 12 adventures appearing in Dungeon magazine. For additional aid in running this campaign, check out Dragon magazine's monthly "Savage Tidings" articles, a series that helps players and DMs prepare for and expand upon the campaign. Issue #350 of Dragon magazine features a regional guide to the seafaring environs the PCs can expect on the journey to the Isle of Dread. It’s time to bid farewell to the city of Sasserine as the PCs board the Sea Wyvern for a 3,000-mile voyage south into the uncharted waters of the Vohoun Ocean. Their destination: the Isle of Dread. Pgs. 16-48

One page adventure, one page map. A necromancer desiring to increase her undead army has unleashed a zombie horde on a remote village. Patch, one-eyed dog of Duff the blacksmith, survived the village massacre which turned most of the inhabitants into zombies. The dog lost his eyepatch in the confusion. If a Speak with Animals or similar spell is used or if a character can read animal emotions well, Patch may tell the location of some of the zombies and the massacre's survivors. Adventure hooks included. Published by Wicked Cool Games
When an injured child collapses in the street, will you venture into the cellar he fled from to discover what hides, creaking in the dark? Published by Nord Games
This adventure focuses on a Zhentarim attempt to spread terror in Mistledale, although it is suitable for almost any lightly settled area northwest of the Sea of Fallen Stars. "The Raiders of Galath's Roost" is suitable for four 1st-level characters, but PCs should be at least 2nd level before tackling the adventure's second half, the Zhentarim Citadel. Even in the first half of the adventure, many of the encounters are quite formidable for 1st-level characters, and the PCs might find it necessary to withdraw and recover one or more times before completely exploring the ruins.

An Undying Evil In Belthaar, city of dark alleys, strange cults, and rival sorcerers, a threat rises from beyond the grave! Can you solve the mystery of the Necromancer's Knife before it is too late? Savage Swords and Sinister Sorcery "The Necromancer's Knife" is a stand-alone sword and sorcery adventure module, inspired by the pulp era tales of Robert E. Howard and Clark Ashton Smith. Venture in the footsteps of Conan the Cimmerian, Satampra Zeiros of Uzuldaroum, Imaro of Nyumbani, and other fabled thieves, reavers and slayers! Written for the Fifth Edition (5E) of the world's most popular roleplaying game, the adventure in this book can be easily adapted to any fantasy roleplaying game ruleset or edition. Note: This standalone adventure was originally published as part of the collection "The Spider-God's Bride and Other Tales of Sword and Sorcery". This new version has been updated to fifth edition rules and includes new maps and artwork.

After basking in the glory of your accomplishments, you learn of a problem with a caravan attack. A group of possibly Goblins have brazenly attacked the Hamlet of Kako, burning it to the ground. The information comes from a local farmer that witnessed the carnage. Pack your gear…time to go back to work in the Principality of Lockerbie!

A Brelish spy steals and defects with a powerful magic sword and the adventurer's have been hired to track down and recover the item. This adventure features a lengthy chase overland on horseback, on a train, and an airship. Along the way the adventurers will also have to deal with third parties seeking to recover the sword for themselves, such as Warforged agents of the Lord of Blades who have hired halfling mercenaries riding glidewings (pteranodons), and Emerald Claw raiders piloting an opposing airship. This adventure can be run stand-alone or as a sequel to The Forgotten Forge and Shadows of the Last War.
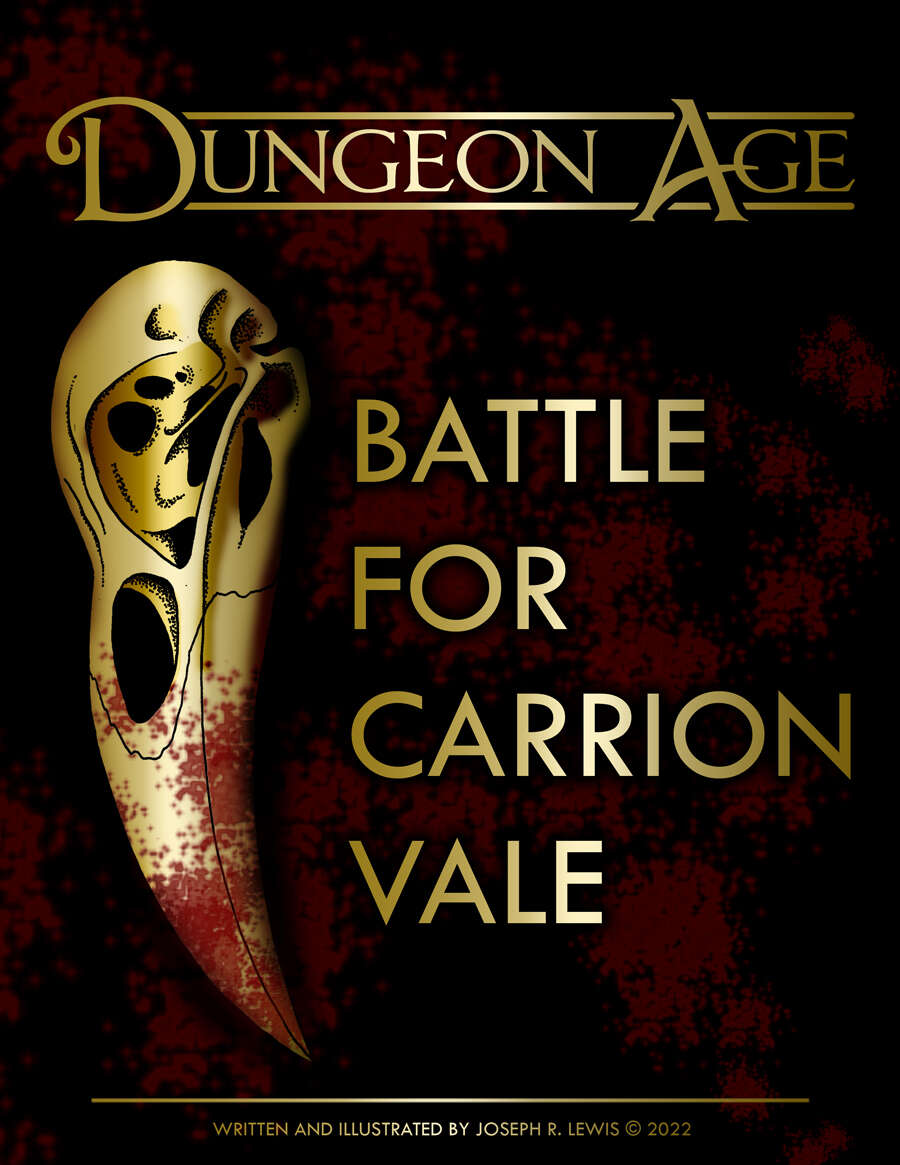
This morning, the forces of Law and Chaos clashed at Castle Yennagor. The battle raged all day, but as darkness fell, a cataclysmic explosion destroyed most of the castle and leveled both armies. Now, as night claims the vale, flickers of life return. Survivors make camp, flee the field, or continue the fight. Scavengers creep over the dead. And one question remains unanswered: what happened inside the castle? This is a dark sandbox adventure. Players take the role of battlefield survivors. They can choose which side they are on (or neither), and they can choose their goal, such as to escape the field with their lives, to plunder the dead, or to reach the castle and finish the mission. ADVENTURE TYPE: Mid Level / Combat / Diplomancy / Battlefield / War / Dark Fantasy / Factions DESIGN NOTES This adventure is intended for mid-level characters around Level 6-7 Players navigate a battlefield full of competing factions and gruesome situations 30 unique encounter locations 70+ original magic items 30+ original monsters One map and multiple illustrations Estimated play time: 1-4 sessions (4-16 hours)