
The Tranquil foothills of the Sword Mountains are quickly plunged into chaos, as a series of earthquakes spread their way through the region. Adding to this danger, bands of vicious, flesh-eating monstrosities have clawed out of the shattered earth, attacking travellers and local residents. Rumours of wealth and riches have drawn the adventurers to the area; little do they know that it is not gold and jewels these monsters protect, but a volatile portal into the Underdark with a disturbing secret.

A dwarven expedition has stopped in Mulmaster for much-needed supplies. Furgis Boltsmelter, their founder and leader, is looking for some “no questions asked” protection for the duration of his stay in the city. Whatever he is trying to protect may not stay hidden for long. Can you keep his secret treasure out of the wrong hands? A four-hour adventure for 1st-4th level characters.

Once every decade, the tides of the Empyrean Ocean recede far enough to reveal the highest eaves of a mysterious undersea tower. Long ago this was an eldritch fastness of Sezrekan the Elder, the most wicked wizard ever to plague the Known World, but now the tower is known simply as the final resting place of the fabled Black Pearl – an artifact rumored to bring doom upon all who dare to posses it. Tonight the moon nearly fills the sky, and the tides have already begun to recede. Adventurers have eight short hours to explore the tower before the dark waters return. The fabled Black Pearl will be theirs for the taking…if they can survive the Pearl’s curse.

The Submerged Spire of Sarpedon the Shaper lies to the west of the Isle of the Dismemberer. On the northwestern shore of this island, crumbling steps spill from the shore directly into the sea. There, a seaweed choked stone path can be glimpsed winding down into the depths. At low tide, a quarter mile along the path, a lone onion dome may be seen poking through the waves. In the twilight of the sorcerer lords, The Submerged Spire was the jewel of the Shattered Isles. Within his submarine redoubt, Sarpedon penetrated ever deeper into the organic mysteries. Now, its for- lorn dome the roost of seagulls, its secrets slumber beneath the waves.
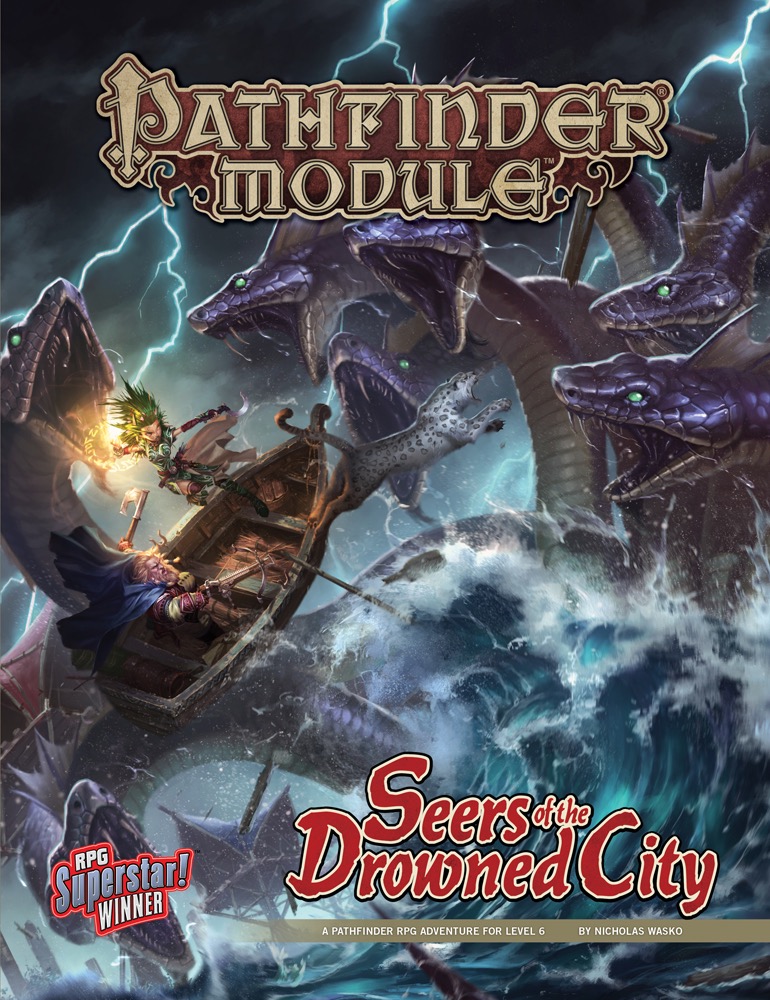
With the dawning of the Age of Lost Omens, a supernatural hurricane known as the Eye of Abendego brought ruin to the nation of Lirgen. Today, what was once a powerful nation exists as a flooded swampland, its fallen cities immersed under the endless flood of a perpetual storm. In Hyrantam, the ruined capital of Lirgen, a few stubborn survivors have managed to eke out a living for themselves, but now, strange new patterns in the storm that constantly looms on the horizon have swept local predators into violent frenzies. Worse, a new sect of strange seers known as the Stormreaders has come to the area, and its demands on the people of Hyrantam have grown increasingly dire. What link might the Stormreaders have to these new squalls, and what vile plots might they be hatching from their new seat of power deep in the drowned city’s ruins? Seers of the Drowned City is an adventure for 6th-level characters and features a poster map of the ruins of Hyrantam. The author of this adventure, Nicholas Wasko, was the Season 9 winner of the RPG Superstar contest, in which hundreds of unpublished authors compete for the chance to write a Pathfinder Module. In addition, this book contains a host of new monsters and magic items designed by the contest’s talented runners-up. Seers of the Drowned City is designed for four characters and uses the medium XP track. The characters will reach 8th level by the end of the adventure.

Taag'thrith, born a gith but transformed into an illithid by ceromorphosis, has been finally found purpose: the assimilation & understanding of all knowledge. Taag'thrith plans to unleash a 10th level spell that will grant him just that-at the cost of all sentient life on the Material Plane. Will the heroes be able to traverse the dangerous corpse of a dead God, find Taag'thrith's aqueous lair the Eternal Spirals, & pit their foes against one another in order to destroy the foul lich once and for all? Or will they fall prey to the threats trapped within the Eternal Spirals & sink beneath the surface forever? They Came from the Deep is the second installment in Pretty Little Liches: a trilogy of adventures centered around three unique liches and their lairs designed for high-level play. These three lairs and the surrounding regions can be run independently as individual adventures or tied together into a mini-campaign that centers on the destruction of the Green Hand, an organization of dangerous liches.

The exciting artifact series concludes with AS3 – Peregrination. With a pair of control rods in hand you are guided to an ultimate prize, a Gnomish flying vessel! The rods have directed you to a crashed ship buried in the sandy beach. A check of the debris sheds light on the mystery of the artifact and a description of how to repair the intricate machine. Apparently finding the vessel is just the start!

Strange catches have long plagued fishermen's nets -- but none so strange as rotting fish that twitch and gasp for days after they are taken from the water, or a gilled githyanki's severed head found in a shark's belly. Do these briny omens lend credence to rumors of a sunken githyanki city caught in a necromantic civil war? This is a sequel to "The Death of Lashimire" (Dungeon Magazine #116). This adventure makes use of rules and options from "Stormwrack" and the "Expanded Psionics Handbook". Pgs. 60-82

The Sea Witch is a short adventure for four 10th-level characters. The difficulty of the adventure can be adjusted by changing the level of main antagonist (Black Molly, the sea hag pirate) or by altering the number of her ogre servants. To tailor the encounter to groups of different levels, refer to table 4-1 in Chapter 4 of the DUNGEON MASTER’S GUIDE. The adventure is set off a lightly populated coastline known as Misty Bay, but adapts easily to any coastal region in existing campaigns. The sea hag known as Black Molly is a notorious pirate who has plagued the coastal cities for the better part of a decade. A successful Knowledge (local) check (DC 15) will reveal that Molly and her ogre crew have a filthy reputation as merciless killers who delight not only in plundering vessels for their riches, but also in destroying the ships themselves and sending all hands to the bottom of the sea. Now the villain and her followers have seized control of the Old Lighthouse of Misty Bay located off a lightly populated coastline. For generations the lighthouse beacon has protected the fishermen of this region, warning them of the dangerous rocks that lurk just below the level of the high tides. Recently, the hag has put out the beacon, darkening the lighthouse; misery and destruction are sure to follow as ships start to blunder into the rocks. Blackmail is apparently Black Molly’s aim in this venture: She conveyed a message to the nearest shore community, the fishing village of Poisson, demanding the princely sum of 50,000 gp. Until she receives this ransom, she intends to hold the lighthouse and its beacon hostage. The fate of the human keepers who tend the lighthouse is unknown to the seaside communities at this time, but they fear the worst. The Sea Witch is ostensibly a rescue mission: The PCs are pitted against the evil of Black Molly and the brawn of her savage ogre crew. It is the heroes’ task to retake the lighthouse and, if possible, free its captives from the clutches of their jailer. What neither the PCs nor the shore communities yet realize is that while she 1would be pleased to have the gold, Black Molly is in fact after bigger treasure. Molly has no intention of giving up the lighthouse — at least, not until she finds what her master sent her here for. Lying on the sea floor practically at the base of the rock on which the lighthouse sits is the wreck of the war galley Flying Cloud, which according to popular legend was captained by a cleric who wore around his neck an amulet of the planes. Black Molly wants this prize, but so far she hasn’t been able to find it. She’s scoured the wreck without finding any sign of the magic item. Now she’s trying to determine where to search next, for the item might well be somewhere near the wreck. If she can’t find it, she’ll start torturing her captives to find out if they have any useful knowledge about the amulet.

FVC9 – Royal Recovery is a short adventure involving a lost princess. A peace accord is in jeopardy when a royal wedding may be postponed due to a missing bride. She was secretly coming to Tol Borron, home to her future suitor, but her ship is now missing. The party has been asked by a gypsy, working on behalf of the king, to head towards the Horns of Barnack where some debris has been located. Will your party be able to solve the mystery of the missing princess?

Tillius Morganstein aka the Mad Mage has selected your group to investigate an ancient temple hidden below the peaceful waters of Lake Springwood. The wizard is too old to investigate the area himself and has enlisted your help. While he has studied the ancient texts dedicated to "Bulu" he cannot define what dangers may lurk or what treasures may await those brave enough to delve into the submerged halls but surely the rewards will be great!

A sunken ruin deep beneath the bay of Mulmaster holds the key to unraveling the Cult of Glaugrax’s nefarious plans. Dare you brave danger and duplicity to plumb its depths? Part 2 of The Neverdusk Trilogy. A Two-to-Four Hour Adventure for Tier 2 Characters. Optimized for APL 8. The Sequel to Ooze There?, an ENnie Awards 2019 nominee in the Best Organized Play category! This adventure is Part 2 of "The Neverdusk Trilogy", and continues the tale of Fenaria Neverdusk, Sovad Klim, and the mysterious Cult of Glaugrax! Ooze Next? debuted at Lion City Conclave 2019 - a charity convention by the D&D AL Singapore Community. The v1.02 package includes: - Full color cover art by digital artist Lau Shang Hui (NezArt), with additional art inserts for key scenes - A high quality digital map pack for key encounter locations - A two (2) page cheat sheet with Jason's personal tips for running Ooze Next?

A Twisted Level 4 Adventure of Science and Sanity Lost by Infinite Initiative They wanted perfection. They got him instead. Beneath the sea lies a sunken research city—once a marvel of arcane progress, now a decaying labyrinth of broken glass, failed experiments, and whispers in the dark. At its heart, a mad scientist clings to his vision, bending corpses and constructs to his will. The players must brave an abandoned lighthouse, activate a long-dormant portal, and descend into the abyssal halls of a drowned facility. But something stirs in the tanks… and it’s not alone. Inside the Adventure: A puzzle-filled lighthouse and a cinematic octopus encounter A non-linear underwater dungeon teeming with mutated horrors Tactical environments: flickering labs, crumbling windows, and flooded chambers A final boss fight against a deranged scientist and his unstable Abomination Includes new stat blocks and a unique magic item: the Cloak of Protection (as a warded lab coat) This is a dark, atmospheric one-shot perfect for groups who enjoy horror, puzzles, and morally twisted villains. Part of the Thirsty Tiger Tales series by Infinite Initiative.

A group of mysterious, sea raiders— capable of appearing from out of nowhere, striking, and disappearing— has terrorized a group of coastal states for some time. Now the leader of the states has asked the characters to infiltrate the raiders, find out how they operate, and put a stop to their activities. But once the heroes join the raiders, things aren’t as clear as they were led to believe. Will they succeed at their mission? Or join the raiders themselves? Pgs. 54-82

Near the jungles of Chult, beneath the waves of Refuge Bay, lies a ruined city. Evil hags and their minions make their home among the ancient relics. Even deeper down, at the bottom of an old undersea lake, an otherworldly monstrosity guards its eclectic hoard of oddities. What does it know about the Soulmonger? An adventure for characters between levels 4-6 Requires the Tomb of Annihilation adventure This 44 page adventure adds Ishau as a location to your Tomb of Annihilation campaign. It describes the city's history and current inhabitants, including maps, new monsters, and treasure. In an undersea temple, characters face off against a coven of sea hags. The sunken wreck of the Decapus is the lair of sea spawn pirates. And among the ruins lurk giant crabs, skeletal sharks, vegetan mummies, and other monstrosities. A second location, complete with keyed maps, is available to characters who wish to dig deeper: the underwater island-domain of a Morkoth, pulled into Chult by Acererak's magic. The Morkoth's home is in disarray. Trophies it collected from across the multiverse are now running wild and its treasures are being looted by marauders from Ishau. If the characters help, it may share its secrets with them.

This adventure picks up where AS1 – Artifact of Gegios left off. You return to the city of Gegios to divide treasure and determine what the strange wand is. Your return trip may have given you a clue in that travel to the east causes it to vibrate less while moving in a western direction causes it to shake more. What is the significance of this anomaly? Is your party ready to find out? Bring your water wings folks you’re probably going for a swim!

It's a horrible time to have a curse! Each wielding a powerful item to a family legacy, your players are a group of young adventurers who barely survive an attack on their order of vampire-hunters by agents of Dracula. After escaping, they discover Dracula has placed a curse upon the land which makes restful sleep difficult outside of hallowed areas. Dracula, "alive" on another plane but dead on this one, must be resurrected so they can kill him, end the curse, and avenge their dead. To accomplish this goal, the player characters must journey through forest, marsh, hill, and underground paths to retrieve relics of Dracula's last life from keeps and fortresses overrun by monsters and the undead. If they can resurrect him, he will be weak and easy to kill... but the adventurers aren't the only ones who want Dracula on the Material Plane, and Dracula is not the only vampire in the world. Gameplay overview This adventure takes the players from 2nd through 9th or 10th level on a milestone basis as they choose where to travel in what order to retrieve what they need. Starting at a happy gathering at the Belmonte Order, which the characters are hereditary members of, the campaign kicks off with a bang as the group retrieves their chosen legacy items, salvages what other gear they can in a race against time and a growing number of foes, and then escapes to begin their quest. In addition to the six main "dungeons," there are two optional regional lairs, traveling vampires, and many foes along the way. Most of the towns in the area have managed to survive, providing points of light at which the party may stop, long rest safely, acquire supplies, and socialize. Travel is hazardous! 5e classes are balanced for resource management across a 5-8 encounter adventuring day. The campaign is designed to have a semi-variable flow of encounters as the party traels around the area. Encounters grow progressively more difficult as time passes and the party spends more time within a region. These are not random encounters rolled on a table, but encounters designed to be unique to each area's geography, combat terrain, and mix of foes. As the party spends more time in a region or revisits it, the encounter difficulty increases. Dracula's curse requires a Constitution saving throw to successfully long rest outside of Hallowed areas (towns). The difficulty scales up over time, forcing the party to balance speed and safety as they try to accomplish their goals without pushing beyond the limits of what they can handle. The game concept, general map layout, and some enemy distributions are loosely inspired by Castlevania II for the NES, one of the forerunners of the "Metroidvania" genre. Dracula's Curse is indeed a game in which the forests are dark and full of monsters, and every night is a horrible one to have a curse. Includes 15 Legacy items, from weapons like whips and swords to a shield, a belt, or a decanter of holy water 60+ enemy statblocks 8 unique dungeons with unique layouts & challenges 5 inhabited towns with multiple named NPCs 100+ travel encounters (expect to use 30-50%) The module is printer-friendly with no artwork and straightforward grid maps for location-based encounters which require one.

The Pearl of Madness is a companion adventure made to go along with the events unfolding prior to the core adventure founding Folio #14 (WS1 ). It contains the information needed to run a side adventure that will help characters gain a degree of experience before setting out into the interior of the Isle of Jade. Thunder booms on the north of the isle and a dark rain falls on the inland swamps prompting the village chief to deny the characters canoes for their journey for another day. This respite offers the characters a chance to participate in a village tradition, the pearl dive. With whispers of great wealth at the bottom of a secluded cove, the players prepare for a dive that will provide more than the mundane. When the Isle of Jade begins to rumble, the islanders cancel the player's expedition to the inland. However, it is still a beautiful day for a pearl dive. Can the players find fortune in the tranquil waters of a hidden cove, or does something more sinister lurk there? This adventure is formatted to both 1E & 5E gaming rules.

Ducklings. It's not too late too close this page, and go and find an adventure about happy-go-lucky halflings, or emotionally stable young adventurers. This is not that story. You can still walk away, and find some other engagement that your players will forgive you for running. Open this little document, and you will be introduced to the wretched streets of Elysium. Home of aberrations, mystery and futile quests for meaning in the drowned streets of the tortured city. Escape is unlikely. Enjoyment fleeting. I implore you, turn away and don't look back. Mind flayers stalk streets plagued by invisible death. Curses bubble from ancient evils sleeping beneath the water. Questions lead to questions, which evolve into answers you will only regret asking for. Go whilst you still can. There is nothing here for you but death. Prologue: Welcome to Elysium Chapter One: The Crooked House Chapter Two: The Broken Prison Chapter Three: The Temple of the Gaunt Silhouette Chapter Four: The Grand Library Chapter Five: The Adamant Asylum Chapter Six: The Dancing Spider Chapter Seven: The Undercity An adventure for characters of level 15+ Contains: An introduction to Elysium, a Ravenloft domain filled with eldritch mystery and drowned secrets, including Life In Elysium, The Rule Unspoken and the Marks of Horror that set Elysium apart. Guidance on Madness in Elysium, with Elysian Madness tables for your horror/amusement. A list of Elysian locations, some of which will be expanded in later releases. Elysian random encounter tables, day & night. An Elysian Wild Magic table, miserable magic items and tragic trinkets. The first installment - The Crooked House, in which we meet the Duchess and her parade of dead husbands. The seconf installment - The Broken Prison, where the shadows of gods walk amongst men The third installment, The Temple of the Gaunt Silhouette, where broken fragments of reality are reached by strange avenues. The fourth installment, The Grand Library, where the things we wanted to forget prove impossible to truly banish. The fifth installment, The Adamant Asylum, where medicine and madness meet. The sixth installment, The Dancing Spider, in which there is no rest for the wicked. The seventh installment, The Undercity, where your worst suspicions are confirmed. Three new character backgrounds: the Eldritch Detective, the Information Broker and the Tempter of Fate. The long-suffering Elysian character race, with two subraces. The first One Page Woes collection, included here for your convenience, which contains thirteen reasons to be thoroughly miserable.

Do you want your players to feel like they are in a zombie movie, struggling against a deadly horde that tries to surround them, overpower them, and bear them down to the ground to be devoured? This is an adventure that can threaten even the stoutest of characters, and is not recommended for parties of levels 12 or below unless they are larger than normal. This module is designed to take 4-8 hours of play and cover a single day, depending on the party’s speed of play and how thoroughly they decide to explore. It includes suggestions and some plot hooks that can be used to tie this easily into a variety of long-running campaigns, or it can be run as an indepdent adventure. The players will come upon a sacked town, figure out what happened, track an item whose theft has ominious implications for the region, and explore a partly-flooded old temple to end the threat. It's primarily combat-focused, but there are a few areas where exploration and route choice makes a difference, as well as traps if the party goes for the optional temple treasury. The antagonists in this module are mostly ghasts and ghouls, but the module title and cover page are deliberately selected to not spoil this. These are greater ghouls and ghasts that can challenge higher-level characters, backed up by mobs of lesser ghouls that can surround, paralyze, and devour the weak and unlucky, led by a Warlord whose aura can drive even the stout-hearted into forgetting their plans in a moment of madness.