
When the water source of the city-state of Guerino is poisoned and its citizens enchanted, a group of adventurers must follow the treacherous path deep into Mistfall Mountain and restore balance to the kingdom. Pgs. 91-97

Tillius Morganstein aka the Mad Mage has selected your group to investigate an ancient temple hidden below the peaceful waters of Lake Springwood. The wizard is too old to investigate the area himself and has enlisted your help. While he has studied the ancient texts dedicated to "Bulu" he cannot define what dangers may lurk or what treasures may await those brave enough to delve into the submerged halls but surely the rewards will be great!

Operating as secret agents for the Lords of Waterdeep, a promising lead takes you deep into the world of the Xanathar, but what will it take for you to return?

A sunken ruin deep beneath the bay of Mulmaster holds the key to unraveling the Cult of Glaugrax’s nefarious plans. Dare you brave danger and duplicity to plumb its depths? Part 2 of The Neverdusk Trilogy. A Two-to-Four Hour Adventure for Tier 2 Characters. Optimized for APL 8. The Sequel to Ooze There?, an ENnie Awards 2019 nominee in the Best Organized Play category! This adventure is Part 2 of "The Neverdusk Trilogy", and continues the tale of Fenaria Neverdusk, Sovad Klim, and the mysterious Cult of Glaugrax! Ooze Next? debuted at Lion City Conclave 2019 - a charity convention by the D&D AL Singapore Community. The v1.02 package includes: - Full color cover art by digital artist Lau Shang Hui (NezArt), with additional art inserts for key scenes - A high quality digital map pack for key encounter locations - A two (2) page cheat sheet with Jason's personal tips for running Ooze Next?

At last- an opportunity to avert the threat to the little town of Saltmarsh! The real enemies have been identified-- evil, cruel creatures, massed in force and viciously organized. Can the brave adventurers thwart this evil and ensure the safety of Saltmarsh? The Final Enemy is the final part in the series of three modules designed and developed in the United Kingdom for beginning adventures with AD&D rules. Its plot follows directly from those of the first two parts (U1 - The Sinister Secrets of Saltmarsh, and Module U2 - Danger at Dunwater.) TSR 9076

So you want to be a Mage of High Sorcery? To join the esteemed organization, you must travel to the Tower of Wayreth and undertake the most important event in your life—the harrowing Test of High Sorcery! If you can survive where so many aspiring mages have failed, you will forever bind your soul to the Gods of Magic and gain access to untold arcane secrets. The Test of High Sorcery is the perfect adventure for new and veteran players looking to experience Dungeons & Dragons in a new way! It is a solo adventure, where your choices have meaningful consequences, but it also provides balanced rules to play with a group or a Dungeon Master. This 154-page tome features: - A sprawling adventure that fits perfectly as an expansion to any Dragonlance campaign, Dragonlance: Shadow of the Dragon Queen, or as a stand-alone replayable experience - A tale full of sorcerous intrigue, featuring many new characters alongside iconic favorites like Fistandantilus, Takhisis, Fizban the Fabulous, and the Gods of Magic - Innovative Destiny and Trait mechanics make your choices really matter—and ensure every mage’s Test of High Sorcery is a unique experience - Over 60 possible outcomes to determine which Order of High Sorcery you join and provide compelling new plot hooks for your character during future adventures - Dozens of unique locations with rich stories and sorcerous challenges that Dungeon Masters can use to create their own version of the Test of High Sorcery - New magic items and stat blocks, with mechanics that support clever use of enemies’ weaknesses and the environment against them - Four gorgeous sample characters, with interactive character sheets designed to be new-player friendly so that you can jump right into the story - A detailed primer on the history of Krynn and how it relates to the Mages of High Sorcery - A community survey when you finish to let you see how you compare to other mages taking their Tests of High Sorcery
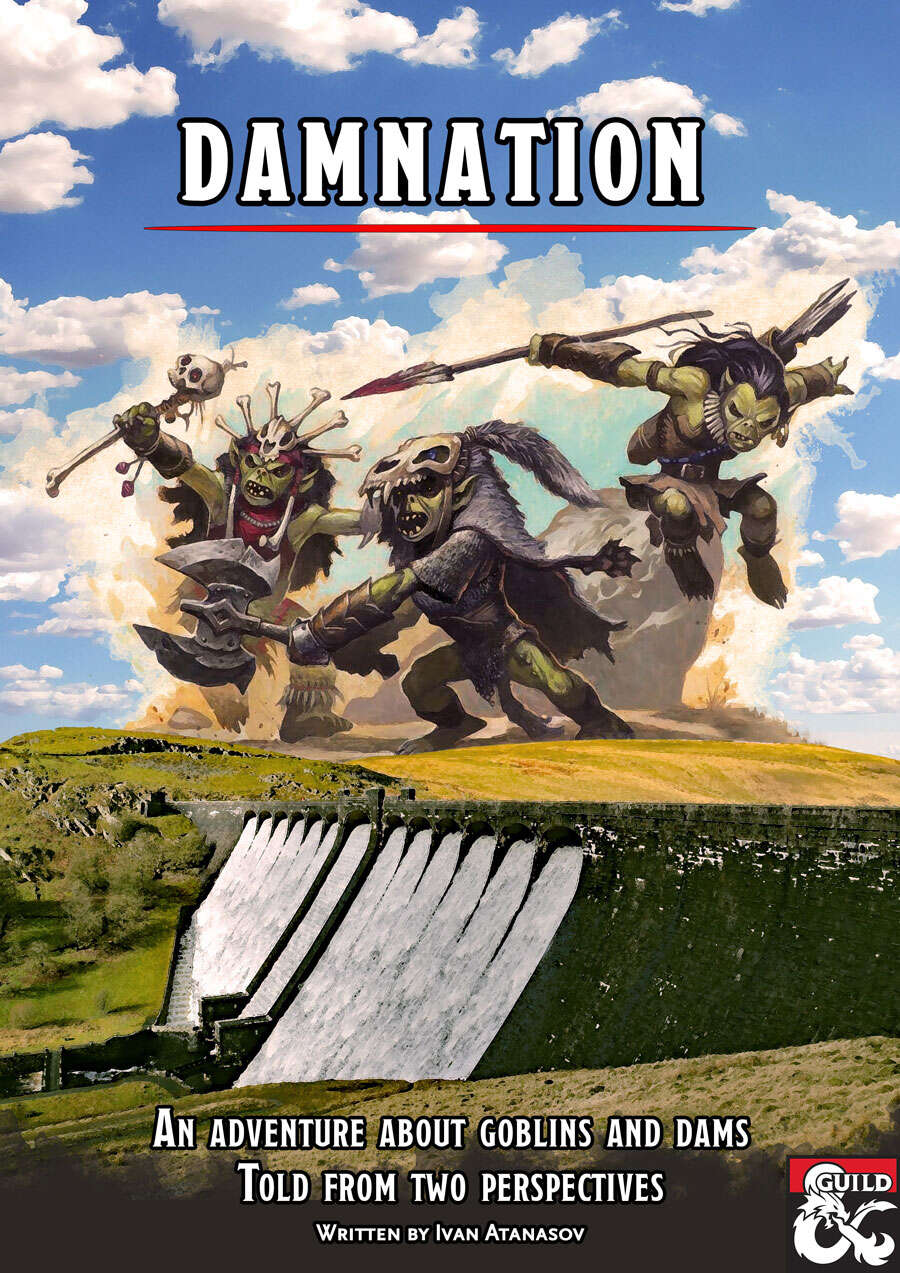
Twenty years ago, the humans built a dam and flooded Gormelin Valley. They drove the Cinderborn goblins away from their land. But now the Cinderborn are back and they want vengeance. The dam must fall and the human towns must drown! Damnation is a set of two parallel adventures that cover the same events, locations and characters. In The Heroes' Tale, the players control a traditional heroic party. They get to attend a wine festival, save a town from a flood, dive to the bottom of a lake, choose between retaliation and negotiation, and face a demon atop the dam as he attempts to demolish it. The Goblins' Tale tells the other side of the story, allowing players to take control of a party of goblins. As the Cinderborn, they must deal with human spies, sneak into a wizard's tower, trigger a catastrophic flood, choose between peace and vengeance, face their own demonic leader, or aid him in breaking the dam. Also included: maps and goblin pregens!

Important: The adventure is 1e but it has monster conversion notes for D&D 4th edition The town of Highport, once a human community overlooking Wooly Bay from its perch on the northern coast of the Pomarj, fell prey to hordes of humanoids swarming out of the jungle-covered hills surrounding the settlement. Though the orcs, goblins, kobolds, ogres, and gnolls razed much of the place in their ferocious rampages, the smoldering ruins they left behind soon became a new kind of community, a place of trade between the humanoid “locals” and the unsavory human traders who have no compunction about doing business with them. Slaves are a commodity in ready supply in Highport’s market, since many pirates raid up and down the coast of the bay, putting fishing villages to the torch and filling their holds with captured refugees. Slavery has become a thriving business in the town, and rumors abound of a cartel of Slave Lords who run things from behind the scenes, filling their coffers in secret from the buying and selling of human chattel. The trade has become so prolific that the good folk to the north have grown tired of these depredations and decided to fight back. Forces of righteousness and honor have recently descended upon Highport, some openly and others in secret, in various attempts to destroy the machinations of the Slave Lords and abolish the abominable enterprise that has taken far too many loved ones from home and hearth. One such doughty servant of goodness is Mikaro Valasteen, a cleric of Trithereon. Mikaro slipped unnoticed past the crumbling walls of Highport with a single mission: to rescue and transport as many slaves to their freedom as possible. Mikaro and a handful of faithful assistants located a number of escaped slaves—as well as rescued a few more not sufficiently restrained and guarded—and shepherded them through the gates and beyond the reach of their humanoid tormentors, returning them to their lands and homes. This covert freedom brigade enjoyed remarkable success early on, since the servants of the Slave Lords were often lax in their vigilance and sloppy in their efforts to prevent loss of the “merchandise.” After one too many shipments never made its destination, the humanoids stepped up their security and the normal channels of escape from Highport closed to Mikaro and his team. He cannot risk exposure by smuggling the freed slaves through the gates as merchandise any longer, since shipments of goods are now regularly stopped and checked. No longer able to free the slaves in that manner, Mikaro began hiding his charges in an abandoned villa in a particularly rundown part of the town. Although they are safe for the moment, their numbers have grown unmanageable, and the priest fears it is only a matter of time before someone slips up and brings slavers to their doorstep. Ever more desperate to find a new means of escape from Highport, Mikaro has started work on a plan that is both daring and dangerous. He intends to use a series of old sewers coupled with natural caverns running beneath the town as an escape route to the sea beyond the walls. But he needs someone to clear out the creatures and pitfalls he knows lie within. Pgs. 2-27

An old elf has wandered into the city from the jungle--prattling on about his long-lost daughter to anyone whose ear he can bend. Though most in Port Nyanzaru dismiss him as mad, he speaks the truth. Can you find and save his daughter?

The Sea Witch is a short adventure for four 10th-level characters. The difficulty of the adventure can be adjusted by changing the level of main antagonist (Black Molly, the sea hag pirate) or by altering the number of her ogre servants. To tailor the encounter to groups of different levels, refer to table 4-1 in Chapter 4 of the DUNGEON MASTER’S GUIDE. The adventure is set off a lightly populated coastline known as Misty Bay, but adapts easily to any coastal region in existing campaigns. The sea hag known as Black Molly is a notorious pirate who has plagued the coastal cities for the better part of a decade. A successful Knowledge (local) check (DC 15) will reveal that Molly and her ogre crew have a filthy reputation as merciless killers who delight not only in plundering vessels for their riches, but also in destroying the ships themselves and sending all hands to the bottom of the sea. Now the villain and her followers have seized control of the Old Lighthouse of Misty Bay located off a lightly populated coastline. For generations the lighthouse beacon has protected the fishermen of this region, warning them of the dangerous rocks that lurk just below the level of the high tides. Recently, the hag has put out the beacon, darkening the lighthouse; misery and destruction are sure to follow as ships start to blunder into the rocks. Blackmail is apparently Black Molly’s aim in this venture: She conveyed a message to the nearest shore community, the fishing village of Poisson, demanding the princely sum of 50,000 gp. Until she receives this ransom, she intends to hold the lighthouse and its beacon hostage. The fate of the human keepers who tend the lighthouse is unknown to the seaside communities at this time, but they fear the worst. The Sea Witch is ostensibly a rescue mission: The PCs are pitted against the evil of Black Molly and the brawn of her savage ogre crew. It is the heroes’ task to retake the lighthouse and, if possible, free its captives from the clutches of their jailer. What neither the PCs nor the shore communities yet realize is that while she 1would be pleased to have the gold, Black Molly is in fact after bigger treasure. Molly has no intention of giving up the lighthouse — at least, not until she finds what her master sent her here for. Lying on the sea floor practically at the base of the rock on which the lighthouse sits is the wreck of the war galley Flying Cloud, which according to popular legend was captained by a cleric who wore around his neck an amulet of the planes. Black Molly wants this prize, but so far she hasn’t been able to find it. She’s scoured the wreck without finding any sign of the magic item. Now she’s trying to determine where to search next, for the item might well be somewhere near the wreck. If she can’t find it, she’ll start torturing her captives to find out if they have any useful knowledge about the amulet.

When her father goes missing, a young adventurer has no other choice than to gather her friends and head for the city of Loudwater. Soon after she gets swept away in an obscure design threatening to drag the entire region into chaos and war. At the heart of this mystery, lies not only her father, but the long-forgotten history of her once-despised family and a primordial beast influencing events from the shadows, moving her family like pieces on a chess board. Visit www.perfumersdaughter.com for more information. You can also address me directly on The Perfumer's Daughter Q&A on Facebook. All battlemaps and dungeons are free to download for use in digital platforms (such as roll20) on the aforementioned site.

A short adventure meant to be inserted into Storm Kings Thunder set on the small island group known as Red Rocks along the Sword Coast. The adventure faces the players of against a coven of hag sisters who have been threatening the region for some time. Hags of the Red Rocks is a encounter and mini-dungeon meant to be dropped into the D&D Adventures League Season 5 - Storm King's Thunder, but can easily be an evenings play for any group travelling along a treacherous coastline.

Be Ready with the Snapping Line... Just about every community, big or small, civilized or seedy, has at least one popular tavern. Folks may go there to relax or to look for work, to celebrate or to mope, to learn the latest or to forget. And while some may be willing to travel far from the comfort of their favorite watering hole in search of adventure, in the seaside town of Saltmarsh, they may not have to. At the Snapping Line Inn and Tavern: * Enjoy food, drink, gossip, a darts competition, and maybe a rousing bar fight. * Participate in a gambling night. Watch out for pirates! * Stop a dark ritual to save an innocent—and yourselves. * Come to the rescue when there’s an accident by the pier—and the predators arrive. Four linked encounters around a pier-side tavern for characters of levels 5-10. Playable individually, scattered throughout another campaign, or together as a four-to-six-hour adventure.

Stormy seas rock your vessel, tossing her about like a toy in the jaws of a hound. Thunder rolls in the distance. Then, an arc of lightning splits the sky, and the sound like an exploding fireball all but bursts your eardrums. Your mainmast, struck by lightning, burns, splinters, and topples onto the deck like a felled oak. The last thing you hear is the cracking of wood as the deck explodes into splinters, and the ship is torn asunder. All goes black. You awaken in shackles, half-submerged in water, and surrounded by salmon-pink coral. You survived, but what fate awaits you now? The sound of soggy footsteps echo down the hallway. A creature approaches with an answer. This week’s encounter is Coral Colosseum, a combat encounter in which the characters must prove themselves as worthy gladiators to escape the clutches of a ruthless sahuagin baron. This encounter can serve as a follow-up to Encounter of the Week: Sharkfin Shipwreck, or as a stand-alone mini-adventure. It could also serve as an introduction to Ghosts of Saltmarsh, which releases on May 21st, 2019.
Provost Faurious has procured an Aethervane, an astrolabe-like instrument tied to Kythri that's used to navigate manifest zones. Unfortunately for the Provost, the Riedran ship that was carrying the Aethervane across the Sea of Rage to deliver it to their agent in Regalport fell victim to piracy. The player characters are dispatched to Regalport to meet up with the Provost’s agent there and petition High Prince Rygar for more information about the stolen cargo. When the characters dock in Regalport, they meet the Provost’s contact and are ushered into a meeting with High Prince Rygar. Wishing to show his intolerance for piracy, Rygar charters one of his own ships for the party’s use as they investigate the stolen cargo. Upon arriving at the crash site of the stolen cargo, the party is set upon by a fleet of pirates known as the Wind Whisperers. When things turn sour, a new surprise reveals itself as an unnatural storm rolls in, a stolen airship at its heart. The Wind Whisperers have found a way to convert the Aethervane to serve their own purposes. Seeking aid from Rygar and House Lyrandar, the heroes chase after the pirates by sail and airship. As they do, they are bedeviled by the Chaos Fleet—strange ships sailed by an even stranger crew that are drawn to the Aethervane and the chaos it brings. In a final airborne confrontation, the party boards the rogue airship and retrieves the sought-after artifact, with a chance to salvage or sink the stolen vessel in the process…

In a cavern lying beneath the surface of the ocean is a series of trials awaiting any heroes who think they are worthy. Come meet the ancient tortoise who wants nothing other than to try out his riddles, partake in the bullywug tournament with such exciting events as Wig-Wag-Woe, and face down the wrath of a mindflayer. Contains multiple uniques puzzles and riddles to give your players a challenge beyond combat.

This adventure picks up where AS1 – Artifact of Gegios left off. You return to the city of Gegios to divide treasure and determine what the strange wand is. Your return trip may have given you a clue in that travel to the east causes it to vibrate less while moving in a western direction causes it to shake more. What is the significance of this anomaly? Is your party ready to find out? Bring your water wings folks you’re probably going for a swim!

Inspired by the "Happy Fun Ball" from the web series Critical Role, The Cube of Vanya is a magical adventure through demi-planes created by an ancient wizard, now destabilized by a malevolent dragon. The adventurers find themselves trapped within a series of themed planes with no idea how they got there. Navigating these planes to find a means of escape, they uncover the secrets of the cube while piecing back together their own memory. During the campaign the adventurers may fight shadow demons in an inn which is really a prison, flee a tornado while perched perilously in the sky, forge a weapon within a volcano, and much more. The module is structured in a non linear manner allowing the adventurers to choose their own way, or for the DM to pick and choose their favourite bits to highlight. The adventure was written with four level 5 players in mind but it would be easy to tweak for different sized groups around that level.

The colony of Farshore has survived on its own for years, a secluded and struggling hamlet perched on the western shore of the tiny island of Temute. An island dwarfed by the savage landscape across the narrow channel to the north, a landscape of rugged mountains, tangled jungles, and trackless swamps. This is the Isle of Dread, and its resources and hidden treasures are matched only by its peril. Yet for all these dangers, what may bring doom to Farshore is not an invasion of inhuman monsters from the mainland, but an invasion of all-too-human monsters from across the sea. "Tides of Dread" is the fifth chapter of the Savage Tides Adventure Path, a complete campaign consisting of 12 adventures appearing in Dungeon magazine. For additional aid in running this campaign, check out Dragon magazine's monthly "Savage Tidings" articles, a series that helps players and DMs prepare for and expand upon the campaign. Issue #352 of Dragon magazine features rumors of Farshore, a helpful list of improvements the PCs can make to the colony, and other features to help get PCs oriented in their new home on the Isle of Dread. The destruction of a pirate ship signals the beginning of a Crimson Fleet invasion. The PCs must race against time to prepare for the onslaught before an old enemy can release another savage tide. Pgs. 28-59 Also see Pgs. 60-71 Backdrop: Farshore City of Hope.
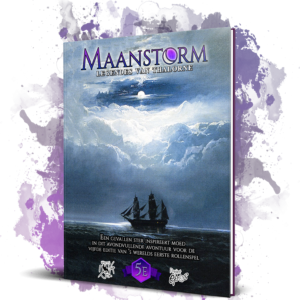
Een gevallen ster inspireert moed! Samen met de jonge priesteres Volana zullen helden een spannende tocht ondergaan waarin kracht, kennis en geloof een hoofdrol spelen. Onderweg krijgen ze te maken met sluwe vijanden, unieke bondgenoten en een duistere macht welke de vonk der goddelijkheid maar moeilijk kan weerstaan. Word een groter deel van het avontuur dankzij deze mogelijkheden: - Begin jouw legende: drie nieuwe subclasses voor fighter, cleric en druid - Aspectgeborene: een nieuw speelbaar ras met een elementaire connectie - Maanzeiler en Zandklauw: twee aan Padkust unieke backgrounds voor spelers - De stad Padkust: gedetailleerde informatie over de stad en zijn leiders - Magische voorwerpen: bekende maar ook unieke schatten om te verkrijgen