
The Filbar Quest series continues with FQ8 – Uprising of the Undead. As you continue to pursue the lost pages from the Codex of Gamber Dauch (Daw-sch) you quickly discover that the dead have risen from their graves. A rogue mage known as Mortatus the Wicked has discovered the emerald pages from the ancient tome and is using the powerful magic to raise an army of the dead. Your cleric had better be in good graces with their deity!
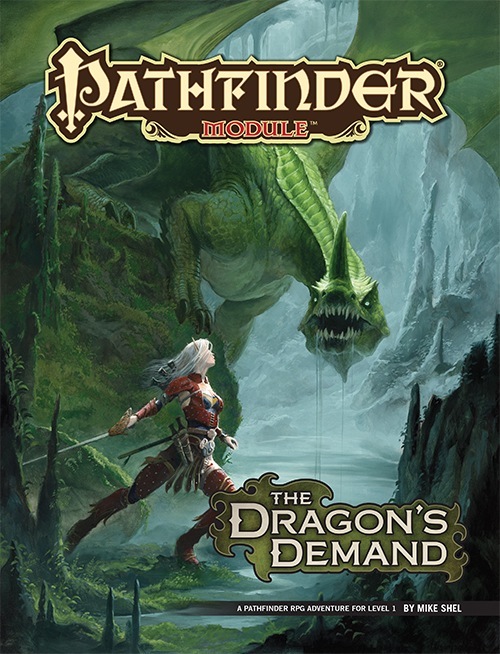
Founded by a famous dragonslayer, the small town of Belhaim has become a sleepy rural community just off the beaten path, a settlement where everyone knows everyone and strangers are the talk of the town. But when Belhaim’s peace and quiet is shattered by the sudden collapse of the last standing tower of its founder’s castle, things quickly bloom out of control. Why were there bodies of kobolds amid the rubble? What’s the sinister secret behind the strange sounds of flapping wings in the night? And what’s happened to local wizard Balthus Hunclay, who’s not answering knocks on his door? The collapsed tower had long been an eyesore to the cantankerous old man—could he have had something to do with its destruction? And what of the rumors of strange stirrings in nearby Dragonfen? Has Belhaim’s ancient draconic nemesis returned?

It was supposed to be a simple job... A strange merchant offers you a simple job – pick up and deliver cargo. You have three days to get it a mere fourteen miles through the city. How hard could it be? A Simple Job is a journey through the city of Anduria, a cascading series of events that takes the heroes to explore strange locales and bargain with even stranger creatures. What secrets does the city hold, buried away for countless centuries?

The rough ground on the outskirts of the village of Col Fen once served as a graveyard for an evil temple destroyed long ago. A recent disturbance released some of the ancient evil buried here, and now the dead in this graveyard are beginning to walk. Several villagers have already vanished and more will die if the undead are not put to rest. Pgs. 56-63

The gnomes built a dragon. Can you turn it off? We gnomes built this wonderful dragon but now the darn thing seems to be out of control. The party meets a hapless gnome tinkerer who's mechanical dragon has gone haywire! The construct is possessed by a spirit named Ahmoras. The party is led to a town called Gnomevale on the way to Mount Nevermind. Finding the town devastated by the automaton, the party follows in the wake into the mountains. The party has many ways to defeat the automaton, ranging from brute force to tricking the spirit of Ahmoras out of the construct. Pgs. 36-49
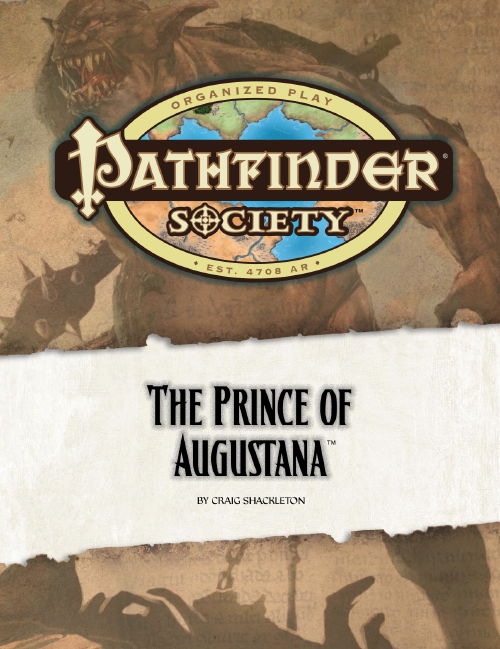
When an old beggar shows up filthy and injured on the doorstep of the Augustana Pathfinder Lodge in Andoran and demands to be recognized as Andoran's one true Emperor, Venture-Captain Wallace is inclined to chase him off. But when the old beggar reveals a wayfinder and tells a tale of demons and portals to another world beneath the streets of Augustana, Wallace summons you from Absalom to investigate. Will you make it through sewers, swarms, and sanctuaries to uncover the truth or will the dangers of the Augustana underworld consume you forever?

This adventure is designed for use with the Advanced Dungeons & Dragons game and the AD&D Battlesystem Fantasy Combat supplement. It cannot be played without these games This is the first Battlesystem supermodule. The tiny village of bloodstone pass s menaced by an army of thousands of brigands - orcs, goblins, giants, and human renegades led by a powerful assassin. Outnumbered and helpless, the villagers must pay tribute in gold, food...slaves. Two villagers have traveled far to find aid for their people. They have turned to you, brave and powerful adventurers, as their only hope they cannot afford to pay more than a few silver pieces a day, but their need is great. You are invited to save the people of Bloodstone Pass. Can you organize a defense, train and equip the peasants, recruit allies, gather intelligence?and win the war? Bloodstone Pass is an exciting good aligned, high-level (15+) adventure that combines role-playing with the thrill of mass combat. TSR 9122

The Bale Crossing is a short adventure for Draw Steel. It takes about four hours to complete and is designed for 3 to 6 2nd-level heroes. It places the heroes at the center of a cat-and-mouse game between House Vorona and the agents of Ajax on a voyage across the Bale Sea. Directors can use this adventure either as a follow-up to The Fall of Blackbottom or as a drop-in scenario in a larger story featuring the power struggle between factions in Capital, Ajax's war of conquest, or war dogs. The adventure features advice for skipping straight to the action in a hot start, an optional negotiation, three possible montage tests, and a dynamic final combat with guidance for running the encounter as a stealth mission or a boarding action across the decks of two ships. If they succeed, heroes will earn 2 to 7 Victories.
Few are the wizards that seek to prolong their lives with dark rituals and foul magic to become the powerful undead beings called liches. But far fewer are those that seek to undo what necromancy what done and take back their lives after initiation to lichdom. Balipur is one of those few. Turned to a vassalich by the darklord Azalin against his will for impersonating him, Balipur, after Azalin's departure at the destruction of Il Aluk, seeks to imitate his former master's Grim Harvest project, inverted, in a smaller scale to forge a soul from the lives of other men.
Into the Forsaken Temple's Crypt is a short adventure for four 10th-level characters. The adventure takes place in a buried temple crypt, which has been sealed for centuries. Dungeon Masters can adjust it for higher-level characters by expanding the dead magic areas and increasing the number and power of constructs and undead that inhabit the complex. Some things are best left untouched, and some secrets are best left untold. One such secret is the location of the resting place of the traitor Ellowyn Blacktree. Her body has lain undisturbed for centuries, undead but immobile, in the prison the elves created for her. The elven histories tell that Ellowyn was a powerful wizard back in a time beyond human reckoning. While others worked diligently to learn magic, Ellowyn's arcane powers came to her quickly. In her youth, she called this a blessing from Corellon Larethian, and she worked diligently to serve him for the good of all elvenkind. In time, she became one of seven female elves entrusted with the care of a mythal, or elven place of power, devoted to preserving the balance of magic and nature. But Ellowyn, it is said, kept a terrible secret of her own: She had fallen in love with a drow whom history knows as Orith To'rellen. One dark winter night she betrayed her sisters, Corellon, and all of elvenkind by allowing Orith and the followers of Lolth to overrun and defile the mythal. Ellowyn herself was then betrayed by the drow, who abandoned her on the surface near a vampire's lair as they returned to their home in the Underdark, leaving her to face certain death and elven justice alone. In the depths of their grief and anger, the elves sentenced Ellowyn, perhaps unwisely, to dwell forever in the darkness that she had chosen, thus ensuring that she never followed the normal path of life and death that most elves take. Many elves died at her hands before they could restrain her. With terrible spells rarely seen even in that ancient time, they bound her in an underground crypt far away from any living thing. There, the legends say, she waits, nursing a terrible hatred against elves, drow, Corellon, Lolth, and especially Orith To'rellen.

Chapter 1 - When a relative of someone close to the characters goes missing from a nearby village, the players are asked to investigate. The party has to recover stolen goods from a thief before setting out from the City of Ravens Bluff. They travel through the wilds of Vesperin in search of the missing person, finding trouble and helping locals along the way. Chapter 2 - As the journey continues, the party arrives in a small hamlet suffering from a strange blight. The players will need to investigate the situation and choose sides in a longstanding feud between the mayor and a local magic user. Chapter 3 - After clearing a tribe of violent orcs from a nearby mountain pass to protect the residents of a town, the party will have to enter the lair of a long-dead dragon to rescue their quarry from a band of goblinoid slavers, where they discover an entrance into a dwarven city, lost and forgotten centuries ago. Chapter 4 - The party will have to traverse the ruins of the dwarven city, avoiding hazards and battling the horrors that lurk there, to uncover the identity of the slaver's leader. A discovery that will lead them through a treacherous forest to the city of Tsurlagol in search of a pirate ship called the Star Carver, and its drow captain, The Viper's Kiss. Along the way, they meet an unlikely ally. Chapter 5 - Once they arrive in Tsurlagol, the players will have to choose between gaining the assistance of the city council to fight the pirates head on, or making a deal with the Viper's Kiss, herself. The path they choose will either lead to an epic battle on the Sea of Fallen Stars, or into the deadly sewers and tunnels beneath the city to face an enclave of wererats, undead, and a tribe of mad, kraken-worshipping kuo-toa, in search of a fabled relic. The Laughing Horde of Ruin, Part 1 is the first module of an original 5e adventure campaign. It is designed for character level 1-5, and uses material from the Dungeon Master's Guide, Monster Manual, and Volo's Guide.

Giants have been raiding the lands of men in large bands, with giants of different sorts in these marauding groups. Death and destruction have been laid heavily upon every place these monsters have visited. This has caused great anger in high places, for life and property loss means failure of the vows of noble rulers to protect the life and goods of each and every subject -- and possible lean times for the rulers as well as the ruled. Therefore, a party of the bravest and most powerful adventurers has been assembled and given the charge to punish the miscreant giants. This module contains background information, referee's notes, two level maps, and exploration matrix keys. It provides a complete module for play of ADVANCED DUNGEONS & DRAGONS, and it can be used alone or as the first of a three-part expedition adventure which also employs DUNGEON MODULE G2 (GLACIAL RIFT OF THE FROST GIANT JARL) and DUNGEON MODULE G3 (HALL OF THE FIRE GIANT KING). TSR 9016

𝐏𝐚𝐫𝐭 𝟒 of the Tower of Bondage “The Middle Tower” introduces Olive Slime and Slime Creatures from notable 1e AD&D fame as well as another of Aumvor’s tortured servants. In this adventure you will go deeper into the tower and find: ● 26 encounters ● More enslaved wraiths ● More traps ● More slime ● More phylacteries ● More danger Discover the Undying One’s library and find tools needed to defeat him, if your players are to escape the tower alive. This release also includes a side view of the tower to better understand the layout of the dungeons. 𝐀𝐥𝐬𝐨, 𝐟𝐨𝐫 𝐭𝐡𝐨𝐬𝐞 𝐰𝐡𝐨 𝐮𝐬𝐞 𝐑𝐨𝐥𝐥𝟐𝟎, 𝐜𝐨𝐦𝐢𝐧𝐠 𝐬𝐨𝐨𝐧: Roll20 Map Pack for Roll20, featuring plain maps for players, without the secret doors and other goodies marked. Coming very SOON. Look for it on DM’s Guild.

The Boneyard is a 3- to 4-hour adventure for characters levels 1st to 4th. It features a flavorful setting, memorable roleplaying, oddball and depraved NPCs, interwoven storylines, and macabre combat encounters! The adventure also includes 3 new NPC stat blocks. When darkness falls and the iron gates close behind you, the dead come out to play!
:strip_icc()/pic775603.jpg)
This Brief Encounter is made up of three events, a fixed encounter and details of the Hivebrood. The events can be played in any order that the DM wishes and should be dropped into play while the adventurers are apparently on their way to another adventure. They are not tied to any set location.

The heroes’ journey is finally at its climax. The evil god Tunkorl has just been freed from his prison and only the strongest and bravest mortals of the realm can defeat him before he regains full strength and throws the world in another dark age. However, the ultimate final fight will not be as straightforward as it seems when the party becomes trapped in a time dilated cross section of Carceri, struggling to get back to the real world and finish the job. Escape the Labyrinth is D&D 5e mini adventure for 3-7 characters of 20th level. This adventure is designed for a single 3-hour session which can be part of a special event, the end, or beginning of a campaign. The heroes go between fighting the big bad evil god (round by round) and trying to escape the mutliple layers of the Labyrinth of Futility a space-time dilated cross section of Carceri.

Tomb at the Dragon's Spine is a companion adventure made to go along with the events unfolding during the middle sections of Folio #14 (WS1 Isle of Jade). It contains the information needed to run a side adventure during the Isle of Jade. Many centuries ago, in an age forgotten, the last of the great sea dwarf masons died on the Isle of Jade after helping construct some of the final Corsair structures the world will ever see. Now, his tomb rests on the heights of the Dragon's Back, and evil has crept into the tomb. Only the brave few might now pass the threshold for the treasures that certainly lay within. While crossing the deadly 'Dragon's Spine' of the island's interior, the party encounters a darkness at the heights. Within the ancient stones the tomb of one of the last sea dwarf master masons rests. Has the corruption of the island reached the tomb? Only exploration will reveal the truth, and the treasure. This adventure is formatted to both 1E & 5E gaming rules.
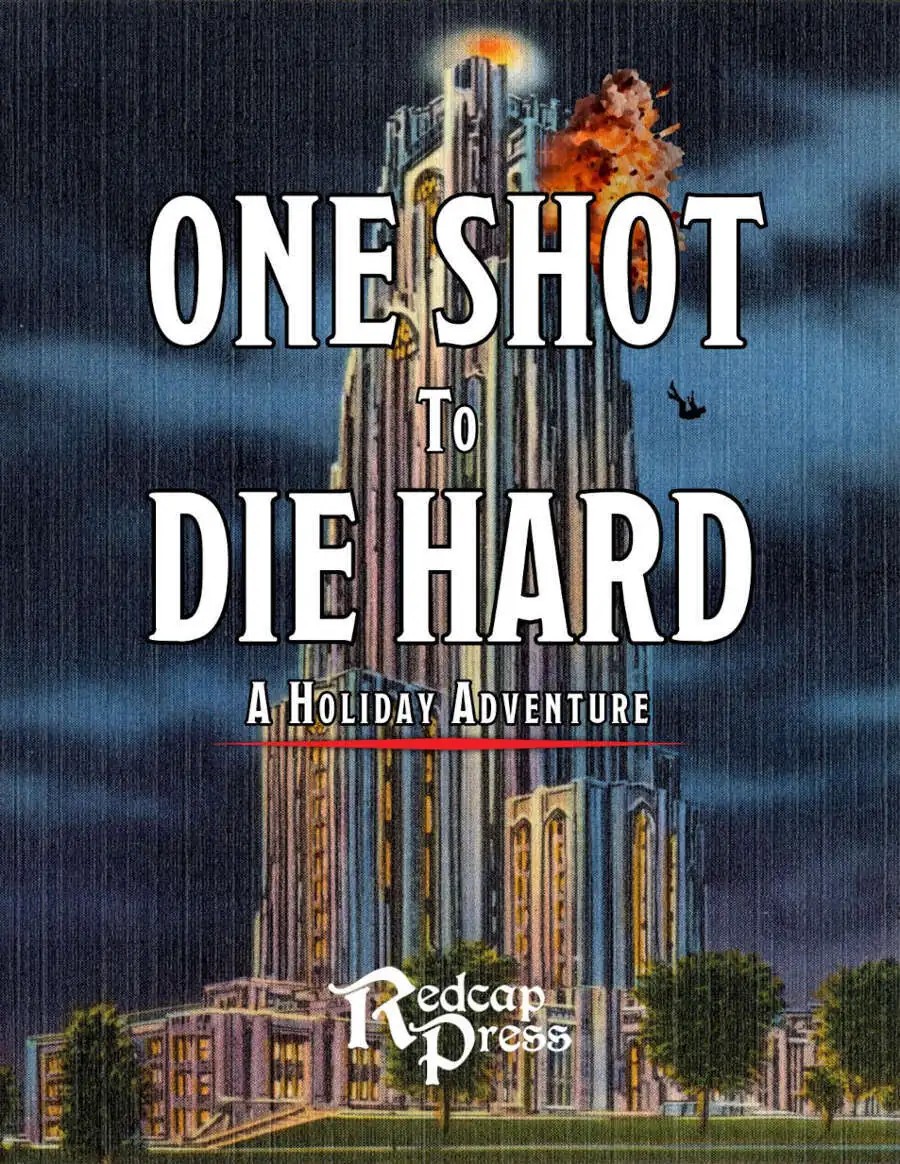
Throw your party into an action movie in this pulse-pounding, single-session adventure inspired by Die Hard. This adventure sends your party to celebration of the winter solstice, on the top floors of an archmage's tower. When a group of mercenaries led by a revenge-seeking criminal mastermind crash the party and take the guests hostage, the adventurers are plunged into their own real-life action movie. Yipee Ki-Yay! General Features - Designed for a level 3 party - Playable in 3-4 hours (and playtested) - Gritty and dangerous; the party starts without any weapons or spellcasting and must ambush the mercenaries to arm themselves. - Includes 8 new magic items and 3 new stat blocks. - 7 fully-mapped floors of the wizard's tower, modeled after the floorplans of the real-life building where the original Die Hard was filmed. Why Players Will Love It - Your choices matter! This is not a linear adventure by any means. You're dropped in a dangerous situation, deprived of your gear, and what happens next is up to you. - You're in an action movie! Ever wanted to crawl around air ducts or up elevator shafts, or swing from a roof and smash through a window? Now you can! - Deadly, but with a safety net. The first to die gets a fun surprise, and stays in the game. - Fun loot! If you continue with these characters after this adventure, you'll have some fun new toys to play with. - It's Die Hard! If you're a fan of the movie, you'll be a fan of this adventure. Why GMs Will Love It - It's flexible and easy to run, and rewarding without being overcomplicated. - A quick-reference page contains all the information you might need at a moment's notice, including suggested on-the-fly combat encounters, NPC names, and a cast list with roleplay suggestions for each character. - A plot checklist to help keep you on track during the game. - Most importantly, information is right where you expect to find it.

When a Thayan research expedition returns from the Glacier of the White Wyrm with only two survivors that are reduced to whispering about an ancient pyramid under the ice, perhaps it is time to discover just what scares the life out of a nation of necromancers. The events of DDEP2 Mulmaster Undone resulted in terrible geographic upheaval all around the southeastern region of the Moonsea. Massive landslides, earthquakes, tidal waves, and gnashing tornados devastated the land and the city of Mulmaster was nearly scrubbed from the face of Faerun. Fortunately, these events also revealed previously hidden artifacts—trinkets, mostly—from the ancient Netherese all around the city. The Thayans have long held an interest in the port city and wasted no time in assisting in the rebuilding efforts. They simply asked that a blind eye be turned to their archaeological interests, and in return they would continue to spend their own resources (at no expense to the Mulmasterites or even the High Blade) to rebuild the city, bigger and better than before. It wasn’t long before their interests paid off with the discovery of a research laboratory beneath the Glacier of the White Worm, far to the east of Mulmaster and nestled in the mountains. The Thayans sent a sizable expeditionary force but only two acolytes returned. The visiting Zulkir has found this particularly troublesome, and with the assistance of Rastol Shan, the head of the Cloaks, has arranged for a mercenary force to perform a more pointed investigation of the area. In return the Thayan noble has promised significant compensation. Upon arrival at the dig site, the characters are quick to discover that the laboratory hides ancient and palpable evil. The purpose of the facility can be discerned with careful investigation, and the effect of the still-active fragment of the Dark Obelisk has empowered (some may say attracted) servants of the Worm that Walks. Danger and death await, certainly, though the characters always have the option of running away and living to fight another day…

Something evil is devouring the souls of the living in Chult, but before the characters take on the horrors in Tomb of Annihilation, they must first uncover the death curse’s origin by braving a lich’s tower in the Cloakwood. This introductory adventure is designed for a party of four to six 1st-level characters, who should advance to 2nd level by the adventurer’s conclusion. It is a prelude to Tomb of Annihilation that should take about 2 to 3 hours. This product includes Fantasy Grounds files for the adventure. What Inspired Cellar of Death? The introduction of Tomb of Annihilation states Syndra Silvane learned about the Soulmonger from the Harpers, who “received their intelligence from a lich.” This adventure is the story of how the Harpers gathered that information. Cellar of Death has a second purpose: to give characters a greater stake in the outcome of Tomb of Annihilation by creating an NPC they love. The death curse kills this NPC, giving the characters a personal reason to go to Chult.