
Wanderers emerge out of the desert in the dead of night, bending low against the driving sandstorm. They are adventurers, heroes whose tale has yet to begin. And they are in trouble. For he last three days, a raging sandstorm has harried you. Your faces and hands are rubbed raw by the driving sand. Worse, not once has the sun risen in that time: 3 days worth of unbroken night. Finally, something rises out of the yellow-black haze. A massive structure, outlined in moonlight. The heroes are TRAPPED in a cursed land, harried by sandstorms. They stumble apon a ruined city and a DARK TOMB that lies beneath. Can they find a way to escape this land? Or are they doomed to be drowned in the SORROW OF THE SAND LORD?

Cheese Goblins III — The Church of Lavache A Level 4 Adventure of Holy Havoc and Dairy Doom by Infinite Initiative High on a lonely hill, the Church of Lavache has gone strangely silent. What was once a peaceful chapel now glows with sickly yellow light. Locals whisper of cheese-scented smoke curling from its windows… and giggling shapes scampering through the graveyard after dark. Inside, something ancient stirs. A deranged warlock—Darius Manchego—has seized the sanctuary and begun a ritual to summon Lavache, an obscure archfey of dairy, indulgence, and decay. Cheese Goblins swarm the halls, corrupting pews, altars, crypts, and even the sacred dead. If the ritual completes, the Matron of Cheese will step through the veil—and the town below may drown in holy curdled chaos. Adventurers must storm the defiled church, navigate its cheese-slicked catacombs, disrupt the ritual flames, and confront Darius before Lavache fully manifests… or face the archfey herself in all her gooey, bovine glory. Inside the Adventure A complete 5e one-shot for characters level 4 • A hilltop church overrun by goblins, traps, riddles, and corrupted magic • A branching dungeon with dynamic time pressure—delays strengthen the final encounter • A cheese-slick sanctuary fight, a cursed family crypt puzzle, and a summoned archfey showdown • A chaotic boss battle with Darius Manchego and (if the party is too late) Lavache, the Matron of Cheese • A new magic item: Curdled Charm of Cheese Conjuring Adventure Hooks The Sudden Takeover – Overnight, the church begins oozing cheese and goblins barricade the road. A Priest in Panic – A trembling clergyman begs the heroes to reclaim his overrun chapel. Bounty on the Cheese Warlock – A wanted poster offers coin for the capture of Darius Manchego, last seen near the church. Part of the Thirsty Tiger Tales series by Infinite Initiative—short, atmospheric adventures built to run in one or two sessions.

When the players get teleported to the plane of the Beastlands, they meet with an intelligent petitioner in the form of a Dog named Reith. Eventually Reith will lead the players to a human; an eagle winged boy by the name of Addler. Addler already knows a way out of the Beastlands, but doesn’t want the players to know because the key is his body and if the petitioners knew he could leave, they wouldn’t like him anymore. Not being the best at planning, he’ll be coerced into giving the players a map to the petitioner that helped him find the portal (A snake named Siy). After passing through some small adventures in the beastlands, the players will meet with Siy and learn about Addlers portal. From here, the players will travel back to Addler and confront him.

A dark and grievous peril has befallen the peaceful free-village of Peppermint as the forces of undeath raised by Senerith Wildblossom, ravage the land. An eon ago he was a proud elven healer of great renown in Duskwood Dell, that has been reduced to a mere husk of his former self, becoming a manifestation of pure evil, intent on wreaking havoc and mayhem to all the living – a Zombie Lord. The players are called to assist Peppermint village and investigate the nearby woodcutting hamlet of Snakewood. The hamlet has been destroyed by the despicable zombie lord, and his forces are now underway to attacking Peppermint too! The players will have to travel to Snakewood hamlet as well as what used to be Duskwood Dell, and then make a mad rush against time while also carrying an injured Halfling, to warn and defend the unsuspecting villagers.

To Hell and Back Again is the perfect adventure for new players and veterans looking to experience Dungeons & Dragons in a new way! It's written as a solo adventure, where choices have gigantic consequences, but it also provides balanced rules to play with a group or a Dungeon Master as well! This 80 page adventure features: - A heart-pounding origins story that fits perfectly as either a prequel to Descent Into Avernus, a stand-alone adventure, or into your ongoing fantasy campaign. - Beloved characters like Lulu the hollyphant, Mad Maggie and her redcap gang, the archdevil Zariel, and many others brand new to this adventure. - Infernal War Machines, and exciting encounters with unique stat blocks. - Innovative Destiny and Traits mechanics that make your choices really matter. - A ton of possible outcomes that will fuel your character's many adventures to come! - Four gorgeous sample characters, with interactive character sheets designed to be new-player friendly so that you can jump right into the story if you'd like. - A community survey when you finish so that you can see how your outcomes and choices compared to other players!

Our heroes are approached by Tristan Harpell, an entitled young mage and heir to a suite of rooms in Ivy Mansion, the ancestral home of the Harpell wizard dynasty. His inheritance is “infested” with the wacky experiments of his dead great-uncle, Siegfried Harpell, and Tristan needs the party to clean things up. The party will have many wild and bizarre encounters while digging through Siegfried Harpell’s derelict magical concoctions - and along the way they might even discover the astonishing truth behind Siegfried's disappearance! Into Ivy Mansion is a Dungeons and Dragons one-shot adventure for a 3rd-4th level party. It features exploration, role-playing and thrilling combat encounters...

An ancient power has started to rise and threatens a small town. Venture into dark caves and put an end to the power creating the skeletons within. Intended for 6 characters level 5-10 Approximately 6 hours of play Featuring 7 new monsters A transforming boss encounter Easily set in your own world, Theros, or Ferun Can be run with the basic rules Full of unique art a map handout for your players and maps for your VTT You can lean into horror or you can keep it PG. Suitable for gamers young and old for one long session or three shorter sessions.

The characters, members of the Clifftop Adventurers’ Guild, have been tasked with acquiring the Chains of Mur’taal, an artifact tied to Thelanis, by their guild handler, Lhara. This artifact is the latest in a series that Provost Nigel Faurious has commissioned the Clifftop guild to retrieve for him. The adventure starts when the characters arrive in Rhukaan Draal via Orien caravan. They’re given a chance to explore a small portion of the city before they head to a local bar to meet their contact provided by Lhara. Accompanied by a local guide, they make their way to the Seawall Mountains, where they’ll have to follow clues and their intuition to find the Valley of the Hero, which conceals the artifact that they’ve been hired to obtain. In order to earn the artifact, characters must first pass three tests laid before them by the Story: The Test of Courage, the Challenge of Wisdom, and the Trial of Honor. Once they finish the tests and collect the artifact, the party heads back toward Rhukaan Draal. But there are Marguul forces in the area, and they don’t intend to let the heroes escape with a priceless piece of their folklore…
Baldur's Gate Break-Ins collects three heist and infiltration adventures for characters of levels 3-5, for use as a continuation of Burial in Baldur's Gate or as standalone modules. This collection fleshes out several locations around Baldur's Gate, providing adventures in every quarter of the city: Crash the world's worst dinner party in Eomane House! Contend with a criminal operation, a murderous raid, and a Feywild crossing in Jopalin's! Break up a blood-drenched cultist lair in Hamhocks Slaughterhouse! This book includes adventure hooks for running each location separately or as part of a campaign, a guide to running heist and infiltration adventures, three possible group patrons for the party, maps and rosters for each location, more than a dozen creature and NPC stat blocks, and a map pack with player and DM maps by Dyson Logos.

When a Thayan research expedition returns from the Glacier of the White Wyrm with only two survivors that are reduced to whispering about an ancient pyramid under the ice, perhaps it is time to discover just what scares the life out of a nation of necromancers. The events of DDEP2 Mulmaster Undone resulted in terrible geographic upheaval all around the southeastern region of the Moonsea. Massive landslides, earthquakes, tidal waves, and gnashing tornados devastated the land and the city of Mulmaster was nearly scrubbed from the face of Faerun. Fortunately, these events also revealed previously hidden artifacts—trinkets, mostly—from the ancient Netherese all around the city. The Thayans have long held an interest in the port city and wasted no time in assisting in the rebuilding efforts. They simply asked that a blind eye be turned to their archaeological interests, and in return they would continue to spend their own resources (at no expense to the Mulmasterites or even the High Blade) to rebuild the city, bigger and better than before. It wasn’t long before their interests paid off with the discovery of a research laboratory beneath the Glacier of the White Worm, far to the east of Mulmaster and nestled in the mountains. The Thayans sent a sizable expeditionary force but only two acolytes returned. The visiting Zulkir has found this particularly troublesome, and with the assistance of Rastol Shan, the head of the Cloaks, has arranged for a mercenary force to perform a more pointed investigation of the area. In return the Thayan noble has promised significant compensation. Upon arrival at the dig site, the characters are quick to discover that the laboratory hides ancient and palpable evil. The purpose of the facility can be discerned with careful investigation, and the effect of the still-active fragment of the Dark Obelisk has empowered (some may say attracted) servants of the Worm that Walks. Danger and death await, certainly, though the characters always have the option of running away and living to fight another day…

A nearly-penniless merchant wants heroes to secure and return priceless heirlooms. But can they do it with goblins all around, raiding and pillaging? Can the heroes reach a peaceful settlement with the raiders, or will they wreak mayhem and slaughter? Find out in Eastbarrow! This package (adventure, maps, and handouts within) forms a complete module for use with DUNGEONS & DRAGONS® 5TH EDITION RULES. It is especially designed for Dungeon Masters to initiate play with a minimum of preparation. Also includes full-sized maps for the VTT of your choice! Old School Look and Feel!
The poor village of Bunting Freely, somewhat off the beaten track, is suffering from an oral health crisis. The villagers are plagued by overly aggressive Tooth Fairies due to a confluence of events in recent history.

While exploring for hints of the Kobolds lair, an unexpected plea changes everything. This is the fourth and final adventure in a miniseries with the following adventures being: A Chance Encounter The Mystic Circle An Urgent Rescue In addition to the adventure, there are a few of maps of the adventure area as separate jpeg files. There is also a printer friendly version of the adventure.
Set in the Radiant Citadel, this is the perfect supplement to your "Journeys Through the Radiant Citadel" campaign, allowing adventurers to explore the ancient city and discover more about its people and places. From the Trade Discal to the Preserve of the Ancients, delve deeper into the secrets of this bastion of wonder and hope. Included in this supplement you’ll find: 10 one-session encounters for characters ranging from levels 2–13 A hand-drawn dungeon map for a new area in the Citadel 3 VTT maps 5 original stat blocks 2 new magic items A printer-friendly version with only essential graphics and text And a host of memorable NPCs! Easily drop an encounter into your existing campaign or build out a new adventure entirely. You’ll find a broad range of themes to help your table bring to life this ancient city in the heart of the Deep Ethereal Plane.

Delve into the depths of the tomb of the long forgotten elven king to bring the eternal peace onto its disturbed dwellers. A 4-hour adventure for two 4th level characters. Small Party Adventure: Though the party size of 3–5 characters is considered optimal in D&D, there are times when you can only gather one or two players at most. This adventure is designed exactly for such occasions.

A Halloween themed adventure for characters levels 3rd to 4th, meant for a single 3-6 hours session. The pumpkin-farmers of Goldgrain are in for terror, as in a rather ironic turn of events, their crops rise to harvest them instead. What's causing the pumpkins to become alive and angry? Is it the curse of a long dead witch? Or is it something even more sinister? Why are they dragging the corpses of their victims away, and to where? Who commands them? Soon enough, they'll find out answers to those questions, or perish under the wrath of the haunted crops.

A plug in adventure that can be used as part of a larger campaign or run as a one shot for 3-4 Tier II characters. A village needs aid, as their small village is under a curse that they have been able to keep hidden from the villagers, but now that clock has run out and the piper demands to be paid. Can they find what is the cause of the curse and finally eliminate it.
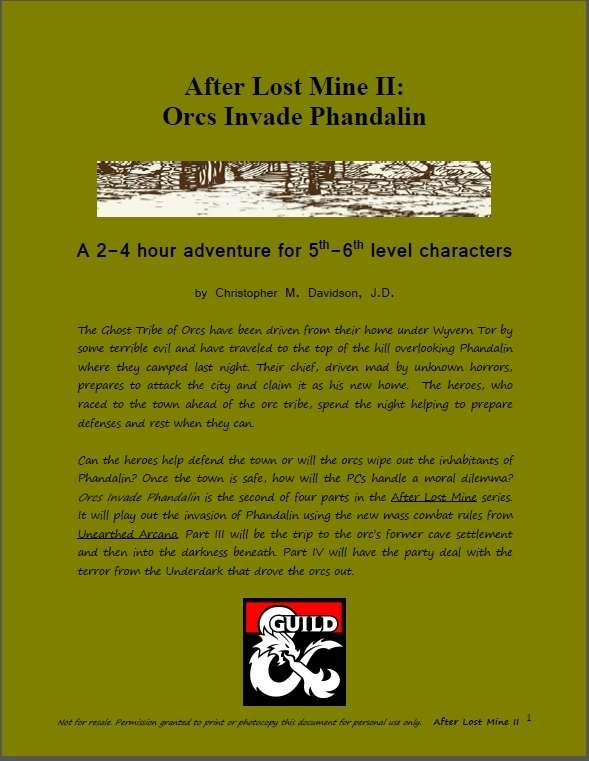
The Ghost Tribe of Orcs have been driven from their home under Wyvern Tor by some terrible evil and have traveled to the top of the hill overlooking Phandalin where they camped last night. Their chief, driven mad by unknown horrors, prepares to attack the city and claim it as his new home. The heroes, who raced to the town ahead of the orc tribe, spend the night helping to prepare defenses and rest when they can. Can the heroes help defend the town or will the orcs wipe out the inhabitants of Phandalin? Once the town is safe, how will the PCs handle a moral dilemma? Orcs Invade Phandalin is the second of four parts in the After Lost Mine series. It will play out the invasion of Phandalin using the new mass combat rules from Unearthed Arcana. Part III will be the trip to the orc’s former cave settlement and then into the darkness beneath. Part IV will have the party deal with the terror from the Underdark that drove the orcs out.

This oneshot adventure is to help teach new players AND new dungeons masters how a game works. You’ll find easy guides and simple stream game. This adventure will guide the player to level up to a level 2. This adventure is for 4-5 people, though you can adapt it to fewer, if needed. It is a very short adventure for those with little time who would like a taste of D&D in its simplest of form. You will adventure to Bruxhelm, in the Sword Coast, where the players have a dilemma to solve. Nature is running wild! Well.. more than usual.

The Ghost Tribe of Orcs have been driven from their home under the Sword Mountains by some terrible evil and they now see Phandalin as their best option for a new home. The heroes, who are on their way to Phandalin for a much needed rest after their adventures in the Lost Mine, must make it to town in time to warn the inhabitants and help prepare for the orc attack. Orcs to Phandalin is the first of four parts in the After Lost Mine series and will detail the trip to Phandalin. There will be three subsequent adventures: Part II, which details the battle to save the city; Part III, which details the trip to the orc’s cave settlement; and Part IV, detailing the party’s mission to deal with the terror from the Underdark that drove the orcs out of their home.