
His name has inspired fear in legions of heroes, and his cult has lurked in the dismal reaches of the world for countless ages. His minions are savage and feral, his worshipers vile and wretched. He is Demogorgon, and his temples are nightmare realms haunted by primeval menaces and hateful legacies from a time when the world was savage. And now, a vengeful death knight has discovered one of these lost temples—will the PCs aid him in his dark quest for revenge, or will they fall before the awakened host of the Prince of Demons? Pgs. 64-83

At last- an opportunity to avert the threat to the little town of Saltmarsh! The real enemies have been identified-- evil, cruel creatures, massed in force and viciously organized. Can the brave adventurers thwart this evil and ensure the safety of Saltmarsh? The Final Enemy is the final part in the series of three modules designed and developed in the United Kingdom for beginning adventures with AD&D rules. Its plot follows directly from those of the first two parts (U1 - The Sinister Secrets of Saltmarsh, and Module U2 - Danger at Dunwater.) TSR 9076

Lost Laboratory of Kwalish explores an alternate expedition into the Barrier Peaks. The legendary inventor disappeared in the peaks eons ago… as it turns out, finding a crashed planar ship and studying its technology to fuel his own experiments—only now, Kwalish’s lost research is desperately needed! This adventure explores two locations within the Barrier Peaks, and includes new monsters, magic items, and spells, plus sci-fi trinkets, random encounters, and even rumors of the area submitted by the player community! Further featuring new art, maps (from Claudio Pozas), and even a cartoon (from Jason Thompson)—as well as the famed suit of powered armor, as edited by Jeremy Crawford on the Dragon+ livestream! Best of all, all monies that Wizards of the Coast receives from sales of this PDF are donated to Extra Life. Your purchase of this adventure goes to a truly great cause!

Important: The adventure is 1e but it has monster conversion notes for D&D 4th edition The town of Highport, once a human community overlooking Wooly Bay from its perch on the northern coast of the Pomarj, fell prey to hordes of humanoids swarming out of the jungle-covered hills surrounding the settlement. Though the orcs, goblins, kobolds, ogres, and gnolls razed much of the place in their ferocious rampages, the smoldering ruins they left behind soon became a new kind of community, a place of trade between the humanoid “locals” and the unsavory human traders who have no compunction about doing business with them. Slaves are a commodity in ready supply in Highport’s market, since many pirates raid up and down the coast of the bay, putting fishing villages to the torch and filling their holds with captured refugees. Slavery has become a thriving business in the town, and rumors abound of a cartel of Slave Lords who run things from behind the scenes, filling their coffers in secret from the buying and selling of human chattel. The trade has become so prolific that the good folk to the north have grown tired of these depredations and decided to fight back. Forces of righteousness and honor have recently descended upon Highport, some openly and others in secret, in various attempts to destroy the machinations of the Slave Lords and abolish the abominable enterprise that has taken far too many loved ones from home and hearth. One such doughty servant of goodness is Mikaro Valasteen, a cleric of Trithereon. Mikaro slipped unnoticed past the crumbling walls of Highport with a single mission: to rescue and transport as many slaves to their freedom as possible. Mikaro and a handful of faithful assistants located a number of escaped slaves—as well as rescued a few more not sufficiently restrained and guarded—and shepherded them through the gates and beyond the reach of their humanoid tormentors, returning them to their lands and homes. This covert freedom brigade enjoyed remarkable success early on, since the servants of the Slave Lords were often lax in their vigilance and sloppy in their efforts to prevent loss of the “merchandise.” After one too many shipments never made its destination, the humanoids stepped up their security and the normal channels of escape from Highport closed to Mikaro and his team. He cannot risk exposure by smuggling the freed slaves through the gates as merchandise any longer, since shipments of goods are now regularly stopped and checked. No longer able to free the slaves in that manner, Mikaro began hiding his charges in an abandoned villa in a particularly rundown part of the town. Although they are safe for the moment, their numbers have grown unmanageable, and the priest fears it is only a matter of time before someone slips up and brings slavers to their doorstep. Ever more desperate to find a new means of escape from Highport, Mikaro has started work on a plan that is both daring and dangerous. He intends to use a series of old sewers coupled with natural caverns running beneath the town as an escape route to the sea beyond the walls. But he needs someone to clear out the creatures and pitfalls he knows lie within. Pgs. 2-27

Fleeing the rage that consumed their feuding families, Juliana and Orlando fled to the Cave of Echoes, where it is said every wish is granted. Two years have passed, and all attempts to return the lovers to their parents have failed, though some believe them lost in the enchanted garden beyond the cave. Many are the rescuers venturing into that enchanted park; a few have returned after long absences, their minds and memories curiously disturbed. Now, the handsome reward offered for the return of the lovers has tempted you, but who knows that lies beyond the Crystal Cave? TSR 9066

The Lost Tombs, Volume 3 The Doomgrinder, a mysterious stone windmill many leagues east of the City of Greyhawk, has for centuries been a source of rumors, frustration and fear. The rumors say that vast treasures are stored inside-all cursed. The frustration belongs to hundreds of adventurers who over the years have attempted to enter the windmill and failed. The fear is felt by those who believe the world will end when the stone sails of the Doomgrinder turn again. In the City of Greyhawk, powerful spellcasters read bad omens for the future, and the Doomgrinder is part of them. Some see no future at all, good or bad. TSR 9581

A handful of would-be adventurers gathers to explore an ancient tomb, eager to trade their discoveries for a ticket to a better life. What they find within presages the advent of the Age of Worms, an era of darkness, decay, and writhing doom. "The Whispering Cairn" is the first installment of the Age of Worms Adventure Path, a complete campaign consisting of 12 adventures, several "Backdrop" articles to help Dungeon masters run the series, and a handful of poster maps of key locations. For additional aid in running this campaign, check out Dragon's monthly "Worm Food" articles, a series that provides additional materials to help players survive this campaign. Pgs. 14-47

Nestled on the coast of the Azure Sea is Saltmarsh, a sleepy fishing village that sits on the precipice of destruction. Smugglers guide their ships to hidden coves, willing to slit the throat of anyone foolhardy enough to cross their path. Cruel sahuagin gather beneath the waves, plotting to sweep away coastal cities. Drowned sailors stir to unnatural life, animated by dark magic and sent forth in search of revenge. The cult of a forbidden god extends its reach outward from a decaying port, hungry for fresh victims and willing recruits. While Saltmarsh slumbers, the evils that seek to plunder it grow stronger. Heroes must arise to keep the waves safe! Ghosts of Saltmarsh combines some of the most popular classic adventures from the first edition of Dungeons & Dragons including the classic ‘U’ series and some of the best nautical adventures from Dungeon magazine: The Sinister Secret of Saltmarsh Danger at Dunwater The Final Enemy Salvage Operation Isle of the Abbey Tammeraut’s Fate The Styes All adventures have been faithfully adapted to the fifth edition rules of Dungeons & Dragons. Furthermore, this book includes details on the port town of Saltmarsh, as well as plenty of hooks to kick-off each adventure. Play through each story in a seafaring campaign leading characters from level 1 through level 12, or pull out sections to place in ongoing campaigns in any setting. The appendices also cover mechanics for ship-to-ship combat, new magic items, monsters, and more! “The Saltmarsh series consistently ranks as one of the most popular classic D&D adventures,” said Mike Mearls, franchise creative director of D&D. “With its ties to ocean-based adventuring, it was an obvious step to augment it with additional sea-based adventures and a robust set of rules for managing a nautical campaign.” Hoist your sails, pull up anchor, and set a course for adventure!

The Grand Duchy of Geoff has recently been plagued by a rash of unusually weird and terrible monsters of an unknown sort. This western area, particularly the mountain fastness which separates the Grand Duchy from the Dry Steppes, has long been renowned for the generation of the most fearsome beasts, and it has been shunned accordingly -- save a handful of hardy souls with exceptional abilities. Within the last few months, however, a walled town not far distant from the area, and four small fortresses as well, have been destroyed by mysterious attacks! This classic adventure set on a crashed spaceship challenges the players assumptions, and expands on what's possible within the "fantasy" label. TSR 9033

Deep beneath the Isle of Dread, in a place forgotten by the world of light, an ancient, unfathomable evil festers. Within the desiccated ruin known as Golsimorga, the debased kopru servants of Demogorgon work foul rites, steeping immature shadow pearls in pits of liquid insanity. None from the world above have yet fathomed what terrors lurk beneath the Isle of Dread, nor what mad scheme roils to profane life deep within the city's gangrenous corpse. "The Lightless Depths" is the sixth chapter of the Savage Tides Adventure Path, a complete campaign consisting of 12 adventures appearing in Dungeon magazine. For additional aid in running this campaign, check out Dragon magazine's monthly "Savage Tidings" articles, a series that helps players and DMs prepare for and expand upon the campaign. Issue #353 of Dragon features ways to improve the PCs' vessel, the Sea Wyvern, as they take their adventures back to the seas. When the PCs journey deep under the Isle of Dread to find the source of the shadow pearls, they discover horrors beyond imagining in a haunted underground city perched on sanity's razored edge. Pgs. 28-66

Ruling uncontested in his Abyssal layer of the Gaping Maw for eons, Demogorgon's reign as first among demon lords may be coming to an end. The storm clouds gather as his inviolate sanctum is about to be breached by an unlikely alliance from across the planes. Despite its combined strength, this invasion offers no guarantees of success. For the alliance faces no house of straw, but rather the entrenched hordes and reinforced ramparts of the home of the Prince of Demons. "Prince of Demons" is the final chapter in the Savage Tide Adventure Path, a complete campaign consisting of 12 adventures appearing in Dungeon magazine. For additional aid in running this campaign, check out Dragon magazine's monthly "Savage Tidings" articles, a series that helps players and DMs prepare for and expand upon the campaign. The time has come to challenge the Prince of Demons! An army of demons and eladrins stands ready to mount an assault on his Abyssal realm of Gaping Maw, which should give your players the distraction they need to prevent Demogorgon from activating the savage tide and driving a world insane. Pgs. 60-99

Having put down a rising of giants, it was discovered that the motivating force behind their depredations was that of long-forgotten evil - the Dark Elves. Determined to seek out these creatures, a body of doughty adventurers mounted an expedition to learn the strength of the Drow and bring retribution to them (DUNGEON MODULE D1, DESCENT INTO THE DEPTHS OF THE EARTH). This module contains background information, a large-scale referee's map with a matching partial map for players, referee's notes, special exploration and encounter pieces, a large map detailing a temple complex area, encounter and map matrix keys, and an additional section pertaining to a pair of unique new creatures for use with this module and the game as a whole. A complete setting for play of ADVANCED DUNGEONS & DRAGONS is contained herein. This module can be played alone, as the second part of a series of three modules (with DESCENT INTO THE DEPTHS OF THE EARTH, D1, and VAULT OF THE DROW, D3), or as the fourth part of a continuing scenario (DUNGEON MODULES G1, G2, G3, D1, D2, D3, and Q1, QUEEN OF THE DEMONWEB PITS). TSR 9020, From 1978

Sinister Forces Terrorize a Town The town of Brindinford is in the midst of its annual street fair. Joy and merriment abound - until calamity disrupts the celebration. Are rival gangs responsible? Is the government sliding into tyranny? Or is a nightmarish plot about to come to fruition? "The Speaker in Dreams" is a stand-alone adventure for the DUNGEONS & DRAGONS® game. Player characters are in for a wild ride in this river town. Leave the dungeon behind: the terrors lurking in Brindinford are more challenging by far! In The Speaker in Dreams, the town of Brindinford is besieged by evil forces under the command of Ghaerleth Axom. A street fair is interrupted by an attack, which serves as a distraction for the villain's forces to attack the keep of the local baron. This provides an entry point for the player characters into the main quest to discover the secret alliances trying to take over the town. The Speaker in Dreams is an event-based, rather than site-based, adventure.

When Monsters threaten the village of Crystalbrook, it's up to adventurers to track down where they're coming from. The investigation leads them on a journey across planes. In the Feywild, the heroes must explore an enchanted island garden and unravel the plot of a foul hag, before she and her fiendish companion can perform a ritual to seize control of the island. "Beyond the Crystal Cave" is a Dungeons & Dragons adventure designed for the winter 2011 season of the D&D Encounters official play program. This season incorporates character options from Player's Option: Heroes of the Feywild, and it comes with three full-color maps, thirteen ready-to-play encounters, and information on the D&D Encounters program. Originally found in Dungeon Magazine #211 now available as a stand-alone adventure. Pgs. 63-122

Clues discovered in Diamond Lake lead to the Dark Cathedral, a forlorn chamber hidden below a local mine. There the PCs battle the machinations of the Ebon Triad, a cult dedicated to the three vile gods. What does the Ebon Triad know about the Age of Worms, and why are they so desperate to get it started? "The Three Faces of Evil" is the second installment of the Age of Worms Adventure Path, a complete campaign consisting of 12 adventures, several "Backdrop" articles to help Dungeon masters run the series, and a handful of poster maps of key locations. For additional aid in running this campaign, check out Dragon's monthly "Worm Food" articles, a series that provides additional materials to help players survive this campaign. Issue #334 of Dragon provides comprehensive lists of all the things you can find for sale in Diamond Lake's (often) dubious shops. Pgs. 16-47
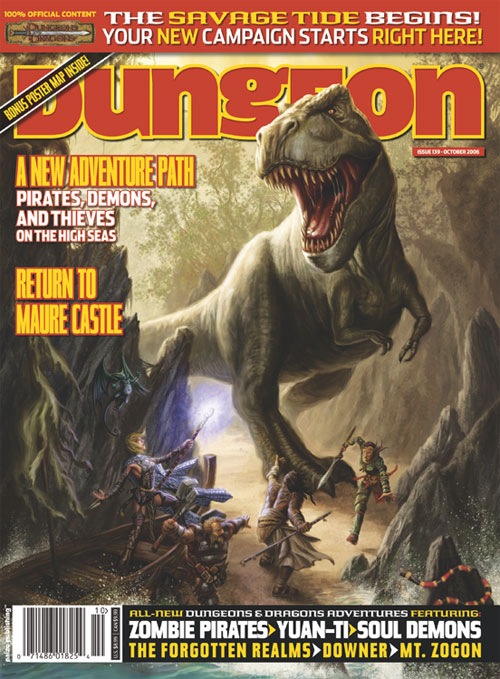
The first savage tide has already touched the mortal world, yet none who live today recall this time of red ruin. Unleashed from the cruel heart of a fell seed known as a shadow pearl, this savage tide swept over an ancient city perched atop the crown of a remote island. The tide transformed beggar and noble, merchant and thief, resident and visitor into feral, ravenous fiends. The fruits of centuries of labor came crumbling down in a matter of days, and when the survivors tried to stem the tide by destroying the pearl, the resulting blast of power sunk their city into the boiling lake of death. Through it all, the Abyssal architect of the savage tide watched, taking pride in the ruin. When the tide's final ripples had faded, what was left became known as the Isle of Dread. Now, after a thousand years, the true masters of the Isle of Dread look upon new targets, new cities beyond the horizon, compelled by the hateful will of their demonic lord Demogorgon to prepare for the coming glory. This time, the doom will not be limited to one hapless city. This time, all of civilization waits unknowing on the shore, blissfully ignorant of what the incoming tide brings in. "There Is No Honor" is the first chapter of the Savage Tide Adventure Path, a complete campaign consisting of 12 adventures that will appear in the next twelve issues of Dungeon. For additional aid in running this campaign, check out Dragon's monthly "Savage Tidings" articles, a series that helps players and DMs prepare for and expand upon the campaign. Issue #348 of Dragon kicks off this series with details on six affiliations based in Sasserine that your players may wish to join. And if you're running Savage Tides in the Forgotten Realms or Eberron, make sure to check paizo.com for the latest conversion notes for each adventure. The Savage Tide Adventure Path debuts as a new band of heroes confronts exotic monsters, undead pirates, and a sinister guild of thieves on the cusp of unleashing a murderous coup. Pgs. 14-46

Stirrings of an ageless war between Law and Chaos are drawing you into an epic adventure! A Struggle More Savage than Good vs. Evil Imagine a time before the words Good and Evil had meaning, a day when the world was young. Discover an ancient conflict that predates the stars. It was in these days that Law and Chaos forged worlds out of nothingness; their war began while the cosmos was yet unfinished. The Rod of Seven Parts defines epic role-playing. The reappearance of the Rod has awakened the powers of Chaos, and their queen seeks to turn the whole world into a battleground. Bold heroes must undertake the enormous task of seeking out and assembling the pieces of the Rod, but even its power cannot stand alone. Ages ago, primal forces of Law stood fast against Chaos; now their champions must once more confront the Queen of Chaos and her foul spyder-fiends, lest the flame of civilization be extinguished. Follow the quest for the capricious Rod as it leads characters on a journey of high fantasy. The Rod of Seven Parts is designed for four to six heroes and heroines of levels 10 to 12. This boxed set includes: Initiation to Power, a 96-page book of grand adventure playable in any AD&D world, including original campaigns; The War Against Chaos, a 64-page book of world-crossing adventures pitting PCs toe to toe against the minions of Chaos; Might and Menace, a 32-page book detailing the mysterious powers of the Rod of Seven Parts: how it affects both its enemies and its friends; Monsters, a 16-page book of new villains, new monsters, and even a new race! 6 two-sided reference cards; 6 full-color poster maps portraying the key locations heroes can visit. Read about this ancient artifact in the epic novel The Rod of Seven Parts by best-selling author Douglas Niles! TSR 1145

Iggwilv. Orcus. Maleanthet. Obox-Ob. Charon. These names are among the most notorious in the multiverse, appellations belonging to some of the most dangerous and powerful creatures on the lower planes. Heroes from countless worlds have raised their arms against these immortal foes and, in most cases, these heroes have perished to their soul-blasting, life-ending might. Their lairs are notorious as they are: the River Styx, beautiful but deadly Shendilavri, the Gray Wastes of Hades, frozen Thanatos, and mind-numbing Zionyn. Simply entering one of these scions of evil is akin to suicide. Yet now, as the Prince of Demons begins the final rituals to bring the savage tide to the Material Plane, heroes must approach these immortal villains not as enemies, but as allies. "Enemies of My Enemy" is the eleventh chapter in the Savage Tide Adventure Path, a complete campaign consisting of 12 adventures appearing in Dungeon magazine. For additional aid in running this campaign, check out Dragon magazine's monthly "Savage Tidings" articles, a series that helps players and DMs prepare for and expand on the campaign. Issue #358 of Dragon magazine features a map of the River Styx and advice for those who would use this notorious river as a route in exploring the lower planes. The time draws near for the final assault on Gaping Maw, but first the PCs must recruit allies from the depths of the Abyss to the eladrin Court of Stars. yet will this unlikely alliance of demons and eladrins be enough to stop the Prince of Demons? Pgs. 40-85

A minion of chaos has come to the Prime Material Plane from the void of the Far Realms to terrorize and conquer in the name of its masters. The PCs must act quickly to assemble a legendary artefact powerful enough to weaken the minion so it can be defeated. Pgs. 20-47

Lost Tombs, Volume 2 The lich Lyzandred: a madman, an undead archmage, a survivor of the twin cataclysms that destroyed tow great empires. His name invokes fear in the hears of the smallest children, the bravest warriors, and the wisest sages. Like a malicious cat, the lich toys with all who stumble into his maze, tormenting them with strange puzzles and obscure riddles, monsters and demons, weird traps and dangerous magics. All who enter the crypt of Lyzandred find themselves scarred with his rune, proof of their visit -- and their folly. But there is a method to the madness of Lyzandred, a purpose to his twisted games. If you're lucky, you might even live to learn about it. The Lost Tombs series begins with Star Cairns (Volume 1) and concludes with The Doomgrinder (Volume 3). Each adventure is playable separately, or they can be linked to form an epic-length story. TSR 9580