
A new threat preys on the local trade road. Rumored to have ties to the legendary undead wizards, Vecna and Acererak, Geoff the Dread Tailor has awakened to garner his revenge on the living. A group of stalwart heroes must arise to put an end to the Dread Tailor’s depravations or all will be lost. This adventure includes: a small village of friendly allies, an optional haunted ruin to discover, an entire lair of creatures (with map!) to explore, three new magic items, two new monster descriptions, interactive document links, and more fun than a bag of scorpions (don't ask)!

Veil Down Conquered is a free preview of the full-length adventure KOBOLDS VS. OGRES, coming in 2018! Veil Down is an affluent halfling village known for its vintners and farmers. Recent kobold incursions into the region around Veil Down have forced gangs of monsters closer and closer to civilized land...and this has brought a gang of ogres to the idyllic village! After driving the halflings out, the ogres have attempted to make the best of their situation and turn the village into their new home, but in a village built for halflings, these ogres are going to have a hard time fitting in... This adventure site contains a chapter from the forthcoming adventure Kobolds vs. Ogres, coming in 2018. Fully presented as a standalone site, expanded gameplay content includes a much more in-depth look at the gnome town of Hardbuckler, briefly touched in Volo's Guide to the Sword Coast and Sword Coast Adventurer's Guide. Additionally, extensive random encounter tables round out the book, steeped in historical lore from the Forgotten Realms campaign setting, presenting stunning mysteries, interesting sites to explore, and evocative NPCs and monsters. This chapter only begins the trials and tribulations players will face in Kobolds vs. Ogres!

East of Beregost, nestled in the outskirts of the Wood of Sharp Teeth, Durlag’s Tower has intrigued and yet stymied adventurers for decades. Stuffed full of mechanical traps and arcane wards, and rumored to be inhabited by fiends, very few have managed to extract any REAL treasure from the former home of Durlag Trollkiller. However, a powerful item in the ancient fight against the giants is said to be housed there, and the cloud giant Baron Rajiram has committed significant resources toward recovering it. After a pleasant tea in her garden, SEER calls upon you to beat him there and put a stop to his efforts! Continued in Durlag's Tomb.
When the moon vanishes from the sky, Selûne’s clergy are certain her sister Shar, goddess of night and secrets, has abducted and imprisoned her. A group of heroes must cross the Astral Sea, breach Shar’s Towers of Night, and rescue the goddess of the moon from captivity.

Rauvin Vale: Ashes of Lhuvenhead After a scout arrives at Hilltop and reports that hobgoblins have been spotted approaching the ruins ofLhuvenhead, the adventurers must travel to the destroyed town and dispatch the hobgoblin forces, working for the Blue Dragon Nahaunglaroth and the Blood of Morueme, before they can establish a base. A Forgotten Realms Adventure for 2nd Level Characters.

The yuan-ti anathema, Hessatali, calls out to his yuan-ti faithful from his prison in the Abyss. His network of vipers has uncovered the ruins of ancient Ss’tatha’lass and the Fane of Hessatali, a fountain of pure venom that will return the demi-god to life. Above the buried ruins of Ss’tatha’lass, yuan-ti agents have moved to control the politics of Scornubel. The characters fall into a complex yuan-ti plot that spans the breadth of the realm, pits the heroes against the forces of the Abyss, and explores the culture of the yuan-ti.

Near the jungles of Chult, beneath the waves of Refuge Bay, lies a ruined city. Evil hags and their minions make their home among the ancient relics. Even deeper down, at the bottom of an old undersea lake, an otherworldly monstrosity guards its eclectic hoard of oddities. What does it know about the Soulmonger? An adventure for characters between levels 4-6 Requires the Tomb of Annihilation adventure This 44 page adventure adds Ishau as a location to your Tomb of Annihilation campaign. It describes the city's history and current inhabitants, including maps, new monsters, and treasure. In an undersea temple, characters face off against a coven of sea hags. The sunken wreck of the Decapus is the lair of sea spawn pirates. And among the ruins lurk giant crabs, skeletal sharks, vegetan mummies, and other monstrosities. A second location, complete with keyed maps, is available to characters who wish to dig deeper: the underwater island-domain of a Morkoth, pulled into Chult by Acererak's magic. The Morkoth's home is in disarray. Trophies it collected from across the multiverse are now running wild and its treasures are being looted by marauders from Ishau. If the characters help, it may share its secrets with them.

Kalzok the Minotaur pirate discovered an old smuggler's hold on a tiny island in the Nelanther Isles, not far from Nemessor. The island sits amid a dangerous archipelago encircled with scores of hidden shoals that is avoided by all but the most daring or foolish navigators. The area's waters are notorious for claiming the ships of unwary sea captains who tried to steer through the gauntlet of hidden reefs. This offering includes an overview of Kalzok's island along with the details of Kalzok's hidden lair.

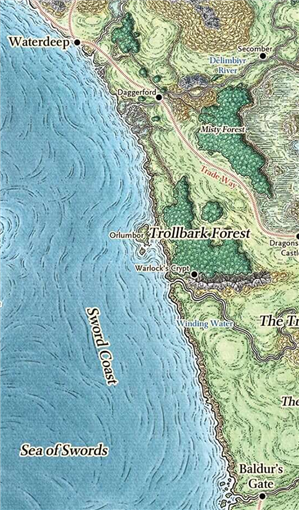
An alien being, dark omens, and vanishing ships send the adventurers to a mysterious island newly appeared in the Sea of Swords. But can the characters uncover the mysteries of the Changing Island in time to save Faerûn from a terror from another plane? A dark fantasy adventure for characters of 11th to 13th level.

5e Solo Gamebooks presents Citadel of the Raven, the third in our series of solo adventures. Citadel of the Raven is the sequel to Tyrant of Zhentil Keep, but is also playable as a standalone solo adventure. The first solo adventure in this series is titled The Death Knight’s Squire. At 589 entries, you can expect a lot of variety from this solo quest. There are several main paths your character could take, and numerous encounters and options on those paths (including short sub-threads designed for specific classes), making the number of possible adventures practically endless. Add to that the characteristics of your class, and the numerous variegated combat encounters, and it’s safe to say that no two run-throughs of Citadel of the Raven will be the same.

Zhentish soldiers, Maerimydran drow, and Sharran cultists have forged a dark alliance to subjugate the peaceful land of Shadowdale. Elminster's tower lies in ruins, Lord Amcathra governs at the sufferance of the dale's conquerors, and the very Weave of magic in this embattled land seems to fray with each passing day. The Zhentish yoke lies heavy over Shadowdale—but the Dalesfolk are ready to fight for their freedom, if only they can find true heroes to lead the way!

This 4 hour module takes the characters from a hidden cove near the Moonsea to hidden tunnels leading under the Glacier of the White Worm. What starts as a recovery mission leads to the uncovering of a much more sinister plot. Optimized for a group of level 7's (APL 7), this adventure can be adjusted for any Tier 2 party. Inside you'll find: * Three battlemaps * Introducing the ice encrusted skeleteon, a hardier version of the standard skeleton for colder climates.
While traveling along the Trade Way, the characters see a small hut on the side of the road, and a spiked barricade erected in the middle of the road. Two men with cudgels in their hands stand on either side of the road. These two brigands proclaim to be members of the Waterdeep City Watch, but any Waterdhavian with half a brain knows this to be a lie. The truth is that these are common highwaymen trying to fleece travelers and merchants with a phony road toll. In this simple encounter, the characters can employ whatever inventive tactics they want to pass the brigands. They may simply pay the toll, they may try to intimidate the bandits or appeal to their better nature by making a Charisma check, or they might resort to violence. Or, they may attempt something else entirely! Encourage creativity.

Aumvor is aware of the intruders and sends a warning with a powerful fire ball. Satisfied that the party has lost interest, Aumvor returns to his vault where he can safely leave his remains and travel the planes in search of greater power. Perhaps the PCs that survive the blast may have the upper hand. Growing closer to the final chapter, the party of adventurers will find that the only way out is into the tank for a swim. Aumvor the Undying has hidden here in this dungeon for centuries, waiting for his chance to resurface as the emperor of Netheril. The time has passed slowly and Aumvor’s powers are waning. He has hidden phylacteries well, but what use will they be if he has no vessel I which to dwell. Aumvor makes a final effort to kill the party before returning to his vault to wait in ambush for them. In “𝐏𝐚𝐫𝐭 𝟓 The Lower Tower”, you will find the secret at the bottom of the tower, 16 exciting and deadly encounters, and a lot of zombies floating in cadaver soup. Ever fight zombies while swimming and dodging specters? Here is your opportunity. Also coming soon, Roll 20 Map Pack for The Tower of Bondage.

Summoned by the ruler of the Moonshae Isles, the adventurers are asked to seek out the five lost Temples of the Earthmother. A 12 hour adventure for 5 players of 1st-3rd level characters.

The recent discovery of an entrance to the Underdark has set local leaders on edge. In a display of initiative, the First Lord of Hillsfar has ordered the construction of defensive structures surrounding what locals have begun to call "The Waydown." You have been charged with escorting an emissary back to his home in the Underdark without alerting the Red Plumes.

A storm of unparalleled fury has been ravaging the peaks of the Earthspur Mountains for a tenday, and the Monastery of the Yellow Rose sits in its eye for now. Some monks have fled the monastery to the safety of Mulmaster and beseech you to convince their more obstinate brothers to retreat to the city before the eye of the storm shifts, and the monestary is in terrible danger. Can you brave the elements and convince the monks to escape?

After the first expedition to locate an ancient tomb was prematurely ended by monsters, the Search and Locate Treasure Consortium is doubling down. Camp established, they are looking for adventurers to make their dreams come true, but the leader of the Consortium is hiding something. Will the characters be able to avoid the Man Slayer tribe that destroyed the first expedition, help Larazmu settle his internal struggles, and locate the tomb that they have been searching for without getting into Moor Trouble?

Riddled with veins of precious ore and gem, the Earthspur Mountains to the west have long been a valuable resource for anyone able to mine them. One such mine has gone silent and the only thing more concerning than its long overdue shipment is the fate of the members of the Soldiery sent to discover what has happened to the mine’s workers. Though the mine lay in a region of the Mountains once claimed by a clan of reclusive dwarves, the Ludwakazar clan wouldn’t be so bold as to violate their long-standing peace with Mulmaster. Or would they?

Part Two of the Umbral Aristocracy Trilogy. The treasure hunt has led to the City of the Dead. Beneath that well-manicured park is an ancient crypt where the treasure awaits you!