
Abandoned and forgotten ruins never are. He left the Abyss to visit his human mother, not realizing he was a century too late. Still, there was a lot he had left to do... An ancient castle, Nol-Daer, has of late become the site of frequent strange occurrences. Gargoyles and Blood Hawks roost in the keep's ruined towers, Dwarves have been disappearing from the nearby area, and a Cambion controls it all from the shadows. Pgs. 3-17 & 64

The village of Farleigh's Well is the target of a vindicative fey noble. The villagers have been seen parading through the Misty Forest, leaving their crops to rot in the field. The characters must contend with powerful fey creatures on their home plane in this action-packed adventure. What's Inside: A highly adaptable single session adventure. Two original NPCs with full stat blocks. Two original magic items. Detailed combat tactics and roleplaying hints for novice and experienced DMs alike. Two brilliant maps to help you bring the adventure to life. Choose from either the Full version with art and page design or the Lite version for easy printing.

A museum of the Mad Archmage, it contains curiosities and treasures from all over the multiverse, and the challenges of the Watery Caves, which are a series of living caves connected by an underground river. This adventure can be used as an expansion to the Castle of the Mad Archmage mega-dungeon adventure, or as a stand-alone adventure. Published by BRW Games
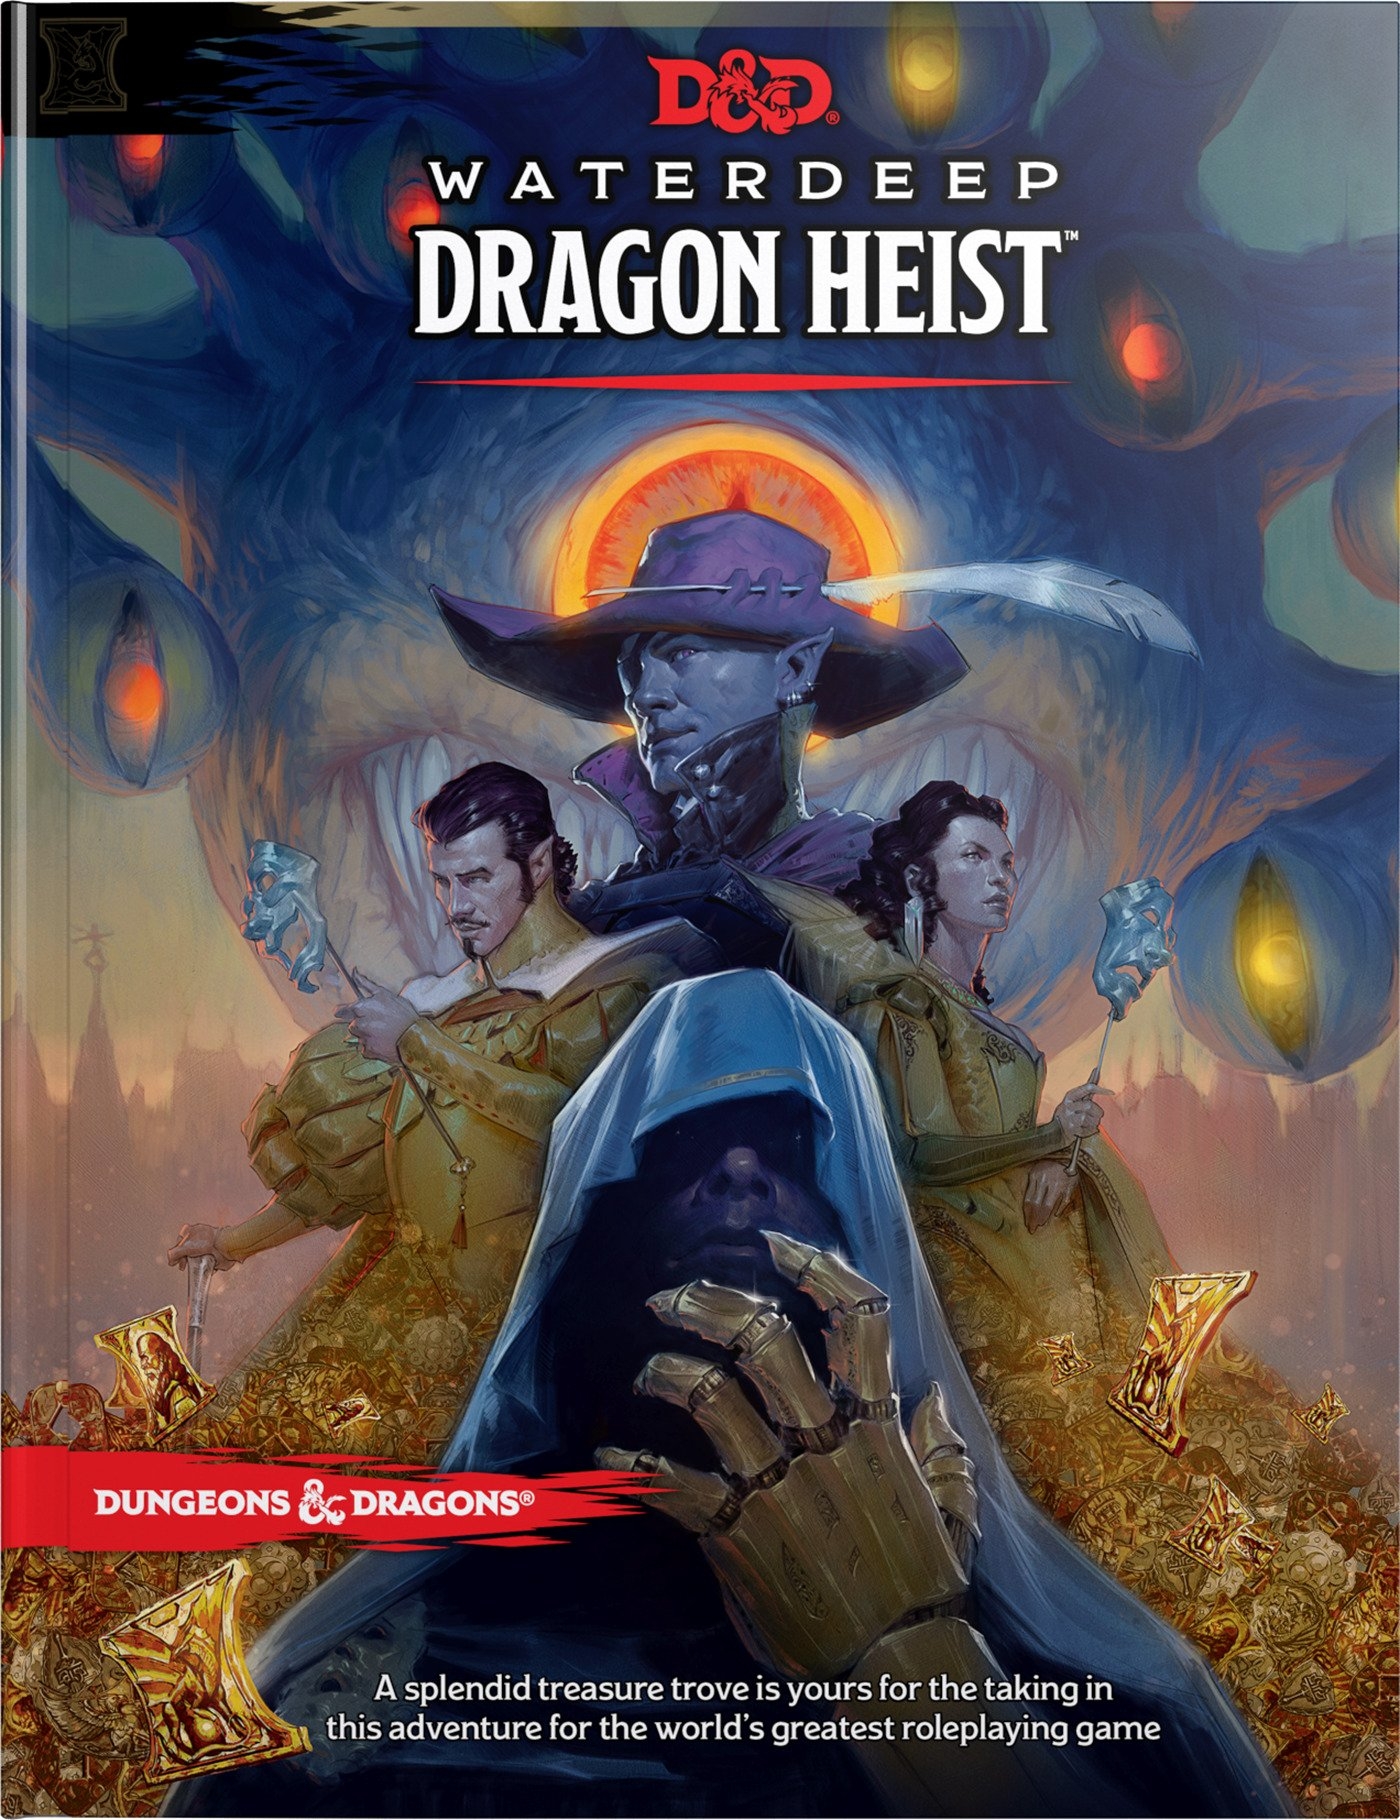
Welcome to Waterdeep! A fantastic treasure trove is yours for the taking in this adventure for the world's greatest roleplaying game. Famed explorer Volothamp Geddarm needs you to complete a simple quest. Thus begins a mad romp through the wards of Waterdeep as you uncover a villainous plot involving some of the city’s most influential figures. A grand urban caper awaits you. Pit your skill and bravado against villains the likes of which you’ve never faced before, and let the dragon hunt begin!

This AD&D scenario is designed to be a humorous departure from regular adventuring. The "heroes" are a fellowship of monsters on a quest to recover a magical item for an orc chieftain whom they have displeased. Having lost the map given to them, they must gain entry to a frontier outpost - probably by sneaking through sewers - and recover the map from a locked safe in the commanders quarters. Once they again have the map, the monsters must travel overland to an abandoned elven witches' temple on the shore of a mountain lake, where they will find the object of their quest. Pgs. 23-32
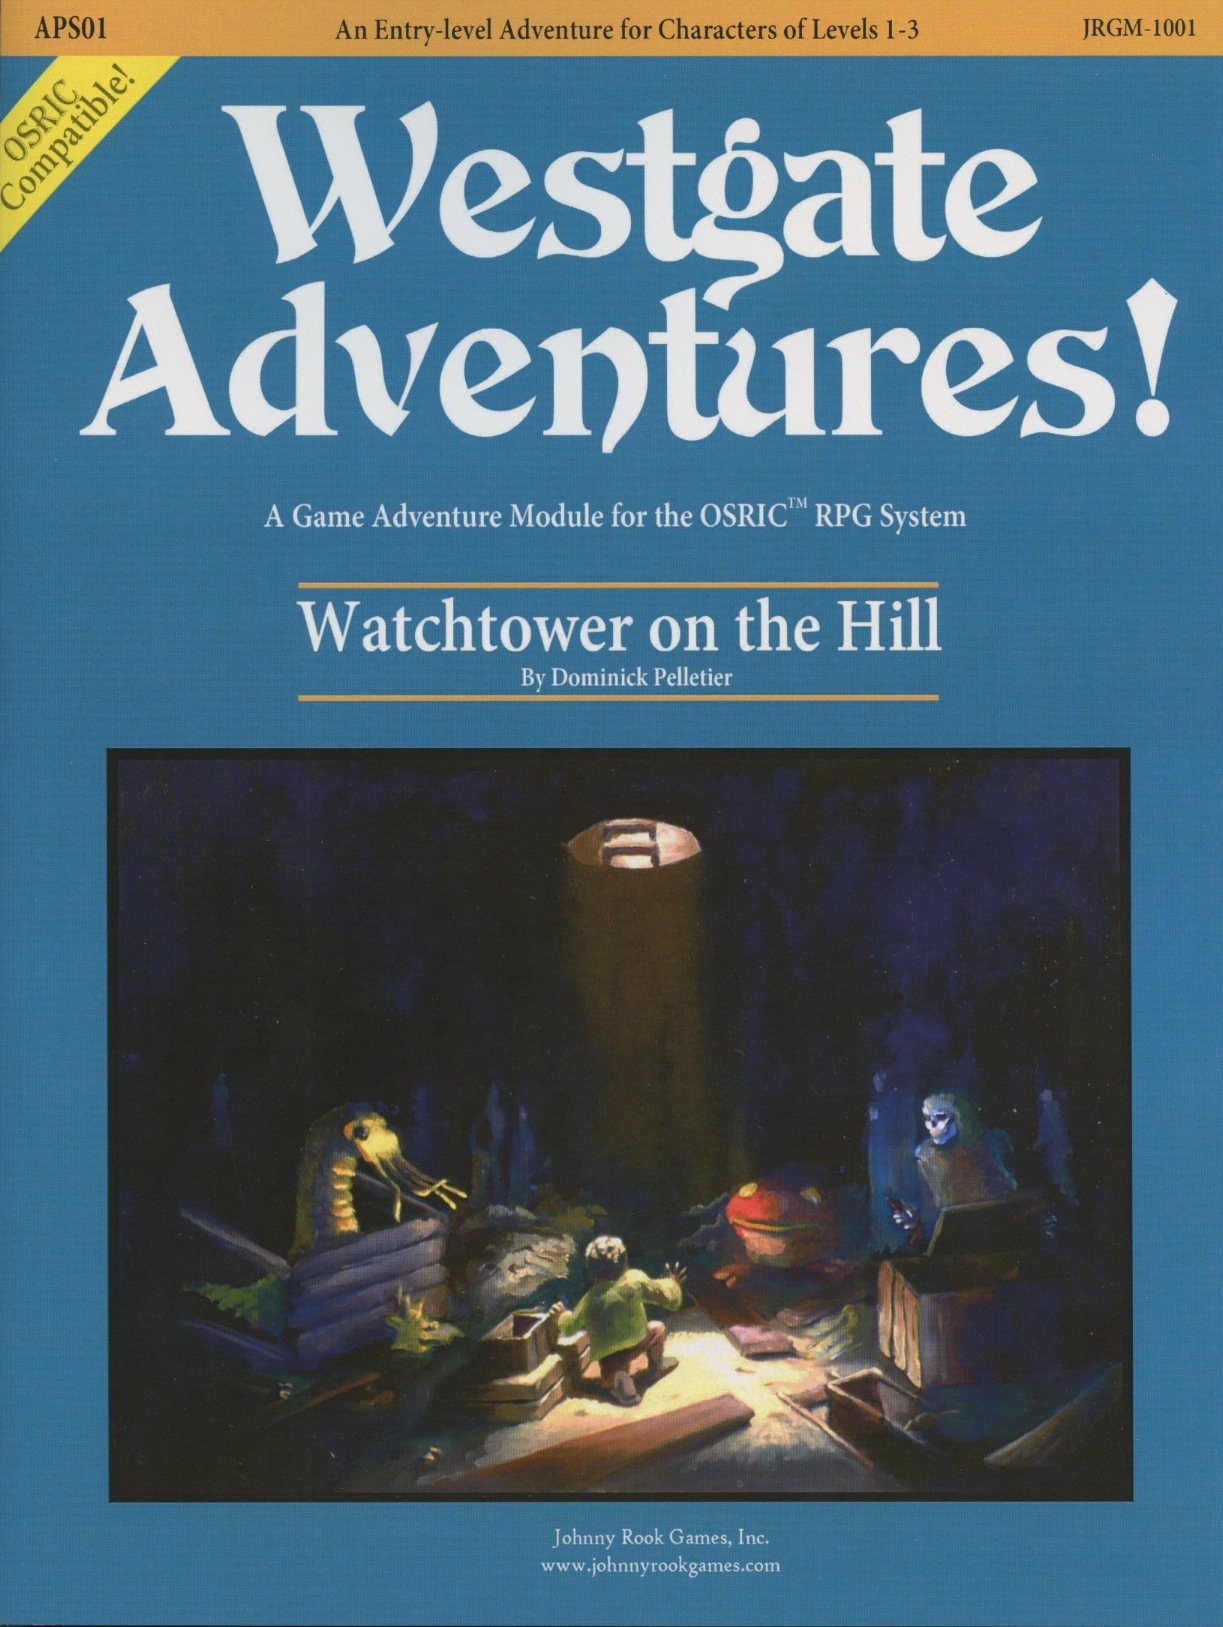
An Early-Level Adventure Game Module Suitable For The Osric Rpg System Or Any Other 1e Compatible System. A Shaft Has Been Discovered Below The Old Watchtower Outside Of Town. Worse Yet, A Boy Has Fallen Into It! Your Party Must Race Against Time To Save The Boy And Sift Through The Remains Of The Watchtower On The Hill!

The Cult & the Tribe Lizards and Goblins and Demons, Oh My! DUNGEON MODULE T1: THE CULT & THE TRIBE Goblins weilding magical blue fire are attacking the peaceful lizardfolk in the swamps near Timbertown. They've come to the humans for help, and Baron Ferrand needs heroes to head into the swamp and find out what's happening. As if that wasn't enough, demons are roaming the countryside, summoned by cultists of the Fraternity of Tharos, one of whom is secretly an important person in the town. Can you help the lizardfolk and keep the town safe?

Roots of Evil, the conclusion to the adventure begun in From the Shadows, delves into the horrific origins of Strahd von Zarovich, master vampire. This 96-page adventure module features Strahd in his final showdown with Azalin the lich, the two most powerful lords of evil in RAVENLOFT® realm. Player characters return to the popular Castle Ravenloft and discover never before known facts about the vampire's roots and origins. The outcome impacts the RAVENLOFT® realm for years to come! TSR 9413

Lord Dragle was set to auction off his most recent discovery, the Shroud of Olindor. The elven relic was certain to make Dragle a wealthy man. Such a pity he had to die. But the plot surrounding Dragle’s death is far more layered than it appears. It is up to the player character to discover the hidden motives and ultimately recover the Shroud of Olindor. Part 2 of the Olindor Trilogy.

Thief's Challenge is primarily a mystery, a story thick with finger-pointing and double-crosses. It takes a thief to catch a thief in this ONE-ON-ONE™ adventure for one player and the DUNGEON MASTER™. A low- to mid-level character will need sharp wits to bag the Gullwing Bandit! TSR 9420

A fiend lurks among the Black Blade goblins. A shapeshifting barghest fashioned by the General of Gehenna to exact revenge on all goblin-kind. It’s aim: to kill as many goblin leaders as possible… A masked goblin approaches the party asking for help. Two tribe leaders are dead. But a rival for chief has control of the crime scene. Will the party discover the barghest among the goblin ranks? Can they stop this imposter before it strikes again? Adventure Overview The adventure’s story is spread over 4 parts and takes approximately 4 hours to play. The adventure begins with a Call to Action scene. Part 1: Goblin Politics. Krill sends his emissaries to implore help from any strong intermediary. The party is asked to investigate the murder of Thrawn in Dringly’s lair. This is Story Objective A. Part 2: The Opposition. Gain entry into Dringly’s lair and investigate the murder of Thrawn. Gather enough evidence to find the killer. This is Story Objective B. Part 3: To The Lair! Now that the players have determined the barghest (Yeep) is to blame, they need to get to Krill’s lair quickly as he is in imminent danger. This is Story Objective C. Part 4: The Barghest.When the players arrive at the lair, they need to get to Krill and expose and defeat the barghest. This is Story Objective D. Adventure Background A barghest named Yeep has begun its onslaught of attacks against the Black Blade goblins. Starting with Chief Gnar, then his second in command Thrawn, the barghest is moving methodically down the line of command. Krill is now chief. But he has some problems: Two leaders of the Black Blades are dead. Who killed them and why? Is he next? Dringly, the next in command, has decided to take his lair for himself, declaring himself Chief of the Black Blades. Who are the Black Blades? The Black Blades are a tribe of goblins in the local area. They are known for dipping their blades in a dark black substance. It is rumored these blades are poisonous. The Black Blades regularly attack passersby on the road to rob them. The Black Blades have two lairs, one run by a chief who leads the whole tribe, and another overseen by a boss lieutenant. The Black Blades have a well-established pecking order which is how Krill stands to become chief. The next in line is Dringly, who has also declared himself chief and wants Krill dead. Krill suspects that there is something suspicious about two leaders being killed within a day of each other, but he has already burned Gnar’s body without any investigation. He needs to investigate the body of Thrawn, but it is in Dringly’s lair. Krill wishes to avoid direct confrontation with Dringly at the present for three reasons: 1) Any violence would only kill his own tribe members and further divide the lairs. 2) He believes there is still hope for negotiation to reunite the Black Blades. 3) He believes that if he were to attempt negotiations himself, Dringly would kill him. This adventure features: Two maps. Ready for your favorite Virtual Tabletop. A full color pdf. A black and white pdf. One custom monster, a reprint of barghest, all others available in the Monster Manual. Four hours of entertainment involving: roll playing a goblin bard, investigating a murder scene, tracking down a barghest before it strikes again. Applicable to any setting.
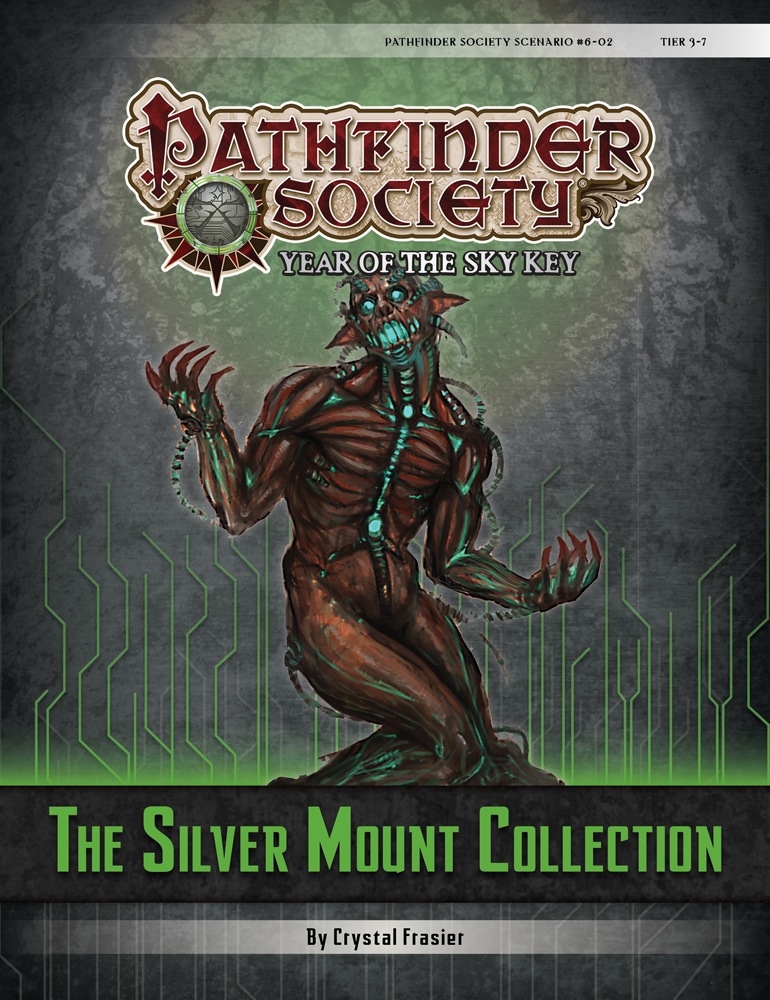
The esteemed Blakros family—famous for their museum in Absalom—receives a large shipment of artifacts from Numeria but fears that the ever-vigilant Technic League will attack to reclaim its "stolen" property. When they request the help of Pathfinders to help guard the collection, the PCs discover that the Technic League is the least of their worries. Content in “The Silver Mount Collection” contains faction missions for the Dark Archive.

Infinite broken night. Milky alien moons. Wavering demons of gold. Held in this jail of immortal threats are three perfect sisters... Maze of the Blue Medusa is a dungeon. Maze of the Blue Medusa is art. Maze of the Blue Medusa works with your favorite fantasy tabletop RPGs. And Maze of the Blue Medusa is the madly innovative game book from the award-winning Zak Sabbath of A Red & Pleasant Land and Patrick Stuart of Deep Carbon Observatory. Lethal gardens, soul-rending art galleries, infernal machines—Maze of the Blue Medusa reads like the poetic nightmare of civilizations rotted to time, and plays like a puzzle-box built from risk and weird spectacle. Art by Zak Sabbath; text by Patrick Stuart and Zak Sabbath. Publisher is Satyr Press.

Blinsky's Toyshop is our take on what happens to Blinsky and Piccolo during, or after the Curse of Strahd campaign. Blinsky, the toymaker in Vallaki with the cute monkey wearing a pink tutu, received a large inheritance from a long-time client. The client, Obtavius Swat, a retired adventurer and avid collector of toys, left his entire estate to Blinsky. The estate included coin, precious gems, art, and his collection of toys, some made by Blinsky and others he acquired during his travels. Blinsky used the fortune to pay a wizard to create a small island in the middle of Lake Zarovich, located just outside of Vallaki. He then paid masons and workers to build a fantastic new toyshop, which he designed to be an experience for both the young and old alike. Though the number of children in Barovia was increasing, mostly imparted to the devil Strahd’s downfall, Blinsky wanted to touch the inner child of the adults in the city. He wanted happiness. He wanted smiles. He named the castle Blinsky’s Toyshop of Marvels. One of the toys, a small silver tiara kept in a black satin-lined ivory jewelry box, was such a lovely piece. Blinsky couldn’t stand the thought of leaving it in the box. He already had enough gold and losing the small tiara wouldn’t be a large loss, so he decided to give it to his monkey – Piccolo (see Creatures of the Toyshop). He smiled at the thought of her running around in her pretty, shiny tiara. Sadly, as Barovian luck would have it, trapped inside the tiara is the sole of an evil gnome wizard named Aribetha Strangge. In his old age, Obtavious Swat forgot that he and his fellow adventurers used the tiara to imprison the gnome’s soul. Yesterday, when Blinsky placed the tiara on Piccolo’s head, silver tendrils cascaded from the tiara and into poor Piccolo’s skull, allowing Aribetha to control the monkey. Now, Aribetha has incapacitated Blinsky in the toyshop’s tower, brought many of the toys to life, and imprisoned or killed many of the workers and customers. The adventure includes costumes (which the character may wear), Strahd Hand Puppets, and a possessed Piccolo.

An adventure site for 3-5 characters of levels 3-4. Featuring two new monsters from the forthcoming guide, The Hag's Hexes! Seven fully developed encounter areas! It's National Gumdrop Day on February 15th, and the forthcoming release entitled THE HAG'S HEXES has a candy hag and its candy-coated minions, so we're releasing this exclusive, seven-encounter adventure site featuring two new monsters -- the enticing Gumdrop Ooze and the cursed Crul -- to celebrate!

A Brelish spy steals and defects with a powerful magic sword and the adventurer's have been hired to track down and recover the item. This adventure features a lengthy chase overland on horseback, on a train, and an airship. Along the way the adventurers will also have to deal with third parties seeking to recover the sword for themselves, such as Warforged agents of the Lord of Blades who have hired halfling mercenaries riding glidewings (pteranodons), and Emerald Claw raiders piloting an opposing airship. This adventure can be run stand-alone or as a sequel to The Forgotten Forge and Shadows of the Last War.
In the city of Waterdeep rests a tavern called the Yawning Portal, named after the gaping pit in its common room. At the bottom of this crumbling shaft is a labyrinthine dungeon shunned by all but the most daring adventurers. Known as Undermountain, this dungeon is the domain of the mad wizard Halaster Blackcloak. Long has the Mad Mage dwelt in these forlorn depths, seeding his lair with monsters, traps, and mysteries—to what end is a constant source of speculation and concern. This adventure picks up where Waterdeep: Dragon Heist leaves off, taking characters of 5th level or higher all the way to 20th level should they explore the entirety of Halaster’s home. Twenty-three levels of Undermountain are detailed herein, along with the subterranean refuge of Skullport. Treasures and secrets abound, but tread with care!
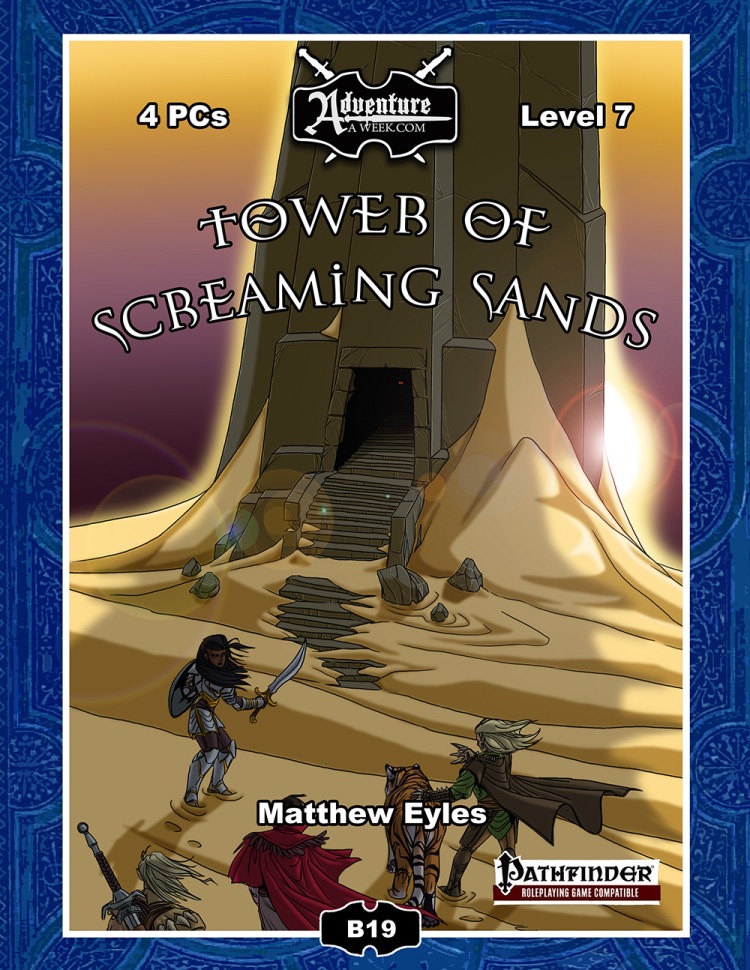
Deep within the blasted desert wastes a mysterious black tower has been sighted. The structure is not marked on any known map and has not been seen in this location by travellers in the region, yet there it stands. The adventurers set out to explore this ancient, isolated tower that appears ripe for the plundering. Within they face a gauntlet of insidious traps and supernatural horrors. The deeper the adventurers delve, the more secrets of the tower’s origins they uncover. The tower’s sinister creator does not rest easy in his arid grave – the adventurers must face him if they are to survive the Tower of Screaming Sands. Also included in “Tower of Screaming Sands”: Five deadly new traps: The Chamber of Ten Thousand Teeth, The God’s Grasp, Chamber of Flooding Sand, Hall of Arcing Blades and Descending Stone Block. A new monster – the scorpion swarm. Rules for whirlwinds, a new magical hazard GM tips for running overland travel.

Many Cannith creation forges were lost on the Day of Mourning, but a rogue artificer has uncovered one of those that pursued some of the most experimental and dangerous research during the Last War. But while seeking the forbidden knowledge in the forge, this explorer awakened a dark power that was more than she could handle, and that now threatens the region. Pgs. 4-34

Social conflict and negotiations, combat, random encounters, treasure, and dungeon delving — all the elements of a classic D&D adventure in 4 hours. Don’t be put off by the 80+ pages! Half of it is maps and character sheets! Goblin Trouble is a short adventure for four 1st level characters. Written for the Dungeon Masters who are running their very first game, it is full of useful advice and tips on how to prepare for the sessions and how to run the game, easing everyone into the game mechanics along the way More advanced Dungeon Masters and players have the option to use extra options for most encounters that make the game a bit more challenging and fun. In the adventure, the party visits a small village in the Green Forest. There they learn about nasty goblins that terrorize anyone who enters too far into the forest... Is the party up to the challenge? This adventure is also a perfect choice for Dungeon Masters who are looking to expand Lost Mines of Phandelver. With this purchase you’ll get: A beautifully-illustrated 4-hour adventure in PDF format Four unique color maps in both Player and DM versions. All the maps are available as separate files, so they’re easily imported into Roll20 or another VTT. A special Adventure Tracking Sheet that helps you prepare for the game and track your progress 12 ready-to-play, slightly simplified 1st-level characters with backstories so you and your players can immediately jump into the adventure! The players also get a short guide that helps them choose the perfect hero for them. Goblin trouble must be solved. Time to set off on a grand adventure! Would you like to know what the supplement looks like inside? Click the preview under the cover picture above!