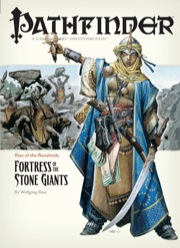
The Giants are on the March! The Rise of the Runelords Adventure Path continues! Driven to battle by a maniacal warlord, the once-peaceful stone giants of the Storval Plateau threaten to destroy the sleepy town of Sandpoint. Will fast action and quick wits be enough to save the defenseless community? Yet, even if the giants' initial raid can be repelled, only by striking at the heart of their titanic war machine—the black-towered fortress of Jorgenfist—can the menace be quelled. But who knows what mysterious bloodlust spurs the usually peaceful giants to war, or what mysteries lie beneath their ancient fortress?

There is no particular overarching story here, just a prospect gate keep dungeon you can drop into your own sandbox and run as you see fit. This adventure is formatted to both 1E & 5E gaming rules.
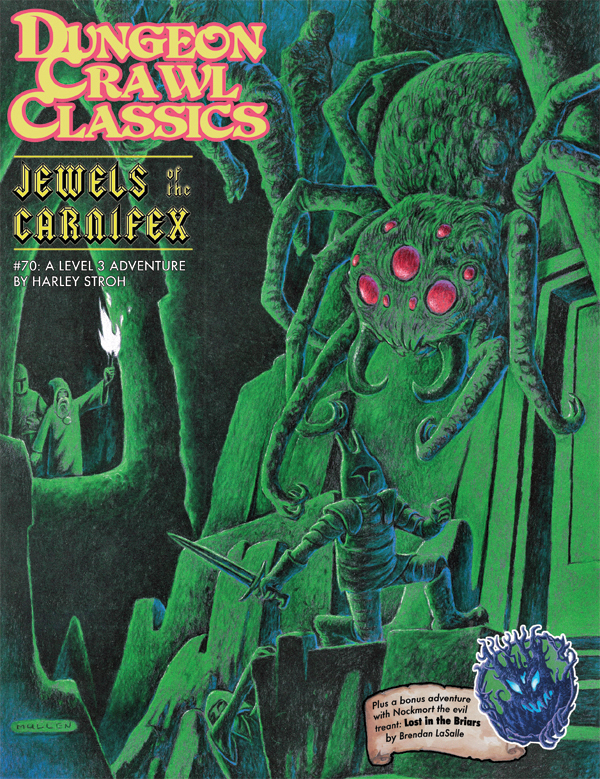
At the end of a forgotten back alley, in the weird and otherworldly marketplace of faiths known as the Bazaar of the Gods, stands the ruins of a forgotten chapel. Once the cult of the Carnifex was celebrated throughout the City of a Thousand Gates. But a band of holy warriors rose against the cult of executioners and torturers, casting down her signs and scattering her devotees to the winds. The fate of the cthonic goddess, and – more importantly – her fabled jewels remains a mystery…until this night. Set amid the sprawling decadence of Punjar, Jewels of the Carnifex offers low-level adventurers a chance to plumb the mysteries beneath the city’s soiled streets, explore forgotten crypts lavished with weird artifacts, and – for the quick and daring – claim the lost Jewels of the Carnifex!
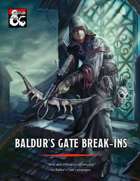
Baldur's Gate Break-Ins collects three heist and infiltration adventures for characters of levels 3-5, for use as a continuation of Burial in Baldur's Gate or as standalone modules. This collection fleshes out several locations around Baldur's Gate, providing adventures in every quarter of the city: Crash the world's worst dinner party in Eomane House! Contend with a criminal operation, a murderous raid, and a Feywild crossing in Jopalin's! Break up a blood-drenched cultist lair in Hamhocks Slaughterhouse! This book includes adventure hooks for running each location separately or as part of a campaign, a guide to running heist and infiltration adventures, three possible group patrons for the party, maps and rosters for each location, more than a dozen creature and NPC stat blocks, and a map pack with player and DM maps by Dyson Logos.

The party is caught between warring goblin and kobold gangs, occupying an abandoned dwarven mine. Will the heroes ally with one of the sides in this quarrel, try to make peace between old enemies, attempt to eliminate both sides, or achieve their goal stealthily and unnoticed? The choice is completely theirs! Small Party Adventure: Though the party size of 3–5 characters is considered optimal in D&D, there are times when you can only gather one or two players at most. This adventure is designed exactly for such occasions.

The local nobles of the region have sent word to your group requesting a meeting. Later that day you find the Black Raven roadside tavern and are met at the door. After being escorted to a back room which has seen its share of shady dealings you are propositioned with an offer to investigate and depose a set of local nobles who are brothers. Rumor has it that the Ironrod brothers, who have been overtaxing the citizens, have now employed humanoids as guards. This is forbidden and if true, the brothers need to be brought to justice immediately!
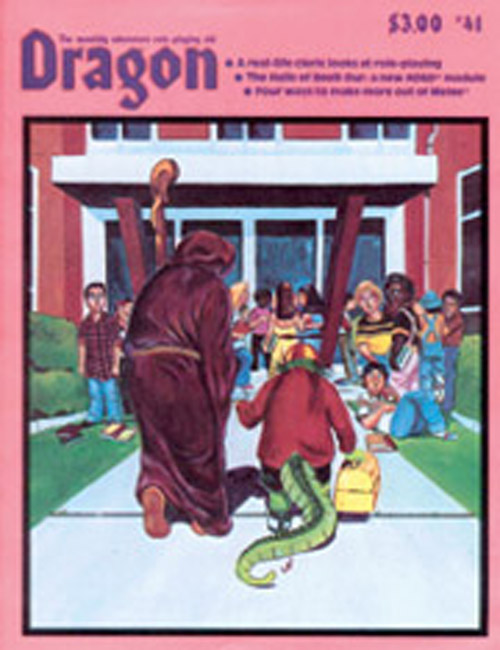
Built into what was thought to be an inactive volcano, the Halls of Beoll-Dur were created as an isolated training ground for dwarven clerics. However, upon their mountain shaking itself awake the dwarves discovered that they shared the mountain with something far more sinister. Few escaped to tell of the massacre as an horde of salamanders rising from the fiery depths, claiming the halls for their king. Now the temple sits desecrated, waiting for the day that hero's will purify it of the evils within. Pgs. M1-M16

Characters explore a dangerous, but sparsely populated temple in search of the Staff of the Dragon. They will encounter traps, environmental hazards, and a nest of lizardfolk. The characters are rewarded for a 'look but don't touch' approach to the temple's features. The real highlight, though, is the closing encounter. Once the staff of the dragon is retrieved, it can transform the characters into dragons for a set period of time. As they exit the temple, they are beset by an ancient dragon and the stage is set for an epic brawl as the characters take to the sky in dragon form. Can be completed as a one-shot.

The adventure starts with a prophetic dream and a plea for help. The heroes are asked to recover a cart-load of supplies stolen by a band of savage monsters that have recently moved into the area. A strange fire wiped out everything the villagers had, and the stolen cart contains seeds and tools with which they can replant their crop before the season passes. It is a mundane task for heroes, but it seems simple and the villagers offer a reasonable reward. Adventure II: Dark Harvest from Book Three: Book of Nightmares: https://www.adventurelookup.com/adventures/the-nightmare-lands Pgs. 9-30 TSR 1124
In what became known as the Age of Madness, an astral lich calling himself the Crimson Hand descended from the sea of stars, setting his fell gaze upon Gaea. Her red moon he made both his temple and his phylactery, and from there he sought to enslave those who would be ruled and devour those who would not. The Ancients of the four corners of Gaea united their knowledge against this threat, constructing a colossal golem, and inscribing the four POWER WORDS upon four scrolls. These scrolls they fed to the colossus, who ascended to the crimson moon in an instant. The sages of the realm watched as the flashes of battle signaled in the night sky, ending as the crimson moon itself split in half. The lich and the colossus were destroyed, and the Age of Madness was ended. Millennia have passed, and now a new threat rises from the netherworld. The four POWER WORDS have been forgotten, lost among the shattered remnants of the moon. The sages have once again united what remains of their power, this time to teleport a paltry handful of crusaders to retrieve the lost scrolls before the world is doomed.

It is said that when the largest and most ancient of purple worms know that the time of their death is near, they make their way through rock, earth, and water to the legendary Purple Worm Graveyard. Canny adventurers can return from this quest with a fortune in purple ivory. Foolish ones will die. The Purple Worm Graveyard is a short dungeon crawl adventure that’s best for levels 1-4. The adventure has 15 entries and is designed to provide a variety of challenges for a new adventuring party or one-shot game. The adventure is designed to provide interesting monsters, traps, tricks, and treasures.

Traveling the space lanes is risky and mysterious, and danger comes in many forms. The rescue of a tiny ship from pirate attackers leads to the discovery of a monumental, supernatural evil. Nothing is ever routine in space. Crystal Spheres takes player characters through four unique crystal spheres to battle a powerful force of darkness. Player Characters will find themselves fighting not just for their lives, but the fate of an entire solar system and its millions of inhabitants. TSR 9299

The Characters come across an ancient wizard's tower. The nearby keep has been reduced to rubble over the ages, but the tower is in perfect condition. It is surrounded by an impenetrable force field that cannot be breached - not even by the ghost of the long-dead wizard, who has been trapped within for centuries. Surely there must be great treasure within this magical abode. But how to get to it?
Under Mirt’s Folly is a 200+ location mega-dungeon from Dunromin University Press Mirt the Long Flame was a mighty wizard a hundred years ago. He fell in love, so the story goes, with a beautiful Goddess. Using all his powers he built his true-love a temple and a pleasure palace with the intention of making her his wife. On midsummer’s eve he bent all his powers to calling her down from Olympus, luring her to our world with the sweetest compliments and tempting gifts. After several hours of calling she appeared and he proposed to her, explaining the wonderful life together he had planned for them. She was not amused. The blasted remains of the temple and the derelict palace, all made from the finest white marble, are all that remains of Mirt’s crazy ambitions. The abandoned ruins are now known by all as Mirt’s Folly. Of course, the anger of a mighty Goddess leaves deep scars in the landscape. A hundred years later the hill, despite being in civilised lands, remains an abandoned place of strange magic. It is the haunt of ghosts and monsters and all who go there return changed, fearful and anxious, if they return at all. No one knows the nature of the Curse of Mirt’s Folly and few desire to find out. But Mirt was a great mage! His powerful magic items and his many books of spells and research have never been found, not to mention the vast wealth he had accumulated. All this amazing loot must still be up there, in the ruins of the palace, or perhaps below it, in the catacombs he is said to have dug there. But who is brave enough, or foolish enough, to go and look? WormThe best-selling Under Mirt’s Folly is just one product from Dunromin University Press. As with all our supplements, Under Mirt’s Folly represents astonishing value, offering excellent quality and quantity at rock-bottom prices: A challenging scenario for a party of 4-8 characters of levels 5-8; Written for OSRIC, OSR, 1st and 2nd Edition D&D and compatible with pretty much ANY FRPG you fancy; More than 100 pages with over 250 encounter locations over 8 levels; Four wandering monster tables; A rumour table to inform and confuse; New and inventive uses of all kinds of Monsters; Inspiring new magic items; Tricks, traps and treasure enough to make any player salivate. And all this for less than FOUR BUCKS for the pdf and not much more for the softback or hardback print copy on Print-on-Demand: that's amazing value for such a quality product! But the best quality playing aids at the best possible prices is what we do at DunrominDunromin University Press...
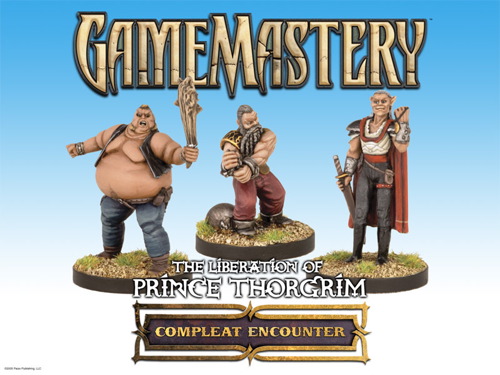
Prince Thorgrim rots in jail, wrongly accused by the corrupt sheriff and his cruel gaoler. Whispered rumors speak that those in his keep are tortured and sometimes murdered. Only the truly brave or fantastically foolish would try to storm the jail and free the prince. A Compleat Encounter, scalable to any level, featuring the shackled dwarven prince, the elven sheriff, and his foul gaoler. CURRENTLY UNAVAILABLE FROM THE PUBLISHER!

The Sea Witch is a short adventure for four 10th-level characters. The difficulty of the adventure can be adjusted by changing the level of main antagonist (Black Molly, the sea hag pirate) or by altering the number of her ogre servants. To tailor the encounter to groups of different levels, refer to table 4-1 in Chapter 4 of the DUNGEON MASTER’S GUIDE. The adventure is set off a lightly populated coastline known as Misty Bay, but adapts easily to any coastal region in existing campaigns. The sea hag known as Black Molly is a notorious pirate who has plagued the coastal cities for the better part of a decade. A successful Knowledge (local) check (DC 15) will reveal that Molly and her ogre crew have a filthy reputation as merciless killers who delight not only in plundering vessels for their riches, but also in destroying the ships themselves and sending all hands to the bottom of the sea. Now the villain and her followers have seized control of the Old Lighthouse of Misty Bay located off a lightly populated coastline. For generations the lighthouse beacon has protected the fishermen of this region, warning them of the dangerous rocks that lurk just below the level of the high tides. Recently, the hag has put out the beacon, darkening the lighthouse; misery and destruction are sure to follow as ships start to blunder into the rocks. Blackmail is apparently Black Molly’s aim in this venture: She conveyed a message to the nearest shore community, the fishing village of Poisson, demanding the princely sum of 50,000 gp. Until she receives this ransom, she intends to hold the lighthouse and its beacon hostage. The fate of the human keepers who tend the lighthouse is unknown to the seaside communities at this time, but they fear the worst. The Sea Witch is ostensibly a rescue mission: The PCs are pitted against the evil of Black Molly and the brawn of her savage ogre crew. It is the heroes’ task to retake the lighthouse and, if possible, free its captives from the clutches of their jailer. What neither the PCs nor the shore communities yet realize is that while she 1would be pleased to have the gold, Black Molly is in fact after bigger treasure. Molly has no intention of giving up the lighthouse — at least, not until she finds what her master sent her here for. Lying on the sea floor practically at the base of the rock on which the lighthouse sits is the wreck of the war galley Flying Cloud, which according to popular legend was captained by a cleric who wore around his neck an amulet of the planes. Black Molly wants this prize, but so far she hasn’t been able to find it. She’s scoured the wreck without finding any sign of the magic item. Now she’s trying to determine where to search next, for the item might well be somewhere near the wreck. If she can’t find it, she’ll start torturing her captives to find out if they have any useful knowledge about the amulet.

This adventure begins with the party chasing down a thief who has procured the crown of a local Marquis. The trail goes to a northern border community in the dead of winter and potentially ends at the ruins known as Valtarius's Retreat which secured the border in the “old days”. The ruins are currently home to a dreaded Dracolich who will most likely not care to be disturbed by a group of adventurers! Can the party recover the crown and remain alive?

The town of Innisfall lives in the shadow of dragons, but has managed to broker a peace with them through the years and avoided outright destruction. Now, a dragon has been murdered and the visiting party of adventurers is accused of perpetrating the deed. Can our heroes prove their innocence and restore the uneasy truce the town has lived under for generations?…
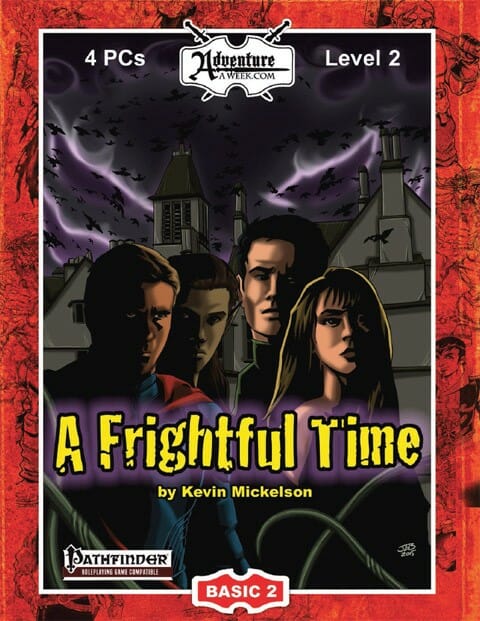
Fall into heroism! The young heroes from Exallizar Preparatory Academy are back for their second adventure – and this time, there’s no safety net. A nearby town has sent out a call for aid after a mad hermit has promised to spread untold misery during their yearly harvest celebration. Your group has been selected by the administration to answer that call, and act as representatives for the entire school! You dare not fail. “A Frightful Time” includes: The second leg of the adventure started in BASIC-1 The return of Ronus, Willow, Meeris, and Kale, fully upgraded to level 2 A new breed of monster that is sure to be an instant seasonal classic A grading system to let you know how well you’ve done at the end of the adventure Part of a series of seasonally thematic modules, BASIC-2 can be run to completion in 3-6 hours
:strip_icc()/pic530592.jpg)
This short adventure is for use with the AD&D Oriental Adventures rules. At a pinch, "Western" AD&D characters from the Players Handbook could be used, although you should be prepared to make changes to the module. The skills and abilities of AD&D Oriental Adventures (A) characters can have little relation to their level. This module is should be suitable for a group of four or five OA characters of levels 4-6, but the DM should feel free to change this to suit a particular group of players.