
Indomitable it stood for centuries, a symbol of order in a world of chaos. Bastion of the pass through the Kamph Mountains, the very stones of the Keep of Adlerweg were the stuff of legends. What evil power had strength enough to take it? How were its defenses swept aside? Fell creatures now attend the battlements that overlook the only pass between Berghof and the sea. This is not a pretty problem to be solved by the militia of the local villages. These and more may be needed to withstand the mayhem stirred up by the fall of the keep. Indeed, if the Keep is not retaken, and retaken soon, the Hold of the Sea Princes itself may not be secure. Now is the time for heroic action. Aided by the Sentinel, former protector of the legendary Guardians of Adlerweg, have you the courage and the determination to rid the keep of its sinister occupants? UK3: "The Gauntlet" (1984), by Graeme Morris, is the third UK-series adventure and the second half of the two-part Adlerweg series. It was run as the final round of the GamesFair 1983 AD&D Open (and won by a RuneQuest fan!). It was then published in 1984. TSR 9111

After the first expedition to locate an ancient tomb was prematurely ended by monsters, the Search and Locate Treasure Consortium is doubling down. Camp established, they are looking for adventurers to make their dreams come true, but the leader of the Consortium is hiding something. Will the characters be able to avoid the Man Slayer tribe that destroyed the first expedition, help Larazmu settle his internal struggles, and locate the tomb that they have been searching for without getting into Moor Trouble?

The trees part before you, revealing the crumbling walls of the ruined keep. Only hours ago, you set off after the marauding orc band responsible for the destruction of the temple of Freya and the theft of its sacred crucible. But something else waits for you within the ruined walls. Something darker and far more sinister. Something that has hidden from the light for ages.
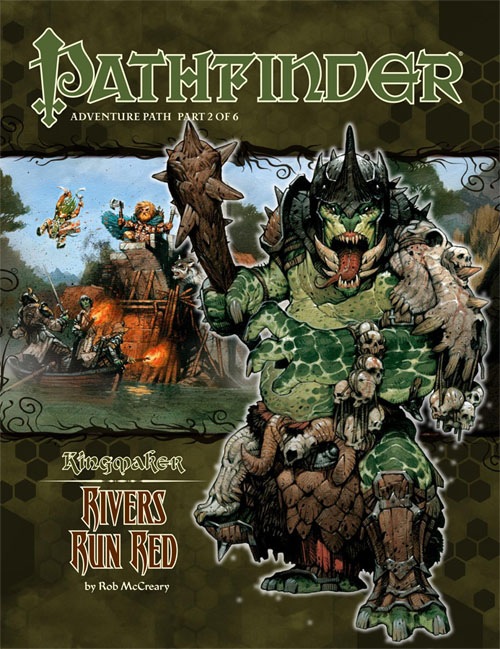
A Pathfinder Roleplaying Game adventure for 4th-level characters, this volume of Pathfinder Adventure Path is part 2 of 6 of the Kingmaker Adventure Path, in which the heroes win and defend a small kingdom from threats foreign and domestic. PCs should advance to 7th level by the end of this adventure. The PCs receive a shipment of funds, materials, and colonists from Brevoy and beyond, along with instructions to build a town and attract more pioneers to their nascent country. Having already explored the northern reaches of their new domain, the PCs must now venture into the wilds to bring the rule of law to the south. Wicked fey inhabiting a ruined keep, undead haunting an ancient barrow mound, and others must be defeated to make the region ever more secure. Along the way, the PCs might also have the opportunity to ally themselves with some of the region’s local residents, including the dryad druid Tiressia, her satyr consort Falchos, and a band of gnome explorers called the Narthropple Expedition. In addition, the PCs will be called upon to mediate between two rival factions in the area: a group of independent loggers and the angry fey sorceress who opposes them. As they explore, evidence that a group of trolls is stirring up trouble in the region becomes apparent. Meanwhile, the PCs must deal with events within their burgeoning kingdom—a rabble rouser seeks to oust the PCs from their positions of power, the secretive cult of the hag goddess Gyronna has infiltrated the town, and a werewolf is preying on the townsfolk. All of these events build to the adventure’s twin climaxes: the sudden assault on their capital city by an owlbear of unprecedented size and the expansion of Hargulka’s trolls into the north. Faced with danger on multiple fronts, the PCs must draw upon all of their resources and bravery to become the undisputed rulers of the Greenbelt.

A One-on-One Competition Module for Thieves Level 8 Your peaceful evening has been interrupted by an unusual request. As a thief, your skills are unmatched, but can you rise to the challenge of thieving for a powerful and frightening wizard? Do you have a choice? The Gem and the Staff is a special One-on-One competition module designed for one player and on Dungeon Master. The Module contains two separate scenarios, so you can switch roles with the other player after the first adventure. Scoring sheets and encounter summaries are provided for each adventure to make running competitions quick and simple. Character figures and a map book are also provided to help visualize the adventures. The player's maps are designed so you can see the rooms as they would appear. Complete DM's Maps are included. TSR 9050

A great evil force descended on the town of Phlan years ago. The townspeople were all either killed or driven away, and Phlan became (literally) a ghost town. Fifty years later, the survivors are ready to reclaim their town. But they need a band of strong and brave adventurers to lead the fight-they need you. Ruins of Adventure is a set of connected short adventures written by James Ward, David "Zeb" Cook, Steve Winter and Mike Breault-four names familiar to all AD&D game fans. It uses the same setting, locations and characters as the classic computer game Pool of Radiance by Strategic Simulations, Inc. In fact, many of the scenarios here in Ruins of Adventure will provide important clues to the successful completion of Pool of Radiance. TSR 9238

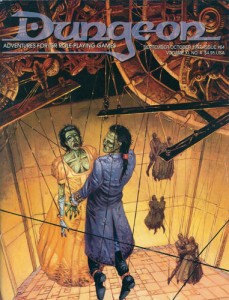
Important: The adventure is 1e but it has monster conversion notes for D&D 4th edition The town of Highport, once a human community overlooking Wooly Bay from its perch on the northern coast of the Pomarj, fell prey to hordes of humanoids swarming out of the jungle-covered hills surrounding the settlement. Though the orcs, goblins, kobolds, ogres, and gnolls razed much of the place in their ferocious rampages, the smoldering ruins they left behind soon became a new kind of community, a place of trade between the humanoid “locals” and the unsavory human traders who have no compunction about doing business with them. Slaves are a commodity in ready supply in Highport’s market, since many pirates raid up and down the coast of the bay, putting fishing villages to the torch and filling their holds with captured refugees. Slavery has become a thriving business in the town, and rumors abound of a cartel of Slave Lords who run things from behind the scenes, filling their coffers in secret from the buying and selling of human chattel. The trade has become so prolific that the good folk to the north have grown tired of these depredations and decided to fight back. Forces of righteousness and honor have recently descended upon Highport, some openly and others in secret, in various attempts to destroy the machinations of the Slave Lords and abolish the abominable enterprise that has taken far too many loved ones from home and hearth. One such doughty servant of goodness is Mikaro Valasteen, a cleric of Trithereon. Mikaro slipped unnoticed past the crumbling walls of Highport with a single mission: to rescue and transport as many slaves to their freedom as possible. Mikaro and a handful of faithful assistants located a number of escaped slaves—as well as rescued a few more not sufficiently restrained and guarded—and shepherded them through the gates and beyond the reach of their humanoid tormentors, returning them to their lands and homes. This covert freedom brigade enjoyed remarkable success early on, since the servants of the Slave Lords were often lax in their vigilance and sloppy in their efforts to prevent loss of the “merchandise.” After one too many shipments never made its destination, the humanoids stepped up their security and the normal channels of escape from Highport closed to Mikaro and his team. He cannot risk exposure by smuggling the freed slaves through the gates as merchandise any longer, since shipments of goods are now regularly stopped and checked. No longer able to free the slaves in that manner, Mikaro began hiding his charges in an abandoned villa in a particularly rundown part of the town. Although they are safe for the moment, their numbers have grown unmanageable, and the priest fears it is only a matter of time before someone slips up and brings slavers to their doorstep. Ever more desperate to find a new means of escape from Highport, Mikaro has started work on a plan that is both daring and dangerous. He intends to use a series of old sewers coupled with natural caverns running beneath the town as an escape route to the sea beyond the walls. But he needs someone to clear out the creatures and pitfalls he knows lie within. Pgs. 2-27

The town of Byr is in need of heroes. Residents of the town of Byr have been kidnapped. Some think it was marauding Hobgoblins, but a grizzled and crippled veteran who helped to drive the Chagmat (monstrous spider-people) back many years ago believes that the Chagmat are back. Their forgotten temple is believed to be up on Little Boy Mountain. He argues that the mountain is where answers, and the missing townsfolk, can be found. Pgs. 33-48
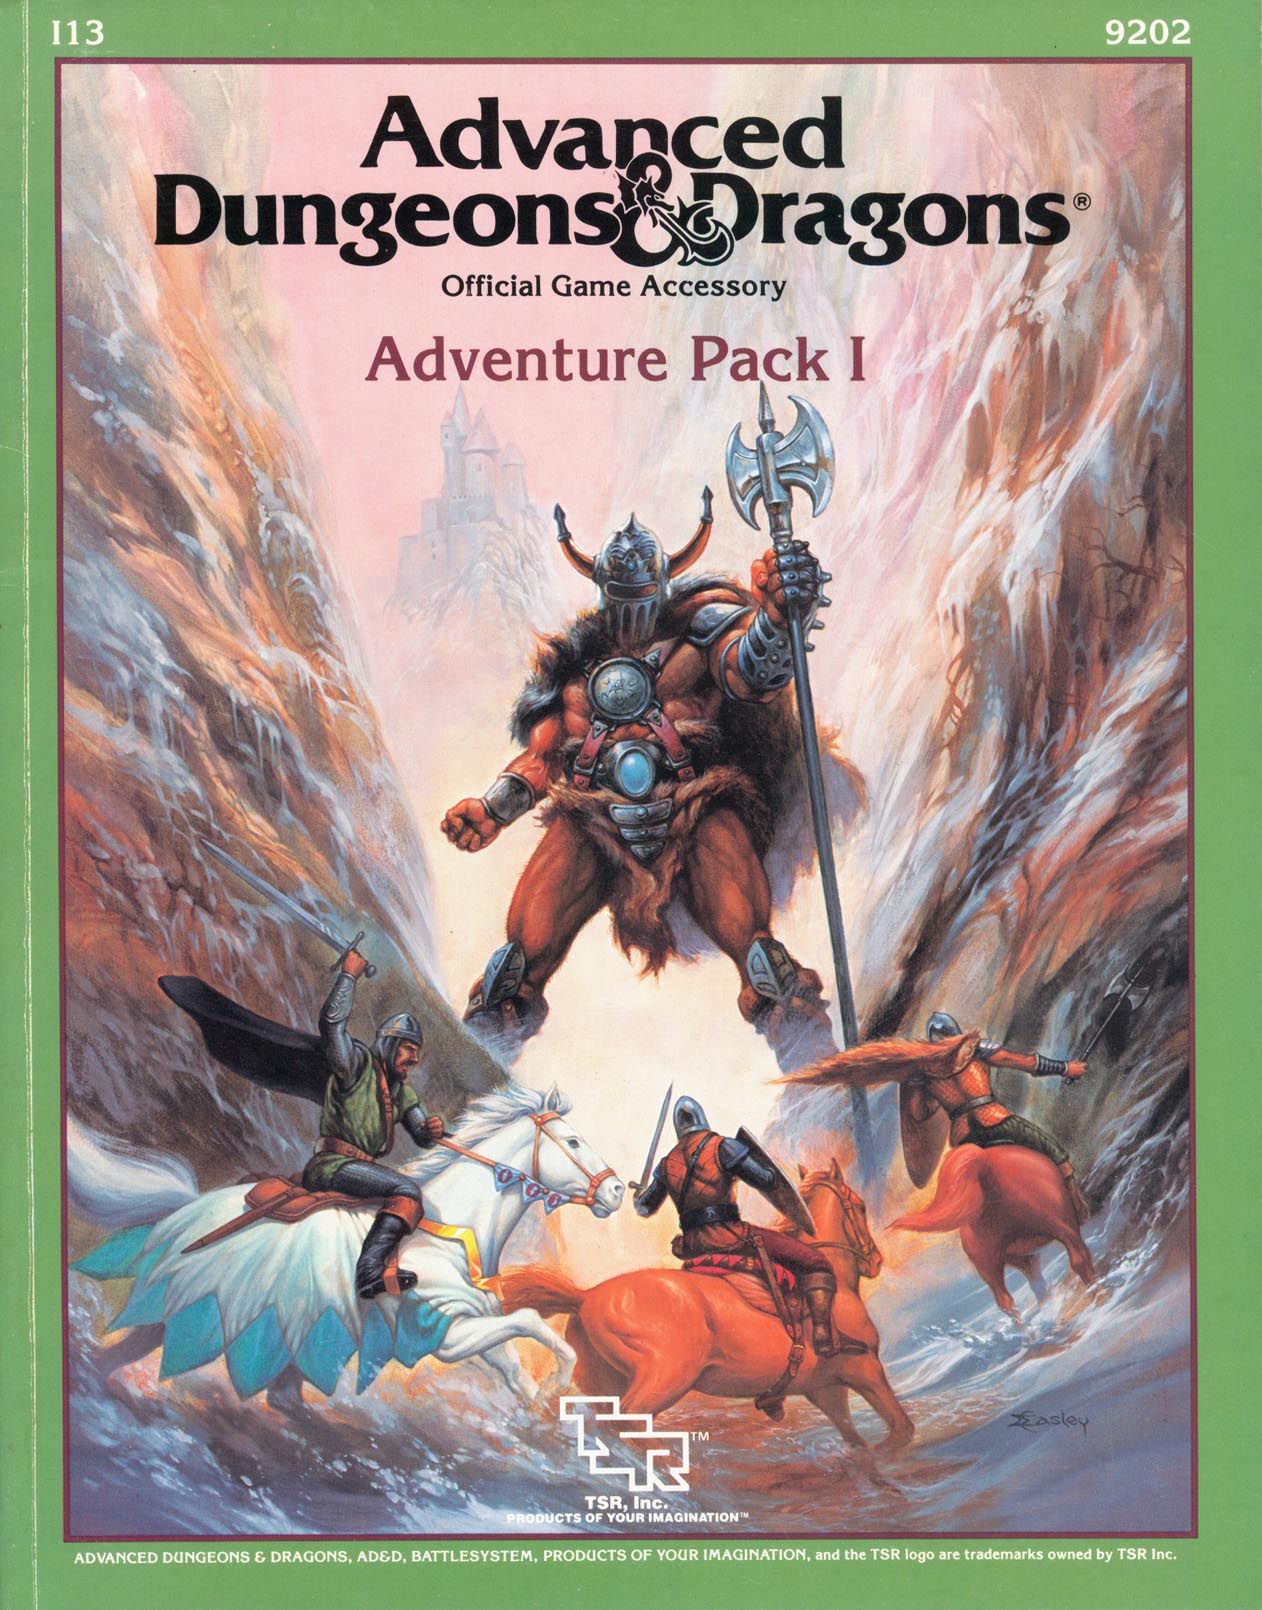
A little friendly competition can be fun now and then - unless, of course, the competition isn't friendly at all. Included in I13 Adventure Pack I - https://www.adventurelookup.com/adventures/i13-adventure-pack-i TSR 9202
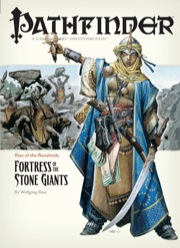
The Giants are on the March! The Rise of the Runelords Adventure Path continues! Driven to battle by a maniacal warlord, the once-peaceful stone giants of the Storval Plateau threaten to destroy the sleepy town of Sandpoint. Will fast action and quick wits be enough to save the defenseless community? Yet, even if the giants' initial raid can be repelled, only by striking at the heart of their titanic war machine—the black-towered fortress of Jorgenfist—can the menace be quelled. But who knows what mysterious bloodlust spurs the usually peaceful giants to war, or what mysteries lie beneath their ancient fortress?

A combination wilderness/dungeon module, first searching for then exploring the temple of Tharizdun. Tharizdun is long gone from the place, so there's no epic final fight. Rather, a mysterious Black Cyst waits at the bottom of the dungeon. The encounter with it is almost scripted, having no hazard except for careless/foolish players. Contains several monsters from the Fiend Folio. Loosely follows Lost Caverns of Tsojcanth. TSR 9065
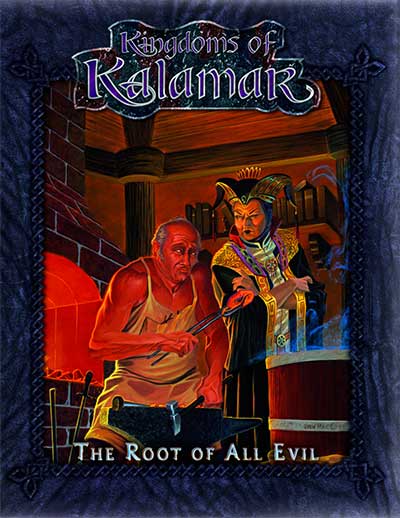
This was supposed to be a simple job! In the small town of Haanex on Reanaaria Bay, the wizard Veoden assembles the PCs to do a simple job: find the remnants of a meteor said to be made of the rare substance mithral. First they must find a map that local rumor tells is guarded by the spirits of the dead. Upon recovering the map and locating the crater, they uncover a plot to create a powerful magical item called the Coin of Power. This artifact is a tool for wickedness and the players soon find themselves on a quest to learn the means to destroy this evil item and its insidious master before she destroys them. Complicating matters is the fact that the one man who can help them was lost during an expedition to the Reelio Jungle months ago and is yet to return. Will the PCs be able to survive the rigors of the jungle and solve the riddle of the tribesmen who live there? The lives of innocents might depend on it! This accessory provides characters with an elaborate storyline and a chance for many varied types of adventure. You will take your PCs from the quiet village of Haanex in northern Reanaaria Bay to the Vry Naasu Headlands, the City-State of Zoa and finally the forlorn Reelio Jungle. The Root of All Evil fantasy game supplement is set in the popular Kingdoms of Kalamar Dungeons & Dragons campaign setting but can be adapated for use in any setting! This module can be used by itself, or as Part One of the Coin of Power trilogy (see also Forging Darkness and Coin’s End).
The Lantanese have lost their magical ship, but they aren't willing to fight for it. That's where your heroes come in. She's expecting you. A party of adventures has gone missing, and the inhabitants of a local town have been acting strangely it is up to the party to figure out what is going on and stop whatever force are at work on the towns people Pgs. 8-23 & 47

A young boy befriends an extra-planar construct that has mysteriously appeared at his family’s farm. Once the boy finds out that other creatures are coming to take it back home, he comes up with a plan to get help from the party to save his new friend. Fairly in depth adventure with plenty of RP opportunity.

Lots of stronghold assaults and shipboard travel/encounters in this one. This adventure's deep political basis might be seen as an introduction for the domain-focused adventures of Companion-level play. This adventure is for use with the Dungeons & Dragons Basic, Expert, and Companion Rules, and includes the intrigue of engaging with nobility's lands and agendas. Intro: All is not well in the kingdom of Vestland. Not only is the king dead and the holy Sonora Crown missing, but the heir to the kingdom was lost at birth and no on knows where to find him. As if this wasn't bad enough, the forces of the Ethengar Khanate, never on the best of terms with Vestland, are now massing on the borders, hoping to take advantage of Vestland's plight. To complete the rosy picture, traitors from within also threaten to speed the downfall of the High Kingdom. Sounds like a job for you. You must find the long-lost heir to the kingdom and recover the Sonora Crown, the mystical device without which a king cannot be crowned. Standing in your way are traitors and spies from within and invaders from without the kingdom of Vestland. Time is running out! Can you save Vestland from disaster? TSR 9218

The dreadful jails below the appalling City of Skulls, Iuz's nightmare capital, contain many wretched and desperate captives. Among them is Earl Holmer, Knight Commander of the Shield Lands. A brave spy in Dorakaa has shown the ay to find and free Holmer—is your party up to the job of freeing him? King Belvor IV of Furyondy believes so. In the way stand fearsome priests and mages of the Lord of Pain; ogres, giants, fiends, and worse hinder the struggle to defeat the traps and guardians of Iuz. Plucking Holmer from his grasp will bring great renown, knighthood, and treasure—for those who survive. None has ever escaped Iuz's jails. Who will you be the first to use stealth or storm to breach them? TSR 9405

Adventurers explore a frozen, buried dungeon of long-dead giants that turns out to be the birthplace of Runemagic itself, and may still hold the secrets of that forgotten art. However, even if they do survive the extreme cold and unfriendly denizens, they will still have to face the massive Runeforged Guardian before they can escape. This adventure includes lots of interesting multi-part traps and alternate encounters that can be added or swapped out in several places.

Baron Ketterall’s lands are beset by a plague of marauding goblins! Goblins you say? Pah! Who's afraid of few poxy goblins? But two experienced parties have already gone looking for the goblin lair – never to be heard of again. Poxy goblins you say? Be afraid, be very afraid… The scenario is designed to be an extremely challenging adventure that might undermine a player’s bravado in dealing with low-level monsters such as goblins. Unusual traps, tricks and special weapons are used by the inhabitants of the dungeon to cause the party as much trouble as possible. Published by Dunromin University Press.
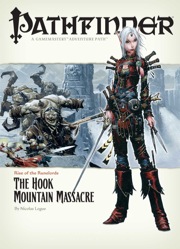
Them Ogres Ain't Right... The Rise of the Runelords Adventure Path continues! The notorious Hook Mountain ogres, known for their violent and savage ways, have slaughtered the soldiers of Fort Rannick. The few surviving rangers need heroes to help them retake this key fortification before the ogres use it as a staging ground for further assaults on the region. Yet why have the ogres chosen now to launch this sudden attack? What sinister force grows in the surrounding wilderness, and what ties to the mysterious Sihedron Rune do the ogres of Hook Mountain hide? Are the rumors of an army of giants massing for war true?

The characters are summoned by the Norse gods to track down two dwarves, one of whom has made a weapon for the giants to use against the gods. The mission takes the characters to Jotunheim, on the plane of Gladsheim, to take the god-slaying weapon from the giants.