
The ruined manor now known as Kobold Hall was once a minor lord's proud holding, a walled keep overlooking the old King's Road. That was years ago, and the lord's name and glories he earned are long forgotten. Today, the place is called Kobold Hall after the malicious humanoids that invest the place. Pgs. 210-219

The party has been tasked with bringing the head of the fire giant king Snurre Ironbelly to the storm giant lord Krombaalt, as well as capturing the dwarven traitor Obmi Ironwhisper. Delving into Snurre's stronghold, they will also discover the sinister drow manipulating the giants. The adventure is part of the "Against the Giants" series originally by Gary Gygax, hence the writing credit.

The Alchemist's Eyrie takes the characters into a fortified dwarven tower, where they are sent to recover some needed items. When they arrive, they discover the tower has been captured recently by a warband of renegade lycanthrope dwarves. Between the interlopers and the remaining traps set by the late owner, the characters may find themselves in deep, despite the lack of head clearance.

Ten years ago, zombies arose from the foamy sea to take vengeance against the inhabitants of Firewatch Island. Now, they have risen again, just in time to welcome the visiting player characters! Will your heroes manage to escape the island with their lives (to say nothing of their delicious brains)? The PCs have to clear the island and learn its secrets, then defend it against an undead attack and then travel to the bottom of the ocean to seal Dagon's Maw! Pgs. 19-50 Updated to 5th Edition in Ghosts of Saltmarsh

A Brelish spy steals and defects with a powerful magic sword and the adventurer's have been hired to track down and recover the item. This adventure features a lengthy chase overland on horseback, on a train, and an airship. Along the way the adventurers will also have to deal with third parties seeking to recover the sword for themselves, such as Warforged agents of the Lord of Blades who have hired halfling mercenaries riding glidewings (pteranodons), and Emerald Claw raiders piloting an opposing airship. This adventure can be run stand-alone or as a sequel to The Forgotten Forge and Shadows of the Last War.
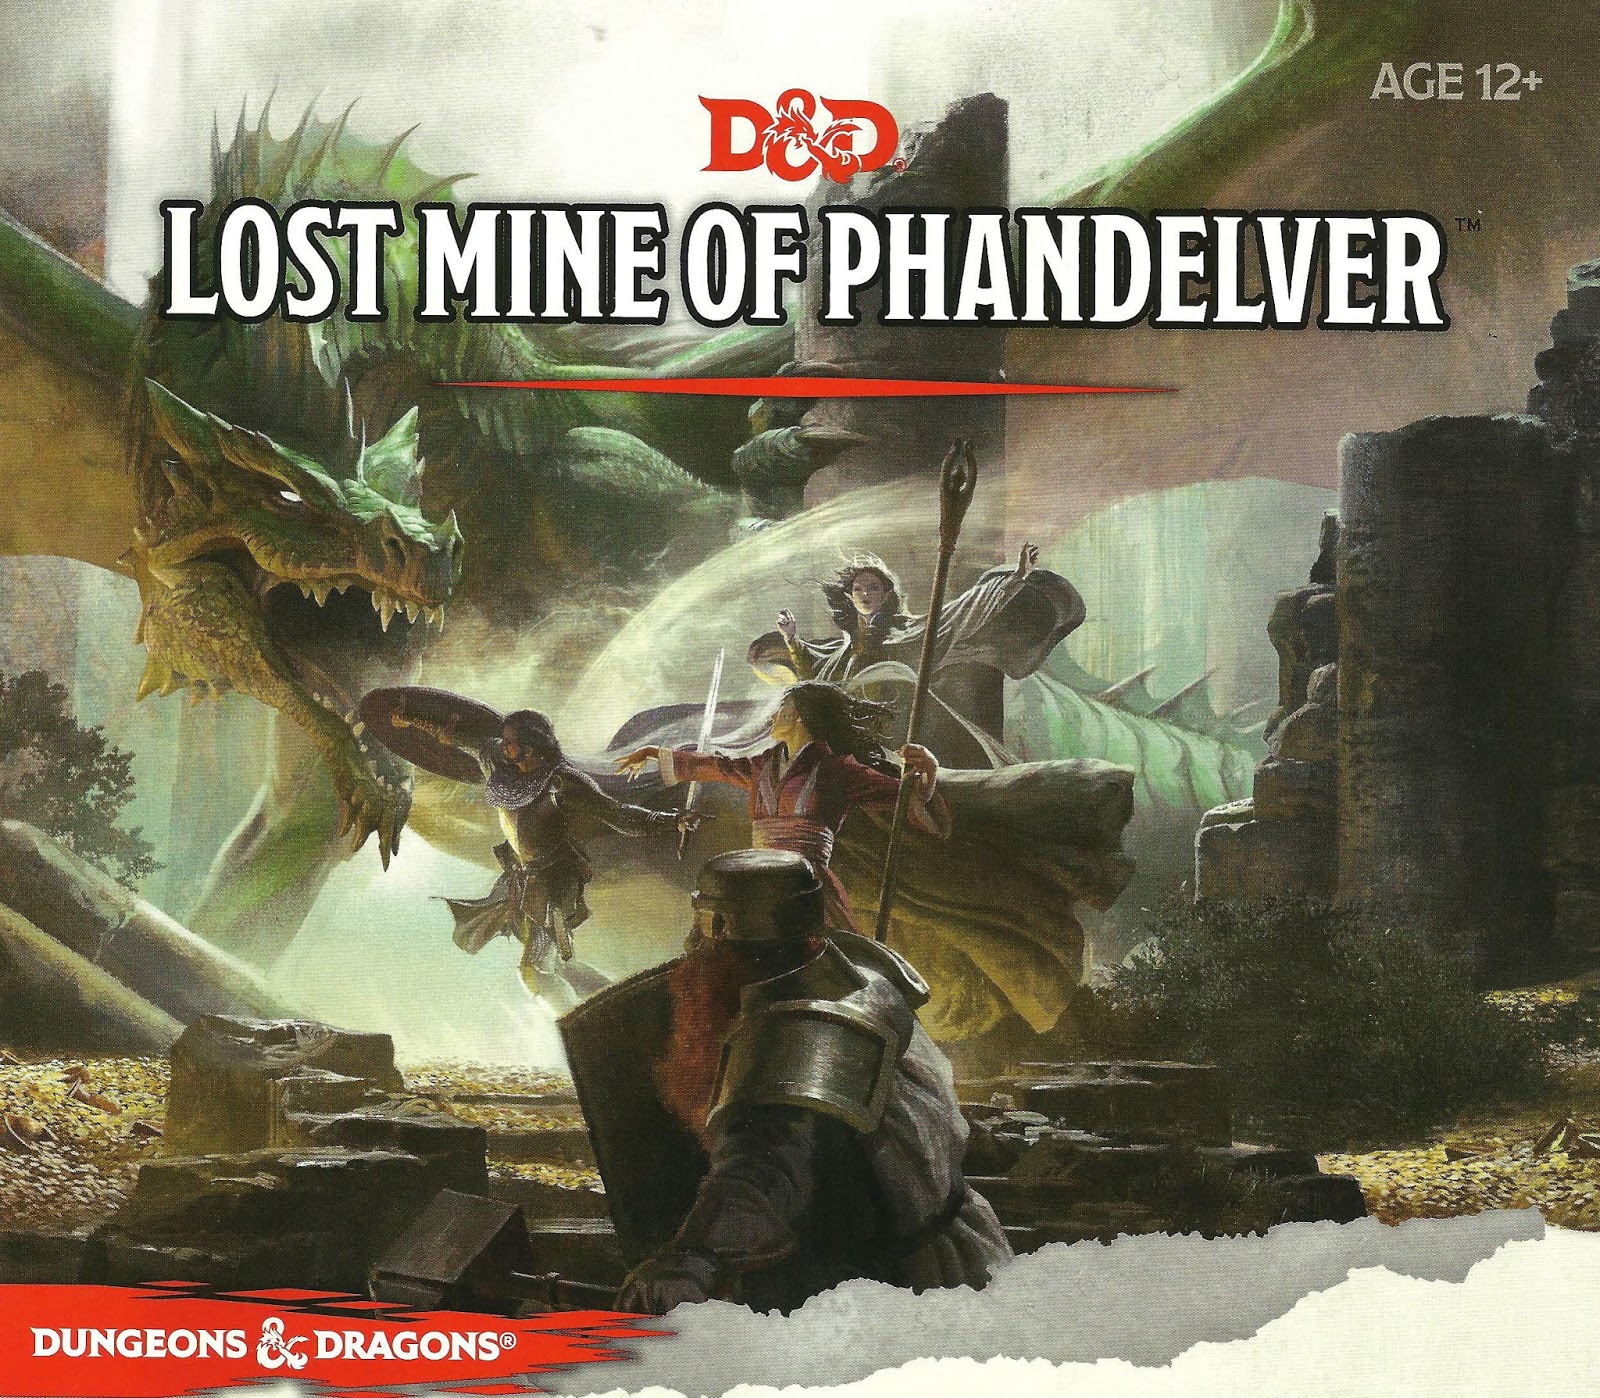
"More than five hundred years ago, clans of dwarves and gnomes made an agreement known as the Phandelver’s Pact, by which they would share a rich mine in a wondrous cavern known as Wave Echo Cave. In addition to its mineral wealth, the mine contained great magical power. Human spellcasters allied themselves with the dwarves and gnomes to channel and bind that energy into a great forge (called the Forge of Spells), where magic items could be crafted. Times were good, and the nearby human town of Phandalin (pronounced fan-duh-lin) prospered as well. But then disaster struck when orcs swept through the North and laid waste to all in their path. A powerful force of orcs reinforced by evil mercenary wizards attacked wave echo cave to seize its riches and magic treasures. Human wizards fought alongside their dwarf and gnome allies to defend the Forge of Spells, and the ensuing spell battle destroyed much of the cavern. Few survived the cave-ins and tremors, and the location of Wave Echo Cave was lost. For centuries, rumours of buried riches have attracted treasure seekers and opportunists to the area around Phandalin, but no one has ever succeeded in locating the lost mine. In recent years, people have resettled the area. Phandalin is now a rough-and-tumble frontier town. More important, the Rockseeker brothers - a trio of dwarves - have discovered the entrance to Wave Echo Cave, and they intend to reopen the mines. Unfortunately for the Rockseekers, they are not the only ones interested in Wave Echo Cave. A mysterious villain known as the Black Spider controls a network of bandit gangs and goblin tribes in the area, and his agents have followed the Rockseekers to their prize. Now the Black Spider wants Wave Echo Cave for himself, and he is taking steps to make sure no one else knows where it is." Extra Info from AL.com users: by @marcellarius. "There are a variety of locations in this adventure: the town of Phandalin, a gang hideout, a ruined keep in the forest, a destroyed village, and Wave Echo Cave (a dungeon crawl). The adventure is written in a sandbox style and relies on the players to choose their path. Phandalin offers several side-quests which could serve as hooks for continuing adventures. The premade characters have ties in their backgrounds to NPCs and locations. If you're not using these you'll need to consider other ways to introduce key NPCs."

Part One of the Umbral Aristocracy Trilogy. Rumors abound of a map that leads to a treasure of unimaginable value. When chance drops the map into your hands, you have the chance to become wealthy beyond your wildest dreams. But you’re not the only ones with that dream. The chase is on. A Two-Hour Adventure for Tier 1 Characters.

This adventure takes place in the Moonsea of Faerûn. The players have been brought to Melvaunt to search for the missing scions of the city's great families. To the north, in Thar the orc tribes converge on the ruined fortress of Xul-Jarak, flocking to the banner of a charismatic warlord. There, he intends to sacrifice the scions of the great families of Melvaunt in a bloodritual to Gruumsh. The players will escape Melvaunt, search along the wilderness of Thar for the Fortress of Xul-Jarak, and then explore the dungeons of the ruined fortress and hopefully rescue the scions before they are sacrificed. There also is a Web Enhancement by Eric Cagle on the archives of wizards of the coast's website designed to scale the adventure to level 8. For example, it replaces the Owlbear with a Tyrannosaurus. This is an easy to scale adventure with much of the player's difficulty coming from intelligently avoiding problems, choosing how to approach each floor in the most tactical way, and quickly adjusting when something goes wrong. The adventure has sidebars including common orc battle cries (In Orc!), ready to use orc names, weather and random encounter table in Thar, a description of what happens if the party fails or partially succeeds, and suggested minis for each of the encounters. There is even an extended description of the bloodspear ritual, an event the party is not meant to encounter in a normal run. The appendix is detailed for all the humanoid characters including the scions and their equipment, the named villains, and variety of unnamed orcs the party will encounter. The fortress also offers an opportunity to introduce the players to the Underdark and the Zhentil Keep. There is a passage to the Underdark the players can accidentally explore, and return to later. Emissaries from Zhentil Keep have come to watch the ritual and have their own motivations. These npcs provide an opportunity for exposition and role playing at a point which otherwise might be combat heavy, acting as a valve for the first floor - helping or hurting the party with subtle magic should the difficulty be off.

The Fortress of the Yuan-Ti describes a fortress build into a cliff side and the slave village outside. The Adventure is the third of three but can easily be played by its self. The adventure revolves around the players discovering the dark plot to revive the demon Sertrous and then stopping it. The adventure describes the outside, inside, and hanging towers of the fortress. The adventure concludes in a forth extra-planer tower were you fight the boss. It also includes 4 sidetracks from portals that explain how they get the materials for the ritual. Final part of the Barrow of the Forgotten King series.
Called by the Elder Elemental Eye to serve, four corrupt prophets have risen from the depths of anonymity to claim mighty weapons with direct links to the power of the elemental princes. Each of these prophets has assembled a cadre of cultists and creatures to serve them in the construction of four elemental temples of lethal design. It is up to adventurers from heroic factions such as the Emerald Enclave and the Order of the Gauntlet to discover where the true power of each prophet lay, and dismantle it before it comes boiling up to obliterate the Realms.

The time is now! The yuan-ti lay on the cusp of freeing an ancient being of insurmountable evil from its imprisonment. Should this happen, Faerûn may very well be plunged into an age of darkness. You have traveled the width and breadth of the peninsula and learned what you could about your foe. Now it’s time to put that knowledge to use. Steel yourself, adventurer, there are important deeds to be done! A Four-Hour Adventure for 11th-16th Level Characters
The town of Phandalin, nestled in the foothills to the east of the Sword Mountains, continues to grow since being rebuilt after the devastation wrought by rampaging orc hordes. It recently survived violent gang activity, drow machinations, and even the attention of a green dragon. But can it withstand a new threat, bizarre but no less perilous: the fame brought by a visit from none other than loremaster Volothamp Geddarm? Six 1-Hour Mini-Adventures for 1st-4th Level Characters. Also included in the purchase of this adventure is a version specially converted for use with the Fantasy Grounds virtual tabletop software. The converted adventure features all the text and maps from the original adventure along with cross-linking of monsters, spells, magic items, equipment, and story elements, plus the powerful rules automation for which Fantasy Grounds is known.

“Siege of Bordrin’s Watch” is the sequel to “Rescue at Rivenroar,” continuing the unfolding story of the Scales of War campaign. This adventure features exploration, roleplaying opportunities, and combats in dynamic environments. In this adventure, a new threat looms to the west: A vast horde of orcs and their despicable kin emerge from the barren lands bent on plunder and conquest. While the Elsir Vale and other lands mobilize their meager forces to respond to the danger, a call has gone out to those heroes of the Vale to join forces and help to push back this new evil before it’s too late. Pgs. 4-55

An escaped duergar slave stumbles into the village of Elventree. With her she brings a malady that grips the small settlement in a bout of madness that seems unshakable. Can you find the source of the madness and save yourself and the village’s inhabitants? A four-hour adventure for 5th-10th level characters.

HSING bears foul news: SEER has been captured. While exploring the ruins of Ulcaster in search of knowledge pertaining to runes (or perhaps even how to create them), they were separated and now the pseudodragon fears the worst. Without SEER's guidance, the efforts of the assembled factions in these recent events may all be for naught.
The Approaching Swarm is a short adventure for four 9th-level characters. The party can consist of any mix of classes, but it should include at least one character that is good in wilderness settings, such as a druid, ranger, or barbarian, and at least one cleric. This scenario should prove a reasonable challenge for characters from 8th to 10th level. The adventure takes place in a swampland that is near a small settlement. The characters attempted to cross back through the swamp to their base of operations. Along the way, they may have got stuck in mud and probably were attacked by a variety of flying insects. They arrive just a bit too late to stop a massacre that occurred back at Crivdall -- the fort is ruined and it appears that almost everyone is dead or missing. Aleretheral, an insane half-orc druid who has mastery of vermin and insects, attacked Crivdall with his insects. He has often infiltrated Crivdall by posing as a harmless elf hermit who lives in the wood. In reality, he wants the settlers destroyed and out of his swamp.

Charasta, an old white dragon, has not reached her age by being unprepared or foolish she is, in fact, much more intelligent than most white dragons. Her lair is well defended and tailor-made to help her defend herself. Not only that, but when she leaves the caves to hunt she’s taken to using change self to disguise her exact color. This wily white makes a perfect foe for your party adventuring in the North of Faerûn or in almost any other campaign setting as well.

The Sea Witch is a short adventure for four 10th-level characters. The difficulty of the adventure can be adjusted by changing the level of main antagonist (Black Molly, the sea hag pirate) or by altering the number of her ogre servants. To tailor the encounter to groups of different levels, refer to table 4-1 in Chapter 4 of the DUNGEON MASTER’S GUIDE. The adventure is set off a lightly populated coastline known as Misty Bay, but adapts easily to any coastal region in existing campaigns. The sea hag known as Black Molly is a notorious pirate who has plagued the coastal cities for the better part of a decade. A successful Knowledge (local) check (DC 15) will reveal that Molly and her ogre crew have a filthy reputation as merciless killers who delight not only in plundering vessels for their riches, but also in destroying the ships themselves and sending all hands to the bottom of the sea. Now the villain and her followers have seized control of the Old Lighthouse of Misty Bay located off a lightly populated coastline. For generations the lighthouse beacon has protected the fishermen of this region, warning them of the dangerous rocks that lurk just below the level of the high tides. Recently, the hag has put out the beacon, darkening the lighthouse; misery and destruction are sure to follow as ships start to blunder into the rocks. Blackmail is apparently Black Molly’s aim in this venture: She conveyed a message to the nearest shore community, the fishing village of Poisson, demanding the princely sum of 50,000 gp. Until she receives this ransom, she intends to hold the lighthouse and its beacon hostage. The fate of the human keepers who tend the lighthouse is unknown to the seaside communities at this time, but they fear the worst. The Sea Witch is ostensibly a rescue mission: The PCs are pitted against the evil of Black Molly and the brawn of her savage ogre crew. It is the heroes’ task to retake the lighthouse and, if possible, free its captives from the clutches of their jailer. What neither the PCs nor the shore communities yet realize is that while she 1would be pleased to have the gold, Black Molly is in fact after bigger treasure. Molly has no intention of giving up the lighthouse — at least, not until she finds what her master sent her here for. Lying on the sea floor practically at the base of the rock on which the lighthouse sits is the wreck of the war galley Flying Cloud, which according to popular legend was captained by a cleric who wore around his neck an amulet of the planes. Black Molly wants this prize, but so far she hasn’t been able to find it. She’s scoured the wreck without finding any sign of the magic item. Now she’s trying to determine where to search next, for the item might well be somewhere near the wreck. If she can’t find it, she’ll start torturing her captives to find out if they have any useful knowledge about the amulet.
Into the Forsaken Temple's Crypt is a short adventure for four 10th-level characters. The adventure takes place in a buried temple crypt, which has been sealed for centuries. Dungeon Masters can adjust it for higher-level characters by widening the dead magic areas and increasing the number and power of constructs and undead that inhabit the complex. The PCs had just entered the Forsaken Temple's crypt in the last episode. Now they can begin to penetrate deeper into the crypt, discovering more of its hidden dangers.

Orcus, the Demon Prince of Undeath, craves the power of the Raven Queen and mastery of death's domain. The key to his ascension and the secret to his destruction lies buried in the heart of the Abyss. As heroes chase Orcus into the abyssal depths, evil opposed them at every turn, and each victory brings them closer to their final fate. Concluded the epic series of adventures and the entire story line begun in Keep on the Shadowfell.