
With your last adventure complete you head to town to sell off loot, replenish supplies and to find a bard to tell your tale to so that your fame can increase. As the group goes their separate ways you are wandering through the muddy streets when a shriek is heard. You see a man stab a merchant and attempt to escape. With no time to gather your associates you call for your mount (or borrow one) and give pursuit! This scenario is a true solo meaning you don’t need a DM to officiate. It is suggested that a 4th level be used for “meatier” characters or 5th for those of less daunting stats.

Rules for playing any level with any number of players without a GM! Have you and your friends ever sat around the gaming table wanting an exciting, perilous dungeon adventure but no one wanted to be the Gamemaster? Do you find yourself with little time to read through lengthy adventure modules and memorize them? Do you want to get down into the dungeon as quickly as possible and start killing monsters and finding treasure? Then look no farther than “Unbound Adventures”! In this rules supplement, players will find the information necessary for using the 3.5 d20 core rules without a Gamemaster. Players will form a party, find an adventure, travel to the dungeon (which will be generated for them as they explore) and fight the monsters they find there.

There is no particular overarching story here, just a prospect gate keep dungeon you can drop into your own sandbox and run as you see fit. This adventure is formatted to both 1E & 5E gaming rules.
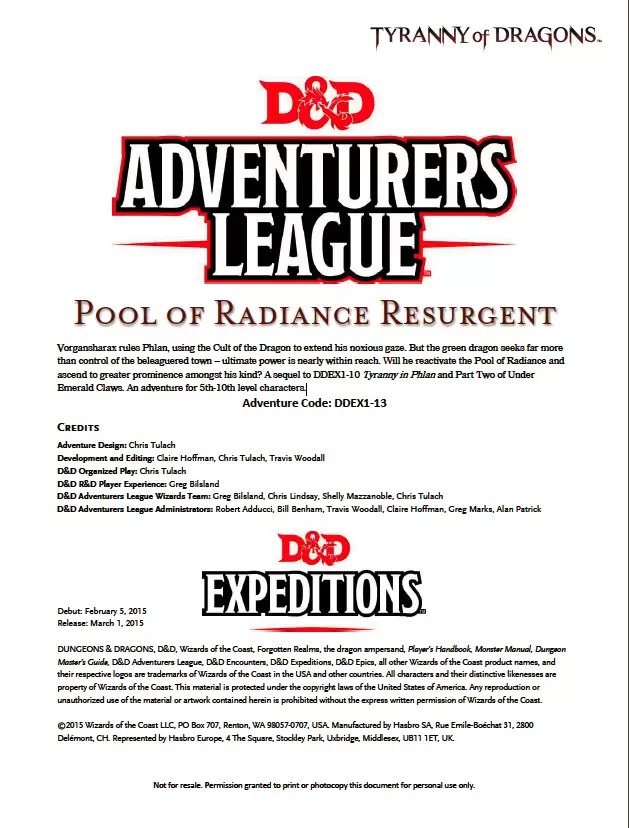
Vorgansharax rules Phlan, using the Cult of the Dragon to extend his noxious gaze. But the green dragon seeks far more than control of the beleaguered town – ultimate power is nearly within reach. Will he reactivate the Pool of Radiance and ascend to greater prominence amongst his kind? A sequel to DDEX1-10 Tyranny in Phlan and Part Two of Under Emerald Claws.

This module is designed for characters who have made their way through the Freeport Trilogy. Characters new to Freeport are at disadvantadge, however. Hell in Freeport sends the characters to the depths of the Hell as pawns of an undead duke. When they discover the truth of their mission, they must race against a sinister clock to save two cities. Act 1 kicks off with a battle against a cornugon on the Freeport docks. The characters are hailed as heroes for defeating the fiend, and are summoned to the Church of Retribution to help in the battle against Hell. Tee old inquisitor who greets them is actually Jalie Squarefoot, an infernal lich who took this form to search for the perfect cat's-paw. Squarefoot wants to take the souls of Freetown, a city in Hell, but must first get around a contract poin: he can't take the city until the Tyre tower clock-now stopped- strikes midnight. He sends the party to Devil's Cry, an inslan off the coast of Freeport, with instructions to close the gate to Hell hidden inside. In truth, he knows the party will be transported straight to the Third Circle when they try. Inside Devil's Cry the party finds the remnants of a great battle fought between an invading devil's army and the Church of Retribution, and battle their way past undead defenders until they reach the gate itself and unwittingly trigger it. Act 2 begins with the party in a twin of the complex they explored in Devil's Cry, but now they are deep in Hell. They fight their way back to the cavern entrance, only to find that they are not on the Prime anymore. When they voyage back their homeport, they instead find themselves in Freetown, a city of scaped slaves in a dark mirror image of Freeport. Once in Freetown, they make the acquaintance of the city's mayor Wycleffe-a servant of Jalie Squarefoot-who persuades them to go on a quest to Tyre to restart the tower clock. They travel the Styx to the Eight Circle and fight their way into a long-buried vity, and then into the tower clock itself. They restart the clock and begin the trip home, but are waylaid by devils and taken prisioner. Act 3 opens with the party naked and in chains in the infernal prison called the Forge. They learn that Jalie Squarefoot and Wycleffe have duped them, and that the supposed rebels of Freetown are actually its protectors. The characters must escape or win their freedom in the gladiator pits before the tower clock they restarted destroys both Freetown and their home city of Freeport. They battle back to Freetown, taking revenge on their captors in the process, and capture the city from Wycleffe with the help of the rebels. Finally it falls to the PCs to enter the tower clock and stop it and Jalie Squarefoot before the fiend's plan can come to fruition. After being tricked and manipulated throughout the adventure, the party finally has their revenge on the duke and his minions.

Can you survive the Madhouse of Tasha’s Kiss? Or will you go mad trying? A small village, empty of villagers except for one boy found sitting and weeping next to a jester’s pageant wagon. The boy explains that the villagers, including his family, followed a jester into the wagon and never came out. A portal to a pocket dimension is found inside the wagon, leading to a brass door with the word Madhouse etched into it. What lays beyond the door? What madness could the adventurers face? Can they save the villagers, or will they go mad trying? Published by Jeff Stevens Games

On a storm-blasted mountain lives an immortal Arch-Mage with a foul temper. The townspeople want you to talk to him - and kill him, if necessary. Is immortality worth the price? An Arch-Mage's magics threaten a small village. To protect it the party must brave a dangerous climb, and survive the Mage's warded lair. Pgs. 43-64
Centuries ago, the four deities worshipped by mortals – Kishar, Kotaresh, Lyth, and Asar-Segt – threatened to drown the world in a flood of saltwater to punish the living for their impiety. The oracles and witches of the realm struck a desperate bargain with the gods, however, and convinced them to spare the world. In exchange, the mortal kingdoms were bound to demonstrate their faith once every generation by sending their most courageous and adroit warriors to the Crucible, a ziggurat in the lowest valley of the land. Every quarter-century, on the first full moon of summer, an eclipse darkens the night and the sealed ziggurat opens. Many traps, tricks, and guardians lie within the Crucible to test those who enter. Few who heed the challenge of the gods survive – most find only quick death. If the races of the world are deserving of the gods’ affection, their champions will overcome the trials of the Crucible and light the Divine Brazier hidden in its uppermost chamber. If they are not, the flickering candle of civilization will be snuffed. Little of value will have been lost. Published by Defy Danger and Save Versus Death

The Ogre Magi of Jade Rock is a companion adventure made to go along with the events unfolding in Folio#16 (WS3 Distant Turtle City). It contains information needed to run a side adventure that will help characters in their journey through Distant Turtle City. The Ogre Magi of Jade Rock has invited the characters to reclaim his lost home, and in turn collect valuable supplies of magical healing that will certainly be required to win the day against the corrupted forces of the city's fortified castle. This adventure is formatted to both 1E & 5E gaming rules.

The Cost of Beauty Deep in the snake infested jungle of Serpent Isle stands an ancient temple. Rumour has it that something still lurks in that place. Something evil from a lost era of devils and darkness. Now fishing boats are going missing off the island’s coast and dark shapes can be seen moving through the undergrowth. Could something have remained on that cursed isle?
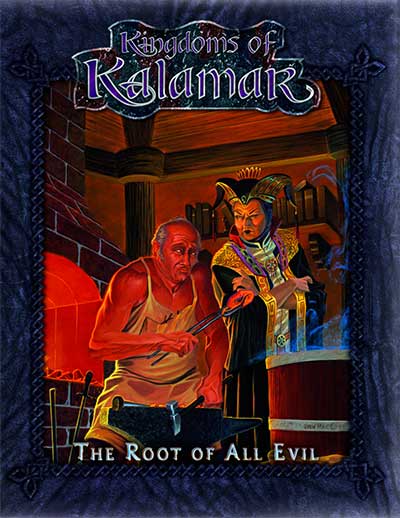
This was supposed to be a simple job! In the small town of Haanex on Reanaaria Bay, the wizard Veoden assembles the PCs to do a simple job: find the remnants of a meteor said to be made of the rare substance mithral. First they must find a map that local rumor tells is guarded by the spirits of the dead. Upon recovering the map and locating the crater, they uncover a plot to create a powerful magical item called the Coin of Power. This artifact is a tool for wickedness and the players soon find themselves on a quest to learn the means to destroy this evil item and its insidious master before she destroys them. Complicating matters is the fact that the one man who can help them was lost during an expedition to the Reelio Jungle months ago and is yet to return. Will the PCs be able to survive the rigors of the jungle and solve the riddle of the tribesmen who live there? The lives of innocents might depend on it! This accessory provides characters with an elaborate storyline and a chance for many varied types of adventure. You will take your PCs from the quiet village of Haanex in northern Reanaaria Bay to the Vry Naasu Headlands, the City-State of Zoa and finally the forlorn Reelio Jungle. The Root of All Evil fantasy game supplement is set in the popular Kingdoms of Kalamar Dungeons & Dragons campaign setting but can be adapated for use in any setting! This module can be used by itself, or as Part One of the Coin of Power trilogy (see also Forging Darkness and Coin’s End).

A mad venture across the fourth dimension. Hang onto your helmets in this topsy-turvy dungeon. Be warned that the accidental release of the Evil One (described in the text) could have devestating consequences on the PCs, not to mention the local campaign area. The DM should consider alternatives to the Evil One's powers if they are felt to be too destructive. Pgs. 32-39

Six kids, one heartfelt promise, one incredible exploration! First Adventure is a one-shot designed to be played as a long session of five hours or two shorter sessions of 2-3 hours each. Keep the promise you made to your dying mother! Journey to an old, abandoned mine to search for the gateway to the Faerie Realm! Fail in your first attempt and regroup again 17 years later to keep the promise! A well balanced mix of exploration, role-playing, riddles, combat and tons of fun suited for both DnD newbies and veterans!

Candon Shaman of the Dark Fen is a companion adventure made to go along with the events unfolding prior to the core adventure found in Folio #14 (WS1 Isle of Jade). It contains the information needed to run a side adventure that will help characters gain a degree of experience before setting out into the interior of the Isle of Jade. After moving into the swamps of the southern coast the party becomes aware of a threat to the native village that now repairs their vessel. A Candon shaman, roused by the corruptive magic of the Necrotic Pearl, is raising a force to destroy the town and only the players have a chance of stopping the Candon before his forces grows to a size they cannot handle. The islanders fear some dark power has corrupted the Candon lizardmen of the lowland fens. If their shaman leader has fallen to the side of darkness, it is only a matter of time before his calls for war are answered by the fern goblins. Can the adventurers stop the shaman before his summons can be answered? This adventure is formatted to both 1E & 5E gaming rules.
This adventure previews the shoggoth, a monster from the Tome of Beasts (Kobold Press). Adventure cannot be readily solved by direct assault, so groups optimized for combat alone may find it difficult or impossible to succeed or, indeed, survive. If a direct assault and toe-to-toe combat is the goal, characters of level 17 or better are called for. It's also excellent for ending a campaign.
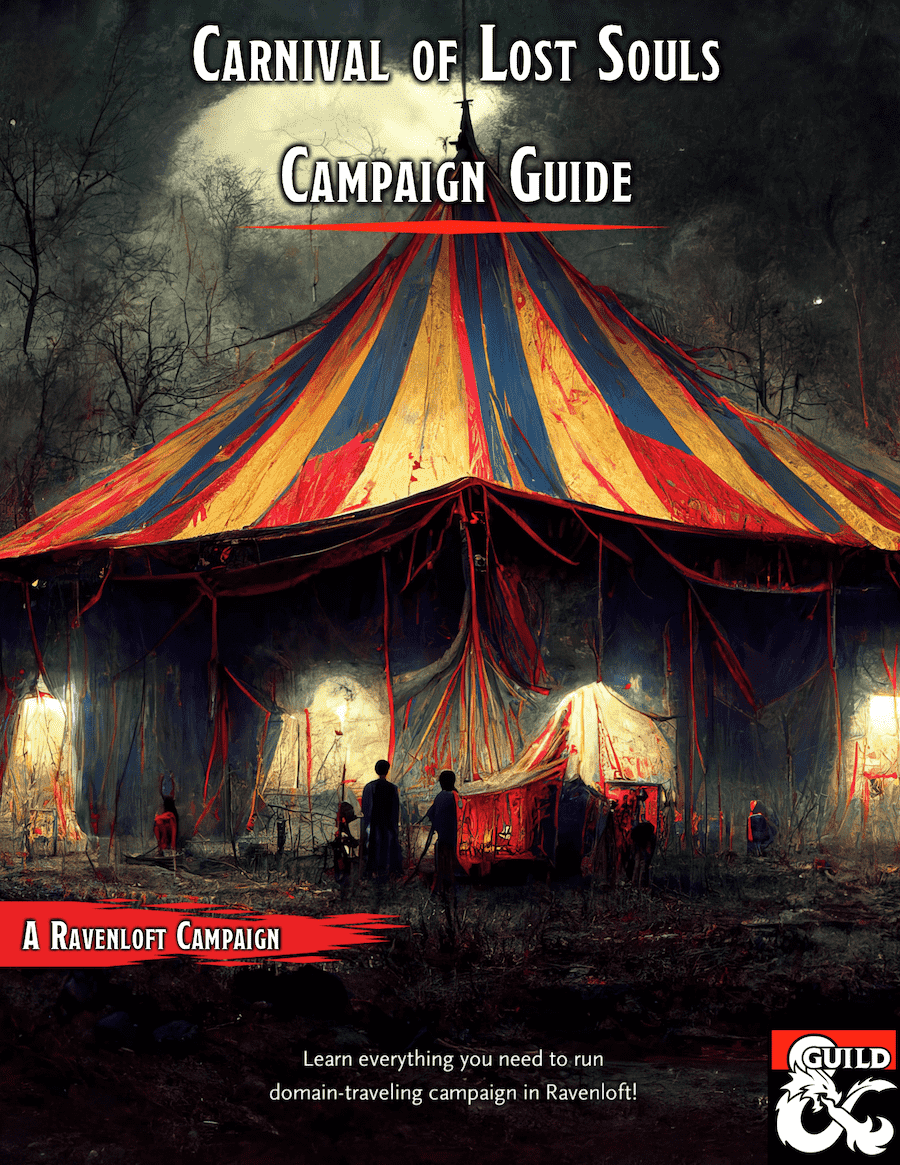
Ravenloft: Carnival of Lost Souls Campaign Guide is a guide for Dungeon Masters who bought our other products from the Carnival of Lost Souls campaign series. It connects together all the modular one-shots we released previously into one grand campaign. It also offers guidance about expanding the scope of the campaign with your own ideas. Ravenloft: Carnival of Lost Souls Campaign Guide features: - Starting adventure to kick the things off and get the characters to know the Carnival - In-between interludes and short encounters, which help to flesh out the Lost Souls NPCs more and add depth to the campaign - Grade Finale - an epic showdown with The Caller in the Mists! - Full description for each of the Lost Souls and what happens to them as a result of players’ actions - Check out the modular adventures of the series: Lamordia: The Hardest of Hearts, Dementlieu: Dance with the Devil, Kalakeri: The Forbidden Temple and Valachan: Hunter’s Moon! Disclaimer: We are a team of writers from Ukraine, so the unprovoked war and senseless aggression of the terrorist state of russia influenced our initial timelines significantly. The release of the Campaign Guide marks also a year since the start of the full-blown war. At the moment, we are as safe as we can ever be under the constant threat of missile strikes, and extremely proud that we managed to finish the whole campaign! We are hopeful that the victory is close at hand, and in the new, whole, and peaceful Ukraine, we will create even more cool adventures! ;) Made in Ukraine

Sacred relics of the monastery, the eyes of the dragon, have been stolen from their rightful place in the eyes of the Ascendant Dragon statue. The elders have chosen one from among their ranks to go and retrieve these two fist-sized emeralds and bring them home.

Escape from Elturel is a 6-8 hour Dungeons & Dragons adventure for characters of levels 1-2, for use as an introduction to Baldur's Gate: Descent into Avernus. Pilgrims and travelers flock to the holy city of Elturel to bask in the light of its second sun. But when the Companion starts to malfunction, the characters must escape the doomed city before it is pulled down to the Nine Hells. In the aftermath, a caravan of refugees needs their help to find a safe haven in that notorious hive of scum and villainy, Baldur's Gate! The adventure has everything you need to start a new campaign in Elturel, including: - a new adventure hook for Descent into Avernus - short introductory encounters set during and after the fall of Elturel - a skill challenge for escaping Elturel as it is pulled down to Avernus - resources, encounters, travel activities, and NPCs for a caravan to Baldur's Gate - notes for transitioning into Descent into Avernus - two creature and NPC stat blocks - a map pack with two maps by Dyson Logos Escape from Elturel also includes suggestions for combining this adventure with Burial in Baldur's Gate if you want to run a mixed party of characters from Elturel and Baldur's Gate.

A haunted house, a missing person, and a hint of wild fey magic. In the kingdom of Norland in the Moonshae Isles, King Keethan rules by the will of Torm the True, though in Glen Dourn folk still hold true to the old ways—a dense and layered folklore of monsters and tales to frighten children. It is to this remote valley that Keethan bids you make haste to seek out signs of his beloved cousin, Lady Sorcha Hannigard. Sorcha vanished on her wedding day three years ago, sending her groom and neighbours alike into mourning. But where can she have gone? The only remaining clues to this mystery lie in her abandoned mansion home, where powers less wholesome have now taken up residence. The Dread Coven will not give up what they know so easily, although they will strike a bargain if you’re willing to pay the price in pain.

"Long ago the Wizards of the world discovered the Afterglow Sea, a new magically charged plane of existence that lay beyond the Veil of the Elemental Plane of Water. It was from this magical well that they drew their supremacy, but some among them sought more raw energy, and surmised another darker and more powerful plane existed beyond the Elemental Plane of Shadow..." The black-heart necromancer Molo of the 13 Wives has discovered the existence of the Veil of Shadow and has set about to once again make contact, threatening the entire world in the process. So it is that a group of adventurers has been hired by the Wizards of the Taux to find Molo before he can bring about this cataclysm, but he has a head start. Molo has gone south across the sea, and a ship, the Coral Stranger, has been outfitted to try and catch him. Can the adventurers survive the trails of the southern ocean, solve the mysteries of corrupted dinosaur islands, brave the shadow-touched port of Distant Turtle City, and overcome the legendary Corsair Mists where Hyperion, Titan of Fire, is said to hold court over sea creatures the likes of which the world has never seen? Even if they can overcome all these obstacles, there is still the White Ship, death vessel of ancient Uthoria and closest contact point to the Veil of Shadow, and Molo himself... Compiling the full White Ship Campaign adventures series from Folio 14-19, as well as over half a dozen supplemental mini-adventures and the Ports of the Nameless Realms supplement, this is a true monster of a sea-based dungeon and lost island crawl. The adventure will take characters from 1st -12th level in an epic island hopping campaign! Contains: WS1 The Isle of Jade WS1.5 The Pearl of Madness WS1.6 Tomb at the Dragon Spine WS1.7 Candon Shaman of the Dark Fen WS2 The Forgotten Plateau WS2.5 The Ruins of Alaxar WS3 Distant Turtle City WS3.5 Pirate Lords of the Dark Sargasso WS4 Samurai's Fall WS4.5 The Final Stand of the Fallen Leaf WS5 The Shattered Tower WS5.5 The Sunken City WS6 Duel on The White Ship WS6.5 The Ghost Tower Ports of the Namless Realms Volume 1&2, Iconic Characters Also Available: WS2.6 Lost among the Crystals WS3.6 The Ogre Magi of Jade Rock These adventures are formatted to both 1E & 5E gaming rules.