
A dungeon of tricky puzzles, ancient magical secrets, and more than a few lingering mysteries, designed to be played as a standalone adventure and not incorporated into another campaign. Six adventurers descend into the Temple of Mysteries to find a mystical artifact called the Strand of Tears. Seems straightforward enough, except that some of the party may not be who they say they are. In fact, none of the party may be who they say they are. Not only that, but they might not be who they don't say they are, either! Worst of all, they're trapped in the ruins of an underground temple specifically designed to keep people from proceeding unless they're proficient in puzzle-solving...and there may be doppelgangers on the loose.

For centuries, the volcano now called Mount Zulgar was the battlefield of a conflict between red dragons and frost giants. The final battle saw the extinction of the dragons and only a handful of living giants. The dwarves of the Frostblood clan used this opportunity to drive out the giants and take the mountain as their own for its rich deposits of gold. 100 have passed, and now the volcano bubbles to life once more, bringing with it all manner of fiery creatures. Miners have been killed, and implike monsters assault the citizens of the mountain. The master of the goldsmith's guild has called upon your party to snuff out the Fire in the Frostblood Mine. Fire in the Frostblood Mine is a 4-5 hour adventure for 4 3rd-level characters. It can be used as either a one-shot or as part of an ongoing campaign. This module includes a single-session adventure to introduce your players to the strange creatures of the inner planes, maps of the two levels of Frostblood Mine, and a unique sentient magic item.

This adventure picks up where AS1 – Artifact of Gegios left off. You return to the city of Gegios to divide treasure and determine what the strange wand is. Your return trip may have given you a clue in that travel to the east causes it to vibrate less while moving in a western direction causes it to shake more. What is the significance of this anomaly? Is your party ready to find out? Bring your water wings folks you’re probably going for a swim!

The time has come for the brave and the bold to put an end to the machinations of Maerimydra’s demonic occupiers and their fiendish fire giant ruler. This will be no mean feat; the city is a cesspit of corruption and madness. You will have help, however, as an unlikely group of allies have gathered to your side in the Underdark beneath Faerûn. Danger, glory, and redemption await those brave enough to seize it. With allies gained from denizens of the Underdark, the former drown enclave of Szith Morcane is on the precipice of being retaken. During the battle for Szith Morcane, secrets of the drow community are revealed. What will you do with this knowledge, and how will it affect the outcome of the conflict?

Everyone starts with goblins. And The Goblin Cave helps you do just that. Using any of several story hooks, this adventure provides a short romp through a goblin-infested cave where the party will encounter traps, treasure, and the perfect start to their adventuring career. An introductory adventure for 1st, 2nd, or 3rd level characters.

Run, play or splice up 66 pages of mayhem and weirdness in this Slavic mythic-inspired (with an acid fantasy-twist) mini-sandbox for Labyrinth Lord or the well-aged fantasy rpg of your druthers. Contains: • A 25-site pointcrawl of the otherwordly Slumbering Ursine Dunes region. Beyond the big ticket adventure sites you will find along the way a Polevik-haunted rye field, a Zardoz head-living hermit, bearling pilgrimage site, antediluvian beaver engineers and other assorted madness. • Two separate “dungeons”, the bio-mechanical, lost-in-time Golden Barge and the faction-contested Glittering Tower, with enough detail and portability to be slotted into an existing campaign. • The Chaos Index, a dynamic events system for modeling the mythic weirdness of the Dunes. Actions of the players in the sandbox will escalate or de-escalate the levels of events. • Four competing factions operating inside the Dunes, plus guidelines for their mutual interactions.

The lands that lie west, across the great sea, are uncharted. The West March Company has spent a fortune on an expedition to loot and tame it. You are part of that expedition. You are the desperate, the outcast, the destitute. This new world is weird and dangerous. Rumours abound of a city of tombs. A cursed dwarven fortress in the mountain. Mist-covered swamps that howl in the night. Pass that treasure map around the table. Drink deeply from your cups and imagine what awaits in the wilderness: gold, glory, death. Inside West Marches Company: A Grim Promise you'll find: Twelve new monsters to surprise and terrify your players. A cult of worms, a city of tombs, centaur khans and a twenty-page dwarven fortress dungeon crawl with over forty rooms. Loaded with art, evocative descriptions, weird NPC's and 2 new magic items. High resolution maps of both dungeons: Kazad Mor The Cursed Dwarfhome and Tunnels Beneath Fort Bramble This module can be run as a standalone adventure or as a west marches style game.

A fiend lurks among the Black Blade goblins. A shapeshifting barghest fashioned by the General of Gehenna to exact revenge on all goblin-kind. It’s aim: to kill as many goblin leaders as possible… A masked goblin approaches the party asking for help. Two tribe leaders are dead. But a rival for chief has control of the crime scene. Will the party discover the barghest among the goblin ranks? Can they stop this imposter before it strikes again? Adventure Overview The adventure’s story is spread over 4 parts and takes approximately 4 hours to play. The adventure begins with a Call to Action scene. Part 1: Goblin Politics. Krill sends his emissaries to implore help from any strong intermediary. The party is asked to investigate the murder of Thrawn in Dringly’s lair. This is Story Objective A. Part 2: The Opposition. Gain entry into Dringly’s lair and investigate the murder of Thrawn. Gather enough evidence to find the killer. This is Story Objective B. Part 3: To The Lair! Now that the players have determined the barghest (Yeep) is to blame, they need to get to Krill’s lair quickly as he is in imminent danger. This is Story Objective C. Part 4: The Barghest.When the players arrive at the lair, they need to get to Krill and expose and defeat the barghest. This is Story Objective D. Adventure Background A barghest named Yeep has begun its onslaught of attacks against the Black Blade goblins. Starting with Chief Gnar, then his second in command Thrawn, the barghest is moving methodically down the line of command. Krill is now chief. But he has some problems: Two leaders of the Black Blades are dead. Who killed them and why? Is he next? Dringly, the next in command, has decided to take his lair for himself, declaring himself Chief of the Black Blades. Who are the Black Blades? The Black Blades are a tribe of goblins in the local area. They are known for dipping their blades in a dark black substance. It is rumored these blades are poisonous. The Black Blades regularly attack passersby on the road to rob them. The Black Blades have two lairs, one run by a chief who leads the whole tribe, and another overseen by a boss lieutenant. The Black Blades have a well-established pecking order which is how Krill stands to become chief. The next in line is Dringly, who has also declared himself chief and wants Krill dead. Krill suspects that there is something suspicious about two leaders being killed within a day of each other, but he has already burned Gnar’s body without any investigation. He needs to investigate the body of Thrawn, but it is in Dringly’s lair. Krill wishes to avoid direct confrontation with Dringly at the present for three reasons: 1) Any violence would only kill his own tribe members and further divide the lairs. 2) He believes there is still hope for negotiation to reunite the Black Blades. 3) He believes that if he were to attempt negotiations himself, Dringly would kill him. This adventure features: Two maps. Ready for your favorite Virtual Tabletop. A full color pdf. A black and white pdf. One custom monster, a reprint of barghest, all others available in the Monster Manual. Four hours of entertainment involving: roll playing a goblin bard, investigating a murder scene, tracking down a barghest before it strikes again. Applicable to any setting.

What good is a king without a city to rule over? What happens when everyone in a city disappears, gone without a trace? This is the state in which an adventuring party, your characters, finds Sheol in; a city devoid of all life forms, claimed by Hegemon, a Wraith that used to be its king. Explore the empty city! Be mindful of the thieves' guilds! Find your way to the portal that leads to the castle! Fight your way through the hoards of undead to foil Hegemon's insidious plan! An adventure perfect for the middle part of any campaign, full of plot hooks, possible plot points and areas of exploration! Tons of places, like the Tower of Eiden, with backstories to tie in with any existing campaign! Discover the "Hell's Gifts", red gems that defy space! This adventure offers: 30 pages of exploration of an empty city and a castle swarming with undead. Maps for major locations Two new Monsters, Hegemon and Corvus, also usable as NPCs. 3 new magic items. A plethora of plot hooks, possible plot points, and setting-neutral lore. Many hours of fun gameplay A Dungeons & Dragons adventure written for 8th level player characters, with level adjustments for levels 5-10 for the encounters.

Escape from Elturel is a 6-8 hour Dungeons & Dragons adventure for characters of levels 1-2, for use as an introduction to Baldur's Gate: Descent into Avernus. Pilgrims and travelers flock to the holy city of Elturel to bask in the light of its second sun. But when the Companion starts to malfunction, the characters must escape the doomed city before it is pulled down to the Nine Hells. In the aftermath, a caravan of refugees needs their help to find a safe haven in that notorious hive of scum and villainy, Baldur's Gate! The adventure has everything you need to start a new campaign in Elturel, including: - a new adventure hook for Descent into Avernus - short introductory encounters set during and after the fall of Elturel - a skill challenge for escaping Elturel as it is pulled down to Avernus - resources, encounters, travel activities, and NPCs for a caravan to Baldur's Gate - notes for transitioning into Descent into Avernus - two creature and NPC stat blocks - a map pack with two maps by Dyson Logos Escape from Elturel also includes suggestions for combining this adventure with Burial in Baldur's Gate if you want to run a mixed party of characters from Elturel and Baldur's Gate.
Greger’s Grotto is a community of pirates and other criminals, hidden away on a desolate coastline. The players are slaves sold to the Grotto’s owning family and used for manual labour and bloodsport in the arena. In this adventure, the players will need to: * survive harsh prison conditions, including the rivalry between prisoner factions: human, orc, goblin and hobgoblin * fight in arena battles against prisoners and beasts, often with strange twists to entertain the crowd * explore small mini-dungeons attached to the prisoners’ caverns * ultimately escape; whether by force, alliance with fellow prisoners, stealth, cunning or any combination of these Features of this adventure: * Pay-what-you-want (even nothing). * Illustrated with art by Setvasai. * Designed to fit into most campaign worlds. * Simulationist or story-driven: includes information for both. Use random rolls to determine what happens when, or take inspiration from various story hooks. (Or do both.) * 11 unique NPCs, including members of the Grotto’s owning family and leader of the prisoner factions. * Full maps of the Grotto, its arena and prisoner caverns, totalling over 40 rooms.

The greatness of a dwarven citadel is measured by its greatness of wealth. The dwarves steadily work mines and forges to fuel the wealth needed to make their presence known throughout the realms. Unfortunately, this also makes them known to those that would seek the opportunity to steal their glory and riches. This story occurs in a place that has experienced this struggle for millennia. New threats emerge as old threats become rivals through the tides of time. This story... your story... is another chapter of this ancient struggle.

In the fourth installment of the Into the Underdark adventure series, characters come face to face with the heretofor unseen puppet master behind most of the strife and chaos in the Shadowed Hallows, Gyldrith the Chosen, a dreaded deep dragon! Includes: Three all new maps of Gyldrith's lair, and those of her minions Two all new monsters, the Ancient Deep Dragon and her Warlock of the Deep Dragon A new player option, the Deep Dragon patron for the Warlock Class. Unnumbered maps suitable for use in your favorite VTT Continues the story from Into the Underdark Part 1 - The Descent with areas and NPCs from The Shadowed Hollows Gazetteer
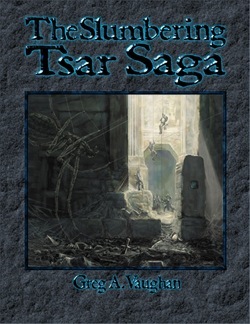
The Sleeper Awakes! At last, after languishing in its crypt for an age, the secrets of the slumbering city of Tsar burst forth in all their macabre glory. Poured forth from the eldritch furnaces and crucibles of the Necromancer and Orcus himself comes Frog God Games bringing you at long last The Slumbering Tsar Saga™. Something Stirs in the City of Evil Over the distant northern hills, beyond The Camp, and past the Desolation stand the pitted walls of Tsar. A hundred armies have crushed themselves against this bulwark in futile attempts to breach the city. Even the combined might of the Heavens and Earth were unable to break through in the final battle of Tsar. So why was the city suddenly abandoned on the verge of victory, and what waits for those foolish enough to enter the Temple-City of Orcus? The Black Gates Await Only the bravest and most powerful of heroes dare the depths of the Desolation and live to tell of it. But what happens when they penetrate that blasted landscape and look upon the gates of the very center of evil on the earth. Can even heroes of such renown breach the Walls of Death and live?

Bandits have kidnapped the eldest child of one of Timbertown’s prominent citizens, who is secretly being manipulated by shadowy forces. You are tasked to get her back. But there are questions. Is she his real daughter? Does she want to be found? Who is behind the kidnapping in the first place? If you bring Evi home alive, your rewards will be great, and your standing in the town will increase. But if you fail, or if the demon worshippers of the Fraternity of Tharos gain a further foothold for their secret society, Timbertown's future may be in jeopardy. This adventure can be played in any frontier campaign area, but is set in the author's home campaign setting of Timbertown, a barony in Impiltur, a kingdom on the Sea of Fallen Stars in the Forgotten Realms, also available from the Guild.
In the town of Easthaven, a group of adventurers is tasked on a routine mission to resupply an expedition to the Reghed Glacier. But everything is not quite as it seems, and it's not long before the chronographer's misfortunes become apparent.

Valachan: Hunter’s Moon is a slasher/gothic horror adventure for 4-5 level characters of 8-9th level. It can be played over the course of 6-8 hours and should roughly take one playing session, if the party is quick, or two if the party is progressing slowly. This is the fourth and final part of the Carnival of Lost Souls campaign, which can also be played as a standalone adventure. Valachan: Hunter’s Moon features: Fully fleshed out Trial of Hearts with dangerous encounters along the journey Rules for sabotaging rival parties before the Trial New custom monsters to make combat encounters truly memorable and exciting High-quality maps, also available in universal vtt format Check out the previous adventures in the series: Lamordia: The Hardest of Hearts, Dementlieu: Dance with the Devil and Kalakeri: The Forbidden Temple! And look out for the special Campaign Guide, which will explain in detail how to best set up and play the campaign. However, if you want to start your campaign right now, don’t worry - we have included a short appendix at the end of each adventure that will explain the basics! Disclaimer: We are a team of writers from Ukraine, so the unprovoked war and senseless aggression of the terrorist state of russia influenced our initial timelines significantly. However, we are now as safe as we can ever be under the constant threat of missile strikes, and determined to finish the whole series! And after that - who knows, maybe even more cool adventures will follow ;)

Please come right in. What can we get started for you? We’re so sorry about that noisy eyesore across the street. I assure you, steps are being taken to solve that little nuisance. Oh yes. Steps are being taken. We have some lovely new teas in from far-away lands. Very mild but oh so delicious. And our cook just took some gorgeous biscuits out of the oven. I’ll bring you some to nibble. Now I need to run down to the basement for some more linens. I won’t be gone long, but my girls will take care of you while I’m away. And I’ll get that racket across the street taken care of. Yes, I most certainly will. Miss Teree runs a elegant teahouse in the upscale part of the city. But when a kobold, Sug, buys the inn across the street, her sales plummet. But then Sug starts finding rats in his basement, and they somehow manage to kill his bouncer. Sug suspects Miss Teree has something to do with his bouncers death, but he needs help figuring out how.
At Death’s Door is a dungeon crawl that takes place almost entirely in the upper chambers of the Lair of the Keeper. This lair belongs to an ancient dracolich that perhaps styles themselves after the legends of the Keeper, or perhaps even inspired them. Stormhome. The player characters are called to the home city of House Lyrandar to meet with Guild Handler Lhara regarding their quest for an artifact tethered to Dolurrh, the Realm of the Dead. The Descent. Traveling by airship over the horrors of the Demon Wastes, the party descends into a vast canyon to find the Lair of the Keeper. After agreeing on a pickup point, the party skydives into the hellish landscape and hides to avoid the notice of a would-be god, then explores the surrounding area. The Lair of the Keeper. The bulk of the adventure takes place in the upper chambers of a dracolich’s lair in a manifest zone tied to Dolurrh, the Realm of the Dead. Surviving the horrors of this place is the main challenge of the adventure. The Ghaash’kala. There is one last challenge standing between the players and their escape to the airship. The orc tribes called the Ghaash’kala consider it their holy duty to protect the rest of the world from the horrors of the Demon Wastes. They will attempt to stop anything from escaping the Wastes, unfortunately including our heroes.

The ancient forest known as the Wildering Woods has a reputation for confounding those who dare venture through it. When a series of unusual events befall a nearby lumber camp, the player characters are asked to seek out a mysterious wizard rumored to reside within. As the adventure unfolds, it soon becomes apparent that big trouble awaits them inside the forest. What's included: 1 fanciful adventure divided into single-page sections for easy running 2 fully-colored maps with unlabeled versions for players (made with assets from 2-minute Tabletop) 3 custom creature statblocks with clickable links for quick access Content Warning: Violence, death, abduction around the Wildering Woods, a fey-inhabited forest whose residents are being terrorized by a delusional hill giant who believes he is a wizard.